


Ever encountered the blue screen of death? Your computer suddenly displays this blue screen where you are told that your PC ran into a problem. That could be really alarming. Sometimes, this could be due to a bad pool header in Windows 10.

The error code 0x00000019 attached to this message signifies that your computer has problems with Windows memory allocation. Your black pool is corrupted.
This problem can arise because of faulty driver and routers, bad sectors or some other disk write issues. The main cause could be your antivirus software not being compatible with your computer.
Fixing this issue of bad pool header will require booting Windows 10 in safe mode. Then you would try any of the next steps.
Check our below YouTube video to How To Boot Into Safe Mode On Windows 10 The Easy Way
6 Fixes for bad pool header
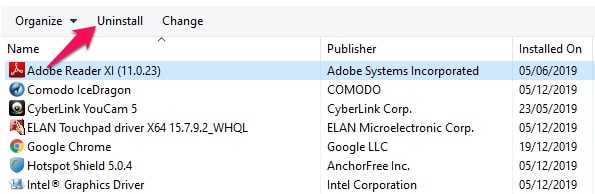
1. Uninstall recently installed software
This should be your first try. Think of any recent software you may have installed and had it uninstalled. This may resolve the issue. In the case this software is an antivirus, you may need to replace it with a different antivirus if uninstalling it solves the problem.
To uninstall, under your control panel click on “uninstall a program”
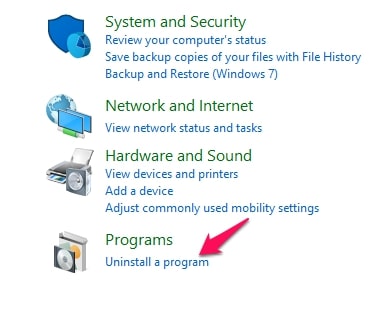
Search for the program you need to be uninstalled, click on it and choose the uninstall option.
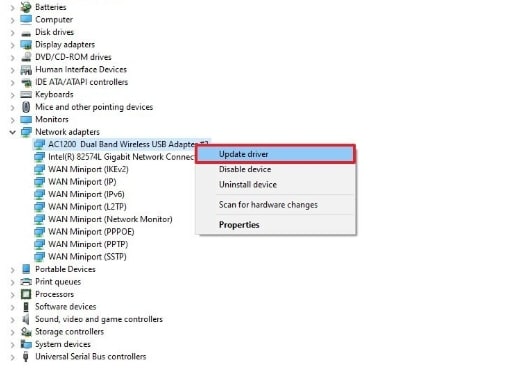
2. Update Device Drivers
Windows update will usually update all drivers, but this process can be done manually.
To do this, open your Run Window by using hotkey Win + R. Type devmgmt.msc to open the device manager. Right-Click on any driver and select “Update Driver Software”.
3. Uninstall recently installed hardware
Open your Devices Manager just like you did in the method above. If there is any new hardware installed on your computer, find the hardware driver, right-click on it and select Uninstall. Then restart your computer and see.
4. Check your RAM
Even though this may not be the first call, it may be an important step to look into. To check your RAM, you will have to meet an expert for this.
5. Perform a Clean Boot
To do this type msconfig in your Run window and hit enter. In the window that displays, go to the “general” tab. Ensure that “Load Startup Items” checkbox is unchecked and that “Load System Services” and “Use Original boot configuration” are checked.Click the Services tab. Select the Hide All Microsoft Services checkbox. Now click Disable all.
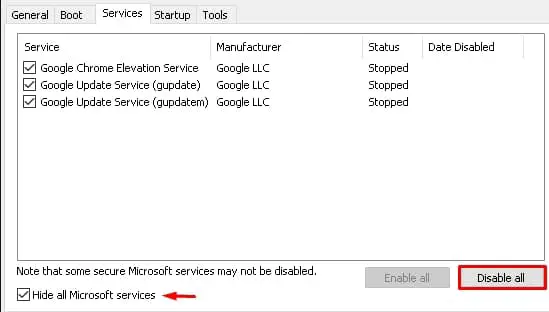
Click Apply then OK and restart the computer.
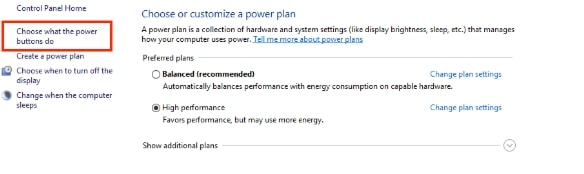
6. Disable Fast Startup feature
Right-click on the Power icon in your notification area and select Power Options. in the window that appears, at the left pane select “Choose what the power buttons do“.
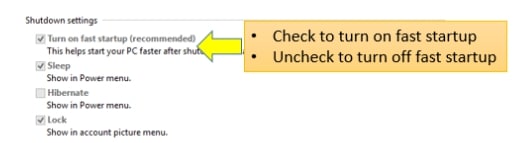
In the window that appears, make sure that the “turn-on fast startup” checkbox is unchecked.
Conclusion
Issues with bad pool header may be alarming, but there are many fixes. If all these fixes are exhausted and the problem persists, then one must seek more technical help.


