


For about $35 you can build your own old-game device that will connect to any HDMI TV or monitor. This article will guide you everything you need to do. We’ll use RetroPie, a nice package that handles all the simulation needs. RetroPie works with any Pi, but I’d recommend using Raspberry Pi 2 or Raspberry Pi 3 because these will maximize game playability as these Pis improve the functionality of the GPU, CPU and ROM.
This article is for those who have just started using RetroPie. The easiest way to install RetroPie is to create a ready-to-use SD image of your system on the Raspbian operating system – this is the method described in the following guide. Or, advanced users can manually install RetroPie.
This article will provide you with a very basic knowledge that you can boot from a blank SD card and run to Emulation Station.
SO we can Emulate many of Emulators in Retro pi image.
- 3do
- Amiga
- Amstrad CPC
- Apple II
- Atari 2600
- Atari 5200 and 8 bit series
- Atari 7800
- Atari Jaguar
- Atari Lynx
- Atari ST/STE/TT/Falcon
- CoCo
- Colecovision
- Commodore 64
- Daphne
- Dragon 32
- Dreamcast
- FinalBurn Alpha
- GameCube
- Game & Watch
- Game Gear
- Game Boy
- Game Boy Color
- Game Boy Advance
- Intellivision
- Macintosh
- MAME
- Master System
- Megadrive/Genesis
- MESS
- MSX
- Nintendo 64
- Nintendo DS
- Nintendo Entertainment System
- Neo Geo
- Neo Geo Pocket
- Neo Geo Pocket Color
- Oric-1/Atmos
- PC
- PC Engine/TurboGrafx-16
- PC-FX
- PSP
- PlayStation 1
- PlayStation 2
- ResidualVM
- SAM Coupé
- Saturn
- ScummVM
- Sega 32X
- Sega CD
- Sega SG-1000
- Super Nintendo Entertainment System
- TI-99/4A
- TRS-80
- Vectrex
- Videopac/Odyssey2
- Virtual Boy
- Wii
- WonderSwan
- WonderSwan Color
- Zmachine
- ZX Spectrum
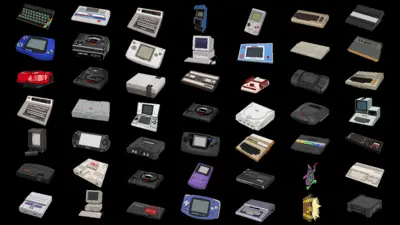
You don’t need these classic game consoles to enjoy their best games. So you just have to set up the retro pi and get the all emulators in one device.
Step 1
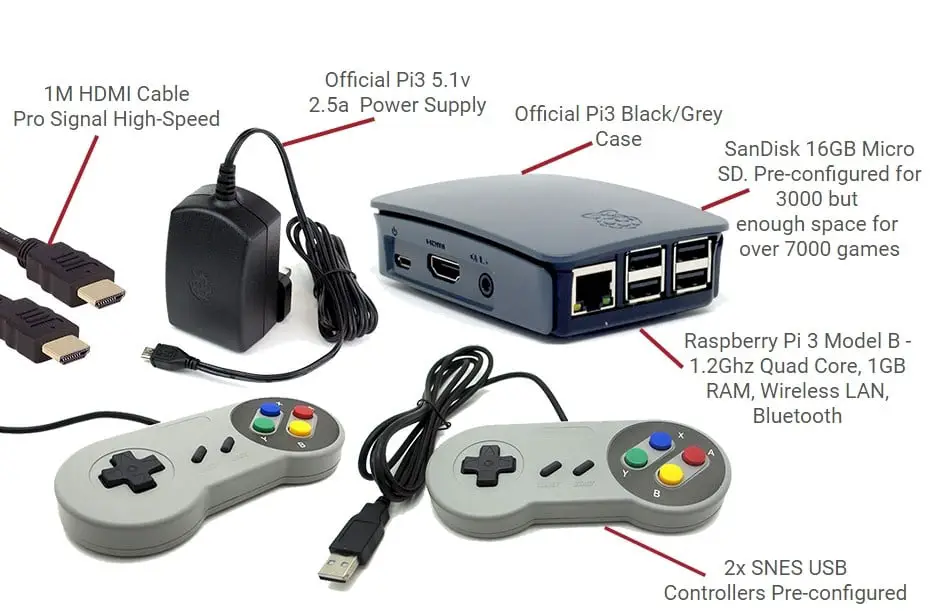
Basic required Hardware
- Raspberry Pi 3 Model B Buy Here
Raspberry Pi 3 official case Buy Here - Raspberry Pi power supply, 2A Buy Here
- MicroSD card, 16GB Buy Here
- HDMI cable
- USB gamepad
- MicroSD card reader
- USB keyboard
- TV/Monitor
- AV/HDMI Cable
STEP2
Software Requirements .
Download Sd card image Writing Tool.
Windows users Win32 Disk Imager.
Mac users ApplePi Baker.
Download Retro pi
Step3
RetroPie installation
To download RetroPie, visit the official RetroPie page.
Click the huge red download button for “Raspberry Pi 2/3” and you will save a file named “retropie-x.x-rpi2_rpi3.img.gz”, where x.x is the current version number of RetroPie. Put this file in your computer where you can easily find it, for example in windows on the desktop.
This file is a disk image that contains all the software (including operating system, emulator, etc.) needed to run our RetroPie setup on the Raspberry Pi 3. We will use a special tool called win32 Disk manager to write it to the microSD card.
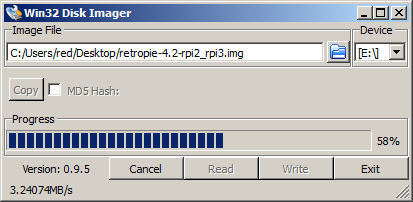
Next, you need to run the installer of the SD card image writing tool that you downloaded. Install it. Run the tool – Win3 2Disk Imager or ApplePi Baker.
Download install Disk imager
For Win32 Disk Imager: Under the Devices section of the program, select the drive letter of your SD card. Make sure it is correct, because if you choose the wrong drive, the program may delete all the data.
Click the folder icon next to the image file box in the program. Select the “retropie-x.x-rpi2_rpi3.img” file we downloaded and unzipped earlier.Assuming you are certain that you have selected the correct drive, click the “Write” button and wait. This will be done in a few minutes.
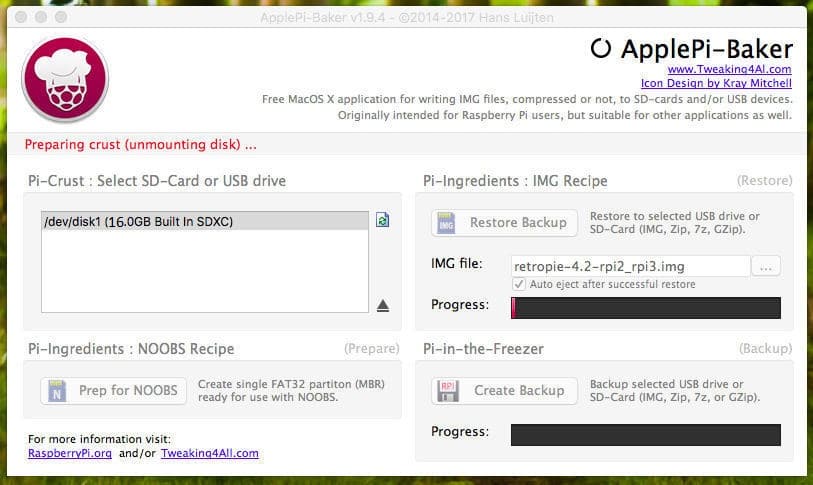
ApplePi Baker
For ApplePi Baker: First, under the Pi-Crust section of the program, select the SD card drive to be written. It will say something like “/ dev / sda3”.
Then under the Pi-Ingredients section of the program, click the […] button next to the white box and then select the “retropie-x.x-rpi2_rpi3.img” file we downloaded earlier.
Step4
Assemble the hardware
Eject the SD card securely and slide it into the raspberry pie.
Insert your keyboard, USB game console, and HDMI cable. Connect the HDMI cable to the monitor or TV. If it is more convenient at this point, you can configure your Pi without a monitor or keyboard. This is called “headless” mode.
Finally, connect the MicroUSB power supply. Once connected to other peripherals, always connect the power so that Pi properly detects all peripherals at startup.
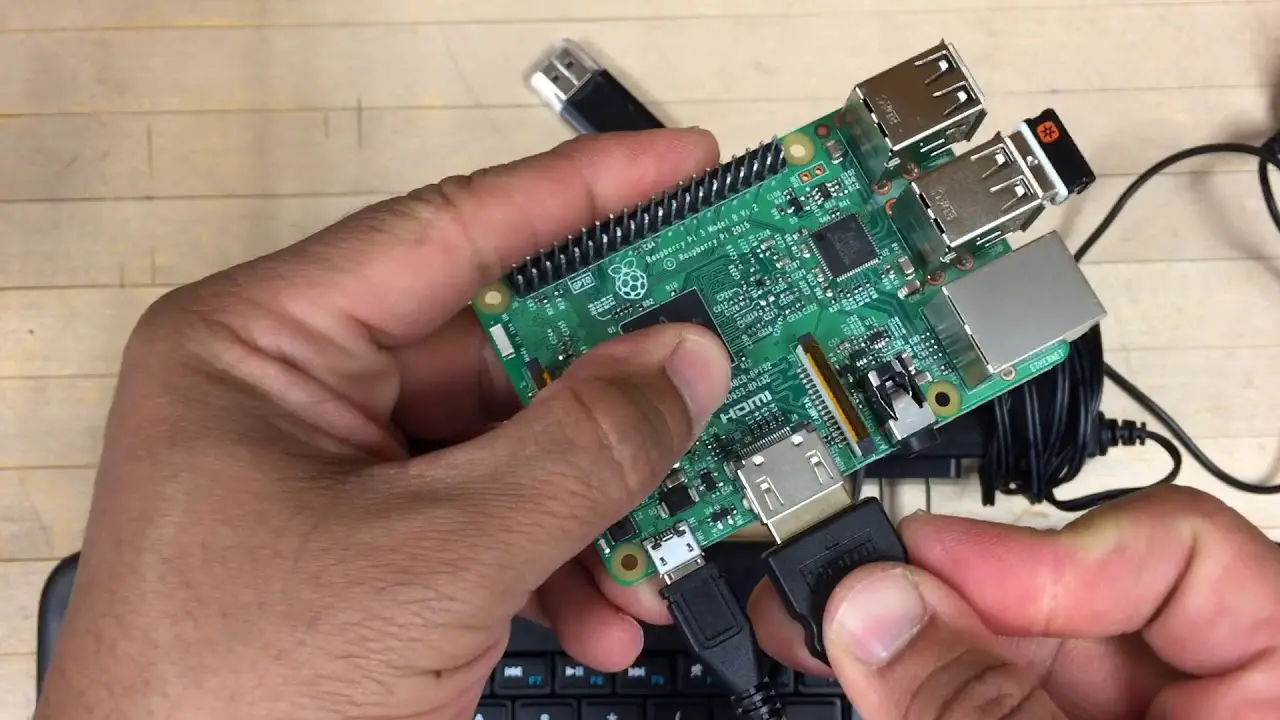
Your Pi is now on!
Step5
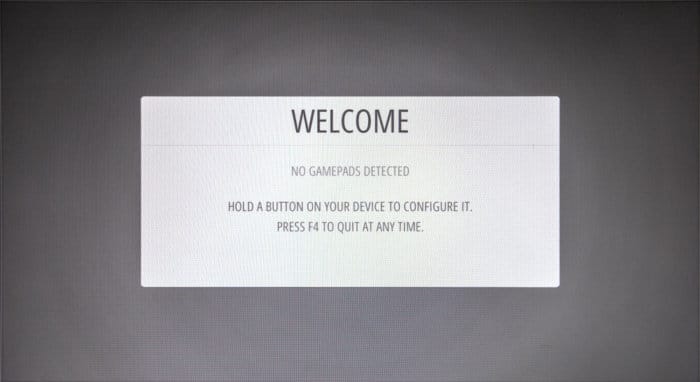
Setup Game Controllers
If you use a wired USB gamepad:
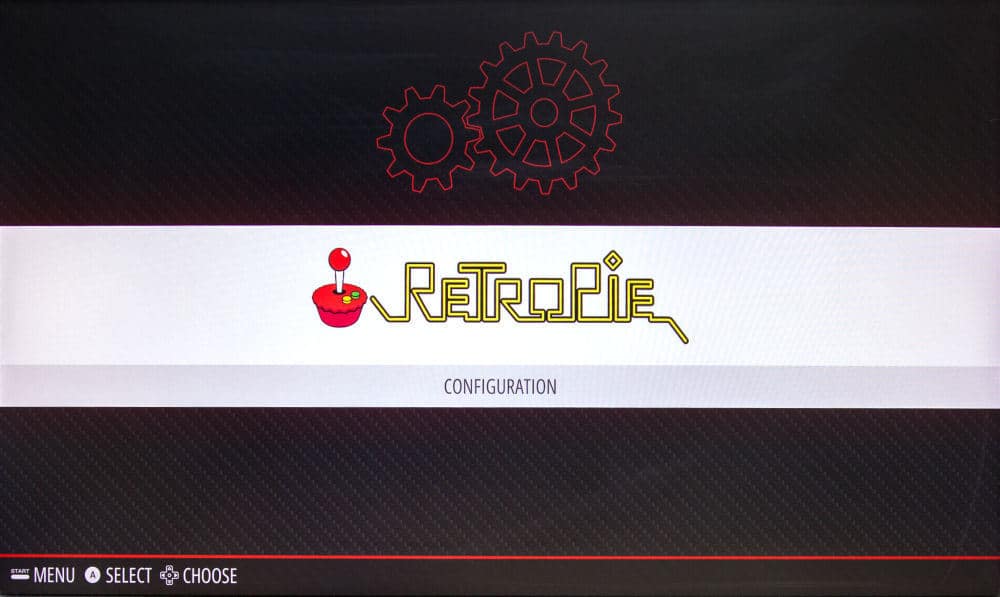
Press and hold a button on the controller until EmulationStation detects it. Then it will ask you a long list of questions that let you assign which button to go to which control (ie, up, down, A, B, X buttons, etc.). Do not mess this up, otherwise you have to unplug it and start over.Once this job, you will see a menu called RetroPie. It contains a list of shortcuts for setting various settings. This is a quick and easy way to configure the system without having to download it to a Linux command prompt.
Connect Your Raspberry pi to wifi
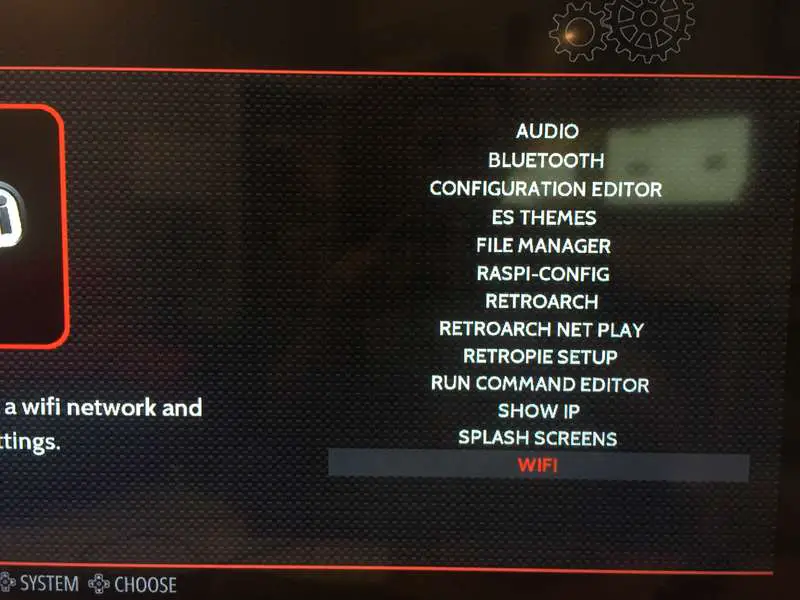
You need to connect your Pi to the Internet to add a game ROM (described in detail later) and to access more RetroPie features such as game ratings / description crawls.
To restart Raspberry Pi safely, use the following Pi reboot command after returning to shell by pressing F4:
$sudo reboot
After the restart please make the update retropie by following
$sudo apt-get update
$sudo apt-get upgrade
Step6
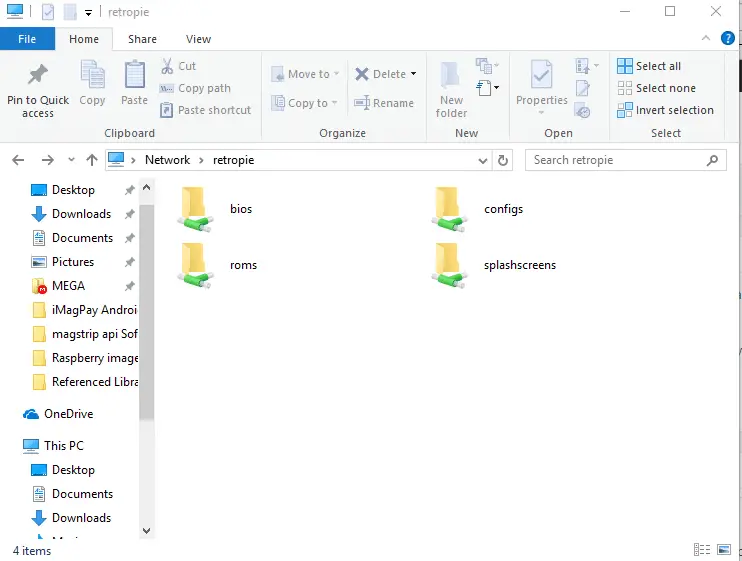
Transferring ROMs
In Windows
If you are on windows type \retropie into the computer folder. You can also replace retropie with your Raspberry Pi’s IP address
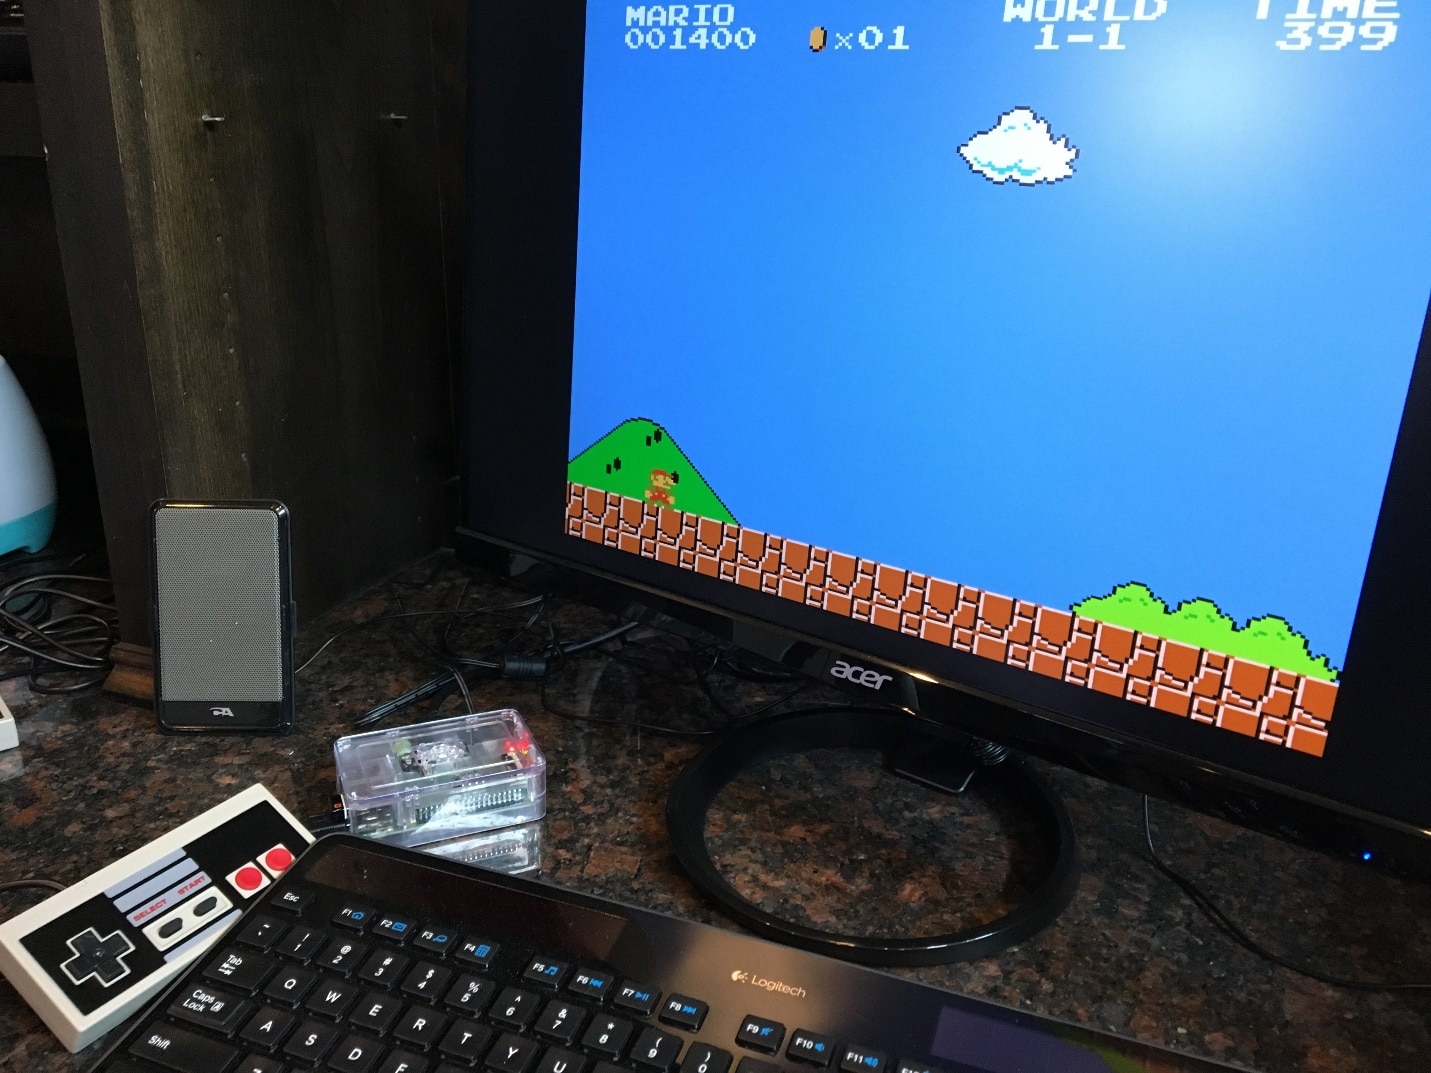
PLAY!
After you add the disc, you need to restart the simulation station to display. You can restart the simulation station from the Start menu, or restart pi with sudo reboot.
Enjoy Supper Mario Bros in Nintendo Emulators
You may also like to read this
How to Install Kali Linux on Raspberry Pi 3
Turn USB Hard drive into network storage disk with raspberry pi
Install an operating system on your RasPi Using Noobs
Hope my article “How to Build Retro pie gaming rig in Raspberry pi” helps you to Build Retro pie gaming rig in Raspberry pi. If you have any query, feel free to comment.


