


Now, the fingerprint sensors we see in science fiction are now becoming very common and can be used for a variety of purposes to verify one’s identity. Now we can see the daily life of the fingerprint system, such as office work, bank staff verification, ATM deposit, government agencies, office staff authentication.
We’ve worked with Arduino and today we’re going to connect the Fingerprint Sensor to the Raspberry Pi.
With this Raspberry Pi Fingerprint System, we can register new fingerprints in the system, and we can delete the fingerprints that have been fed. The complete work of this system has been shown in the video given at the end of the article.
Connect Fingerprint Sensor Module with Raspberry Pi
Collect Hardware
- Raspberry Pi ( Buy Now )
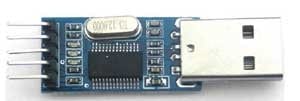
- USB to serial converter Buy Now
- Fingerprint module Buy Now
- Press the button
- 16×2 LCD
- 10K pot
- Breadboard or PCB
- Jumper
- LED (optional)
- Resistance 150 ohm – 1k ohm
Circuit Diagram and Description:
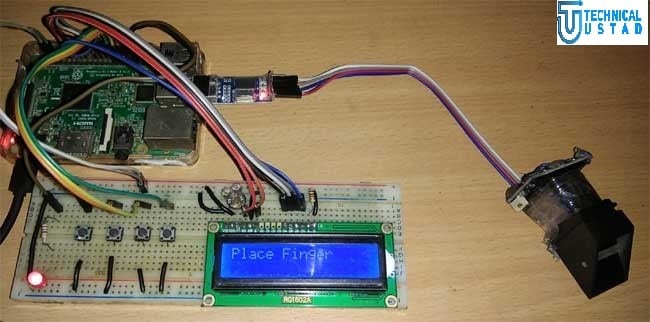
In this Raspberry Pi Fingerprint Sensor Interface project, we used 4 buttons: one for registering new fingers, one for deleting already fed fingerprints and the other two for incrementing/decrementing the fingerprints already fed.
The light is used to indicate that the fingerprint sensor is ready to take a finger to match. Here we use a fingerprint module that works on the UART. So here we have used the USB to Serial Converter to connect this fingerprint module to the Raspberry Pi.
So, first, we need to do all the necessary connections, as shown in the circuit diagram below. The connection is very simple and we connect the fingerprint module to the Raspberry Pi USB port via a USB-to-serial converter.
A 16×2 LCD is used to display all the information. The LCD also uses a 10K electrode to control its contrast. The 16×2 LCD pins for RS, EN, d4, d5, d6, and d7 are connected to the GPIO pins 18, 23, 24, 25, 8, and 7, respectively, of the Raspberry Pi.
The four buttons connect to the raspberry pie GPIO pins 5, 6, 13 and 19. The LED is also connected to RPI’s 26 feet.
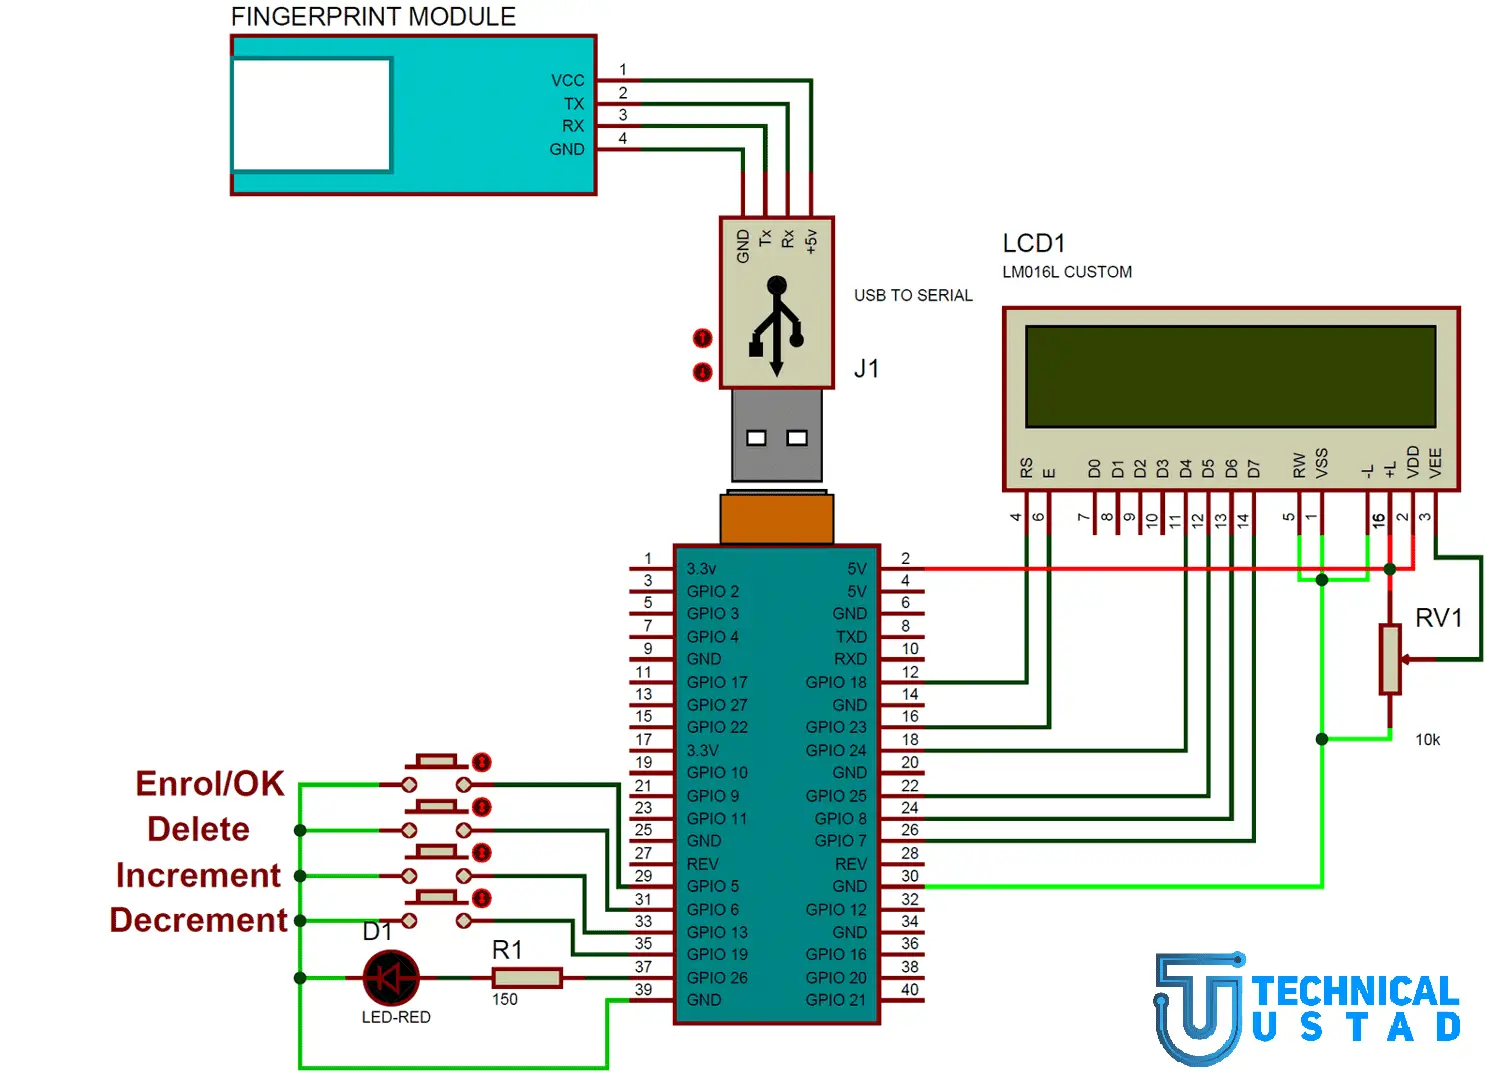
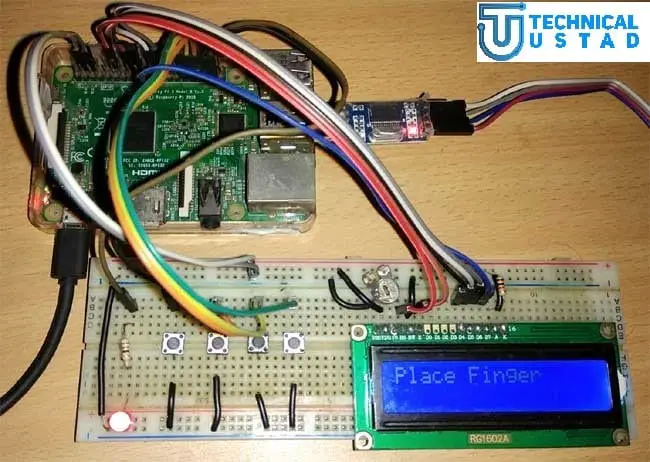
After the wiring, this is how schematics looks like
Install Library
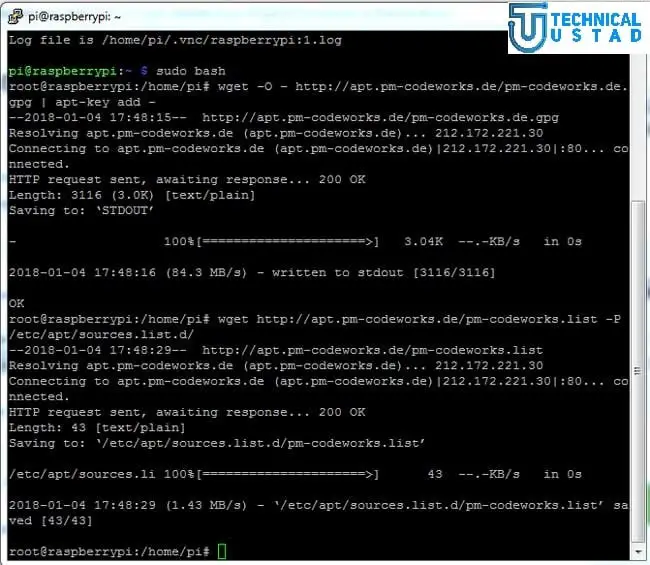
After all the connections have been made, we need to start the Raspberry Pi and get it ready with the terminal open. Now we need to install Raspberry Pi’s fingerprint library in the python language by following the steps below.
For install this library, you need root authority. So first we enter the root directory with the given command:
sudo bash
Download Necessary Packages
wget –O – https://apt.pm-codeworks.de/pm-codeworks.de.gpg | apt-key add –
wget https://apt.pm-codeworks.de/pm-codeworks.list -P /etc/apt/sources.list.d/
After installation of packages update Raspberry Pi
sudo apt-get update
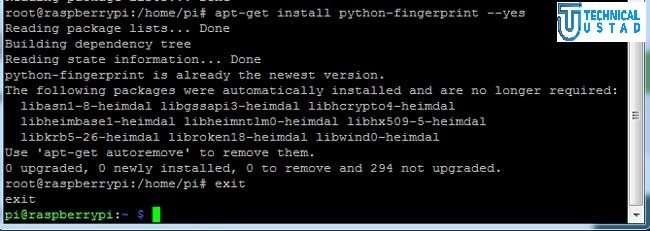
sudo apt-get install python-fingerprint –yes
After installation of Libraries
Check your fingerprint sensor for the USB port connected by using the given command:
ls / dev / ttyUSB *
Now replace the USB port number with the USB port and replace it with python code. The completed Python code is given at the end of this project.
Python Source Code
Copy the Program in Python Emulator and watch the video is given below.
import time
from pyfingerprint.pyfingerprint import PyFingerprint
import RPi.GPIO as gpio
RS =18
EN =23
D4 =24
D5 =25
D6 =8
D7 =7
enrol=5
delet=6
inc=13
dec=19
led=26
HIGH=1
LOW=0
gpio.setwarnings(False)
gpio.setmode(gpio.BCM)
gpio.setup(RS, gpio.OUT)
gpio.setup(EN, gpio.OUT)
gpio.setup(D4, gpio.OUT)
gpio.setup(D5, gpio.OUT)
gpio.setup(D6, gpio.OUT)
gpio.setup(D7, gpio.OUT)
gpio.setup(enrol, gpio.IN, pull_up_down=gpio.PUD_UP)
gpio.setup(delet, gpio.IN, pull_up_down=gpio.PUD_UP)
gpio.setup(inc, gpio.IN, pull_up_down=gpio.PUD_UP)
gpio.setup(dec, gpio.IN, pull_up_down=gpio.PUD_UP)
gpio.setup(led, gpio.OUT)
try:
f = PyFingerprint(‘/dev/ttyUSB0’, 57600, 0xFFFFFFFF, 0x00000000)
if ( f.verifyPassword() == False ):
raise ValueError(‘The given fingerprint sensor password is wrong!’)
except Exception as e:
print(‘Exception message: ‘ + str(e))
exit(1)
def begin():
lcdcmd(0x33)
lcdcmd(0x32)
lcdcmd(0x06)
lcdcmd(0x0C)
lcdcmd(0x28)
lcdcmd(0x01)
time.sleep(0.0005)
def lcdcmd(ch):
gpio.output(RS, 0)
gpio.output(D4, 0)
gpio.output(D5, 0)
gpio.output(D6, 0)
gpio.output(D7, 0)
if ch&0x10==0x10:
gpio.output(D4, 1)
if ch&0x20==0x20:
gpio.output(D5, 1)
if ch&0x40==0x40:
gpio.output(D6, 1)
if ch&0x80==0x80:
gpio.output(D7, 1)
gpio.output(EN, 1)
time.sleep(0.005)
gpio.output(EN, 0)
Low bits
gpio.output(D4, 0)
gpio.output(D5, 0)
gpio.output(D6, 0)
gpio.output(D7, 0)
if ch&0x01==0x01:
gpio.output(D4, 1)
if ch&0x02==0x02:
gpio.output(D5, 1)
if ch&0x04==0x04:
gpio.output(D6, 1)
if ch&0x08==0x08:
gpio.output(D7, 1)
gpio.output(EN, 1)
time.sleep(0.005)
gpio.output(EN, 0)
def lcdwrite(ch):
gpio.output(RS, 1)
gpio.output(D4, 0)
gpio.output(D5, 0)
gpio.output(D6, 0)
gpio.output(D7, 0)
if ch&0x10==0x10:
gpio.output(D4, 1)
if ch&0x20==0x20:
gpio.output(D5, 1)
if ch&0x40==0x40:
gpio.output(D6, 1)
if ch&0x80==0x80:
gpio.output(D7, 1)
gpio.output(EN, 1)
time.sleep(0.005)
gpio.output(EN, 0)
Low bits
gpio.output(D4, 0)
gpio.output(D5, 0)
gpio.output(D6, 0)
gpio.output(D7, 0)
if ch&0x01==0x01:
gpio.output(D4, 1)
if ch&0x02==0x02:
gpio.output(D5, 1)
if ch&0x04==0x04:
gpio.output(D6, 1)
if ch&0x08==0x08:
gpio.output(D7, 1)
gpio.output(EN, 1)
time.sleep(0.005)
gpio.output(EN, 0)
def lcdclear():
lcdcmd(0x01)
def lcdprint(Str):
l=0;
l=len(Str)
for i in range(l):
lcdwrite(ord(Str[i]))
def setCursor(x,y):
if y == 0:
n=128+x
elif y == 1:
n=192+x
lcdcmd(n)
def enrollFinger():
lcdcmd(1)
lcdprint(“Enrolling Finger”)
time.sleep(2)
print(‘Waiting for finger…’)
lcdcmd(1)
lcdprint(“Place Finger”)
while ( f.readImage() == False ):
pass
f.convertImage(0x01)
result = f.searchTemplate()
positionNumber = result[0]
if ( positionNumber >= 0 ):
print(‘Template already exists at position #’ + str(positionNumber))
lcdcmd(1)
lcdprint(“Finger ALready”)
lcdcmd(192)
lcdprint(” Exists “)
time.sleep(2)
return
print(‘Remove finger…’)
lcdcmd(1)
lcdprint(“Remove Finger”)
time.sleep(2)
print(‘Waiting for same finger again…’)
lcdcmd(1)
lcdprint(“Place Finger”)
lcdcmd(192)
lcdprint(” Again “)
while ( f.readImage() == False ):
pass
f.convertImage(0x02)
if ( f.compareCharacteristics() == 0 ):
print “Fingers do not match”
lcdcmd(1)
lcdprint(“Finger Did not”)
lcdcmd(192)
lcdprint(” Mactched “)
time.sleep(2)
return
f.createTemplate()
positionNumber = f.storeTemplate()
print(‘Finger enrolled successfully!’)
lcdcmd(1)
lcdprint(“Stored at Pos:”)
lcdprint(str(positionNumber))
lcdcmd(192)
lcdprint(“successfully”)
print(‘New template position #’ + str(positionNumber))
time.sleep(2)
def searchFinger():
try:
print(‘Waiting for finger…’)
while( f.readImage() == False ):
#pass
time.sleep(.5)
return
f.convertImage(0x01)
result = f.searchTemplate()
positionNumber = result[0]
accuracyScore = result[1]
if positionNumber == -1 :
print(‘No match found!’)
lcdcmd(1)
lcdprint(“No Match Found”)
time.sleep(2)
return
else:
print(‘Found template at position #’ + str(positionNumber))
lcdcmd(1)
lcdprint(“Found at Pos:”)
lcdprint(str(positionNumber))
time.sleep(2)
except Exception as e:
print(‘Operation failed!’)
print(‘Exception message: ‘ + str(e))
exit(1)
def deleteFinger():
positionNumber = 0
count=0
lcdcmd(1)
lcdprint(“Delete Finger”)
lcdcmd(192)
lcdprint(“Position: “)
lcdcmd(0xca)
lcdprint(str(count))
while gpio.input(enrol) == True: # here enrol key means ok
if gpio.input(inc) == False:
count=count+1
if count>1000:
count=1000
lcdcmd(0xca)
lcdprint(str(count))
time.sleep(0.2)
elif gpio.input(dec) == False:
count=count-1
if count<0:
count=0
lcdcmd(0xca)
lcdprint(str(count))
time.sleep(0.2)
positionNumber=count
if f.deleteTemplate(positionNumber) == True :
print(‘Template deleted!’)
lcdcmd(1)
lcdprint(“Finger Deleted”);
time.sleep(2)
begin()
lcdcmd(0x01)
lcdprint(“FingerPrint “)
lcdcmd(0xc0)
lcdprint(“Interfacing “)
time.sleep(3)
lcdcmd(0x01)
lcdprint(“Circuit Digest”)
lcdcmd(0xc0)
lcdprint(“Welcomes You “)
time.sleep(3)
flag=0
lcdclear()
while 1:
gpio.output(led, HIGH)
lcdcmd(1)
lcdprint(“Place Finger”)
if gpio.input(enrol) == 0:
gpio.output(led, LOW)
enrollFinger()
elif gpio.input(delet) == 0:
gpio.output(led, LOW)
while gpio.input(delet) == 0:
time.sleep(0.1)
deleteFinger()
else:
searchFinger()
Execute Program
Just run the python code, there will be some introductory information on the LCD, and then the user will be asked to place his finger on the fingerprint sensor. Now with the finger of the fingerprint module, we can check if our fingerprint is already stored or not.
If your fingerprints are stored, the LCD will display information about where the fingerprint was stored, such as ‘at Fount: 2’ or ‘No Match Found’ otherwise.
Test Video

You may also like to read these articles
Install an operating system on your RasPi Using Noobs
How to Connect your Raspberry Pi and Arduino Together
Hope this article “How to Connect Fingerprint Sensor Module with Raspberry Pi” helps you to Connect Fingerprint Sensor Module with Raspberry Pi. If you have any query, feel free to comment.


