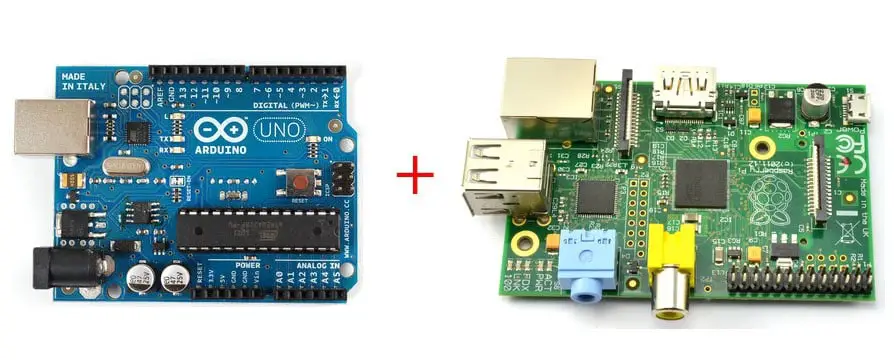
The Raspberry Pi and Arduino do not have the very basic unprotected IO pins on the Raspberry Pi and the lack of real-time performance in Linux but are ideal settings for many real interface projects.
After pricing a combination of many microcontroller boards and Wi-Fi adapters, I found that Raspberry Pi + USB Wi-Fi + Arduino is great value for money if you need wireless Internet access and simple sensor data processing.
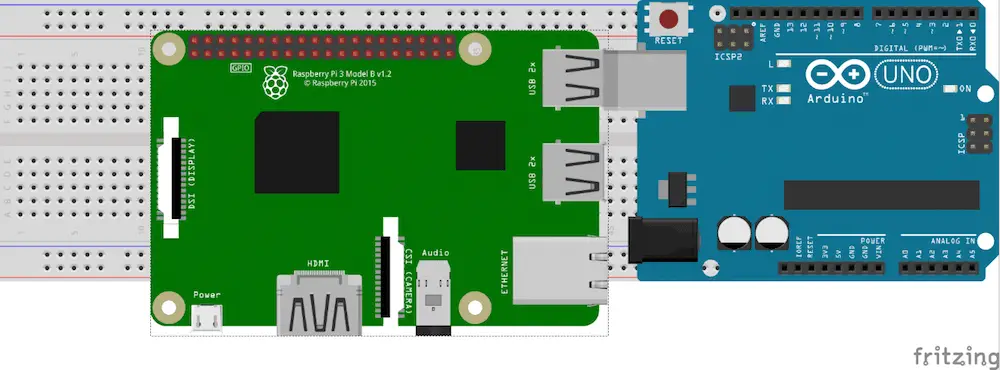
There are many ways to connect Raspberry Pi with Arduino, such as using GPIO and serial pins and using I2C. But this may be one of the easiest ways to get them talking because the hardware is minimal: all you need is a miniature USB cable for use with the Arduino. To set up your raspberry pi, take a look at this article.
To illustrate how this works, I’ll be doing two small projects, one for data from Arduino to Raspberry Pi and the other for the opposite. First, make sure you have installed pySerial, which allows you to read and write serial ports in the Python programming language. Arduino was used by people before, so it’s proven to work, you can check it out.
Step-By-Step Process to Connect your Raspberry Pi and Arduino
Step1:- Setup RX and TX Pin
The basic steps are the same as described here. On the hardware side, you can connect the 3.3V / GND / TX / RX pin on the Raspberry Pi to the 5V / GND / RX / TX pin on the Arduino via a level shifter. Or you buy a 3.3V Arduino and avoid the need for a horizontal translator. I am individually powering the Arduino to avoid overloading the RPi pin (this seems to be an intermittent problem with RPi boot lengths).
Step 2 Let’s Make
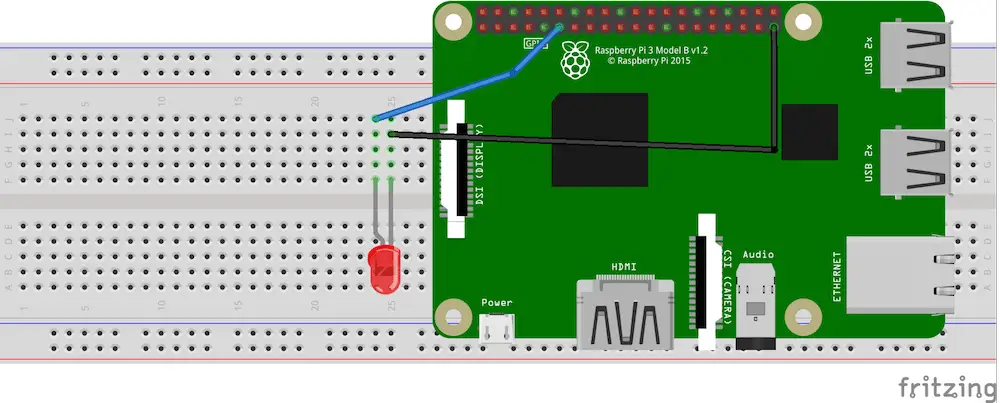
Connect the LED light to GPIO pin number 11 of raspberry pi as shown in the image below.
Give power to the Raspberry Pi and Open Python 3 a new window
Write the following code in the new window and save it. (Saving to your desktop is a good place so you don’t lose it)
import serial
import RPi.GPIO as GPIO
import time
ser=serial.Serial(“/dev/ttyACM0″,9600) #change ACM number as found from ls /dev/tty/ACM*
ser.baudrate=9600
def blink(pin):
GPIO.output(pin,GPIO.HIGH)
time.sleep(1)
GPIO.output(pin,GPIO.LOW)
time.sleep(1)
return
GPIO.setmode(GPIO.BOARD)
GPIO.setup(11, GPIO.OUT)
while True:
read_ser=ser.readline()
print(read_ser)
if(read_ser==”Hello From Arduino!”):
blink(11)
Now open Arduino IDE and upload the following code to your Arduino.
String data=”Hello From Arduino!”;
void setup() {
// put your setup code here, to run once:
Serial.begin(9600);
}
void loop() {
// put your main code here, to run repeatedly:
Serial.println(data);//data that is being Sent
delay(200);
}
Step 3:- Configuration
Make sure the code is uploaded to Arduino.
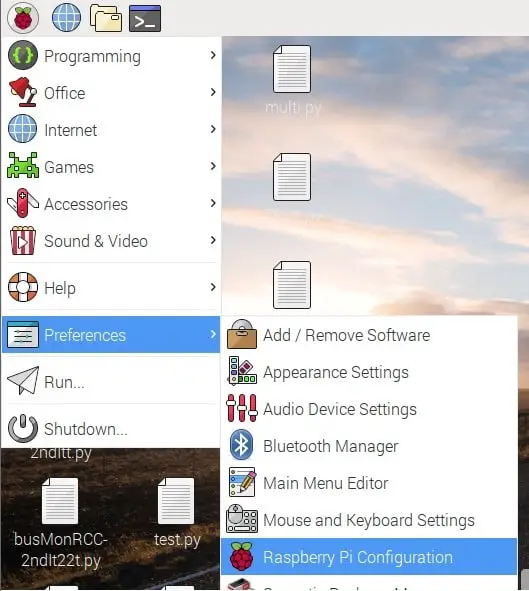
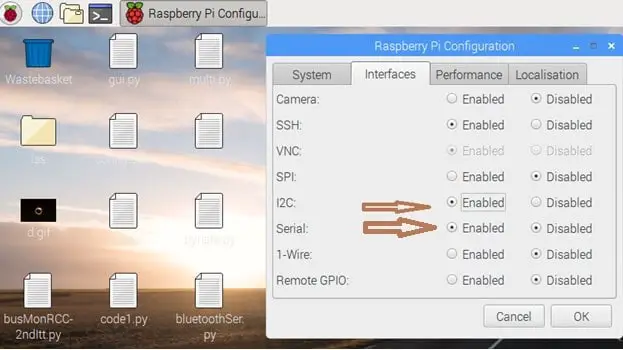
In your Raspberry Pi interface, be sure to enable Serial and I2C in PiConfig.
Step 4
Next, you’ll need to restart your Raspberry Pi. Open the Terminal and execute these commands:
sudo apt-get install python-serial
sudo pip install pyserial
Connect your Arduino to your Raspberry Pi
Execute
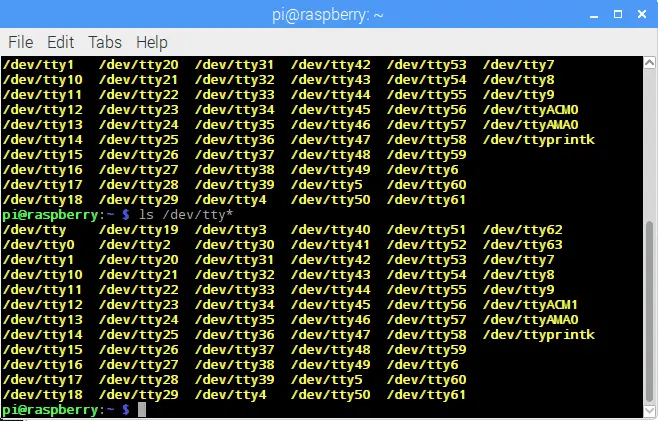
ls /dev/tty*
Then find a line with /dev/ttyACM0 or something like /dev/ttyACM1 etc., check for an ACM with any number 0,1,2 etc.
Open Python again and change ser=serial.Serial(“dev/ttyACM1”,9600) to the ACM number you found. So if in your case, in your case you got ACM0 then the line should look like ser=serial.Serial(“dev/ttyACM0”,9600)
Now run the program you just created in Python3. You will see “Hello from Arduino!” in the Python terminal and your LED should be blinking as well!
Done
I will recommend you to read these books to learn more about Raspberry Pi and Arduino
Hope my article “How to Connect your Raspberry Pi and Arduino Together” helps you to Connect your Raspberry Pi and Arduino Together. if you have any query, feel free to comment.


