


It all started with a dark age little game called “Mario”, jumping from a little kiddie duck to save my princess until it became a man roaming in Prince of Persia (Prince of Persia) Handsome Prince, Fighting Darkness To save my world, I’ve been a big fan of video games and I grew up playing them. But sometimes they get bored and I feel less tired. Today, advanced gaming consoles enable virtual games and help us feel better about games than keyboards or mice.
As an Arduino fan, I’m tired of playing the famous Angry Birds game with my keyboard and mouse and decided to build my own game controller with Flex Sensor and Potentiometer. When the spring sensor is pulled, the bird on the catapult is also pulled, and you can use the potentiometer to set the direction it should launch. Then, when you release the flexible sensor, the bird will start. I really like doing this, so if you are building something very similar then this tutorial can be very helpful. This tutorial also helps with controlling the mouse cursor with a potentiometer.
Software and hardware requirements:-
Software:
- Arduino IDE ( Download Now )
- Handle IDE
- Angry bird game on the computer
Hardware
- Arduino (Buy Now)
- Potentiometer (Buy Now)
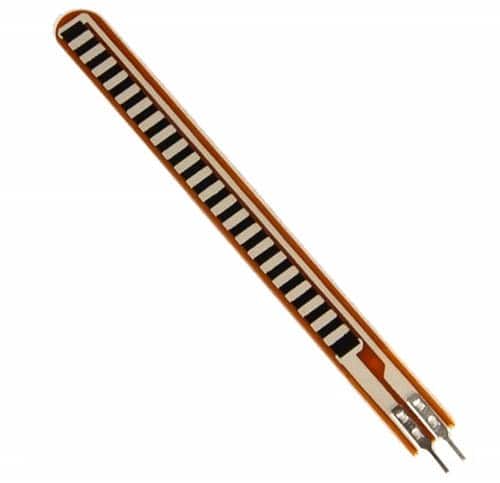
- Flex sensor (Buy Now)
- 47K ohm resistance (Buy Now)
- Jumper wires (Buy Now)
- Breadboard (Buy Now)
Project idea
The Arduino Board reads the values from the potentiometer and the Flex Senor and transfers the data to the laptop / PC through the normal Serial.write () function via the USB serial port. We then use Processing to read this information and control the mouse cursor using the Robot class in Java that handles IDE support. We programmed the Processing IDE, and when the Flex sensor is pulled, it produces a mouse click and, depending on how much it is pulled, the mouse pointer moves in the X direction. Then, depending on the value of the potentiometer, we move the mouse cursor to the Y direction so that we can set the bird’s firing direction.
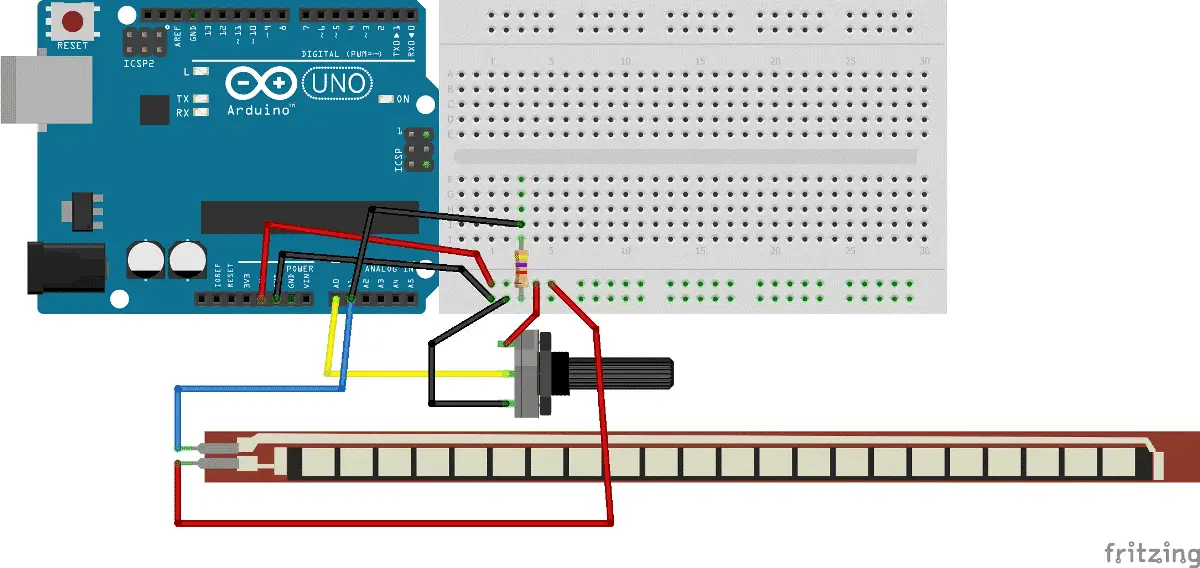
Circuit diagram:
It’s easy to play Angry Birds using a Flex sensor and a potentiometer.
We simply connect the potentiometer and the flexible sensor to the analog inputs (A0, A1) of the Arduino. The output of the Flex sensor is also pulled low using a 47K pull-down resistor.
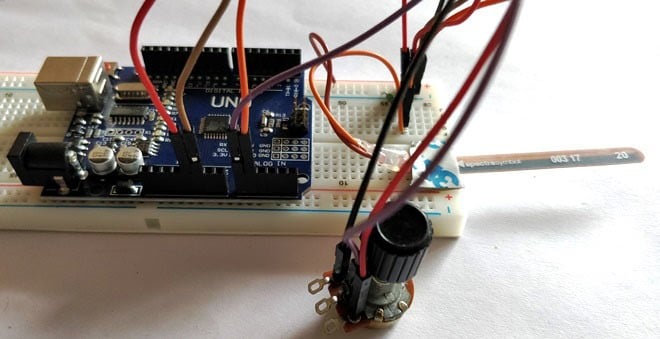
You can attach it directly to the breadboard or weld them to a Perf board and assemble them on gloves or other items to make them more creative. I only use a breadboard to complete my connection, as follows:
Arduino program:
The complete Arduino code is given at the end of this tutorial. Here are a few important lines to explain.
We initialized the program to use the 9600 baud rate and start reading the values of the Flex sensor and potentiometer. As we know, the serial.write () function can only send one byte of data at a time. Since one byte is 8 bits, 2 ^ 8 = 256, we can send a value from 0 to 256. Therefore, we must compress the values of the Flex sensor output and the potentiometer output to 0 to 25 6.
To do this, we use the map () function in Arduino. All values from the flexible sensor are converted from 5 to 100 so when we bend the sensor it will increase from 5 and when it is released it will return 5. Referring to the mouse clicks, use the values 1 and 0. When sending 1, press the mouse, when sending 0, release the mouse.
Processing:
In order for this Angry Birds project to work with the provided code, assemble your hardware according to the circuit diagram and upload the given Arduino code. Then notice which COM port your Arduino is connected to and make the necessary changes in the processing code and start the processing of the sketch.
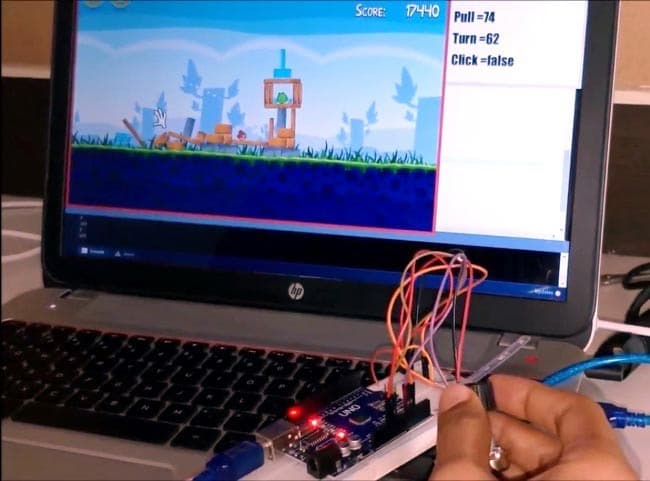
Now, just start the Angry Birds game and place the cursor near the catapult, then pull the flex sensor to pull the bird and use the potentiometer to set the direction. Once the orientation is set, release the Flex sensor
EEEEWWWWWEEEEEEEEEE !!!!!!!!!! ……………
Your bird will be thrown into the air and BOOMM! In piglets The complete job can be found in the video given below.
Hope you enjoy this project and be able to build something similar. If you have any questions, you can contact me in the comments section, or post a question to the forums about technical issues.
Now, have time to hit those piggy boxes, get back our eggs!
Upload Source Code
void setup() {
Serial.begin(9600); //Transmit at 9600 Baud Rate
}
boolean Mclick = false;
void loop() {
int potValue = analogRead(A0); //variable to store potValue
int FlexValue = analogRead(A1); //variable to store Flex Value
// Serial.println(FlexValue);
// Serial.print(“POT: “);
// Serial.println(potValue);
// Serial.print(“Flex: “);
if (FlexValue>=65 && FlexValue<=115) //my flex sensor varies from 65 to 120, your might be different
{
FlexValue = map (FlexValue,120,65,0,100); //based on bending convert to 0 to 100
if (FlexValue>=5) // 1 and 0 is used for mouse click so start from 5
{
Mclick=true;
Serial.write(1); //1 is sent to make mouse left click
Serial.write(FlexValue); //Flex value is the distance to move mouse in X direction
}
else
{
Mclick=false;
Serial.write(0);}
}
else
{
Mclick=false;
Serial.write(0);}
if (potValue<=200)
{
potValue = map(potValue,0,200,101,201); //Based in turn convert to 101 to 201
Serial.write(potValue); //Pot value is the distance to move mouse in Y direction
}
delay(500); //stability delay
}

You may also like to read these articles
How to Build game using Arduino UNO
Build Super Computer with 5$ Raspberry pi zero using Cluster HAT


