


If you’re here, you’re definitely facing the really irritating “critical process died” error. It could even be happening regularly and you’re wondering what’s up with your system.
This article will not only explain how to fix it, but I will also explain what causes this error so you can take preventive measures.
Of course, the measures don’t mean the”critical process died” error won’t ever happen, but it will greatly reduce the chances of it happening.
What Exactly Is The “Critical Process Died” Error?

Note: The error is also referred to as the “blue screen error” due to the color of your screen when the error occurs.
There are system processes that make your system run, when the processes suddenly stop, your system will stop too. It will then display a blue screen with the text “critical process died”.
This error just basically means there are some changes in system files, settings, and processes that are making your system unstable.
It can be really disturbing when you keep getting the blue screen. You will have to fix these changes to ensure your system stops experiencing this error.
This error can sometimes cause your system to go into a continuous loop where it reboots, shows the error, and then reboots again.
Situations That Could Trigger The “Critical Process Died” Error
Below are some of the situations that could trigger the error. There are other situations that could happen still but I found these ones to be more common.
1. After Windows Updates
The “critical process died” error can immediately be triggered after Windows updates.
Many users have reported that although the updates successfully downloaded, it was during the installation process that the error occurred.
2. During Gaming Sessions
Gamers have really suffered from the “critical process died” error a lot during Gaming sessions. It just happens and after a reboot, everything goes back to normal until the next gaming session.
3. After Enhancing PC (Overclocking)
This is also gaming related. Many PC users overclock their PC to eke out more resources to enhance their gaming.
The “critical process died” error is also triggered in this situation.
4. After Sleep Or Logins
Many users have reported that the error occurs immediately after they try to wake their PC or just after the login option appears on startup.
5. Rundown On Situations
There are so many other situations that could trigger this error.
Most of these situations can’t be avoided so it is usually not the situations themselves that trigger the error, it could be other conflicting system processes.
How To Fix The “Critical Process Died” Error

The fixes below are suited to some situations more than others. I will be explaining the fixes in easy to follow steps and I will also be suggesting when to use which tip.
It is important to know however that they are suggestions and I can’t be absolutely right on each suggestion because I don’t know what the problem is on your own system.
Just use the fix that might address your problem based on when the error occurs.
1. Using The SFC Scan To Find And Fix Errors
This fix is a tried and tested method of fixing errors so it is just right that it should be the first fix I offer.
There are no absolute guarantees that this will work but then if you’re trying to find and fix an error, you can do worse than running the SFC Scan.
To try to fix the “critical process died” error using the SFC Scan, follow the steps below.
The steps are divided into two. Opening a Command Prompt and then Using the Command Prompt To Run A SFC Scan.
Opening A Command Prompt
The first step is to navigate to the Start button. Then right-click on the Start button.
From the options that appear, select the Command Prompt (Admin) option.
It is important you choose the Admin option so as to be able to make changes to system processes.
Using The Command Prompt To Run A SFC Scan
When the command prompt opens, enter this command.
sfc/scannow
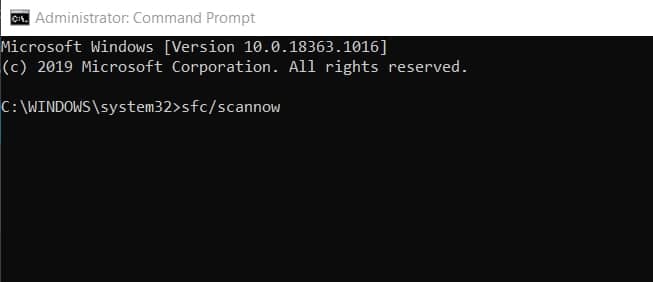
Note: Entering a command means you input the text in the command prompt window and then you press the Enter key.
The scan doesn’t take that long. It should be over after minutes, not hours.
When the scan is over and your errors have been scanned and fixed, reboot your PC and see if the “critical process died” error still persists.
2. Using The CHKDSK Scan To Fix The Error
This fix is similar to the first one and that’s why I thought it best to group it close. The process is somewhat similar but with a few key differences.
Chkdsk scans are probably more reliable than SFC scans so it could be worth the hassle to try running chkdsk and then see if it helps with the problem.
The steps below are also split into two. You will need to open a command prompt (admin), just like in the above fix, and then run a different set of commands.
Opening A Command Prompt
The first step is to navigate to the Start button. Then right-click on the Start button.
From the options that appear, select the Command Prompt (Admin) option.
It is important you choose the Admin option so as to be able to make changes to system processes.
Using The Command Prompt To Run A CHKDSK Scan
In the command prompt window, enter these commands
chkdsk C: /f
“‘C:” – stands for your hard drive letter so you can change it if that’s not the letter your storage unit is using.
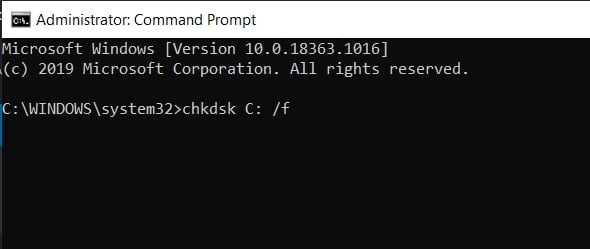
This command above scans your system, finds files that need fixing and then fixes the files. Basically an internal process on your hard drive.
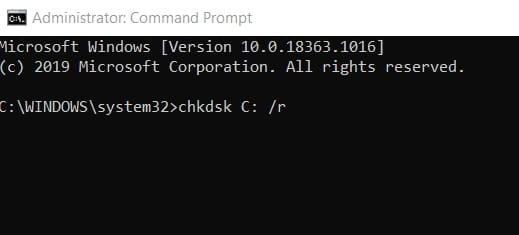
But another Chkdsk command can also help fix the physical damage to your hard drive to an extent.
Run the command below if you feel the “critical process died” is occurring because of physical damage.
chkdsk C: /r
After running the command you choose out of the options above (or after running both of them), you should reboot your system and check if the error is still happening.
3. Using DISM To Fix The Error
This is another inbuilt scan that helps restore health to systems. The scans are grouped together because their processes are similar to an extent.
DISM promises to scan and fix any issues it finds. I will also be explaining additional tips you can use to try and make sure the DISM scan works.
You also need to open a command prompt for this fix so I will be explaining step by step too.
Opening A Command Prompt
The first step is to navigate to the Start button. Then right-click on the Start button.
From the options that appear, select the Command Prompt (Admin) option.
It is important you choose the Admin option so as to be able to make changes to system processes.
Using The Command Prompt To Run A DISM Scan
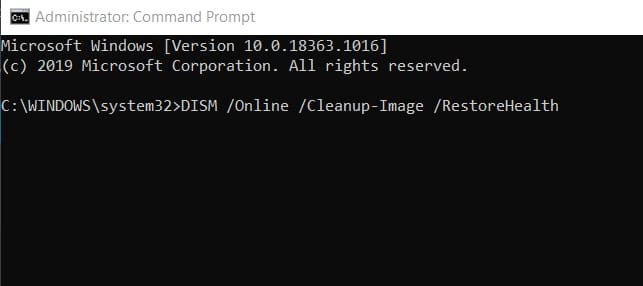
In the command prompt window, enter this command –
DISM /Online /Cleanup-Image /RestoreHealth
Run the command above and it should take some minutes for your system scan to be completed.
After the scan is done, do the needful by restarting your computer and checking if the error is gone.
Important Scans You Should Consider Running
The next tip is still under DISM scans but they are kinda important extra commands that can help reinforce the DISM scan and increase its efficacy.
Steps To Take
Find your Windows 10 iso file. Double click the file to mount it.
The next step is to open a command prompt admin (use the steps I explained above to open a command prompt as an admin)
The scans are divided into two –
- Scans For Checking System Health
dism /online /cleanup-image / scanhealth
dism /online /cleanup-image / checkhealth
dism /online /cleanup-image / restorehealth
- Scan For Resorting System Health
DISM /Online /Cleanup-Image /RestoreHealth /source:WIM:X:SourcesInstall.wim:1/LimitAccess
Note that the “X” letter in the command stands for the drive letter where your Windows iso file is mounted. So replace the letter with your drive letter if your drive letter isn’t X.
4. Using A Full System Antivirus Scan To Get Rid Of The “Critical Process Died” Error
Many users have reported that although they didn’t have malicious viruses on their systems, this fix still worked for them.
The reason is that even spyware or adware can definitely cause the blue screen error to occur so it is worth the short.
You can use the inbuilt Windows defender or a trusty third-party antivirus app to help solve your problem.
I will be explaining how to use the inbuilt Windows defender program mainly because it is the program that all users with this error already have.
Using Windows Defender To Fix The Error
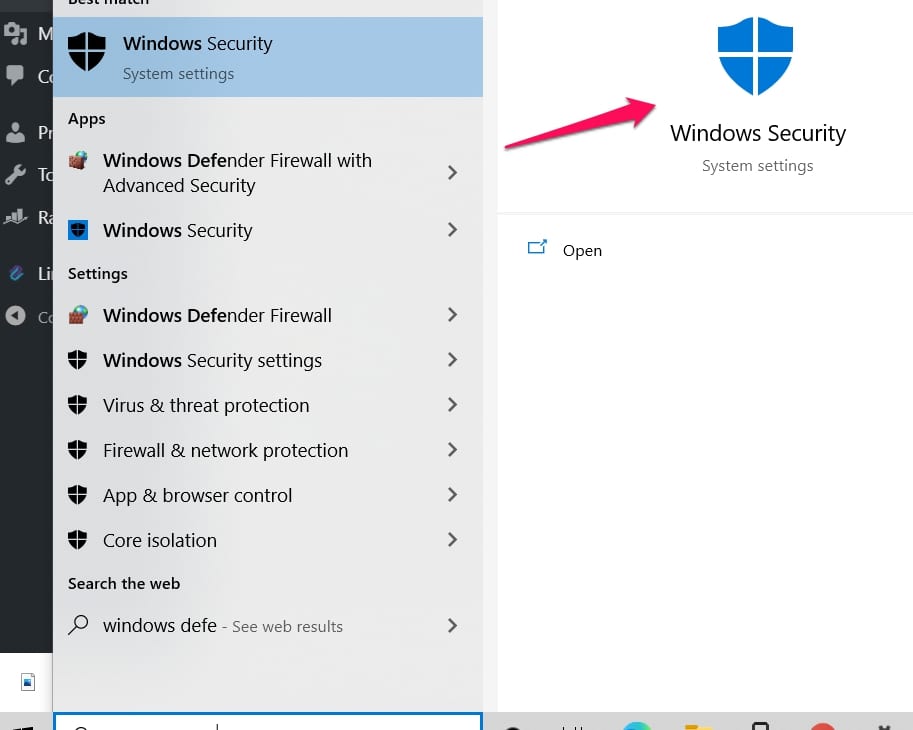
Navigate to Start and input the text “Defender” to find the Windows Defender program (Windows Security).
When your search results come back, select Windows Defender and open it.
Look at the left-hand side of your screen, the pane contains many icons. Choose the icon that looks like a shield.
When a menu opens at the right-hand side of your screen, look down and click on the Advanced Scan option.
In the Advanced Scan option, choose the Full Scan option to ensure that all of your files and running programs are checked.
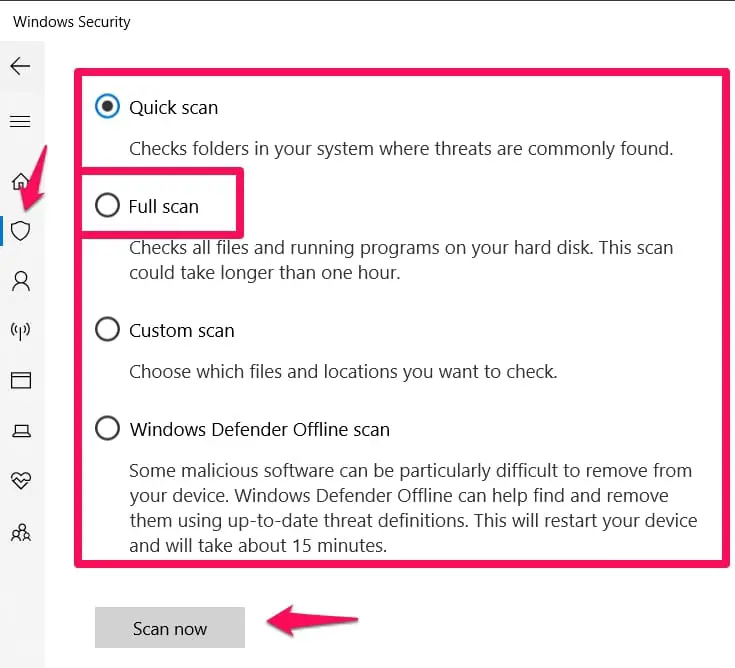
This scan lasts longer than an hour so you should make sure your system is plugged in to avoid potential data loss due to your system going off before the scan is complete.
Using Other Antivirus Programs
Of course, you can always run the full scan using any antivirus you currently have. Try to ensure it is a trusted antivirus program so that you can be sure it detects not just malware but adware and spyware.
5. Updating Your Drivers To Fix The “Critical Process Died” Error
Drivers are as important in systems as they are in real life, with a bad driver you’ll get accidents and that’s exactly what happens too in systems.
Just like in real life, good drivers can still get errors but updating your drivers ensures you minimize the risk of that happening.
When your drivers are out of date or (bad), usually both of these things happen at the same time, then the blue screen error can occur.
It is also important to note that you need to check if the drivers are compatible with Windows 10.
Also, important functions like the graphics card and the sound card also depend on you updating drivers to ensure maximum performance.
How To Update Drivers
You need to navigate to your Device Manager. You can use the search bar or any other method you feel better using.
Open the Drivers menu and check if there are updates available for your drivers. You can then install the updates and remove the bad drivers.

Some users have reported that it is too long a process to manually update each driver especially if a lot of their drivers are outdated.
Using Third-party Apps
There are some third-party apps that could help you easily automatically download all the updates you need.
I will however suggest you try doing it manually especially when your system is experiencing this error so that you’ll be absolutely sure.
You can then use the third party app later when your system is working properly to maintain driver updates.
If however, you feel like third-party apps are the way to go, Google search for the best options (most of them demand some sort of fee to work).
6. Uninstalling The Updates You Made To Fix The Error
Some users have reported that immediately they had the latest Windows updates, their system began to exhibit the “critical process died” error.
This actually is a good thing in disguise because chances are you have gotten exactly the fix to use without just trying out random long processes that may not work.
All you will have to do is uninstall the crappy updates and then your system should be back to normal.
How To Uninstall Updates
Navigate to the Settings menu, then select Windows Update in the settings menu.
When the Windows Update menu opens up, look for and click on Update History.
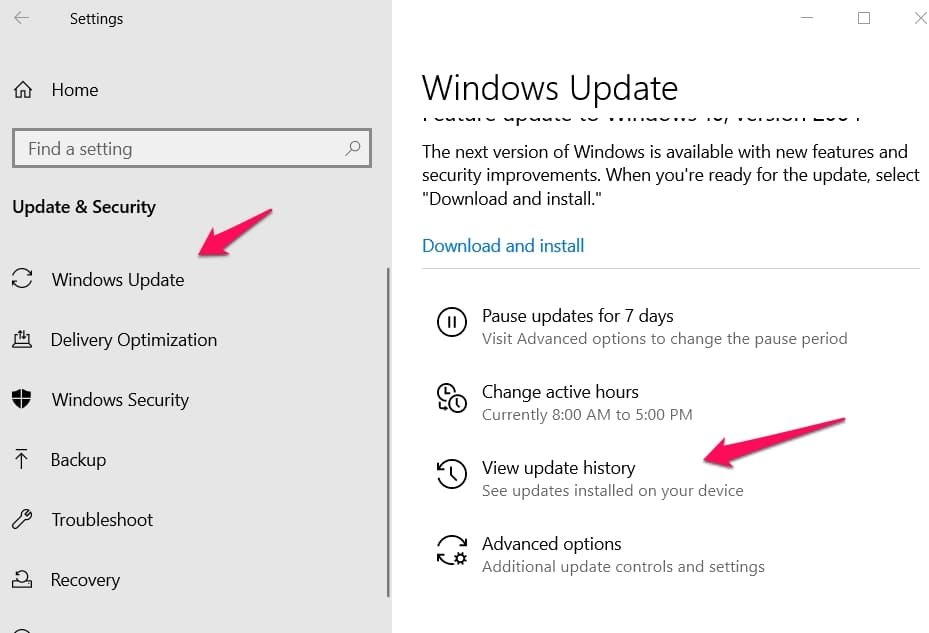
Here’s where you will find the Uninstall Updates option.
You will be asked to select the updates you want to uninstall. The updates will show the date and time they took place.
I will advise users to uninstall all the updates leading to a time when your system worked perfectly.
If you’re not sure if it’s two or three updates ago, you may want to go slowly, one update at a time.
The fix usually works as long as the updates were the cause of the issue.
7. Using The System Restore Feature To Fix The Error
Using system restore points just means going back to a point where your system worked perfectly.
In some ways, it is like uninstalling updates but there are other consequences like the loss of apps and data gotten after the restore point you’re using.
But this option may be your only choice when faced with the “critical process died” error.
Your system usually creates access points automatically when it notices that you’re about to make system altering changes like updates and the likes.
Why Using Manual System Restore Points Is Important
I will not just be explaining how to use System Restore Points.
I will also first explain how to create one manually because it is a good preventive measure that can help preserve your info.
The idea behind this tip is for users to always create manual restore points after getting important data to ensure that using the system restore points does not make you lose that data.
Of course, you should always just backup your information to be absolutely sure.
How To Create Manual System Restore Points
Before I go into the process of creating a manual system restore point, I would like to point out that some users might not even have the system restore feature enabled on their systems.
So, I will take a little detour and show how to enable it and then go on to how to create manual points.
The steps are pretty similar in the beginning but differ later, so just follow the steps outlined for each process separately.
Enabling System Restore Points Feature
Navigate to Start and input this search query – Restore.
When your search results come back, select the option “Create A Restore Point”.
Note: You might be confused about why you need to go here first, just follow the process and you’ll understand why as I go on.
When you open the Create A Restore Point option, go to the System Properties menu.
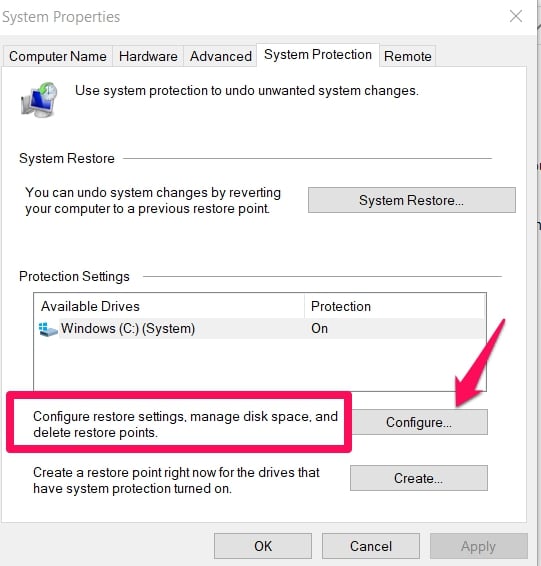
Then choose the System Protection tab, this is where you can check to see if your drive has the feature enabled. This is also where you can enable the feature.
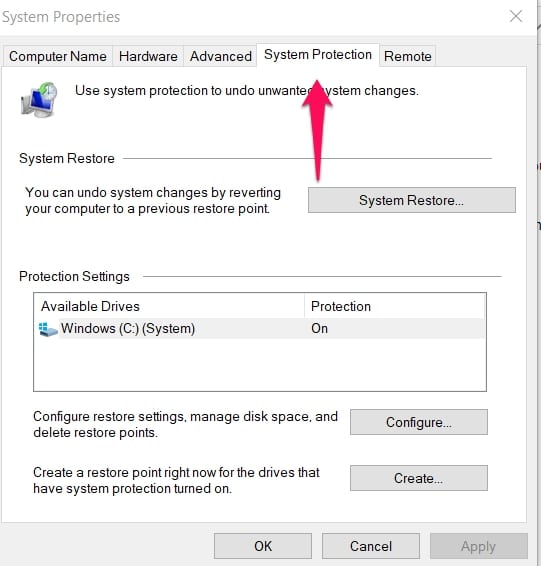
Usually, the drive that needs the feature is your C: drive because that is where all your system files are.
So, if you see that the feature isn’t enabled yet, select your C: drive and select the Configure option.
You will be allowed to Turn On System Protection, you will also be allowed to make changes to the amount of disk space the restore points can make use of.
Apply the changes you’ve made and select OK to confirm the changes. Now that you’ve enabled the system restore feature, let’s move on to creating restore points.
Creating System Restore Points
If you’re worried about too many restore points being created, know that old restore points are usually deleted when new ones are created.
Navigate to Start and input this search query – Restore.
When your search results come back, select the option “Create A Restore Point”.
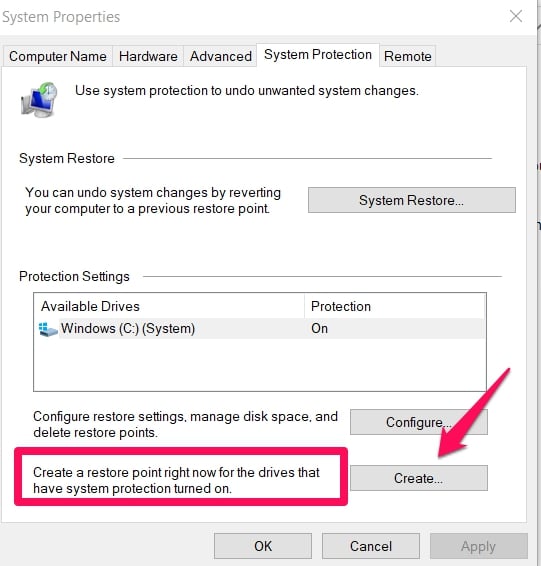
Navigate to the same System Properties menu we used above and select the System Protection tab. Instead of selecting configure, select Create.
You will be asked to type in a name, it is always important to type in a name that reminds you of your system status at the time you were manually creating the restore point.
Creating the point usually takes a minute so you should be done in no time.
When you’re done, you will get a message that the creation was successful then you can close the menu.
Using System Restore Points To Get Rid Of The “Critical Process Died” Error
Now we’re finally here. I took my time to explain the processes above so that this one does not appear foreign to users who aren’t tech-savvy.
The first steps are identical to the ones above so if you followed the article properly, you shouldn’t have issues with the steps below.
Navigate to Start and input this search query – Restore.
When your search results come back, select the option “Create A Restore Point”.
Navigate to the same System Properties menu we used above and select the System Protection tab. Then select System Restore from the tab.
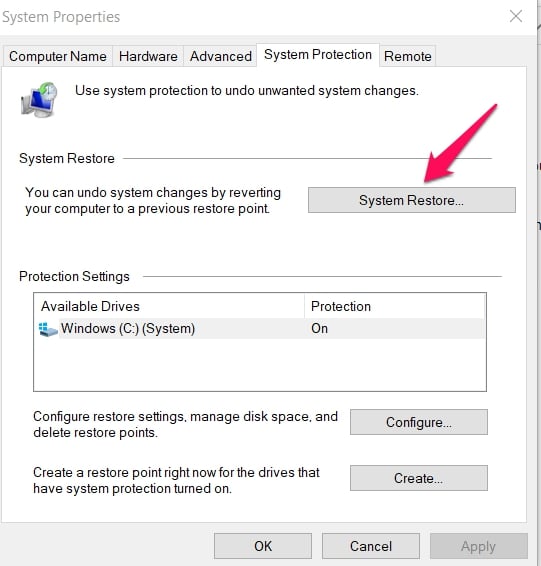
A wizard that will help you through the process will be displayed, just follow through to go on.
Then you will be shown the available restore points. Note that the restore points you see are the weekly automatic restore points and the manual points you created.
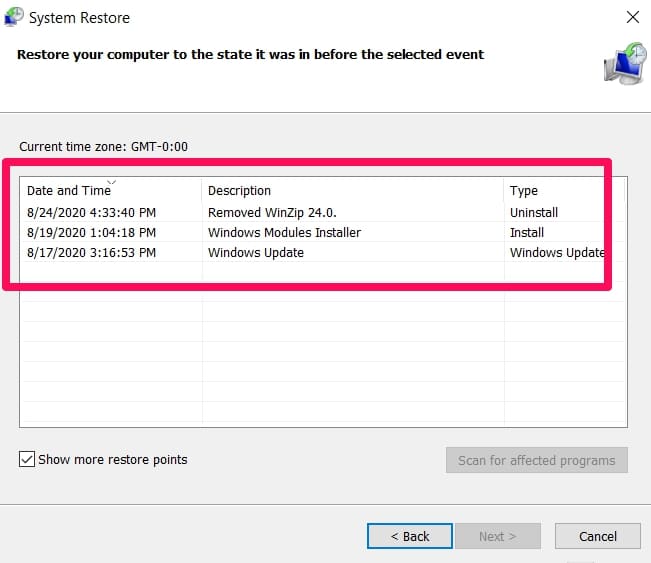
There may be other restore points created after major system changes hidden. To access those, click on the Show More Restore Points Feature.
A Few Things To Note About Using System Restore Points
- Just before you click Yes to use that access point, another access point will be automatically created by your system so you can always go back to that point if the system restore did not help you get rid of the error.
- During the system restore process, your PC must not go off. It is really risky if it does, you may lose data or worse. So make sure it is plugged in.
- Deleted programs and drivers that now reappear after using a restore point don’t always work until you perform a reinstallation process.
Conclusion
The steps above are suited to different situations and I have tried to give you some ideas of the situations you can use them in.
But usually, one of the above tips should help you solve your “critical process died” error and get your system running back up.
I usually recommend using the “scan fixes” first before diving into altering major system processes. But you can always use any of the fixes above first.
Is there any other way that worked for you? Please let me and other readers know about it in the comments section below. It will really help a lot of people.

