


In this Article, I will explain to you how to setup VC0706 camera module just bought online, including communication between the camera module and Arduino UNO, how to take a picture of the camera module and so on. This is an Arduino camera module, designed for image acquisition and processing applications designed for surveillance cameras digital image processing chip-VC0706, based on the TTL communication interface, Arduino controller is very easy to connect, you can read the image through the UART serial port and Data port, and then perform some image processing. This is a detailed DIY guide for VC0706 TTL and UART cameras.
DIY Camera using VC0706 Camera module with Arduino UNO
Step 1:- Sensor Detail
This camera module can perform image processing on video signals from CMOS sensors such as AWB (Auto White Balance), AE (Auto Exposure), and AGC (Automatic Gain Control). In addition, the module will output high-quality digital video signals through the standard CCIR656 interface under the combination of advanced technologies such as image enhancement processing under low illumination, intelligent prediction and suppression of image noise, and the like.
The VC0706’s built-in JPEG decoder enables re-encoding of captured images, allowing external controllers to easily read M-JPEG video streams for dual stream camera design. VC0706 support screen character and pattern superimposed motion detection and OSD display, customizable detection area and sensitivity.
Step 2: Diagnose Hardware
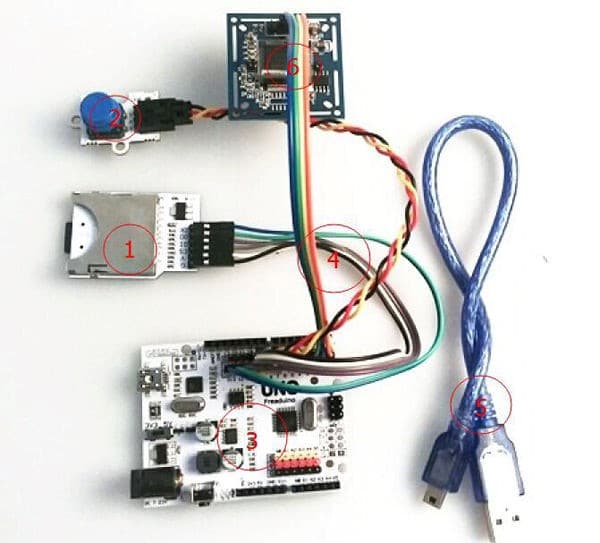
Collect Hardware-
SD Module
Digital key module
Arduino UNO ( Buy Now )
Jumper wire
USB cable
VC0706 camera module ( Buy Now )
Step3: Make Connection
Make the connection as the mention below
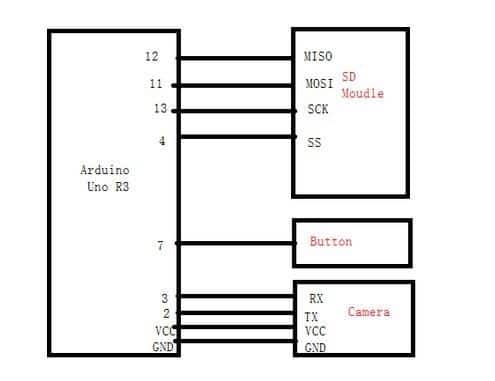
So this is how physical Diagram look like
Note:- I have written a post for people looking for the best digital camera under 300 $ to buy?, do read it If you are interested.
Step 4: Software usage and code programming
Load the extracted file of Camera_VC0706_lib into the Arduino IDE folder in the library.
Liberary files can be downloaded from this Camera_VC0706_lib
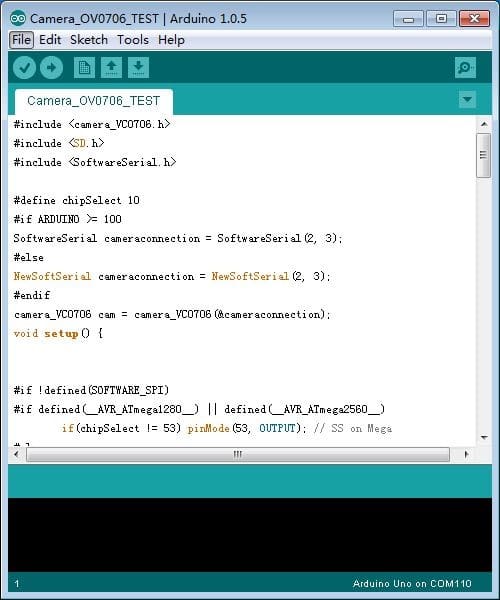
Upload Source Code
//////////////////////////TechnicalUstaad.com////////////////////////////
#include <camera_VC0706.h>
#include <SD.h>
#include <SoftwareSerial.h>
#define chipSelect 10
#if ARDUINO> = 100
SoftwareSerial cameraconnection = SoftwareSerial (2, 3);
#else
NewSoftSerial cameraconnection = NewSoftSerial (2, 3);
#endif
camera_VC0706 cam = camera_VC0706 (& cameraconnection);
void setup () {
#if! defined (SOFTWARE_SPI)
#if defined (__ AVR_ATmega1280__) || defined (__ AVR_ATmega2560__)
if (chipSelect! = 53) pinMode (53, OUTPUT); // SS on Mega
#else
if (chipSelect! = 10) pinMode (10, OUTPUT); // SS on Uno, etc.
#endif
#endif
pinMode (7, INPUT_PULLUP);
Serial.begin (9600);
Serial.println (“VC0706 Camera test”);
// SD card detection
if (! SD.begin (chipSelect)) {
Serial.println (“Card failed, or not present”);
return;
}
// Check the camera
if (cam.begin ()) {
Serial.println (“Camera Found:”);
} else {
Serial.println (“No camera found?”);
return;
}
// Camera version number
char * reply = cam.getVersion ();
if (reply == 0) {
Serial.print (“Failed to get version”);
} else {
Serial.println (“—————–“);
Serial.print (reply);
Serial.println (“—————–“);
}
// Choose the right image size 640×480, 320×240 or 160×120
// The bigger the picture, the slower the transfer speed
cam.setImageSize (VC0706_640x480);
//cam.setImageSize(VC0706_320x240);
//cam.setImageSize(VC0706_160x120);
uint8_t imgsize = cam.getImageSize ();
Serial.print (“Image size:”);
if (imgsize == VC0706_640x480) Serial.println (“640×480”);
if (imgsize == VC0706_320x240) Serial.println (“320×240”);
if (imgsize == VC0706_160x120) Serial.println (“160×120”);
Serial.println (“Get ready!”);
}
void loop () {
if (digitalRead (7) == 0) {// button detection
delay (10);
if (digitalRead (7) == 0) {
if (! cam.takePicture ())
Serial.println (“Failed to snap!”);
else
Serial.println (“Picture taken!”);
char filename [13];
strcpy (filename, “IMAGE00.JPG”);
for (int i = 0; i <100; i ++) {
filename [5] = ‘0’ + i / 10;
filename [6] = ‘0’ + i% 10;
// create if does not exist, do not open existing, write, sync after write
if (! SD.exists (filename)) {
break;
}
}
File imgFile = SD.open (filename, FILE_WRITE);
uint16_t jpglen = cam.frameLength ();
Serial.print (jpglen, DEC);
Serial.println (“byte image”);
Serial.print (“Writing image to”);
Serial.print (filename);
while (jpglen> 0) {
// Read 32bytes once
uint8_t * buffer;
uint8_t bytesToRead = min (32, jpglen); / / adjust the size of a one-time read data from 32-64byte, too easy to not work
buffer = cam.readPicture (bytesToRead);
imgFile.write (buffer, bytesToRead);
jpglen – = bytesToRead;
}
imgFile.close ();
Serial.println (“… Done!”);
cam.resumeVideo ();
}
}
}
Upload the Source code as figure below
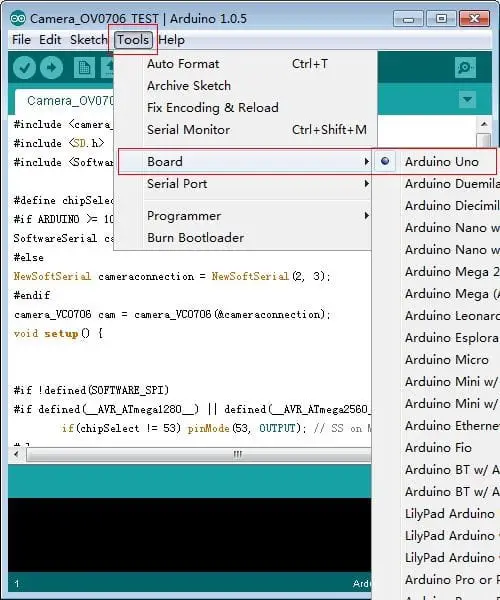
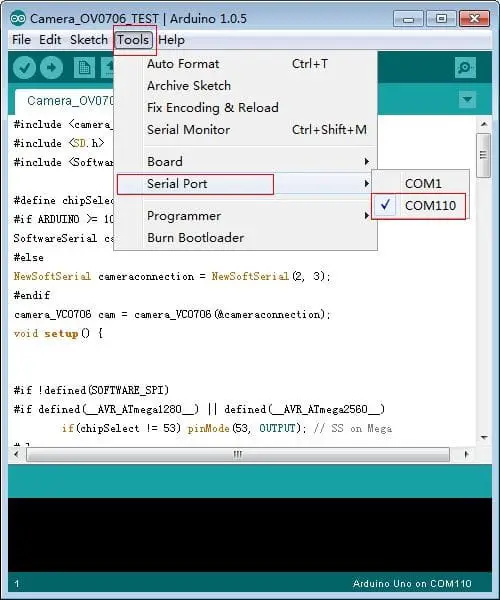
Click on tool -> Board Select Arduino UNO
Click Tool Serial Port and Select your Com Port
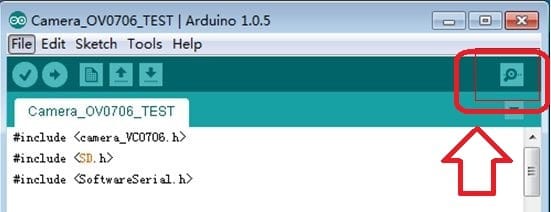
Now click on Upload button as mention below

Now Click On Serial Button as mention below in image
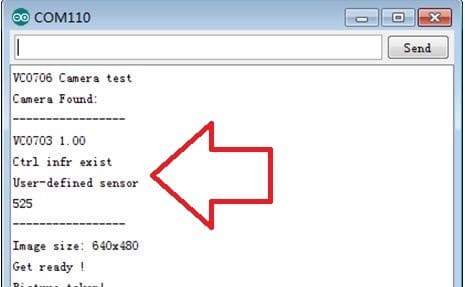
When the serial port displays the data like demonstrated below, you can press the button key for taking a photo
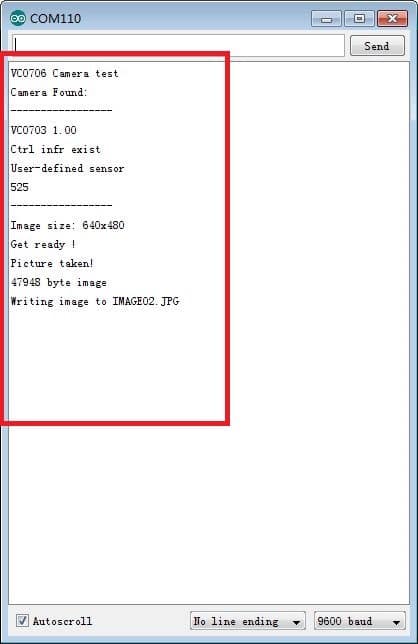
If photo Taken successfully it will have showed us the message such display at write below
Note if you face any problem regarding camera module then please write the comment Below
You may also like to read these articles
How to Connect your Raspberry Pi and Arduino Together
Arduino VS Raspberry: Which Is The Mini Computer For You?


