


Tired of waiting for hours and hours while your Android device tries and fails to deal with the “failed to obtain IP address” error?
Then you’ve come to the right article. I will explain what the error is and give easy to use tips on how to fix the error. I will also give the most common reasons why the error occurs in the first instance.
This can help serve as preventive measures against the occurrence of the “failed to obtain IP address” error.
What Is The “failed to obtain IP address” Error?
A common problem that occurs among Android device users who are trying to connect to a WiFi is the “failed to obtain IP address” error.

This happens because your router cannot get an IP address for your Android device and this usually happens after you’ve entered the password correctly.
What then happens is that your device will continue trying to reconnect and get an IP address assigned but it won’t be successful in its retries.
Some patient users have said it took hours and hours of retrying and it still did not work. That must have been very depressing.
Oh well, there’s good news now. With the help of this article, you should be able to fix the error without having to wait for hours.
What Causes The “Failed To Obtain Ip Address” Error? 🤔
There are a few fair issues that might result in your Android device encountering this error.
I will explain the most common issues and you should probably note them so that you can avoid the error by prevention methods instead of solving after the error happens.
The main causes that can be diagnosed easily and fixed are
- Wrong Password
- Weak Signal
- Router’s Amount Of Users Maxed Out
Wrong Passwords
I know, I know, you’re totally sure you got the right password. Have you considered though that you might have gotten uppercases or lower cases of the password mixed up though?
There are many little mistakes that can occur when typing in a password so you must ensure you check each letter closely to see if it corresponds with the actual password.
This is a common mistake that everybody makes so don’t be too harsh on yourself and just check to make sure you’re totally correct.
Weak Signal
Sometimes a weak network signal can bring up the “failed to obtain IP address” error.
If your network service providers are facing issues too with their network, maybe running upgrades or experiencing technical difficulties. It can negatively impact on your end and cause the error to occur.
Router’s Amount Of Users Maxed Out
This is a classic case of using other devices for your WiFi and forgetting to remove them while you add others.
There is a limit to the number of devices that your router can link at a time, so you have to take note and remove devices you don’t use often so as to ensure there’s space for your Android device.
Tips To Fix The “Failed To Obtain Ip Address” Error
I have explained above a few obvious causes and how to sort them out easily.
The tips below are based on some internal processes that may be affecting your WiFi connection negatively.
There is no exact science to knowing which situation warrants which tip because you do not know exactly where the problem is coming from.
That is why I have identified problem areas below and explained the fixes involved.
You should just use the tips you feel comfortable with the most and usually, it will sort out your issue. If one doesn’t work, try out another until the error is gone.
1. Using The “Forget Network” Feature To Get Rid Of The Error
Restarting any tech process is always the first fix and this error is no different.
The first fix I will be explaining is basically about rebooting the connection process especially if you have already used the WiFi connection before and your password is saved.
Here’s How To “Forget Network”
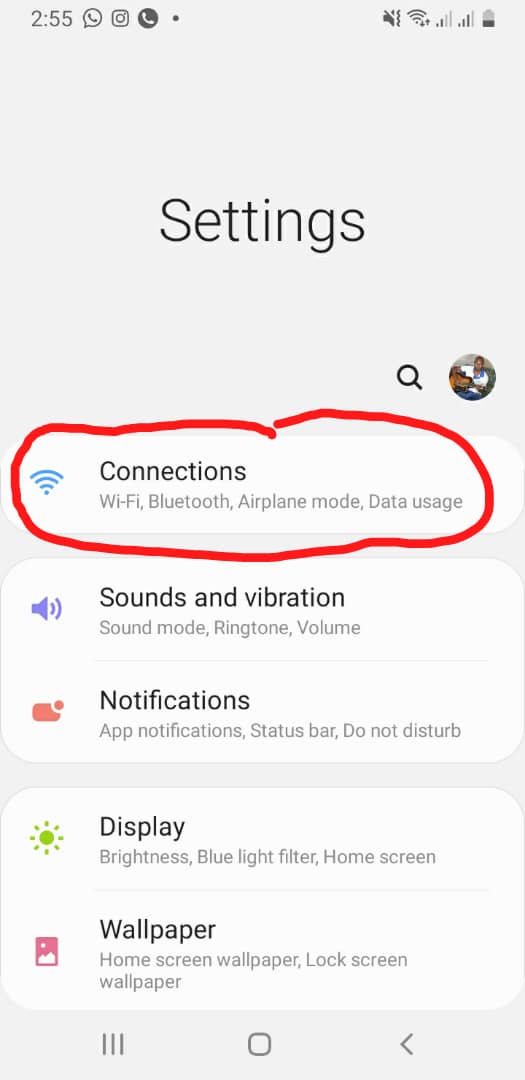
The first step is to navigate to and open the Settings menu.
When the menu is open, search for, and click on WiFi, this may sometimes be hidden in the “connections” option.
In the next menu (WiFi), press and hold the name of the connection that you’ve been trying to use.
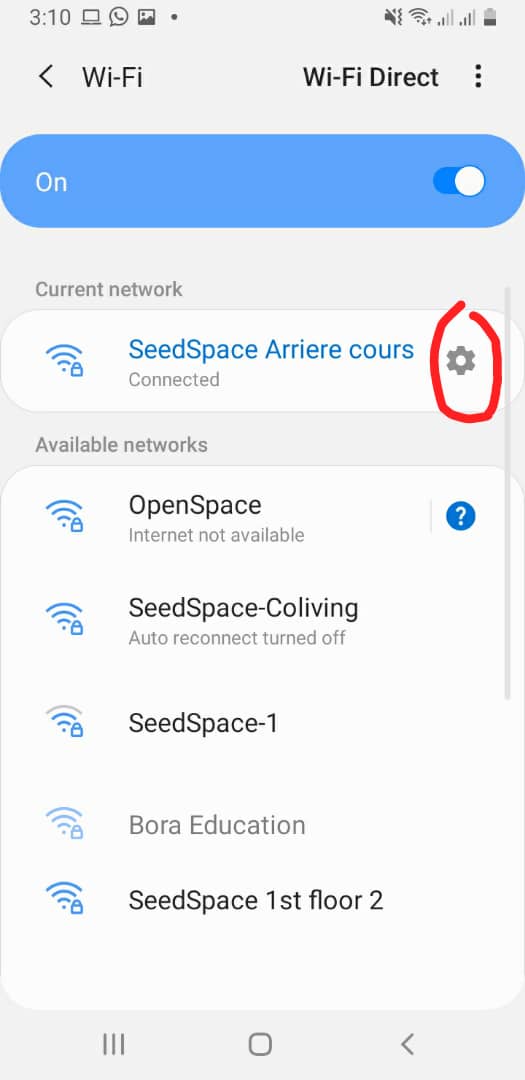
When you hold for a few seconds, you will get a pop-up list of options. Alternatively, simply tap on the gear icon in front of your network.
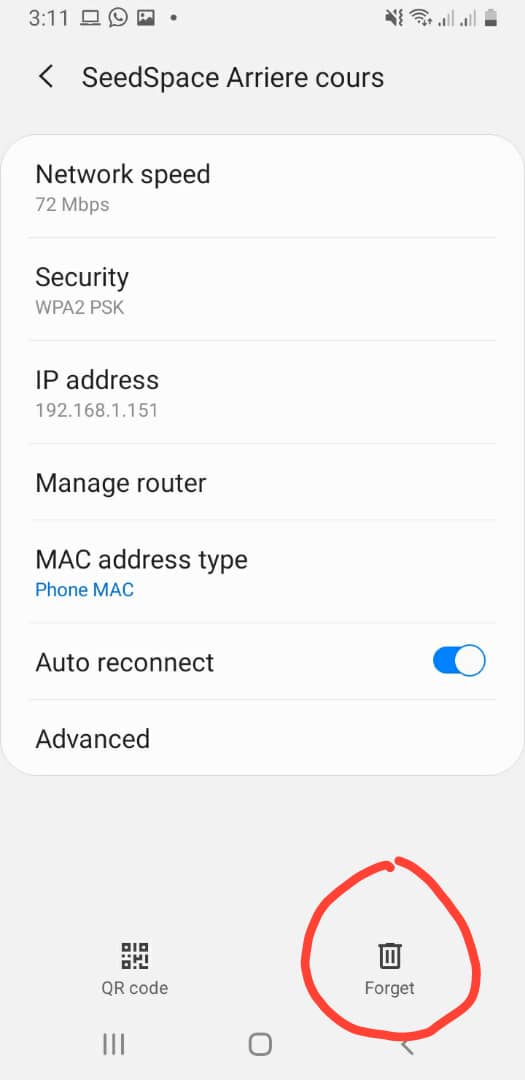
Choose the “Forget Network” feature to erase the connection.
When you’re done erasing the connection, navigate back to your WiFi menu, and locate the connection.
Try connecting with the WiFi, note that you will be asked for the password because you’re connecting anew.
Enter the correct password and check to see if the connection is established.
2. Reboot Your Router
We are still on the issue of rebooting the system processes and this is another idea that you can use.

The idea is not just to turn off and turn back on immediately, the idea is to turn it off for some minutes and then reboot back.
Make sure it stays turned off for around 10 minutes to get rid of any overheating problems that stem from you having your router working for so long.
The chances of an overheated router causing the error are pretty slim though but it can’t be entirely ruled out.
Plus you don’t need to do much to use the fix so it is a good choice to start with the two first fixes before diving into any tweaking of device settings.
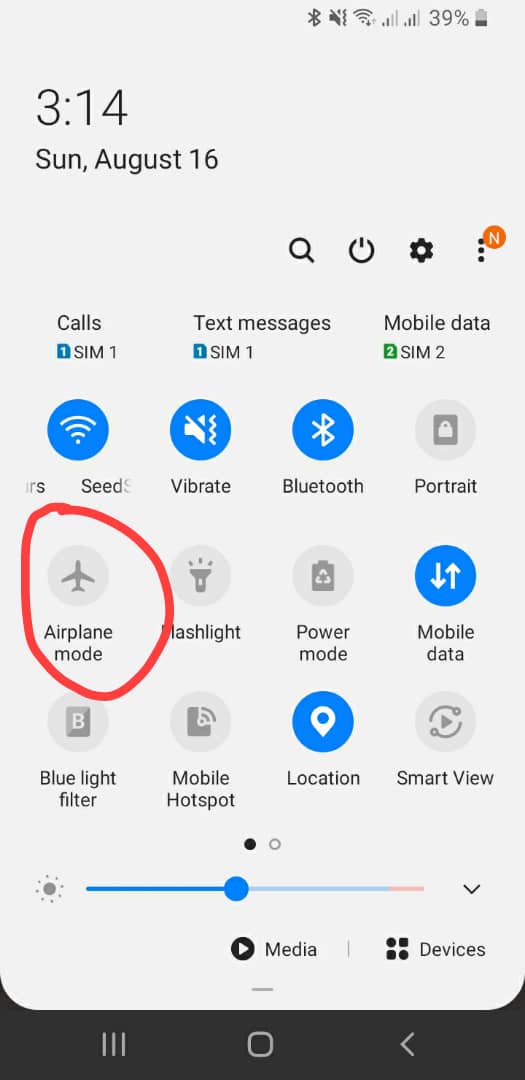
3. Toggle Off And On The Airplane Mode Feature To Force WiFi To Reconfigure The Connection
This is also a reboot of some sorts but it is the last reboot themed fix on this list.
You can just easily toggle the Airplane Mode Feature on and wait for one or two minutes and then toggling the feature back to off.
This process helps in refreshing the connection you’re trying to make.
This method has been known to work so it might seem pretty easy but it is effective too.
You could achieve this by pulling down the notification center of your phone and tapping twice on the plane icon.
4. Deleting Google Play Services Cache
Clearing cache is an effective fix for most Android device processes errors. This is because the Google Play Services feature is an integral part of so many apps on your Android device.
So when its cache contains bugs, it might affect other apps and their processes negatively. You should use this fix for other app issues that might be troubling your phone too.
Here’s How To Clear The Cache Of Google Play Services
The first step is to navigate to and open your Settings menu.
When the menu is open, tap on Apps & Notifications.
Another menu will appear, choose the Google Play Services among the list of Apps that will be in the Apps & Notifications menu you opened.
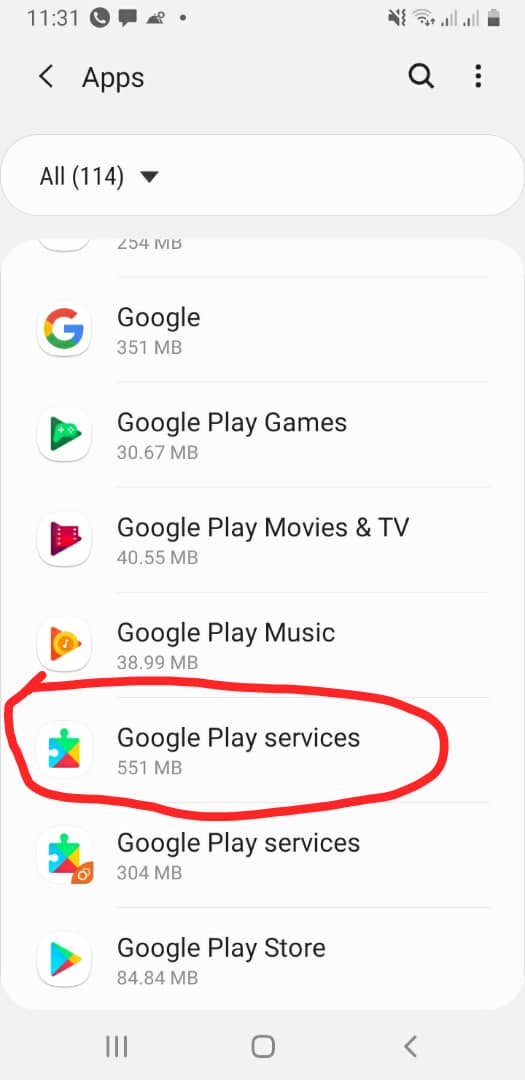
The next step is to select Storage in Google Play Services and then select Clear Cache.
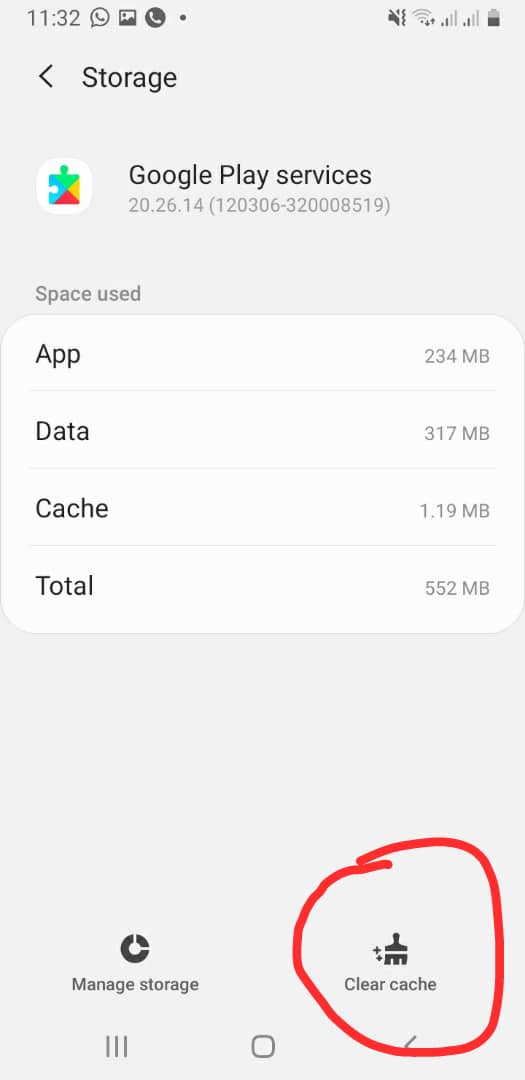
When the clearing is over, navigate back to your WiFi and try reconnecting.
If the problem was a buggy Google Play Services cache, then you should be able to reconnect in no time.
If the error still persists, then try out the next fix.
5. Resetting The Router
The other processes have been a bit easier but now I will be explaining fixes that will need a little bit more finesse and patience. These may be important for some cases of the failed to obtain IP address issue.
Resetting your router is different from rebooting it. This reset is much more effective and not as easy as just turning it off and on.
There are two resets that can be performed. You can do it the Hard (Hardware) way or the Soft (Software) way.
It is rather hilarious to point out that the easier way is the hard way. So I’ll start with it.
Hardware Way
Your routers may have physical reset buttons that will make this fix really easy.
Find out if your router has the reset button and where it is located online or if you have no connectivity, just turn your router to the back and check the left-hand side likely next to the antenna for a SMALL HOLE.

You will know if you have found it when it says “RESET” just underneath it.
Use your sim ejector pin or any similar object to press the reset button usually located deep in the reset hole.
Press and hold for about 10 to 15 seconds and when you notice all the lights on your router come up at once, let go.
This fixes your router issues in most cases.
The question is now what if you don’t have a router with a physical reset button. Then that’s where the Soft (Software) method comes in.
Software Way
What you have to do is use an Ethernet cable to connect your laptop or PC to the router.
When the connection is secure, you will have to open your router’s web admin.
You can do this by entering your router’s IP address which is almost always -> (192.168.0.1) without the parenthesis of course, on any browser on your PC or laptop.
In the space provided, log in with your password and username and follow the steps below to reset your router.
I will be broadly explaining the steps above because there might be slight differences across many routers.
In my case, I’m going to be explaining it using the TP-link type of router. If that’s the same one you’re using, you’re in luck.
If not, follow the steps as closely as you can and you should still be able to make it work for your type too.
Resetting Your Router:-
Navigate to System Settings and click on Backup & Restore in the system settings menu.
In the new menu that opens up, search for Factory Reset and click on it. In some routers, you may be asked to confirm your choice.
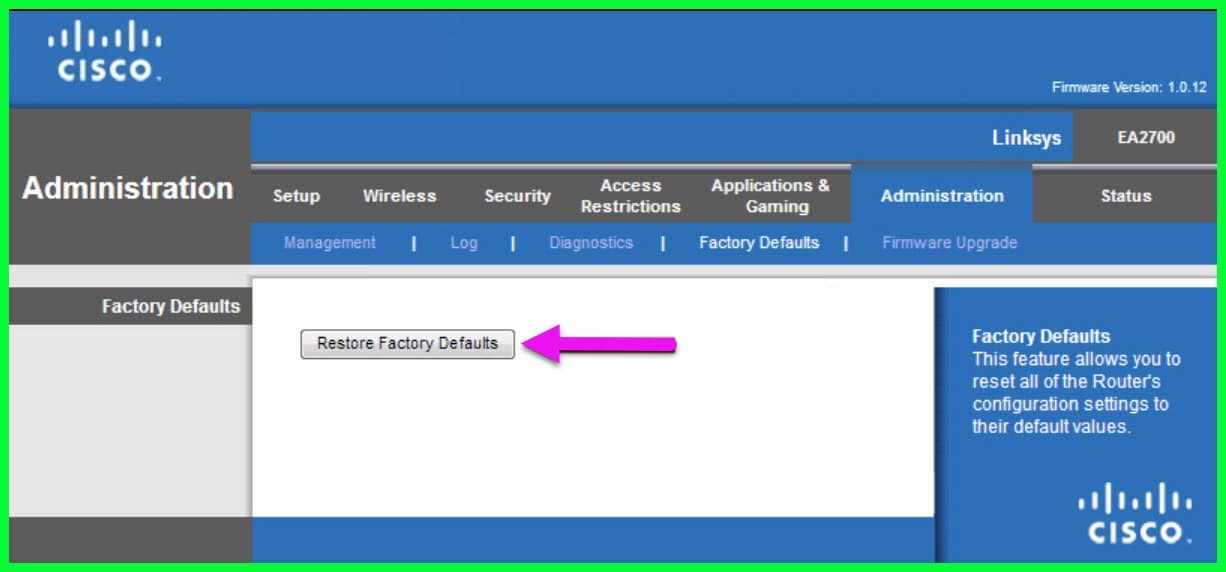
Confirm the reset and be patient while it’s done.
The good part about this reset process is that across all routers, it is almost always found under System Settings.
When you’re done with the reset, turn off your router for a few minutes.
Turn it back on again and try to connect. The “failed to obtain IP address” error should be fixed by now.
Assigning A Static IP Address
This next tip is also effective when it comes to the error we’re trying to get to get rid of.
It involves tweaking some internal device system settings so the steps must be followed as precisely as possible to ensure that you don’t cause more problems while trying to fix the error.
Here’s How To Go About Assigning A Static IP Address
Navigate to your device’s Settings menu and select WiFi from the settings list.
Press and hold on the connection that’s exhibiting the error and choose Modify Network in the pop-up list that appears.
In the Modify Network menu, click on Advanced Options and a drop-down menu will appear.
In the first item on the drop-down menu (IP Settings), click on it to open a list of options and choose Static from that list.
Then just below the IP settings we just changed, select the next item (IP Address).
You will see a bunch of numbers separated by dots, quite like the IP address of the router I explained above.
What you will need to do is change the last three digits of the bunch of numbers to any number you choose between (10-255) and make sure you don’t use the same number you saw there.
Then go down a bit after making all the changes explained above and select Save to ensure your changes are made.
If you don’t save the changes, they won’t be enforceable so it is important that you save it.
Now check the connection to see if it’s working properly again and the error is gone.
6. Tweaking Your WPA Encryption Settings
You can see that I am now getting into some processes that are a bit technical but I will still explain it in simple terms that just about anybody can follow.
This tip is just about switching up your connection settings.
Here’s how to go about it.
The first processes are similar to that of the Software Reset Method.
Using The First Step Of The Software Reset Method
For this way to work, you must have a laptop or PC and an Ethernet cable.
What you have to do is use an Ethernet cable to connect your laptop or PC to the router.
When the connection is secure, you will have to open your router’s web admin.
You can do this by entering your router’s IP address (192.168.0.1) on any browser on your PC or laptop.
In the space provided, log in with your password and username.
Tweaking Your Encryption Settings
Once your router menu is open, click on Wireless and then search for and click on Wireless Settings.
In the wireless settings menu, look for the type of encryption that your router is using and then change it.
Usually, your router will be using the AES encryption, just change it to the TKIP encryption.
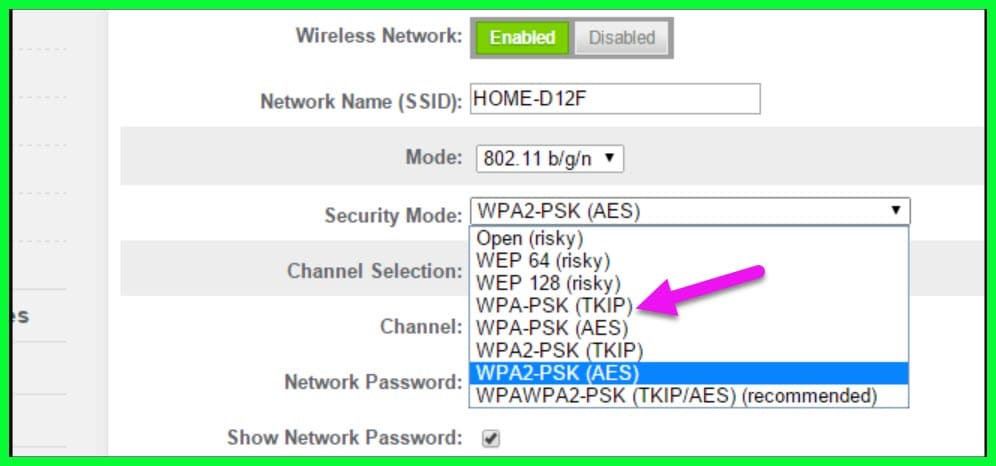
This also works in the reverse just in case your router was already using the TKIP encryption.
Save the settings you made by selecting the Save button usually located a bit down the menu and then reboot your router.
Then go on to your phone and use the “Forget Network” fix again.
Then reconnect with the correct details and check if the connection will work sans the error.
7. Turning Off The Mac Filter On Your Router
This tip helps in case your router is blocking access on purpose. It may not work in the long-run but it should do the trick for now if the issue was router blocking access.
The first step is pretty much the same step for about two methods above but for the sake of clarity, I will explain it again.
For this way to work, you must have a laptop or PC and an Ethernet cable.
What you have to do is use an Ethernet cable to connect your laptop or PC to the router.
When the connection is secure, you will have to open your router’s web interface.
You can do this by entering your router’s IP address (192.168.0.1) on any browser on your PC or laptop.
In the space provided, log in with your password and username and you’ll be able to see your router’s web interface.
Navigate to Wireless and open up its menu.
In the menu, search for Wireless Mac Filtering at the left-hand side of your screen and then click on it.
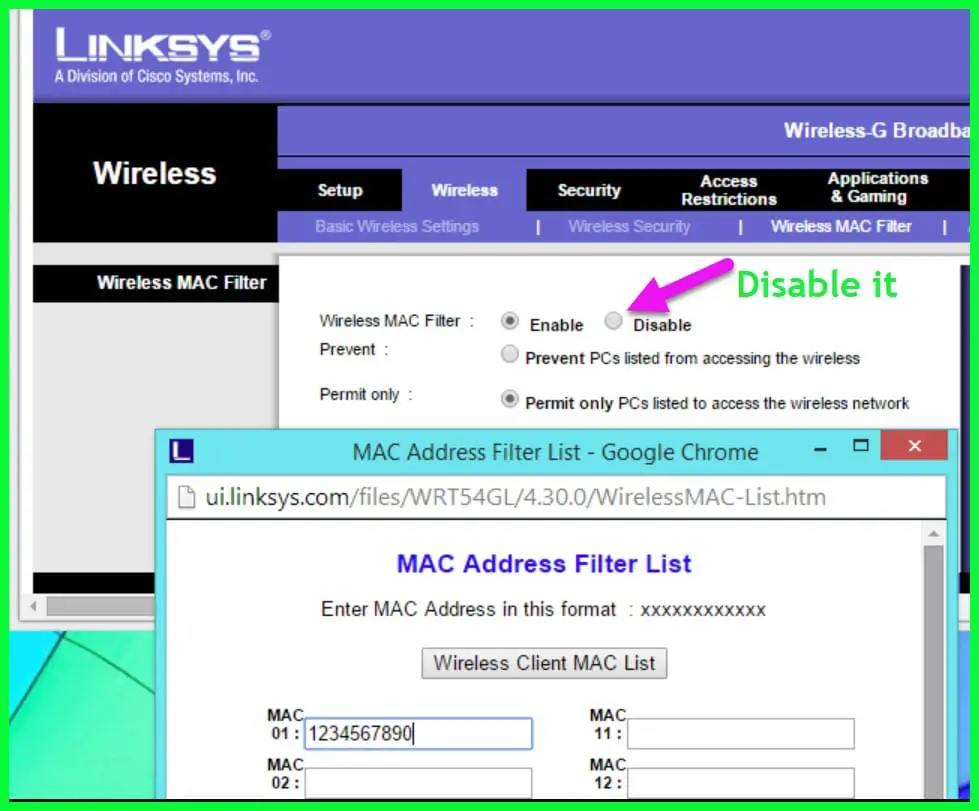
When you do, the Wireless Mac Filtering menu will open up at the right-hand side of your screen.
Click on the Disable option to remove the filtering.
Using The Forget Network Fix
What you have to do now is go on your computer and use the “Forget Network” fix again.
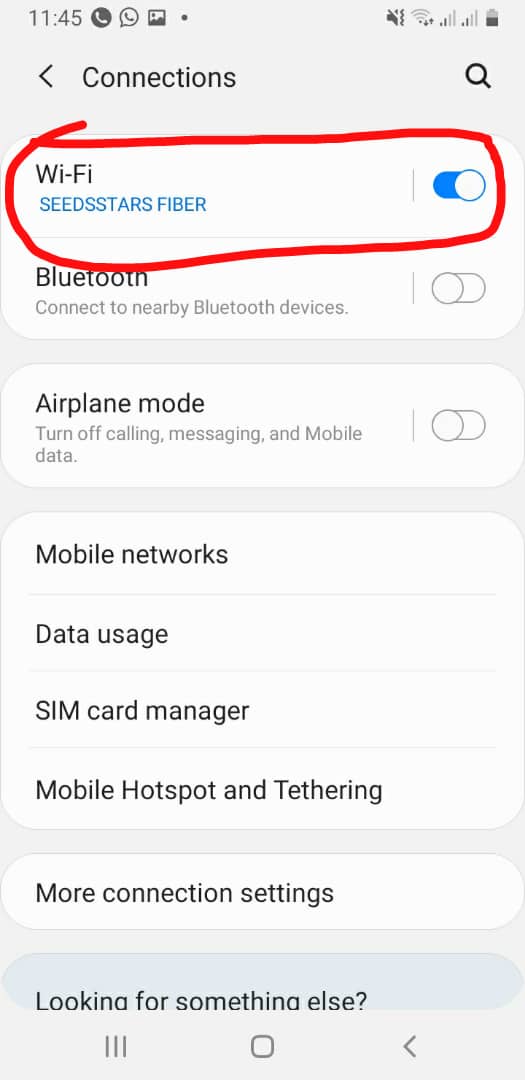
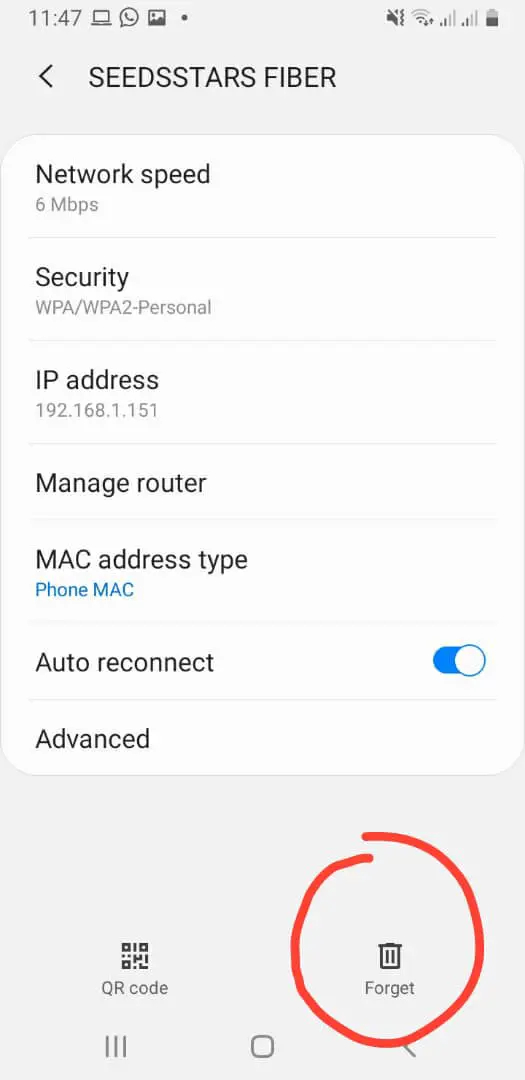
If you are on a phone try this step to forget your network:
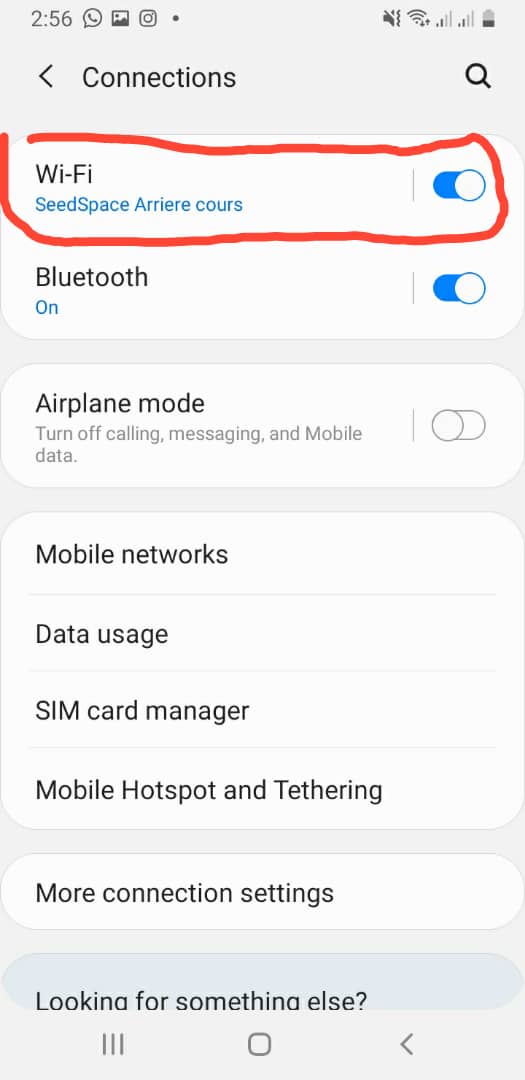
Nvigate settings > connections > WiFi
Click on the gear in front of the WiFi you are connected to.
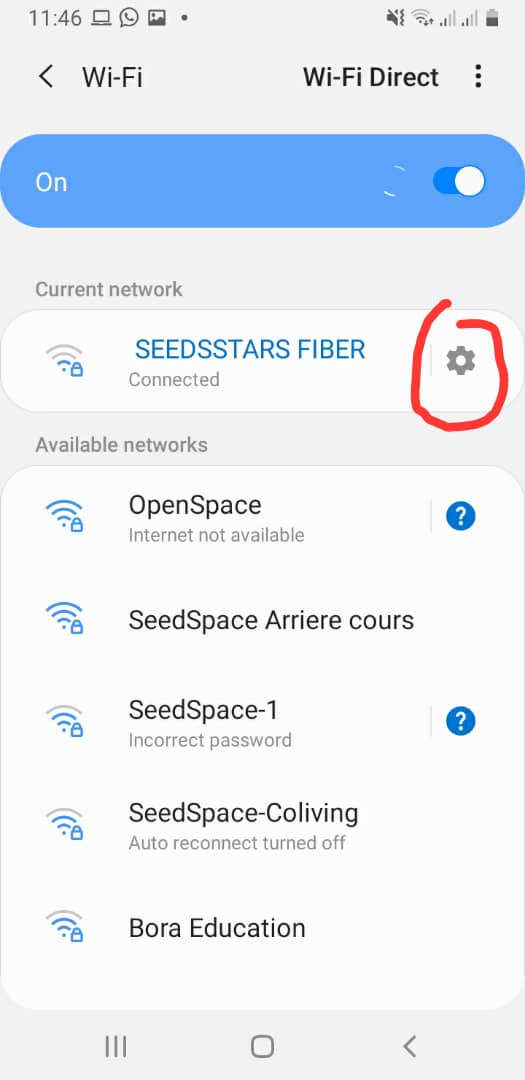
Then click on the forget icon at the bottom right.
Then reconnect with the correct details and check if the connection works perfectly or if the error still persists.
Remember to re-enable the filter later if the fix got rid of the error, or re-enable it immediately if the fix did not get rid of the error.
Conclusion
The “failed to obtain IP address” error is a quite common occurrence for users who use WiFi a lot (and who doesn’t) in this world of instant connectivity.
It is important we know how to get rid of the error especially for people who work with their Android devices and an internet connection. I strongly recommend you try the easy fixes first before diving into any system settings tweak.
I’d love to hear from you if you have encountered this error and what methods you used to get rid of it. Is there any fix you want to add or debunk?
Please use the comment section below to share your views about the error and fixes.

