


If you need software to compare files or source code, WinDiff would likely be recommended.
WinDiff (Download Here) is a graphical file comparison software created by Microsoft (and included along Microsoft Windows Toolkits, some releases of Microsoft Visual Studio, and as data files mostly with Platform SDK code samples) that was first released in 1992.
Till Microsoft Windows SDK on Windows 7 and.NET Framework 4, WinDiff was incorporated into the Windows SDK (formerly called the Platform SDK, originally known as Resource Kit) (a.k.a. Windows SDK 7.1).
WinDiff had been featured in Visual Studio up to the 2010 Visual Studio because components of the Windows SDK were delivered with it. Because WinDiff was taking off the Windows 8 SDK, it can no longer be found in Visual Studio 2012 or more modern versions.
The Microsoft WinDiff software, despite its antiquity, still performs well when comparing files and directories. The application has enough features to handle any file comparison task quickly.
Today, you’ll explore how to analyze files and directories with the WinDiff software. Learn how to skip marked files, export data to a text document, and change the comparisons that arise.
How to Install WinDiff
Windows do not include Windiff as part of the default package. Hence, downloading it is the first step you must take.
WinDiff can be found in an older version of a Microsoft SDK, on Windows 7 and .NET Framework 4
There are two alternative mirrors that provide only the windiff.exe executable without requiring the whole SDK to be downloaded and installed. These are available for download from both Grig Software and Archive.org.
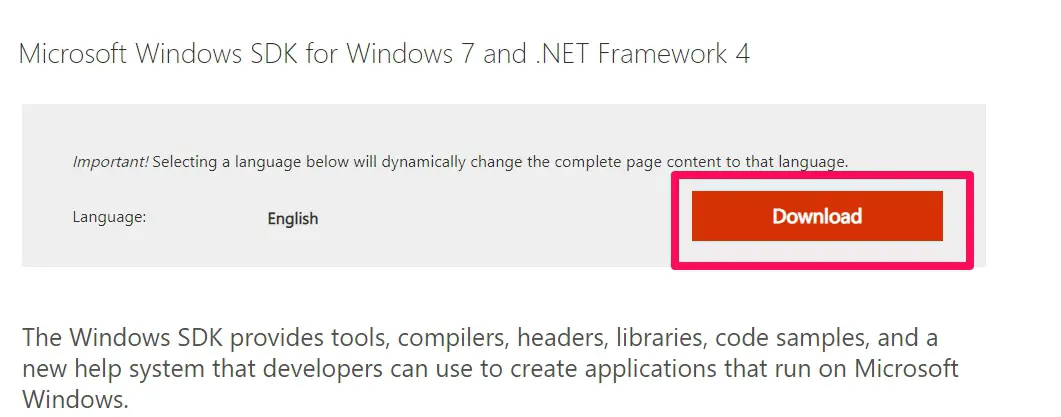
Firstly, go to the Microsoft Windows SDK for Windows 7 and.NET Framework 4 installation page and tap the Download option.
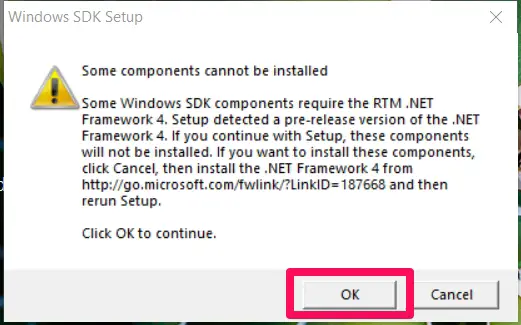
 Once you have this downloaded, run the winsdk_ web.exe executable file. On Windows 10, users may get a warning, that you can ignore by clicking OK.
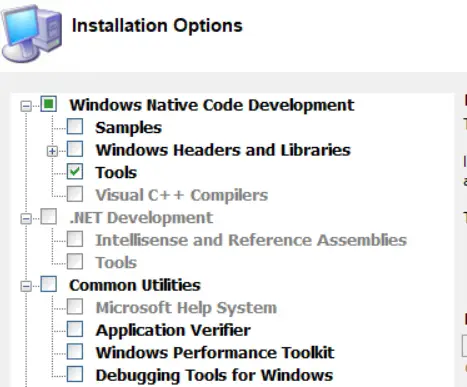
After downloading WinDiff, you move to the installation options screen by clicking on all the default buttons.
Unselect every prompt in the Windows Native Code Development area save for Tools because the Windows SDK includes a lot much more simply WinDiff.
Tap on the Next tab to start the installation process and the Finish tab to complete the process.
How to Compare a File Using the WinDiff Application
Once you’ve obtained and launched your WinDiff application, it’s time to figure out how to explore and then use it. Despite the fact that WinDiff has a simple interface, there is much more than meets the eye.
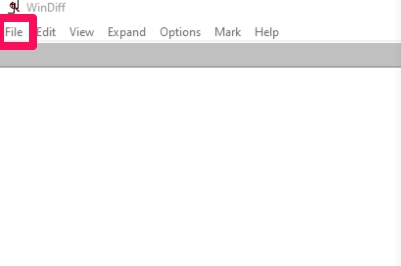
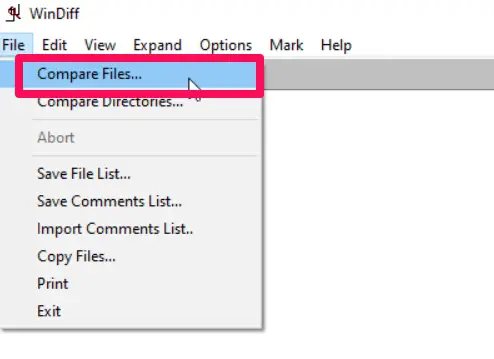
Run the WinDiff in the C: Program FilesMicrosoft SDKsWindowsv7.1Binwindiff.exe if you got it through the Windows SDK, or using an unofficial mirror’s download site. The next step is to select Compare Files from the File menu.
Select the first file to compare; typically, those are all source code files, however, the text is utilized here.
 Then, select the next file for comparison.
A mini-map display shows up on the left-hand side outlines the critical differences all through the files, allowing you to rapidly browse to a specific portion of the file.
To make a comparison, double-click the data or use the Expand option. After that, you’ll get a page that breaks down all variations and similarities between the two files.

A mini-map display on the left-hand side outlines the critical changes all through the files, allowing you to rapidly browse to a specific portion of the file.
To make a comparison, double-click the data or use the Expand option. After that, you’ll get a page that breaks down all variations and similarities between the two files.
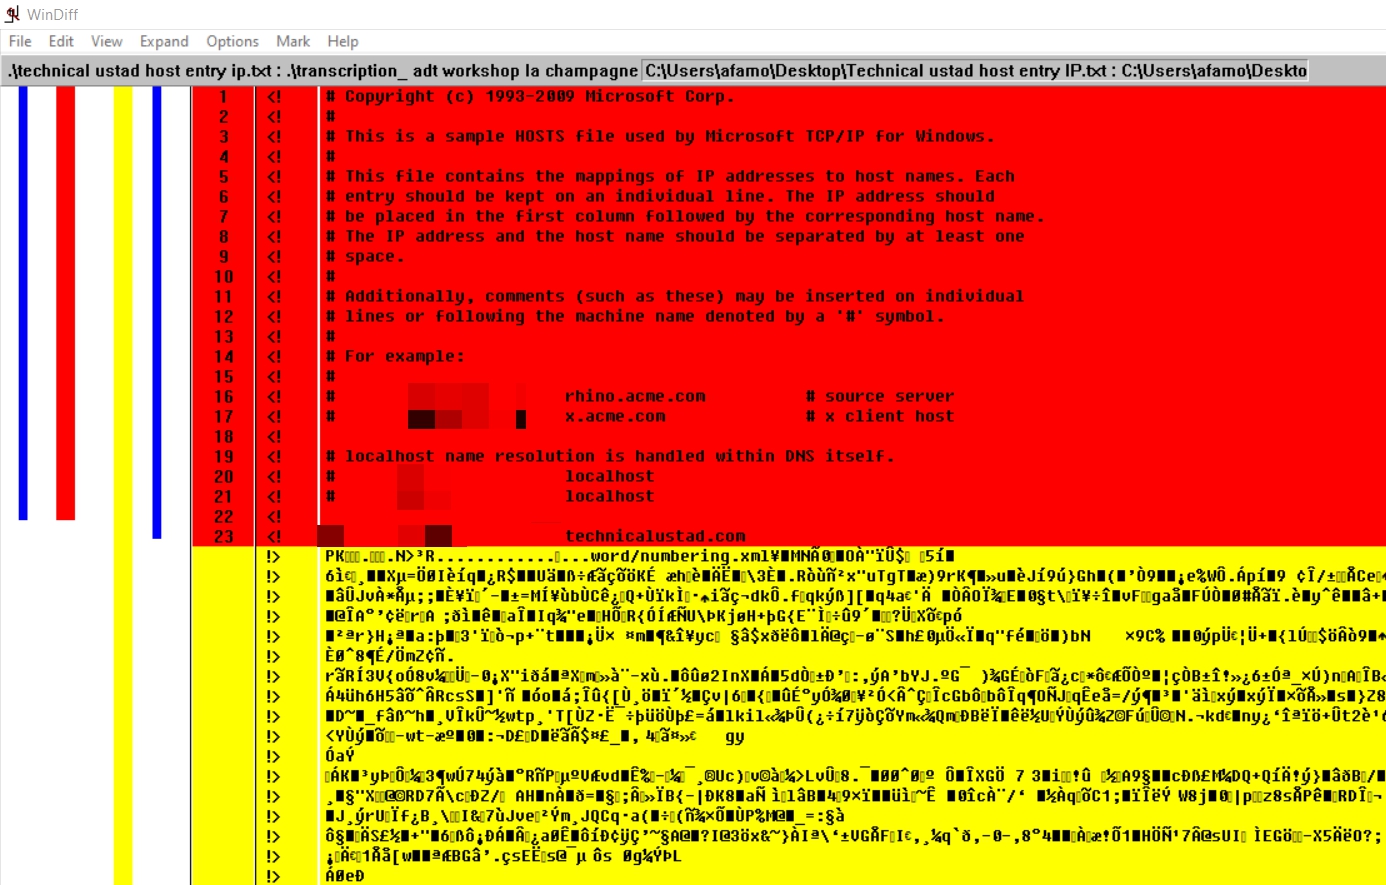
A mini-map display on the left-hand side outlines the critical changes all through the files, allowing you to rapidly browse to a specific portion of the file.
How to Modify Compared Files
You may need to resolve the contrast between both files once you’ve compared them to discover differences.
You can change the very first file, the next file, or a combination of both files to accomplish this. Continue reading to know how to edit files using changes with WinDiff, despite the fact that it isn’t a merging tool.
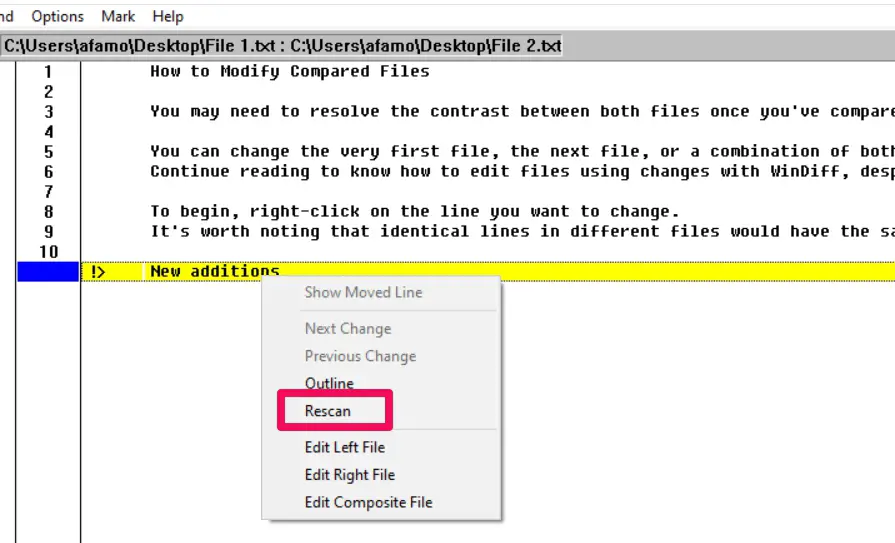
To begin, right-click on the line you want to change. It’s worth noting that identical lines in different files would have the same line number. As shown below.
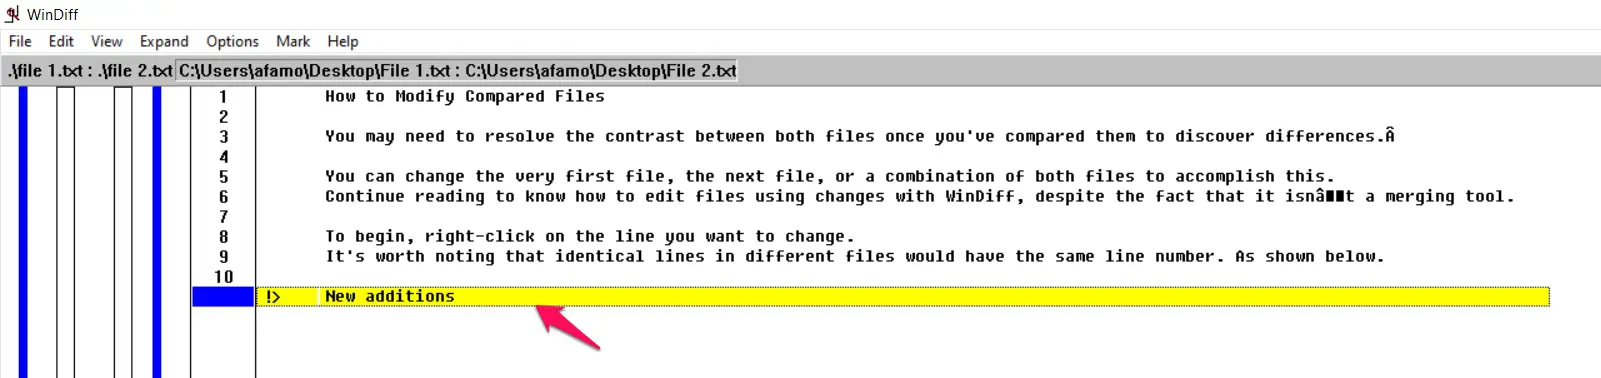
To update a specified change, in this case, pick to edit the Left File firstly, which will open in Notepad the default option. The document has been updated to include an equivalent second line as shown below.
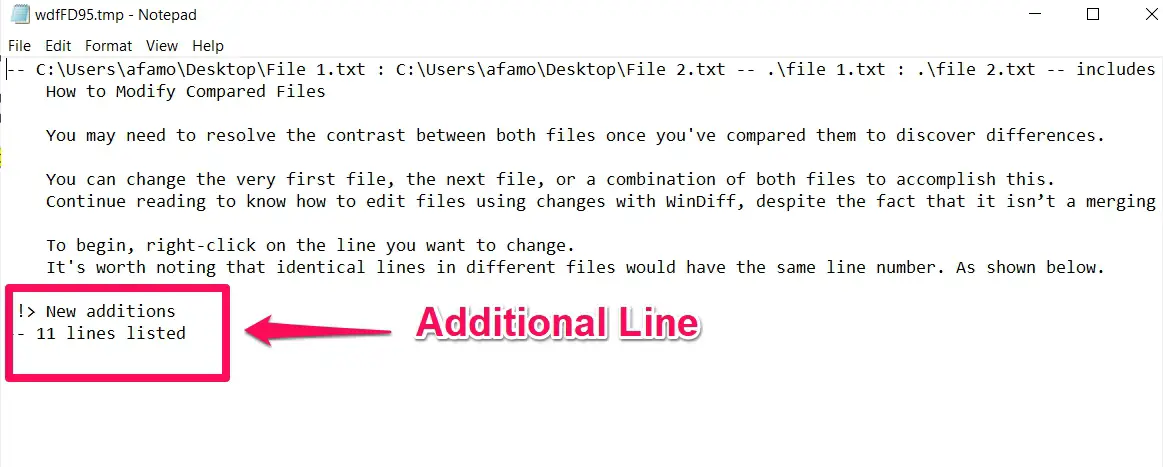 In WinDiff, right-click on the very first changed line and select Rescan to refresh the scanned files and check for any modifications.
The updated line is no longer visible in the comparison, as shown below.
How To Comment On a Change
The option to offer a comment on a modification is a helpful feature of WinDiff. This remark can be saved as a text file later. If you exit WinDiff before exporting that comment, it’ll be lost.
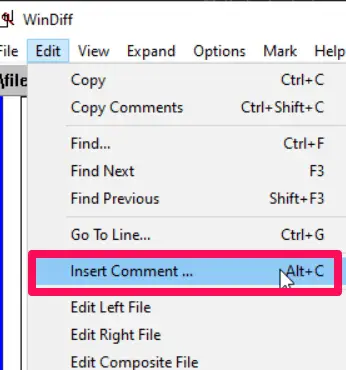
To write a comment, simply tap on the modification you want to comment, then go to the Edit list and tap on Insert Comment.
 Type any comment and then hit OK. Throughout the modified lines, you’ll notice all new comments colored green.
Comparing Folders in WinDiff
You might find that you’ll need to review a complete folder once you’ve compared files using WinDiff. WinDiff allows you to compare two separate folders in the same way that it compares files. To analyze two separate directories, follow the procedures below.
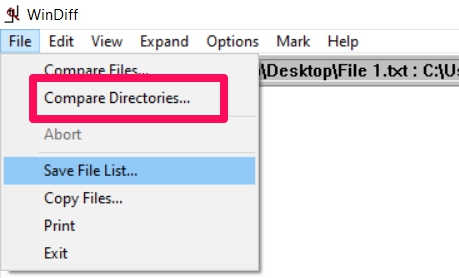
Launch WinDiff and select File Compare Directories from the File menu.
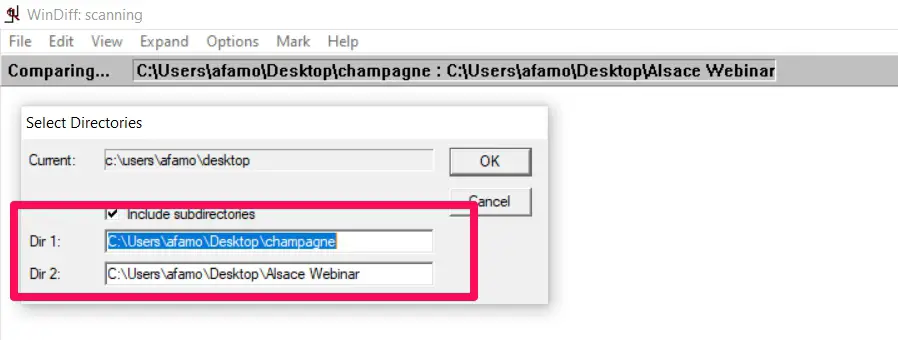
Put the locations of both directories you want to compare in this box. You have the option of including subdomains as well.
Double-click the document to enlarge and compare it even further once you’ve seen the list of changes.
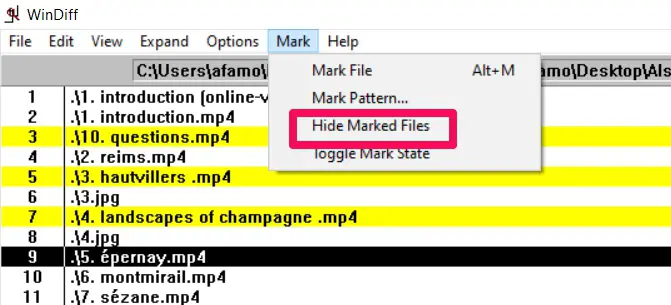
Marking a file and hiding it from view is possible with WinDiff. Mark whichever file you want to hide with a right-click.
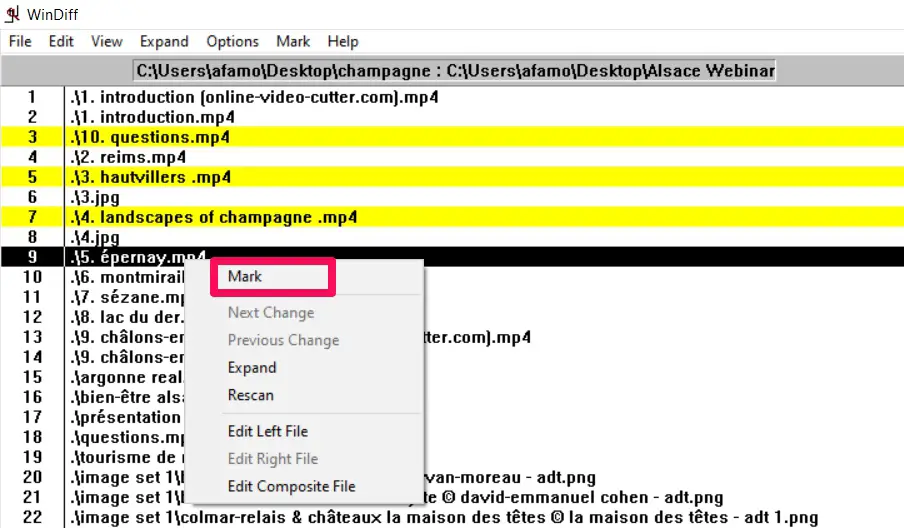
The boundary will appear yellow once it has been marked. Select Hide Marked Files from the Mark menu.
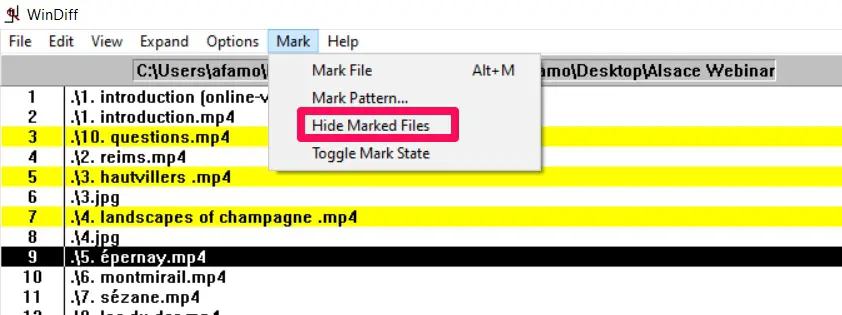
It will only retain the files you chose to focus on, as shown below.
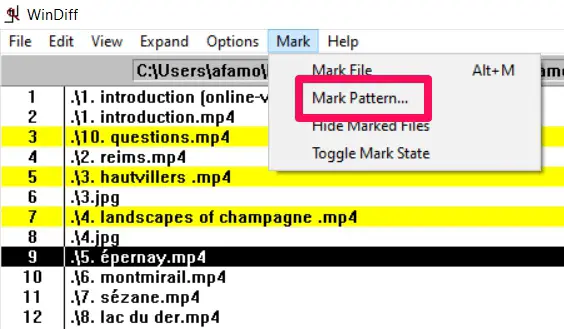
How to Mark Files Using RegEx
If you’ve got a lot of files to ignore since manually marking each all would be taking so much time and effort, you can instead use a regular expression.
To begin, go to the Mark menu and select Mark Pattern, as shown below.
Filter out the files with a regular expression. Like the expression shown in the example below.
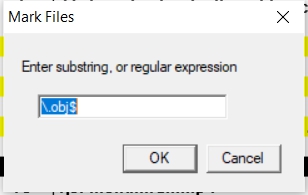
Lastly, under the Mark menu, select Hide Marked Files.
How to Customize WinDiff
Though WinDiff’s default settings are fine, there are situations when you’ll want to tweak it to better suit your needs. Continue reading to find out what may be altered!
Making Changes to the WinDiff File Editor
You’ve been modifying files in Notepad all through this article. Visual Studio Code is a sophisticated editing application that may be used to compare files. So, how do you instruct WinDiff to start editing in this program instead?
To begin, just go to the Edit menu and select Set Editor.
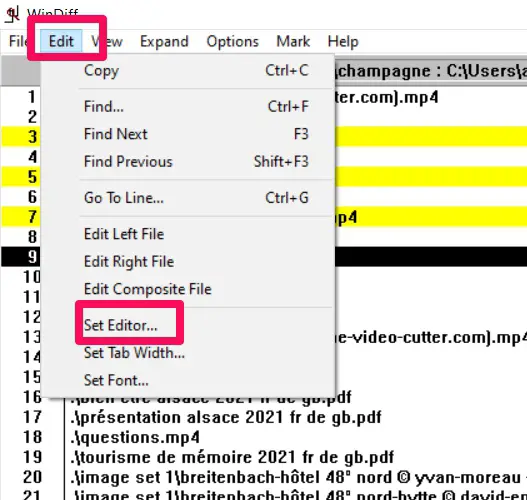 In the set editor question, type the code below followed by clicking the OK button.
“C:\Users\user\AppData\Local\Programs\Microsoft VS Code\Code.exe” %p
If you’re using a per-user install of Visual Studio Code, remember to change “user” with your login. Just use location instead if VS Code is enabled for all customers.
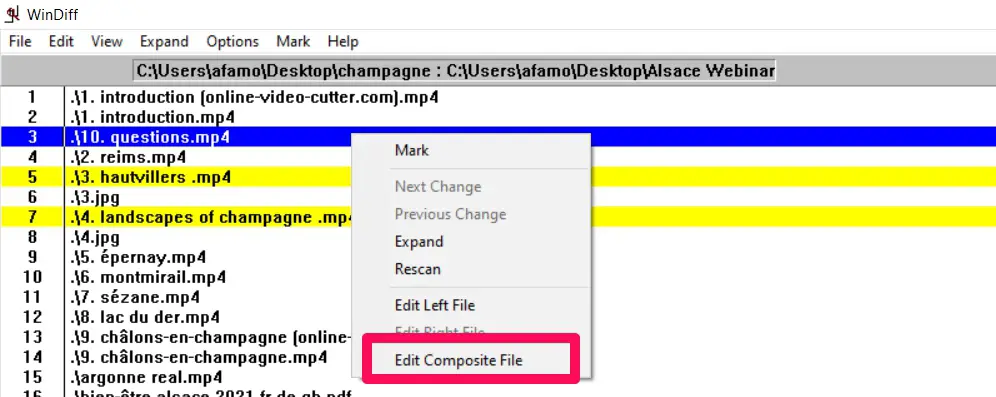
Lastly, right-click on the line having highlighted variations and select Edit Composite File from the context menu to open the file within Visual Studio Code.
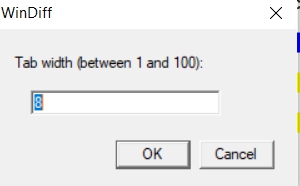
Changing the Size of the Default Tab Comparison
Instead of the more common 2 or 4 spaces, WinDiff’s standard tab size is set to the comparable of 8 spaces.
The data comparisons might not have been accurate due to the higher size. As a result, you’ll want to change this number and set it appropriately.
To do so, go to the Editor menu and select Set Tab Width from the drop-down menu.
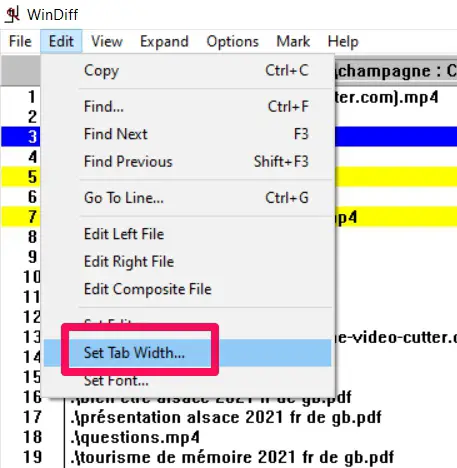
After that, change the tab size to the appropriate size and hit OK.
How to Export a Text File of Differences or Comments
Furthermore, you can publish either a list of discrepancies in a document or a database of responses in a file.
Select the File menu and select Save File List to export the file list.
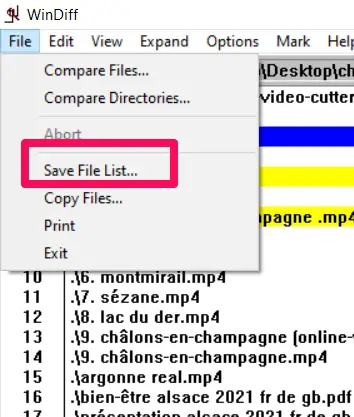
Then choose settings to edit and save all the documents to a place relative to the present matched files. To transfer the file list, hit OK at the end.
Select the File menu once more and select Save Comments List if you want to save the list of comments as a file. Click OK after entering the location where you want to save the responses file.
Windiff Alternatives
We’ve got so many comparable products to WinDiff. So, let’s talk about the top WinDiff alternatives, as determined by verified brands, votes, opinions, and other variables.
1. WinMerge
WinMerge is indeed the best choice. WinMerge is a Windows-based Open Source differencing and merging program. WinMerge would compare all folders and files, displaying discrepancies in a convenient visual text style.
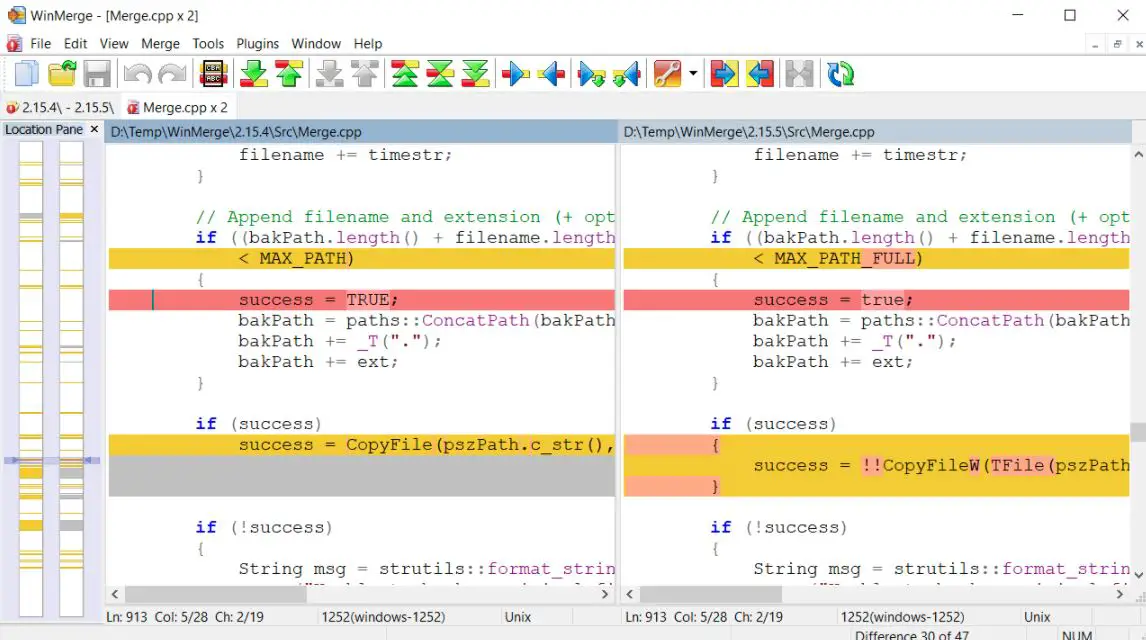
WinMerge is an excellent tool for assessing what has altered between file versions and merging those changes. WinMerge is used as a stand-alone device or as an independent differencing/merging solution.
Furthermore, WinMerge has a number of important add-on capabilities that make comparing, synchronizing, and merging as simple and efficient as possible.
WinMerge works with Microsoft Windows XP SP3 or more recent operating systems. It works with different text formats such as Mac, Windows, and Unix.

2. Beyond Compare
Beyond Compare (Download Here) is a program that allows you to compare multiple business documents. It’s utilized by analysts to do workflow automation validations. This is a fantastic tool for comparing and analyzing data.
Beyond Compare is ideal for situations when you need to compare or review papers, such as a sample agreement or audit revisions.
It’s great for comparing the history of modifications in case we need to trace what was in the prior version and add new versions accordingly. It cannot be used in a non-comparison circumstance.
Beyond Compare is a rich text comparison tool that can also be used to recursively evaluate directory patterns on disk. It’s popular among design teams. Beyond Compare not only highlights differences among files, but it also has basic merging abilities, so it can combine multiple files into a single file.
Unfortunately, Beyond Compare’s ui appears to be ancient, with low-res graphics and text settings that suggest it was probably designed 15 years ago.
Beyond Compare has command-line integration with operating systems, but I’d like to be able to use version control through the GUI too.
3. Mergely
Mergely is a JavaScript plugin for diffing and merging files within a browser (diff/merge), with a robust API that makes it simple to incorporate Mergely into a current online application. It may be used to compare text files online, such as.txt,.html,.xml,.c,.cpp,.java, and so on.
Mergely includes a JavaScript version of the Longest Common Subsequence (LCS) diff algorithm as well as a markup engine that may be customized.
Mergely and its dependencies are best installed with a Node package manager (npm or yarn) and webpack.
It is strongly advised that you begin by copying mergely-webpack. Whatever you would need to get begin is included in the webpack.
WinDiff vs WinMerge:-
Here is a detailed comparison chart on WinDiff and WinMerge:-
| Feature | WinDiff | WinMerge |
|---|---|---|
| License | Proprietary | Free and open source |
| Platform | Windows | Windows |
| Interface | Command-line interface and GUI | GUI only |
| File formats | Supports comparison of text files | Supports comparison of text and binary files |
| Folder comparison | No | Yes |
| Syntax highlighting | No | Yes |
| Merge support | No | Yes |
| Ignore lines | No | Yes |
| Filter files | No | Yes |
| Plugins support | No | Yes |
| Unicode support | Yes | Yes |
| Performance | Faster | Slower |
| Ease of use | More complex | More user-friendly |
| Updates | No longer updated (since Windows Vista) | Still being updated |
📗FAQ
Is WinDiff included in Windows 10?
No, WinDiff is not included in Windows 10 by default. However, it can be downloaded and installed separately.
What is WinDiff used for?
WinDiff is a file comparison tool to identify the differences between files or folders. It can compare source code, configuration files, or text-based files.
Where can I find a WinDiff?
WinDiff can be downloaded from the Microsoft website or other third-party software repositories. It is also included in some development software suites.
What is the best WinDiff replacement?
Several WinDiff replacements are available, including WinMerge, Beyond Compare, and ExamDiff. The best replacement for WinDiff will depend on your specific needs and preferences.
What is Linux equivalent to WinDiff?
The Linux equivalent to WinDiff is a command-line tool called “diff”. It can be used to compare two files or folders and identify their differences.
What is the best way to compare two files?
The best way to compare two files will depend on the specific use case. For text-based files, a file comparison tool like WinDiff or one of its replacements can be useful. For binary files, a hex editor or binary comparison tool may be necessary.
What app can I use to compare 2 files?
Several file comparison apps are available for Windows, including WinMerge, Beyond Compare, and ExamDiff. These apps can be used to compare two files and identify their differences.
Does Windows 10 have a duplicate file finder?
Yes, Windows 10 has a built-in duplicate file finder that can be accessed through the Storage settings. It can identify and remove duplicate files to free up space on your computer.
What is similar to Diffchecker?
There are several alternatives to Diffchecker, including WinMerge, Beyond Compare, and ExamDiff. These tools can be used to compare two files and identify their differences.
How do I find replace files in Windows?
To find and replace files in Windows, use the built-in Find and Replace feature in a text editor or a command-line tool like PowerShell. Some file comparisons tools like WinMerge or Beyond Compare may also have a find-and-replace feature.
Conclusion
In this article, we learned about using WinDiff to compare data files, you’ll find that this small program comes in handy for quick file and folder analyses.
Of course, you might find that this tool does not meet all of your requirements, in which case there are other competitors, like WinMerge.
However, the older WinDiff program remains a staple in several IT expert’s toolkits; learn how to make comparisons using WinDiff today!

