


This article is majorly about learning how to add fonts to Gimp especially in a Windows operating system so if that’s what you’re looking for, this is the right article.
Other operating systems will be explained too but the emphasis will be on Windows OS.
Putting new fonts in Gimp is quite useful because although the tool (Gimp) is a quality image editing tool, it only uses the fonts already available on your system. This can inhibit creativity when working with images.
I will now explain how to add fonts to Gimp in Windows OS and other operating systems, then there will be a guide afterward about how your system works with fonts.
Tips On How To Add Fonts To Gimp (Windows OS)
Downloading Fonts
The process of adding fonts to Gimp starts with you downloading the fonts. Luckily for all of us, there are a lot of sites that offer free fonts for download.
I have added some options as links in the sentence above. Use these links if you don’t already have a preferred site for downloading.
Remember to always be careful when downloading stuff because of malware.
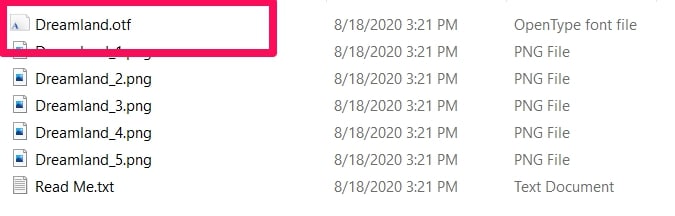
One sure way of knowing that you’re downloading fonts is when the file extension reads “.ttf” or “.otf””.
Whenever we see that file extension, we should know we’re usually downloading what we need, which is fonts.
“How To Add Fonts To Gimp” Steps
I will be using Windows 10 as my testing operating system but you should be able to follow the same instructions on most Windows operating systems.
When you have the necessary fonts downloaded, you have two options for adding.
- Adding Fonts To Gimp Through Windows
- Adding Fonts Directly To Gimp
Let’s start with the first one.
Adding Fonts To Gimp Through Windows
Navigate to the fonts file you’ve downloaded and then open it.
It is usually in a zip file, so you have to unzip it and extract the needed files.
Remember to always run the downloads through antivirus software before unzipping to ensure the download files are free of malware.
Extract the font files to any folder, preferably one you just created.
Open the folder and right-click on the .ttf or .otf file. In the pop-up options menu, search for and click on Open With.
From the menu that appears, click on Windows Font Viewer.
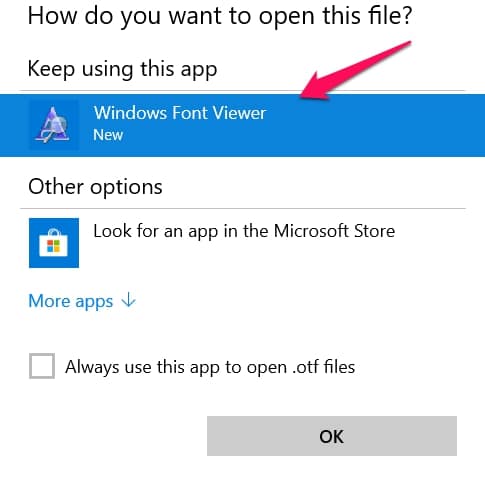
This will immediately install that font for you and you’ll be able to use it in Gimp.
There’s something else you might need to do though if you open Gimp and can’t find the font you just installed.
You will have to refresh your font menu in Gimp to reflect the changes you made.
How To Refresh Your Font Menu
Here’s how to do that.
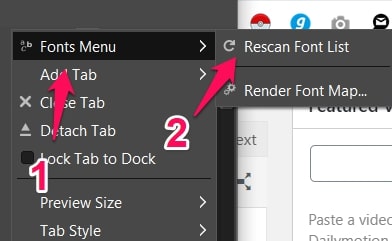
Launch Gimp and navigate to the top right-hand side of your screen.
Click on the Tab Configuration button and then click on the Fonts menu.
When the Fonts menu opens up, select the Rescan Font List option and then wait a bit while Gimp searches for newly added fonts.
Normally you should then see the font you’ve just downloaded in the Font List but if you don’t see it, don’t panic just yet.
You still have other options like manually installing it on Gimp and bypassing other Windows apps that use Fontconfig.
Adding Fonts Directly To Gimp
The idea behind this is to just get the font file and directly place it into Gimp’s fonts folder.
You can then rescan for new additions and it should appear on your Gimp font list. This idea is quite useful if you’re trying to add multiple fonts at once.
All you have to do is copy all of the new font files you are trying to add and then go paste them in Gimp’s font folder manually following the instructions below.
Here’s how to go about it.
You will have to copy the TTF file you want to add. You can easily do that by using the shortcut keys Ctrl + C but use any method you’re most comfortable with.
The next part is where the work really starts. You have to find the Gimp font list folder.
To do that, navigate to C: Program Files and click on it.
In the Program Files, search for Gimp 2 and also open the folder.
The next folder to open is Share, in Gimp 2.
When you’ve opened Share, look for a folder named Gimp and then open the folder too.
In the folder, you’ve just opened, search for the folder named 2.0 and then click on it. This location is where you will find Gimp’s font folder.
The name of the folder is just Fonts.
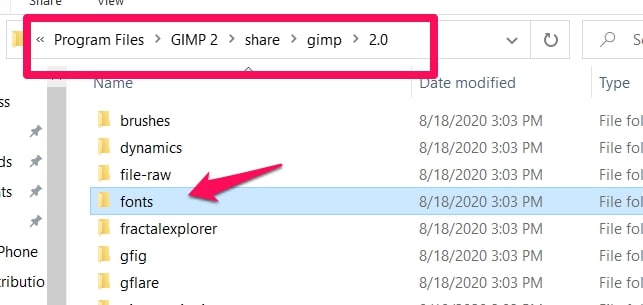
Open the Fonts folder and then paste the font file you copied earlier on in it.
Remember to grant the font file administrative access before rebooting Gimp and rescanning your font list.
Making Sure The Fonts Actually Work On Gimp
Sometimes we might add the fonts and not test them. Later on, when we actually need them, we would then learn that Gimp does not load them.
This really sucks so it is important you try out new fonts so that you’re sure they work.
Here’s how to try out new fonts. I’m assuming you’ve already downloaded and installed new fonts using the tips above.
Launch Gimp and open any image at all.
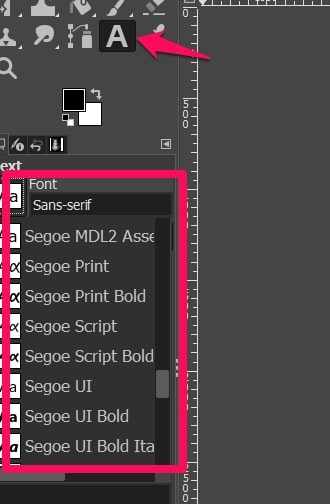
On the right-hand side of your screen, select the Text tool from the Toolbox section.
Then in the text space of the Toolbox section, click on an icon that looks like this – Aa (It is usually next to Font).
When you click on it, a list of all of the fonts loaded by your Gimp app will appear.
Check through and select the fonts you’ve just added.
If they work on your image, then you have confirmed that the fonts you’ve downloaded are compatible with Gimp.
Tips On How To Add Fonts To Gimp (Linux)
In Linux based systems, there are two choices.
You can either add it to your system so any app can access it or you can add it directly to Gimp so that it would only be made available to the Gimp app.
Adding New Fonts To Your System
Here’s how to add fonts to Gimp on Linux based systems.
All you have to do is copy the font file, assuming you have already downloaded it.
Then navigate to this directory – ~ / . fonts.
Once you add the fonts you’ve downloaded to this folder, it will be accessible to all apps that have access to the Fontconfig utility (basically what makes fonts work in your system).
Adding New Fonts Directly To Gimp
This is to make sure only the Gimp app can access the font, you can add it directly using the steps outlined below.
Copy the font files you want to use and paste them in Gimp’s directory > Fonts.
When they’re in the folder marked Fonts, you should be able to access them by Refreshing your font list in the Fonts Dialog on Gimp or rebooting the Gimp app.
Tips On How To Add Fonts To Gimp (Mac OS X)
This operating system has a fair few methods of adding fonts to Gimp.
First Method
What you have to do is drag the fonts you’ve just downloaded and you want to add to this address – Home Folder > Libraries > Fonts.
Drop the fonts you want to add in the Fonts folder and rescan it because the new additions made.
Second Method
This alternative method uses a feature called the Font Book.
Here’s how to access Font Book.
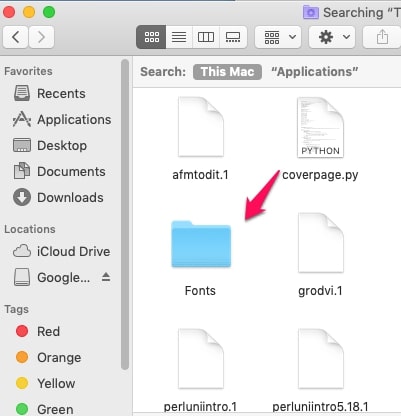
Navigate to Finder and then select the font file icon.
With this feature, you will be able to check the fonts out before installing them on your system.
What To Know When Trying To Add Fonts To Gimp
Now that I’ve explained the needed steps for learning how to add fonts to Gimp in different operating systems, I would like to just give you an overview of how fonts work in Gimp.
This guide is purely informational for people who just want to know what’s under the hood.
This might even help you in adding the fonts and knowing which one will work. These two functions make fonts work on systems.
A FreeType 2 font engine and the Fontconfig system utility.
Gimp usually allows the use of fonts as long as the font files are in Fontconfig’s font path, in the Font Folders page in the Preferences tab or the font folder found inside your personal Gimp directory.
There are some fonts the FreeType 2 font engine does not support so it is important that you download fonts that are compatible with the engine utilizing them.
There are a lot of options out there that will work perfectly so don’t be alarmed by the fact that the engine does not support all font files.
Conclusion
Gimp is an effective image editing app and adding new fonts will only really help in creativity building.
You can manually install them directly to Gimp or use them for all apps that use Fontconfig.
Downloading and installing to the system ensures that you can easily use the same font across many apps and it might be useful to users.
Have you ever downloaded and installed a font on Windows or any other OS? Please use the comment section to tell us all about it and also tell us which fonts are your favorite and why.

