


The ESP8266 Arduino based is a low-cost Wi-Fi microcontroller with a complete TCP / IP stack and MCU (microcontroller unit). The cheap micro-controller trapped the devotion of Western vendors for the first time in August 2014.
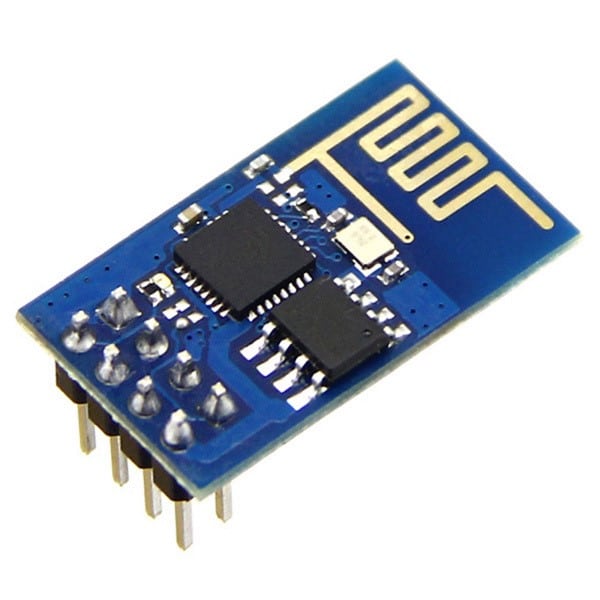
The ESP-01 module was prepared by a third-party maker, Ai-Thinker. This small module allows us the microcontroller to connect to a Wi-Fi network and use Hayes-style commands for a simple TCP / IP connection.
The ESP8266 WiFi esp01 module is a stand-alone SOC with an integrated TCP / IP stack that allows any microcontroller to access your WiFi network. ESP8266 can host applications or uninstall all Wi-Fi network capabilities from other application processors.
Each ESP8266 module is preprogrammed with an AT command set firmware, which means you can simply connect it to your Arduino device and get as many WiFi functions as the WiFi Shield! The ESP8266 module is a cost-effective motherboard with a large and growing community and every one can use it for as open source product in the market.
ESP8266 has an almost unlimited source of information, all of which are provided by amazing community support.
In the following documentation section, you will find plenty of resources to help you get started with the ESP8266 and even instructions on how to convert this module to an Internet of Things (IoT) solution!
Why Need a Wifi Extender?
I needed a cheap way to increase WiFi range so that a IoT snail mail alert device could reach a distance of WiFi router to connect to the internet and send notification to my phone.
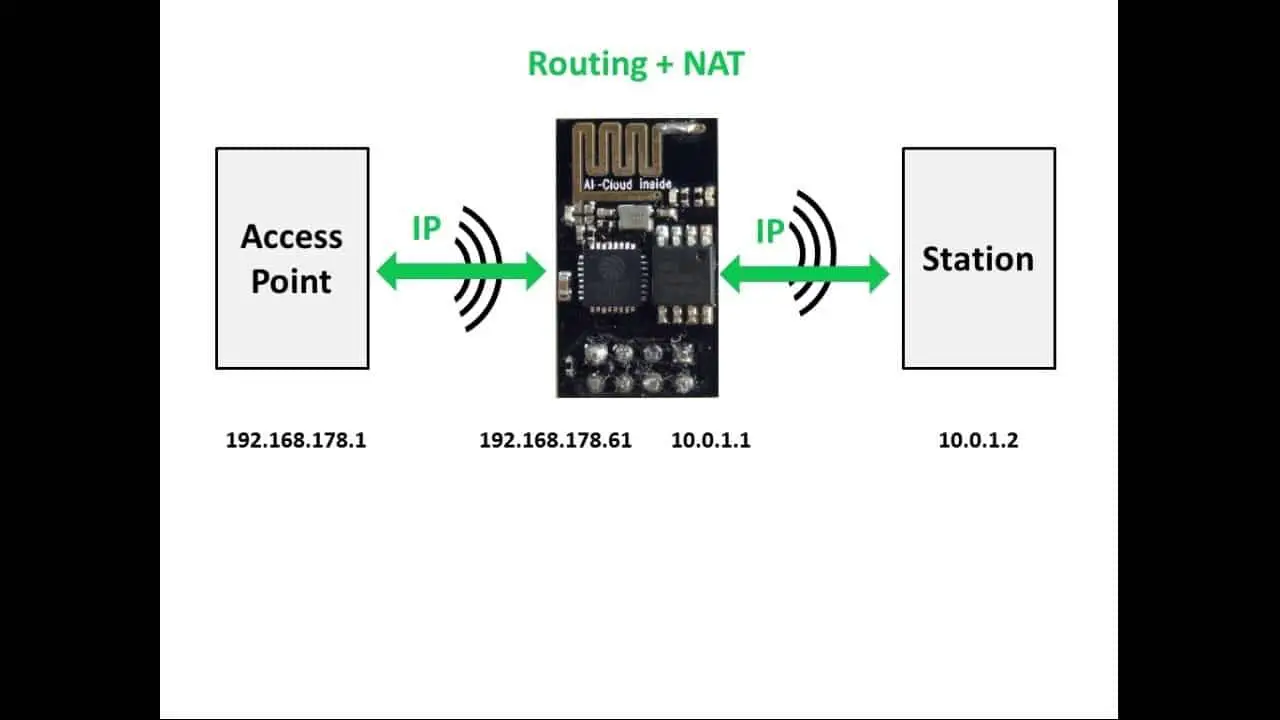
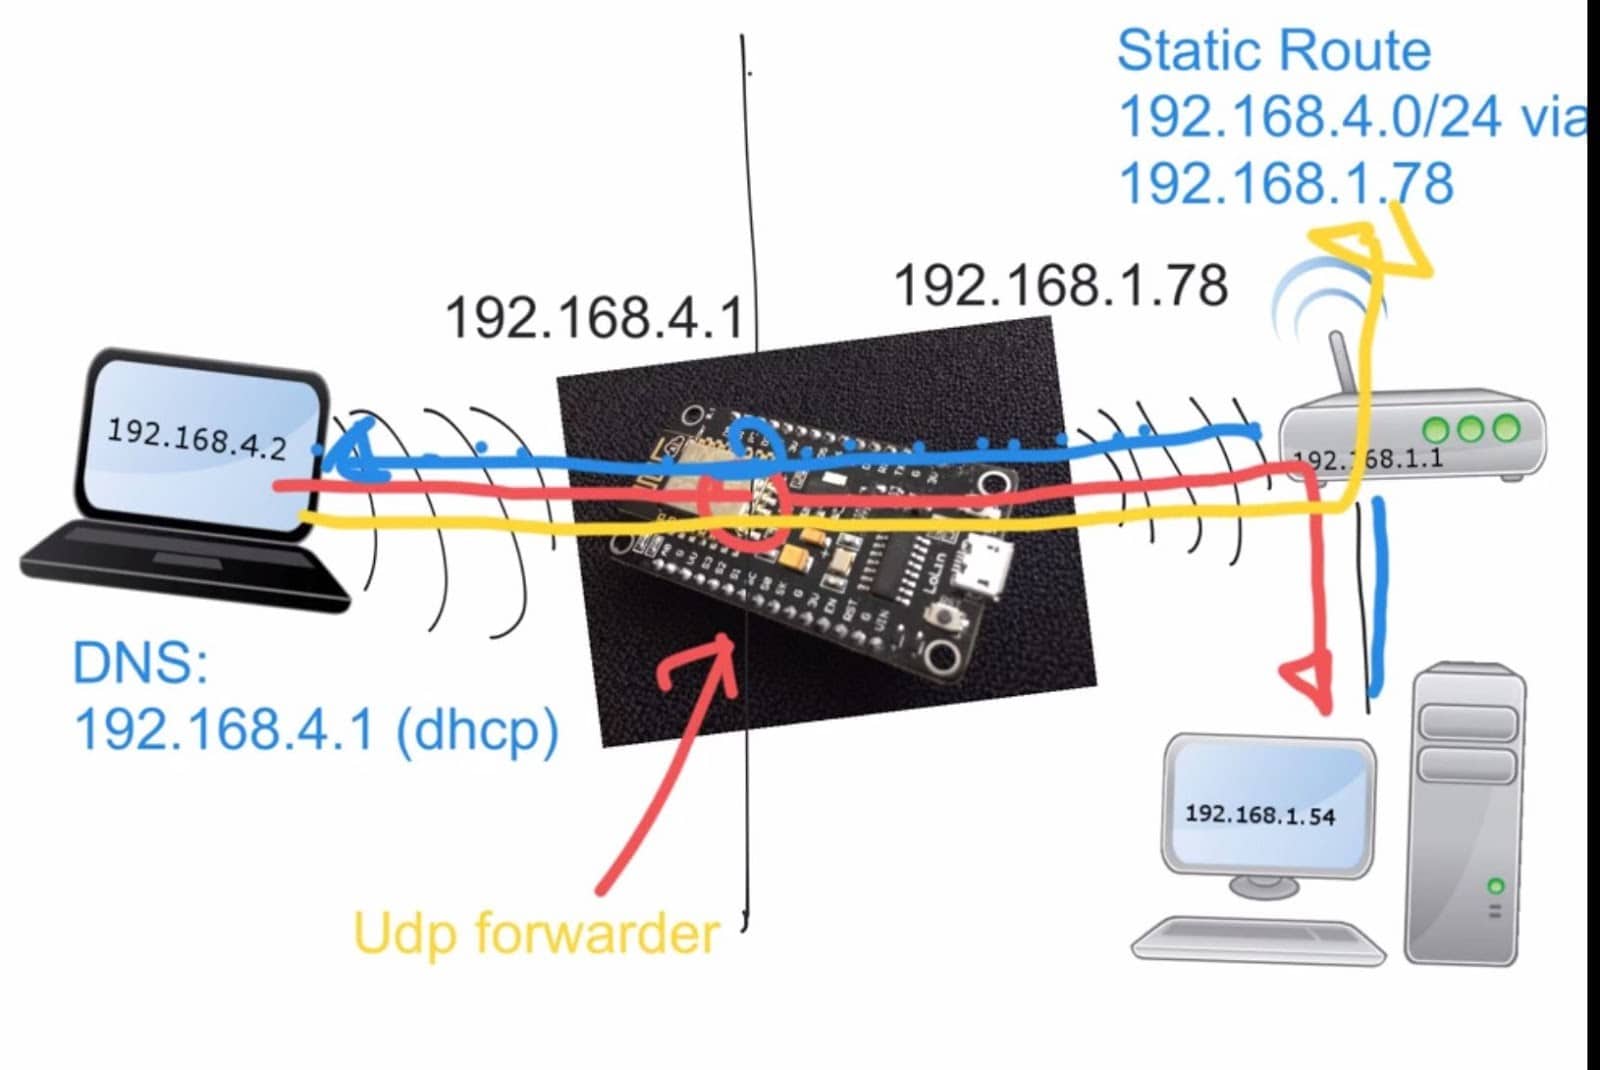
I stumbled upon Martin Ger’s WiFi NAT Router firmware for the ESP8266 WiFi module, flashed it onto my $2 ESP-01 WiFi module, and it works quite well.
The router my extender connects to only reaches about 20 feet due to a wall, but with the extender plugged in 10 feet to 50 feet away from it, the connection reaches 310 feet and is just fast enough to stream YouTube!
STEP 1:- Collect The Hardware
STEP 2:- Download Needed Software
Download the .zip file source code called “ESP8266Extend.zip” which contains the firmware files and software tools you will need .Unzip a.k.a. extract the zip you just downloaded to a location on your computer that is easy to find .On Windows, this is done by right-clicking on the zip, and clicking “extract all”.
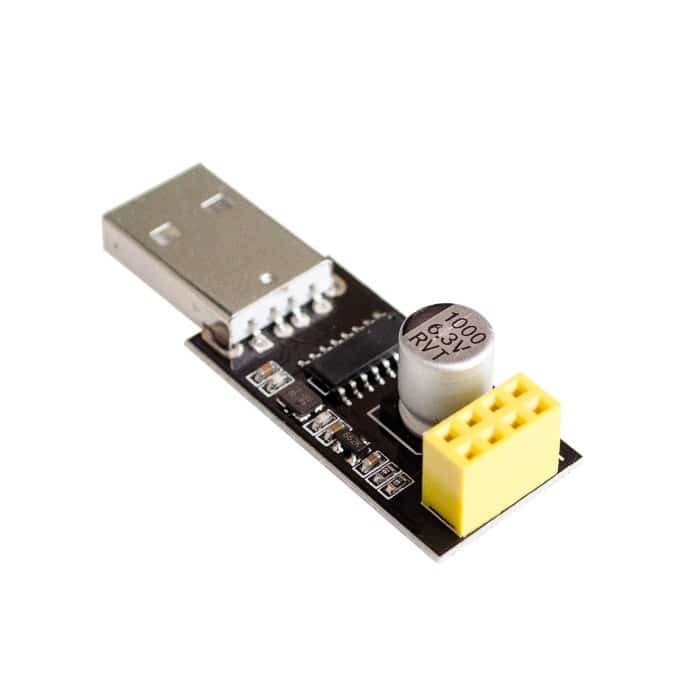
Plug the ESP01 into the USB adapter, plug it all into your computer, and flip the physical switch to “Prog” programming mode not “UART” mode.
Step 3:- Configuration
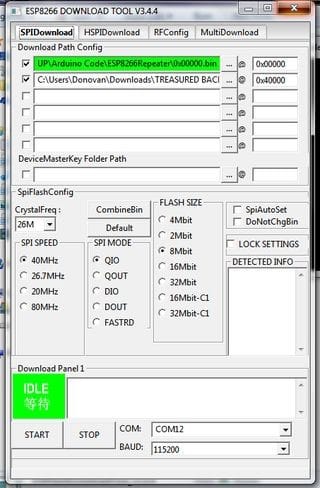
- Run the application called “ESPFlashDownloadTool_v3.4.1” and select “ESP8266” after that.
- Setup that program to the setting shown in the screenshot below if you are using the ESP01 from the earlier shopping step:
- if you are using a NodeMCU or Wemos D1 Mini module instead of the ESP01 or ESP07, switch the part that says “8Mbit” to “32Mbit” instead
- For the ESP01 or ESP07, under “Download Path Config”, click the three dots button for each section and browse to find the “firmware_sdk_1.5.4”. Click each one and type out their names to the right as shown in the screenshot e.g. “0x00000” and “0x40000”
- If you are using a different ESP8266 module variant instead of the esp01 I suggested, use the folder named “firmware” and use those .bins instead with their corresponding names to the right.
- Select the COM port you want, and set the baud rate to “115200”, then click “start”, “flash” or “connect”.
- When it says “finish”, unplug your adapter and ESP8266 module from your computer.
- Flip the physical switch on the USB Adapter back to non-programming non-flash mode. This is important!
Step 4:- Configuration from extender Site
You must connect a computer to your extender in order to configure it. You can do this by using a serial terminal app such as the Arduino IDE serial monitor, or a program such as Putty.exe, setting the baud rate to “115200” with NL&CR (new line and carriage return) enabled then physically plugging the extender into your computer, OR you can use a connect wirelessly by connecting your device to the extender’s WiFi (default name is “MyAP”) and then use a Telnet app such as Putty.exe or JuiceSSH and adding a new connection on the ip address “192.168.4.1” with the TCP port set to “7777””.
I have used the JuiceSSH app for Android and Arduino IDE Serial Monitor without hiccups
Once you have connected over telnet or serial, type the following bolded commands each followed with hitting the enter key:
(Without quotes, and replacing the hashtag symbols with you desired settings.)
- set ssid #### This sets to the name of the router hotspot you want the extender to extend.
- set password ##### This sets the password of the router hotspot you want the extender to extend.
- set ap_ssid ##### This sets the name of the extender’s hotspot.
- set ap_password #### This sets the password of the extender’s hotspot. NOTE: the password must be more than 8 characters long!
- set ap_open 0 This turns password protection ON so only people who know the password can connect to the extender.
- save This saves your settings.
- quit This terminates a remote session.
For Example
set ssid homewifi
set password 23456789
set ap_ssid Ammar
set ap_password 1234
set ap_open 0
save
quit
JUST GIVE THE POWER WITH USB FEMALE HUB AND USE IT
You may also to read our some other awesome projects
How to Drive OLED with ESP8266 NODE MCU


