


Clearing your cache is quite important in maintaining a healthy system and this article will help you learn how to clear cache in Windows 10.
You will also learn what exactly a cache is, a cache’s functions and why it should be routinely cleaned.
Cache: What It Is And What It Does
In tech terms, it is a storage mechanism (high speed). Basically, all it does is store data and offer the same data up to speed up certain app processes. It is a temporary storage unit.
A cache especially in browsers stores information about web pages which makes it really fast to access web pages once you have already visited them. Caches usually hold lots of temporary data that make access faster and different processes usually have different locations for storing data.

For Windows 10 cache, you will most likely find the data in C:\Windows\Temp. As you must have learned from the explanations about Windows 10 cache above, caches are there to help speed up processes but sometimes can remain dormant taking up space even when the process isn’t in use.
This is part of the many reasons why I advise people to clear their cache routinely. Deleting cache does not spell the end of the cache for a particular process, once you start the app process again, another cache will be created for it.
I will be explaining the different methods and the cache you’re deleting in easy-to-follow steps.
How To Clear Cache in Windows 10
There are 6 methods below, use them to routinely clear different app processes’ caches from different access points in your system.
1. Deleting Temporary Files In Settings
- The first thing you have to do is open a Run window. You can do that by using the shortcuts Windows + R.
- In the Run window, input %temp% and open the temp folders when it shows up.
- Delete all the files and subfolders if any.
Temp folders usually contain a significant portion of the cache on your system so it is always a good starting point for clearing cache.
2. Deleting System Cache
Hover on the Start button and right-click on it. Click on Settings when a small menu opens up. In Settings, search for and click on Systems.
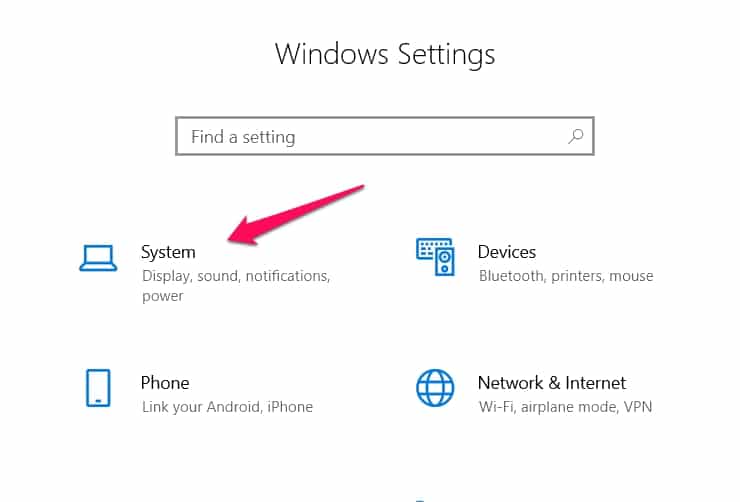
On the left-hand side of your screen, look for Storage, and click on it. Then in the Storage menu, click on Free Up Space Now or the dust bin icon beside temporary files.
![How To Clear Cache In Windows 10 [Step By Step Guide]](https://technicalustad.com/wp-content/uploads/2020/08/temp.jpg)
Your system will immediately start scanning your hard drive, wait patiently while this is happening.
When the scanning is done, carefully read through the short description that tells you exactly what is in the files or folders you want to delete before pressing the Remove Files button.
When you’re satisfied, check the box next to the items you deem deletable and then go delete them by selecting the Remove Files option at the top of the menu.
If what you’re clearing is much, it might take longer to clear but usually after a few minutes, the process will be completed.
3. Deleting The Windows Store Cache
Whenever you notice that your Windows Store is acting weirdly, maybe the app isn’t running as smoothly as before, chances are the cache has been infected by bugs and you should immediately clear the cache.
Another reason is that when we download apps, Windows Store creates temporary files that will help integrate that app into your system. Most times, these files won’t get deleted and it will just continue taking up space on your system.
So I’ll advise you to think about clearing Windows Store cache regularly especially if you notice some issues with the app or you have downloaded a lot of apps recently.
Here’s how to delete the Windows Store Cache.
- The first thing you have to do is open a Run window. You can do that by using the shortcuts Windows + R
- Input this text into the Run dialog box – wsreset.exe
From here, you won’t have to press a button. Just watch as the Command Prompt comes on (without any text on the screen) and then disappears as the Windows Store app launches.
![How To Clear Cache In Windows 10 [Step By Step Guide]](https://technicalustad.com/wp-content/uploads/2020/08/store-cache.jpg)
What happened is that the Command Prompt was deleting the Windows Store cache in the background and after the deletion, the app will be restarted.
This method really helps because it can be a troubleshooting tool for a faulty Windows Store app and it also enhances storage space.
4. Deleting File Explorer Cache
This is another goldmine of cache just like in the case of temp files. I can say, with a high level of assurance that if you delete temp files and clear file explorer cache, you have cleared more than half of the cache in your system.
You can also use the file explorer to target specific cache files to clear. File Explorer has so many hidden files so it is imperative that users navigate to the toolbar and find View. Check the box next to Hidden Items to be able to gain access to the hidden files.
Here are three access points for the cache you need to clear routinely.
C:\Users\Username\AppData\Local\Microsoft\Windows\Explorer
This access point takes you to the Windows thumbnail cache. This cache usually contains thousands of thumbnails, even thumbnails of pictures and videos you have deleted so it might be a lot.
Here’s how to delete them. Follow the above navigation and then open the Explorer folder, choose to clear all of the files if thumbcache appears in their names.
C:\Windows\Software\Distribution\Download
This is a member of the “hidden files” category. If you did not enable viewing hidden files, you will not be able to gain access to this cache. It contains Windows updates data.
This is useful for installation and updates but afterward, it is just a lot of residual data that needs clearing. Clear the folder, don’t leave anything behind.
C:\Users\Username\AppData\Local\
In this directory, search for a file named IconCache.db. This folder should be cleared. Check for files with iconcache in their names and these are the files you will delete to ensure optimal use of storage space.
5. Clearing Browser And DNS Cache
This helps in making sure your browser gets updated IP addresses and runs smoothly. In Windows 10, open the Command Prompt with Administrator privileges and enter this command
ipconfig/flushdns
Your DNS will be cleared and updated when you turn on your network.
In the case of browsers, navigate to settings and clear browsing data. You can usually clear based on time in browsers like Chrome. Lighten the load and get rid of some bugs too in the process.
6. Using Tools To Clear Cache
I will explain using two tools, an inbuilt one and a 3rd party app.
Inbuilt
Using The Disk Cleanup Feature This is a tool that comes with your Windows 10 OS so it is safe to use.
Here’s how to use it to help clear your cache.
Search by pressing Windows + S and then inputting Disk Cleanup. Start the app and select the drive you’re looking to clear cache from.
The app will scan that drive and show you the files that are irrelevant, use the app to clear these files and you’re done.
Note: Always double-check the files before deleting.
You can also clean up System files in the app. Just before you clear cache from the drive, click on Clean Up System Files and then click on OK. Your cache should be considerably cleared with that.
3rd Party Apps
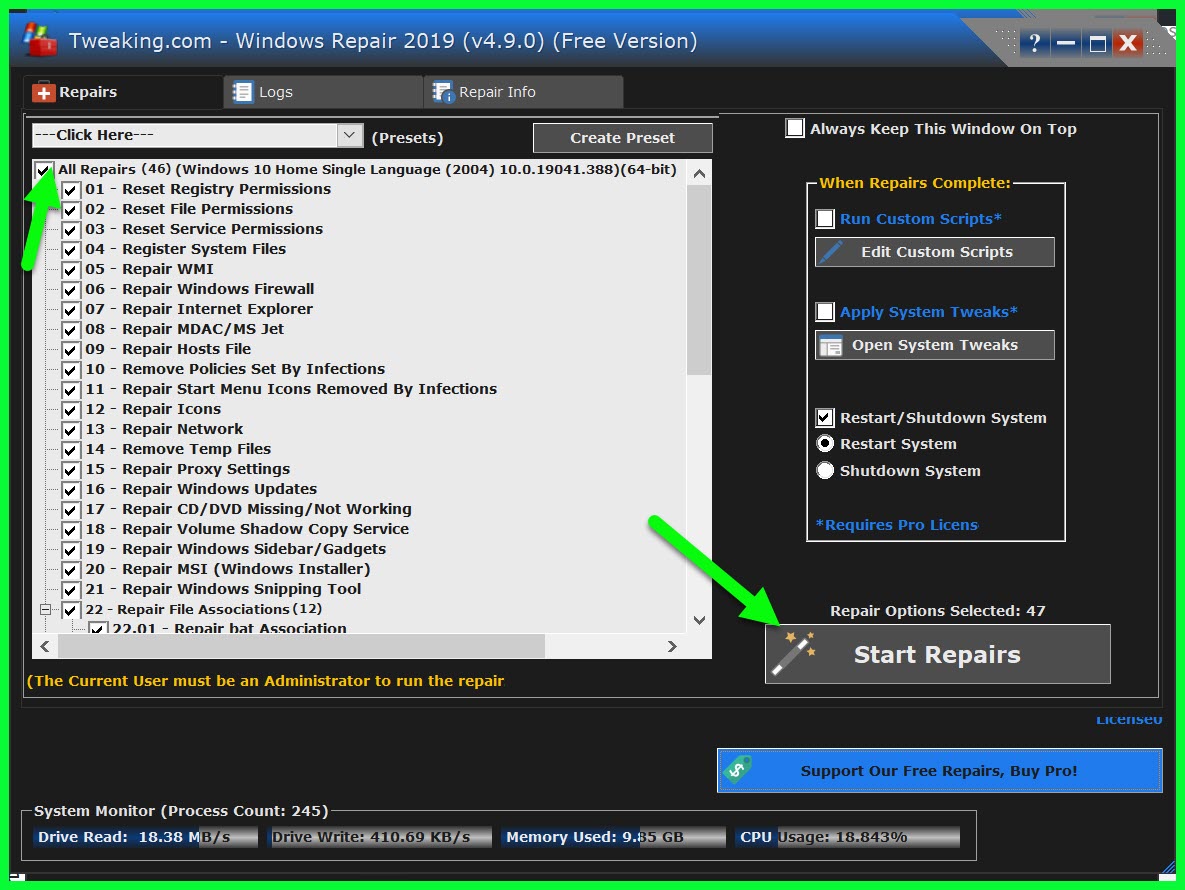
Apps like the Windows repair (Download Here) will really help clear all unwanted cache from your system without you having to locate these cache points. It is an efficient way of keeping your system light and fast.
All you have to do is install the app and launch it, follow the in-app instructions and you will be able to delete your cache easily.
Click on the “Repairs – Main” tab and click on the “Open Repairs” option.
![How To Clear Cache In Windows 10 [Step By Step Guide]](https://technicalustad.com/wp-content/uploads/2020/07/What-Is-A-WMI-Provider-Host-And-What-Does-It-Do-1.jpg)
By-default all the option is selected that is perfect to clear all PC cache and fix the permissions. Click on the “Start Repairs” option to start repairing.
It will take around 10 to 15 minutes that will fix all the issues related to cache and file permissions.
You will even have access to customized processes like choosing what file names will be deleted.
For users who aren’t too comfortable with 3rd party apps though, then the best choice is to use the inbuilt tool.
Why You Need To Learn How To Clear Cache In Windows 10
1. Corrupted Data
Bugs usually find their way to residual data in the cache and its presence will hamper the app process and probably even the whole system. It is imperative that you clear your cache routinely to avoid system damage.
2. Taking Up Too Much Storage Space
Some cache can be quite large and keep growing until your screen becomes slow and starts to lag because of the absence of storage space.
Some other bad outcomes could be your system freezing or facing the Blue Screen Of Death error (which can be fixed but still terrifying).
3. Users With Low RAM Might Suffer From Cache In The Long Run
When a system has ample RAM and storage space, the cache can really make everything faster and if there are no bugs or malware, you can keep it for a long time.
In systems with low RAM and storage space, it is not practical to keep on accumulating cache until your storage space is filled up as this will definitely slow down your system.
I already mentioned how there’s a different cache for different app processes. So it follows that there won’t be just one way to clear the cache of different app processes.
Conclusion
The Windows 10 cache always contains residual data that might not be useful or might contain bugs that could slow down your system. It also contains data that helps with many processes.
Knowing how to clear cache in Windows 10 is very important to fix a lot of errors in your system. Many app processes will misbehave over time and a simple clearing of their cache usually returns them back to a normal efficient state.
Clearing cache also optimizes storage space which will make your system fast so it’s a win-win process whenever you clear cache. The cache will always come back so it needs to be a repeated process.
I hope you enjoyed this article and you successfully used any or all of the tips explained to clear your cache.


