


Most of us will be familiar with 16×2 dot-matrix LCDs, which are used to display some information to users in most projects. However, these liquid crystal displays have many limitations.
In this tutorial, we will learn about OLED displays and how to use them with Raspberry Pi. There are many types of OLED displays on the market, and there are many ways to make them work. We have used a 4-pin OLED with Arduino.
Required hardware:
- 128×64 OLED display module (SSD1306) View on Amazon
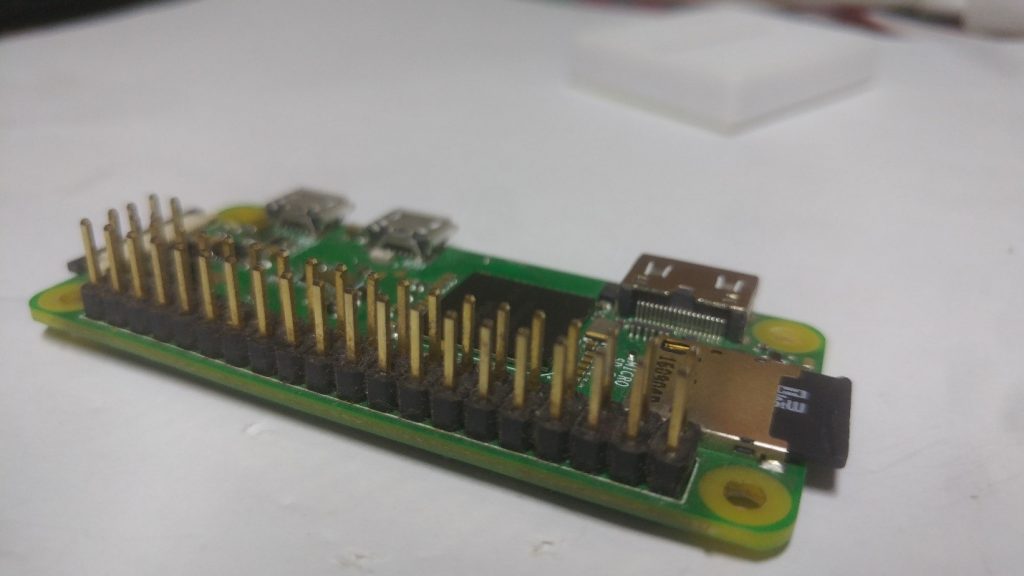
- raspberry pi View on Amazon
- Breadboard View on Amazon
- Connection wire View on Amazon
OLED Display
The term OLED stands for “organic light emitting diode” and it uses the same technology used by most of our television sets, but with fewer pixels.
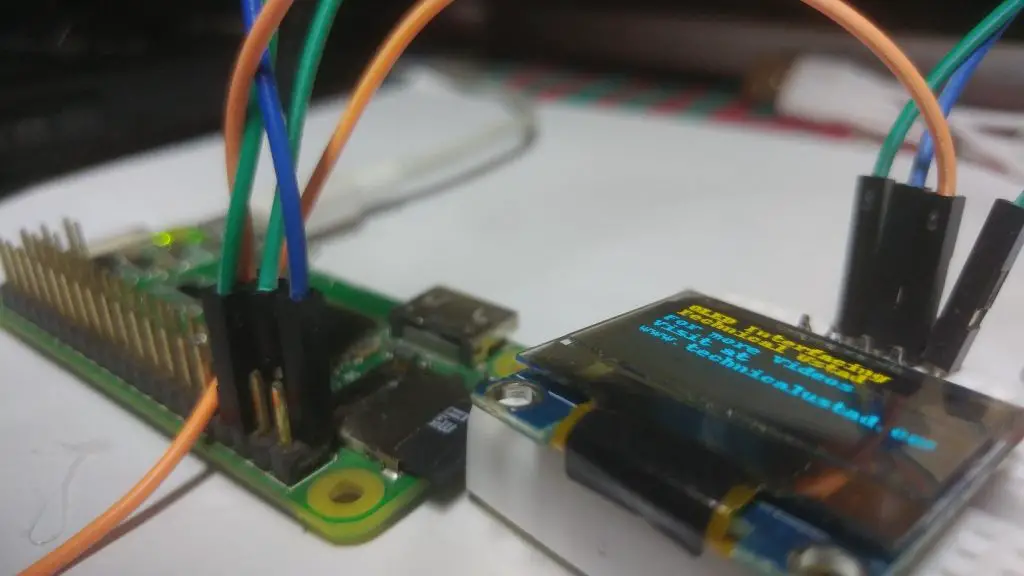
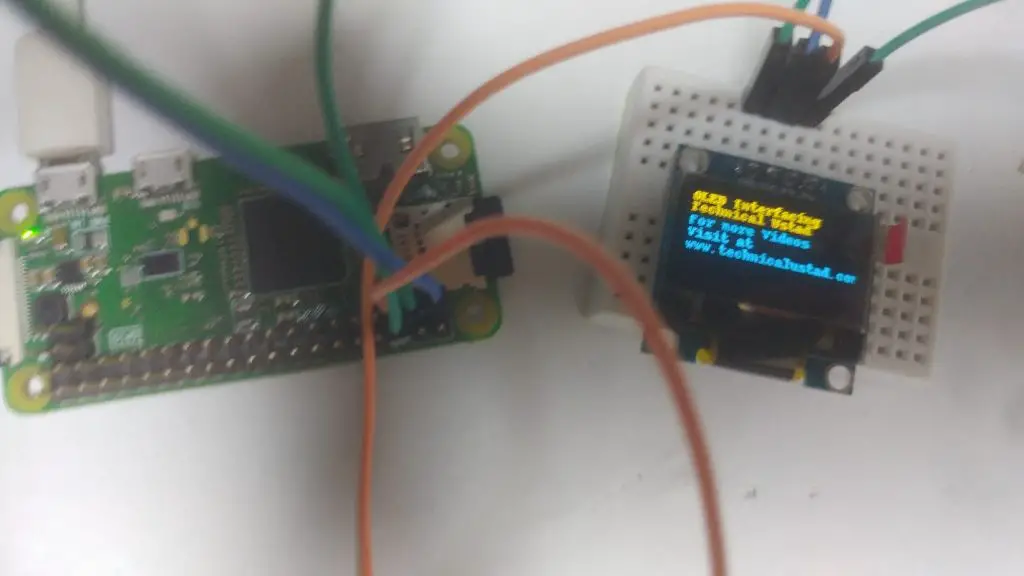
Connecting these cool display modules to the Raspberry Pi is really fun because it will make our project look cool. We have covered here a complete article on OLED displays and their types. Here we are using a monochrome 4-pin SSD1306 0.96″ OLED display. The LCD can only work in I2C mode.
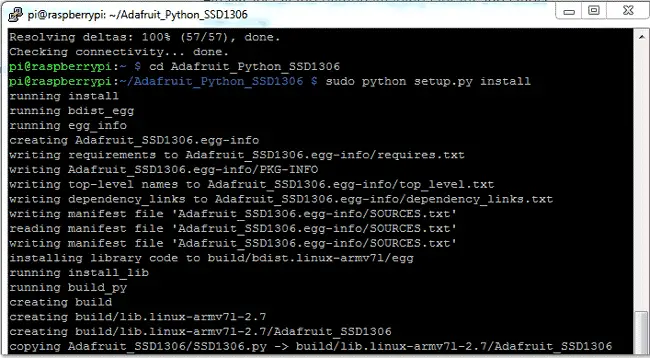
Follow these steps for installing libraries
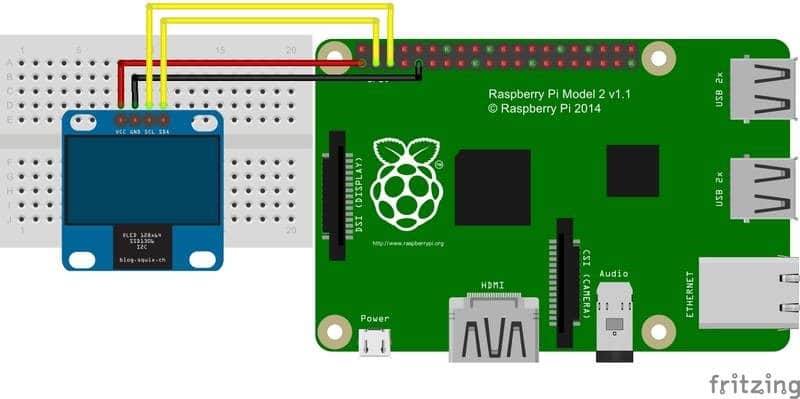
Connect OLED to Raspberry Pi:
| OLED Pin | RPI Pin |
| VCC | 3.3v |
| GND | GND |
| SDA | SDA (Physical pin 3) |
| SCL | SCL (Physical pin 5) |
The RPI community has provided us with a lot of libraries that can be used directly to make this easier. I tried several libraries and found that the Adafruit_SSD1306 OLED library is very easy to use and has a few graphics options, so we will use them in this tutorial.
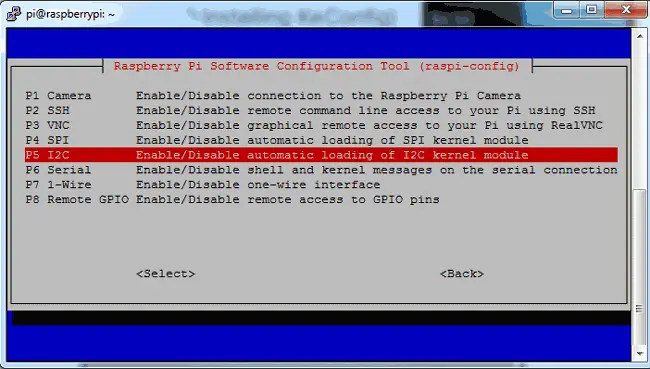
Enable I2C Communication
Before installing the Adafruit SSD1306 library, we need to enable I2C communication in the Raspberry Pi.
Do this in the Raspberry Pi console:
Sudo raspi-config
Then a blue screen will appear. Now select interface options
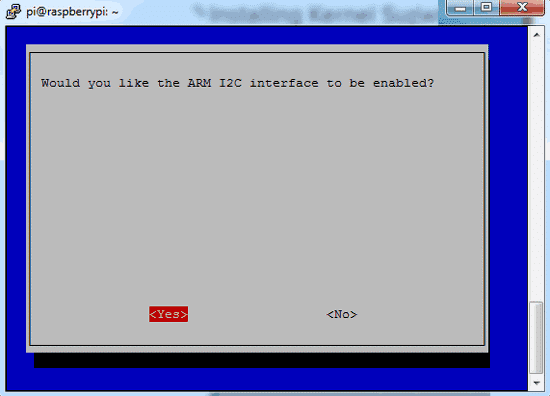
After that, we need to restart the Raspberry Pi with the following command:
Sodo restart
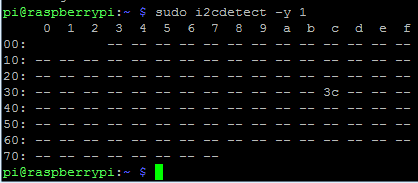
Find the OLED I2C Address and Update It
Then we need to use the given command to find the OLED I2C address and you will see a hexadecimal address.
Sudo i2cdetect -y 1
Then update the Raspberry Pi with the given command:
Sudo apt-get update
Install python-pip and GPIO libraries
After this, we need to install pip with the given command:
Sudo apt-get install build-essential python-dev python-pip
And install Raspberry Pi GPIO library
Sudo pip installs RPi.GPIO
Install Python Imaging Library and smbus Library
Finally, we need to install the Python Imaging Library and the smbus library on the Raspberry Pi using the given command:
Sudo apt-get install python-imaging python-smbus
Python Code
import time
import Adafruit_GPIO.SPI as SPI
import Adafruit_SSD1306
from PIL import Image
from PIL import ImageDraw
from PIL import ImageFont
import subprocess
RST = 0
disp = Adafruit_SSD1306.SSD1306_128_64(rst=RST)
disp.begin()
disp.clear()
disp.display()
width = disp.width
height = disp.height
image1 = Image.new(‘1’, (width, height))
draw = ImageDraw.Draw(image1)
draw.rectangle((0,0,width,height), outline=0, fill=0)
padding = -2
top = padding
bottom = height-padding
x = 0
font = ImageFont.load_default()
while True:
draw.rectangle((0,0,width,height), outline=0, fill=0)
Write two lines of text.
disp.clear()
disp.display()
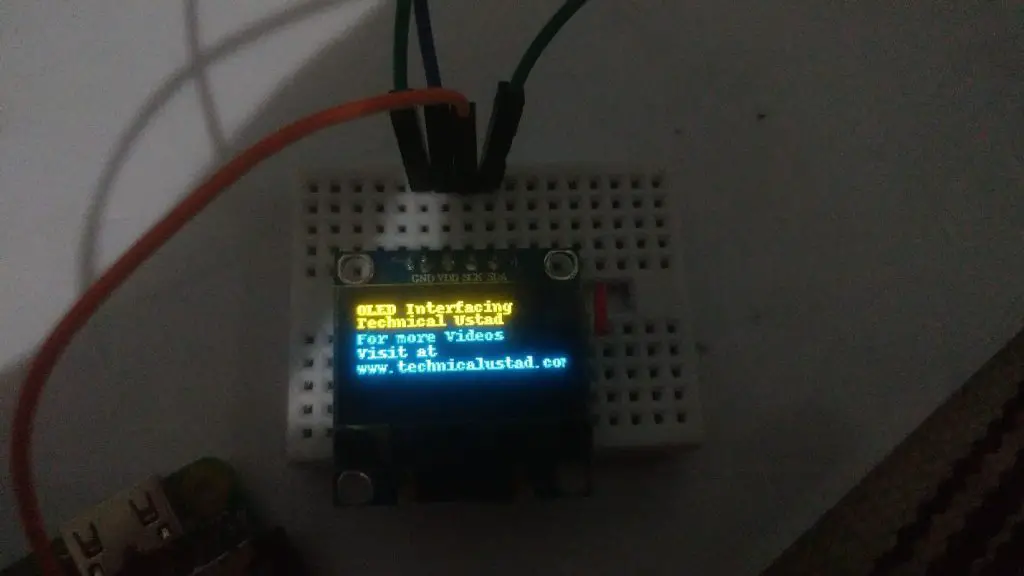
draw.text((x, top), “OLED Interfacing ” , font=font, fill=255)
draw.text((x, top+8), “Technical ustad”, font=font, fill=255)
draw.text((x, top+16), “For more Videos”, font=font, fill=255)
draw.text((x, top+25), “Visit at”, font=font, fill=255)
draw.text((x, top+34), “www.technicalustad.com”, font=font, fill=255)
Display image.
disp.image(image1)
disp.display()
time.sleep(2)
if disp.height == 64:
image = Image.open(‘img1.png’).convert(‘1’)
else:
image = Image.open(‘img1.png’).convert(‘1’)
disp.image(image)
disp.display()
time.sleep(2)
if disp.height == 64:
image = Image.open(‘img3.jpg’).convert(‘1’)
else:
image = Image.open(‘img3.jpg’).convert(‘1’)
disp.image(image)
disp.display()
time.sleep(2)
if disp.height == 64:
image = Image.open(‘img4.jpg’).convert(‘1’)
else:
image = Image.open(‘img4.jpg’).convert(‘1’)
disp.image(image)
disp.display()
time.sleep(2)


