


If you switched from Windows to Ubuntu and you are searching for Administrator user here, you will not find it. Because in Linux ( and Unix in general), there is a Super User named Root. Super User can do anything and everything, and thus doing daily work without typing the Sudo command.
For me, it’s boring to always enter sudo to run any program. However, it,s good practice to run your OS with less privileges.
Step-by-step Process Enable Root User in Ubuntu:-
Now first you need to change your password. For this open your terminal with Ctrl Alt T and enter the command rumy@:~ sudo passwd root and enter your password.

now on the terminal enter the command
rumy@:~ sudo gedit /etc/lightdm/lightdm.conf
it will open the lightdm configuration file. by-default you will not seen allow-guest=false line. because in my previous article I disable the Guest account.
check this How to disable guest account in Ubuntu.

Now you need to add the greeter-show-manual-login=true to the bottom of the file and save the file.

restart your Computer. Now you have the option to enter the name of the user.
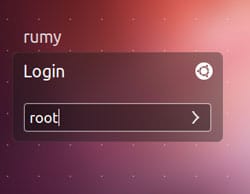
Done Now you successfully enable the root user in Ubuntu. As you see in below image, my name change to root.

Enjoy your login with Root.
Hope you like my post.How to Enable Root User in Ubuntu. Please Share with others.


