


Some photos can be taken again and you can only regret at other situations for getting the blurry photos. Photos can be blurry due to motion or inaccurate camera angles.
Other than improving your camera skill for the next time, this is a tutorial to fix blurry photos. You might be forgiven of taking shaky hands this time.
It may not work on all the photos or all situations. It’s no magic here but a little bit of image manipulation trying it’s best using intelligence and photo recognition to fix minor photo blurs, like blur due to wrong camera focus or little motion.
If the picture is nearly useless to see, then it is likely that it’ll be as much impossible to fix. With a little bit help of Photoshop, your blurred photo should become clearer. Here we will show you how to deblur a blurred photo using Photoshop CC. I’ll be using the CC 2017 for instance.
This same feature is available on GIMP, a free alternative to Photoshop. The sharpness level of output may vary but they work much alike.
Sadly, Images captured in super dark or high ISO settings won’t be able to take advantage of this.
It doesn’t necessarily have to be blur. It could be anything that is pulling a bit of blur due to slow shutter speed, moving hand. You can pull back some of that information and get back some sharpness.
Step-by-Step Process to Fix a blurry picture
Step 1 :– Fire up your Photoshop (or GIMP, if you’d like). Drag and drop the blurry photo or File > Open to choose your file.
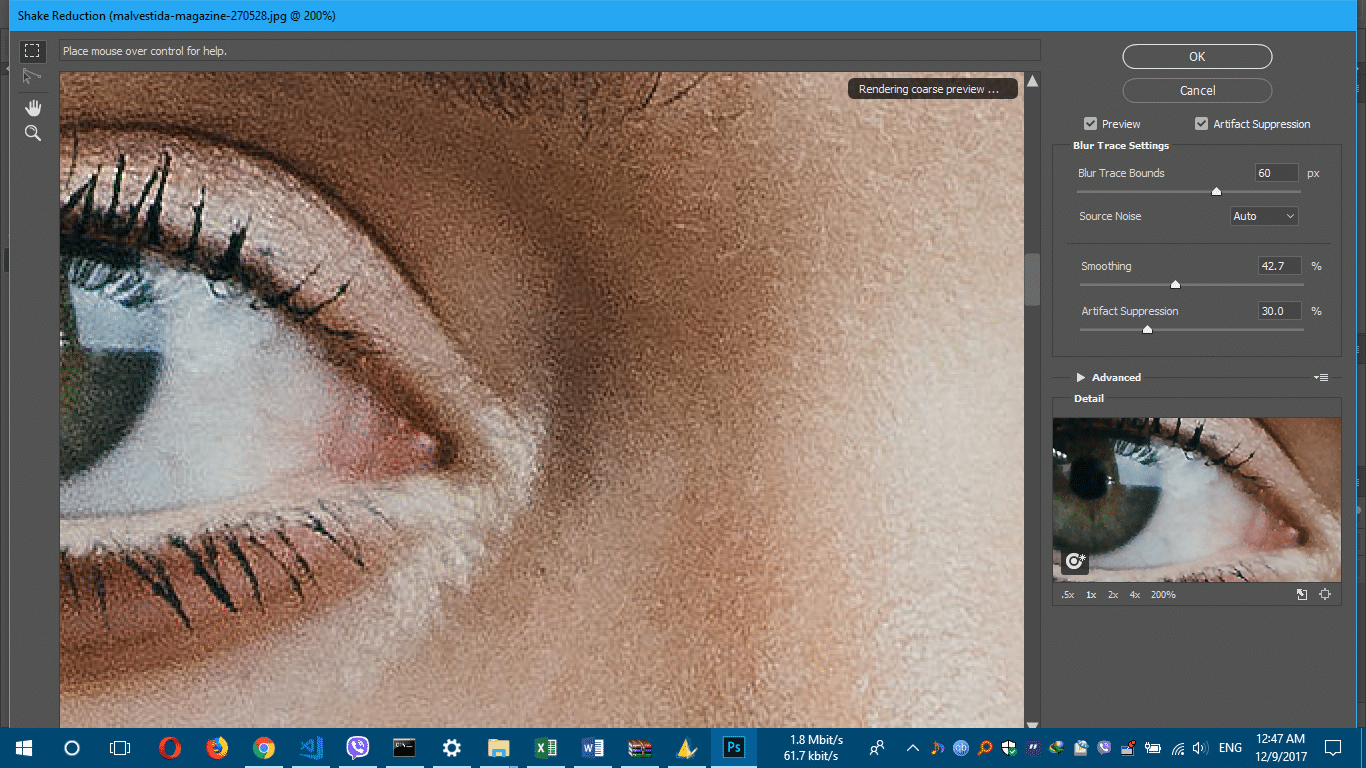
Now go to Filter > Sharpen > Shake Reduction.
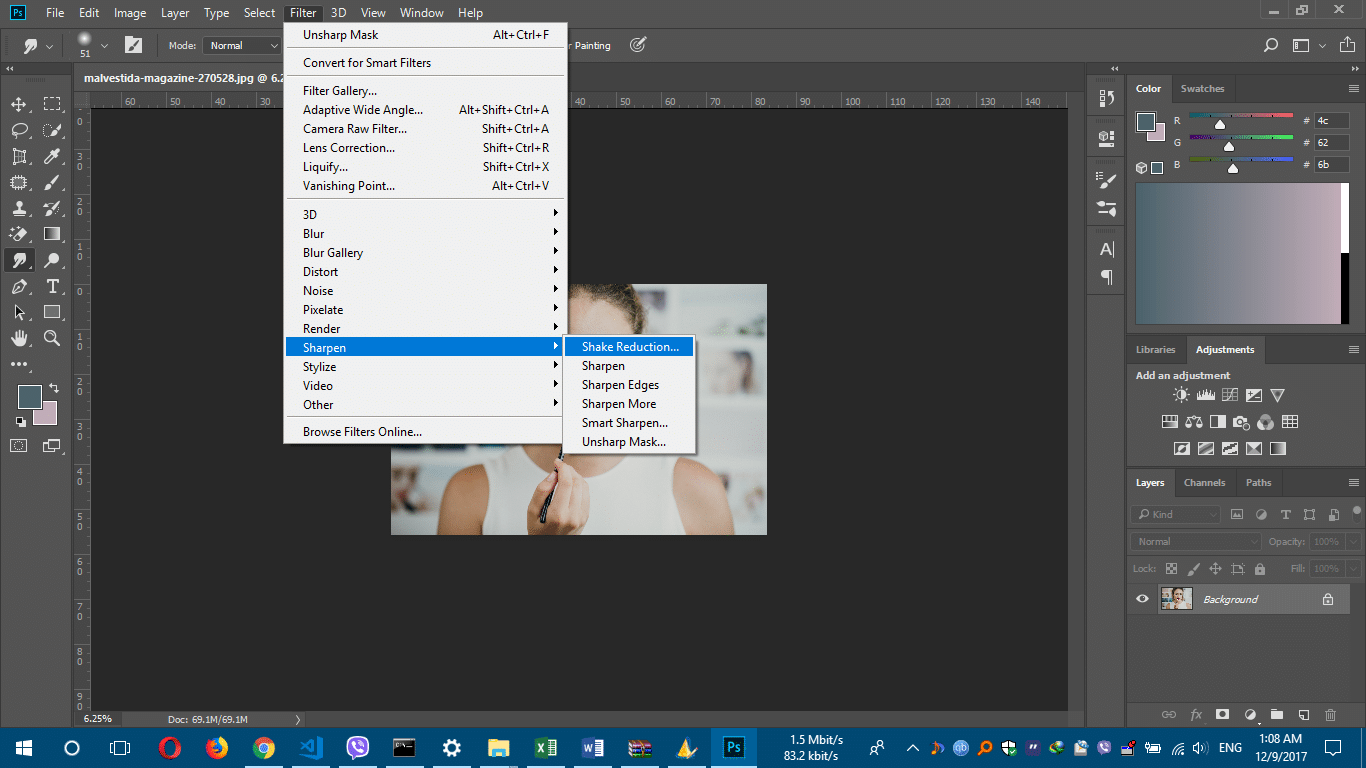
Zoom in a bit to see the blur in the image. You can click around to see the details. You will be able to increase or decrease the balance at which it sharpens to trace that blur. A little noise is produced in this process which you can smooth out by selecting the smoothing level. Adjust the settings as needed.
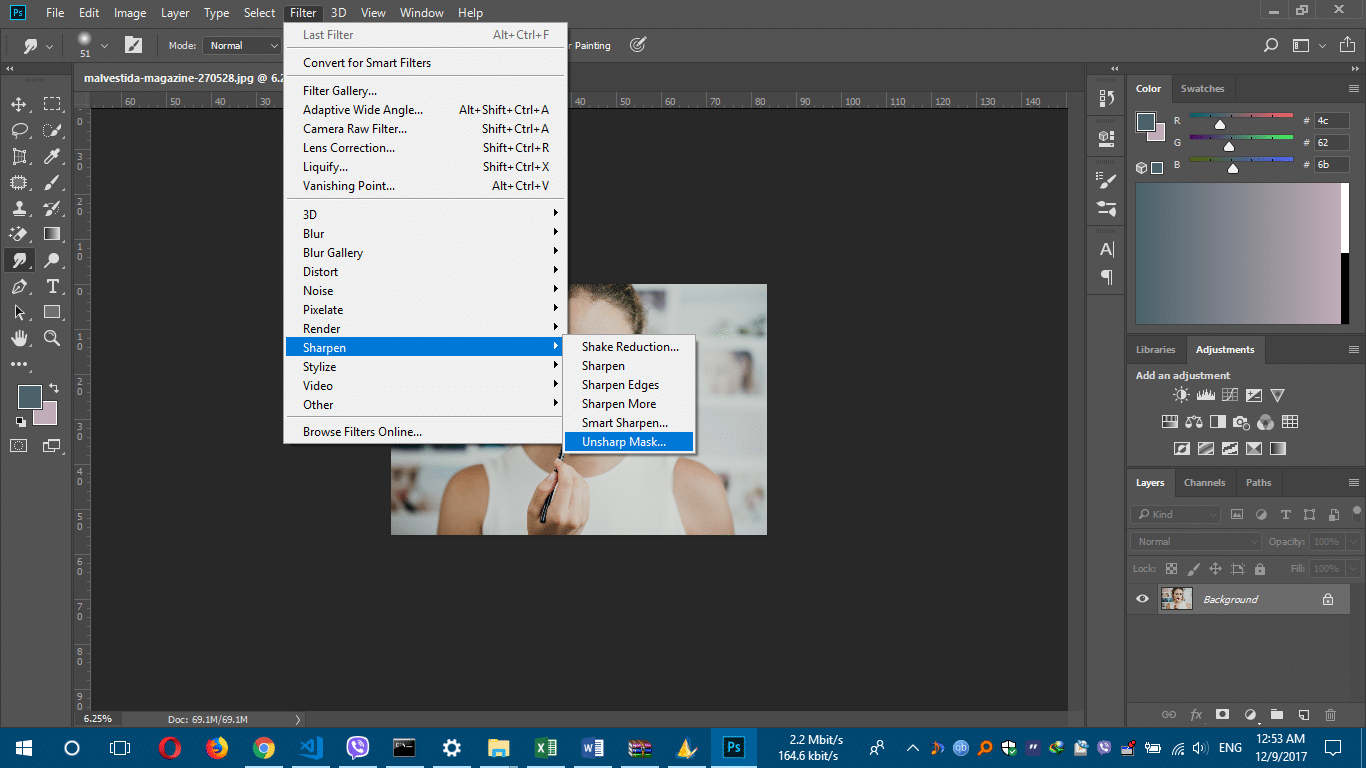
Step2:- If you’re on a older version of Photoshop or GIMP, you may not have “Shake Reduction” option in Filter > Sharpen. In that case, choose the “Unsharp mask”.
A new window will appear with the following options.
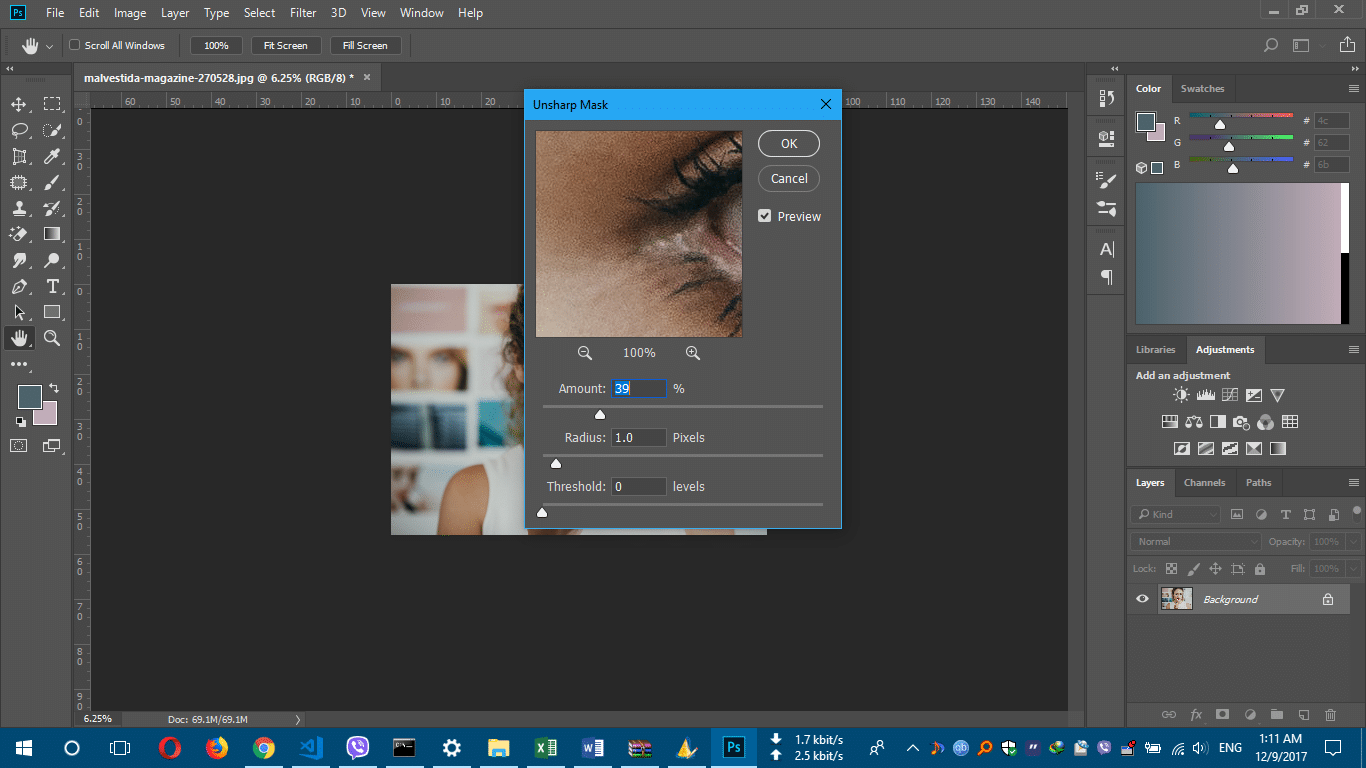
Radius is the total area where the sharpening will be applied, starting from the edges.
Amount is the total strength of sharpening. Increasing it will make dark colors darker and light colors lighter.
Threshold determines the contrast areas that will be sharpened. Increasing it will apply sharpness to higher contrast areas, and decreasing it will apply sharpness to lower contrast areas.
Play around with these options until the image looks good. Do not go too far with the values. There are no such values as perfect one. You don’t have to move threshold at all most of the times and radius a bit between 2-4. Balance with the Amount around 10 or 20 and keep adjusting slightly.
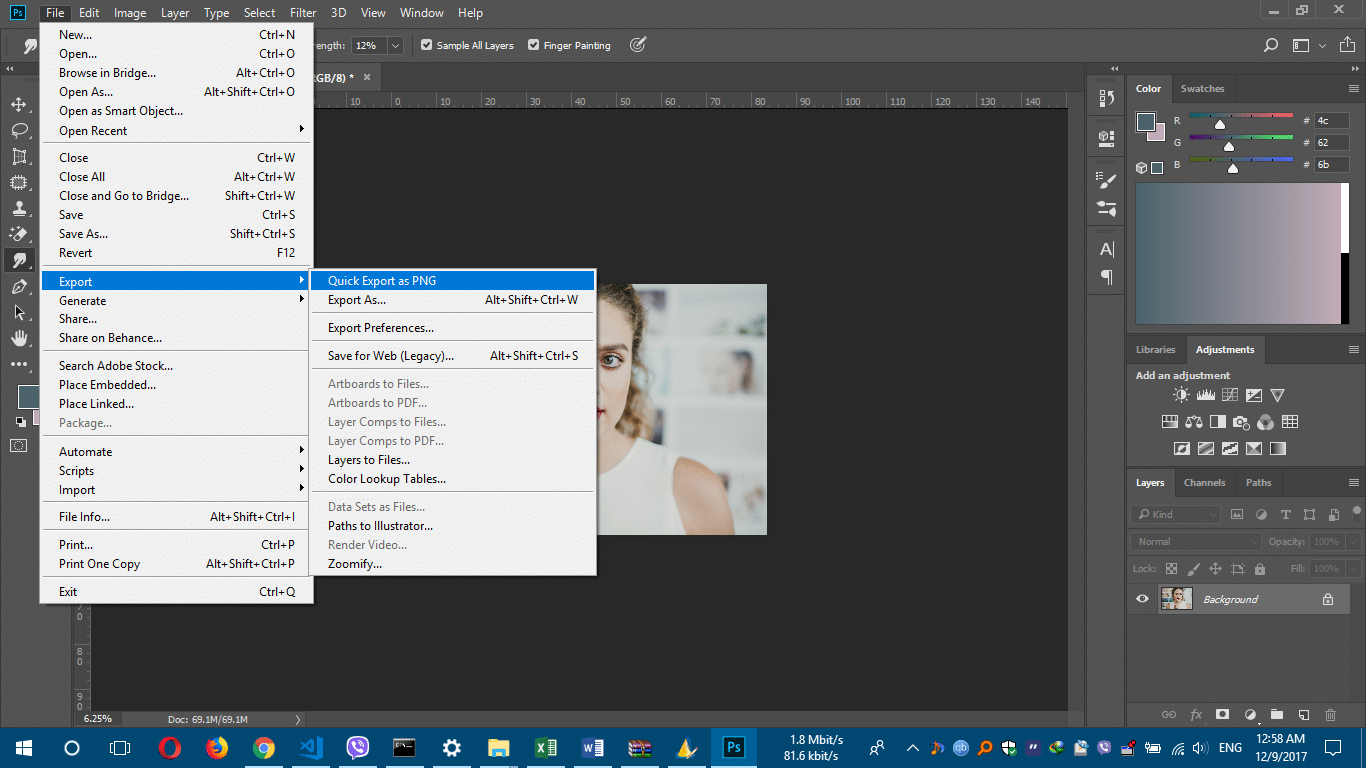
After you’re satisfied with how it looks, go to File > Export > Export as PNG or Export As for more options such as quality and other extensions (jpg, for example).
Enjoy the moment. You’ve fixed a blurry picture successfully.

Check Which YouTube Videos have Manual Closed Captions
An app that Fixes blurry pictures:-
With the rise of mobile phones, now you have flexibility to use your phone for your all online activities, We come with the best app App that fixes blurry pictures easily.
1. AfterFocus ( Download Now )
With AfterFocus, you can create DSLR-style background blurred photo by simply selecting focus area. Also, various filter effects offer you to create the most natural and realistic photo.
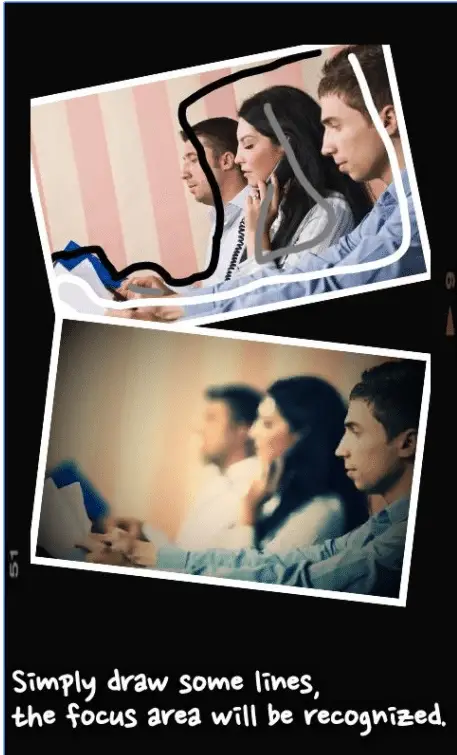
Selecting a focus area more precisely, you can achieve a more natural and professional image.
Just mark the areas you want, AfterFocus automatically recognizes the focus area precisely even for an object with complex shapes. This auto function allows you to work faster on smartphones with small screen.
Also, the background blur effect of AfterFocus gives a photo of the realistic look between the edge of the background and the focus area.
2. Blurry Photo Editor ( Download Now )
“Blurry Photo Editor” is the perfect photo square editor to post a full-size picture on Instagram. “Blurry Photo Editor” makes the size photo so easy by blur background.
And you can simply use it. “Blurry” is free and wonderful. You will love it so much! Blurry is proud of No cropping and amazing effect.

“Blurry Photo Editor” is application professional photo editor and photo effects, with a simple interface and easy to use, it will create a wonderful photo with high definition, it provides effects and designs professional will give you the best photo editor way and photo effects way and easy with one click.
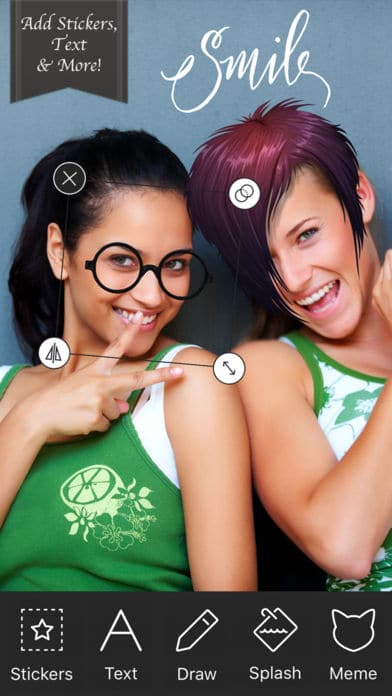
3. Photo Editor Download on iTune
Photo Editor- is an amazing all-in-one photo editor! With Photo Editor- you can enhance your photos, apply effects, add stickers, create collages, paint & draw, remove blemishes, whiten smiles.
Final Word
With the above-mentioned methods and apps, you can easily fix blurry pictures. Remember one thing with the above methods maybe it will not fix strong blur pictures but it will make cleaner. If you know any other method or apps to fix blurry pictures, please share it with us in the comment box.

