


Installation of KODI in the Raspberry Pi 3 is a very easy tool and it will turn your old TV into a smart TV. It’s also one of the more valuable, interesting and useful projects for Raspberry Pi 3. It just handles KODI operating system very well, and it’s also a IOT (Internet of things) of stuff that can be used to make a cheap KODI setup for a monitor or an old TV.
KODI is one of the most popular media center apps in the world for smart TV Entertainment System. Open source programs make it easy to us for organize local files such as images videos, audio and watch streaming media on a variety of devices, and all with the same highly customizable interface which mean we can change the layout of KODI and customize the each and every icon in the GUI and it’s also user-friendly features.
In the KODI operating system including all the features, KODI is actually a very lightweight operating system that’s perfect for running on old PCs and other devices although in small programmable computers such as raspberry pi.
Our favorite tiny computer is a favorite of KODI users, so you may ask is why? Here we are to show you how to install KODI on Raspberry Pi.
So, KODI is not although not an operating system it’s basically a Linux based application, when we use KODI as their front-end environment and user interface, the number of lightweight operating systems running on the Raspberry Pi is also considerable.
Most popular KODI are LibreELEC and OSMC. Today, we show you how to use LibreELEC. OSMC is very similar to LibreELEC, but in this Article, I will guide you about the LibreElec.
There are two major installation packages for installing KODI to Raspberry pi 3, OSMC and Open ELEC.
Which one is a preference, OSMC has an installer that makes it easier for Open ELEC to require image authoring software. There are free image writing software, so you can download and install for free.
Let’s Start
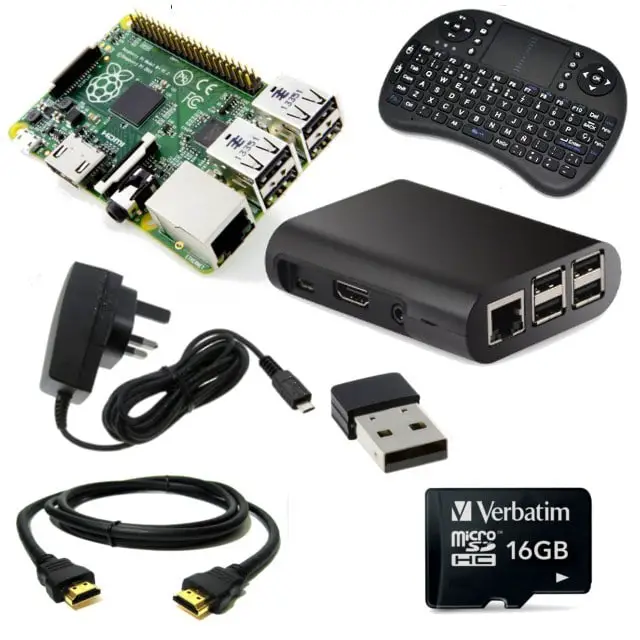
Step 1 Collect Requirements
- Win32DiskImager
- Raspberry Pi 3, 2, 1
- 8GB Micro SD Card
- Bluetooth Mini keyboard
- Raspberry Pi Case
- Raspberry pi Heat Sink
- Micro SD Card loaded with NOOB image
So the very First step goes to the Official Website of raspberry pi and download noob and copy files to the Micro SD Card, if you don’t know how to install NOOB Please Visit to this link and Read my previous article for installing the raspberry pi
How to install NOOB in Raspberry Pi
Step 2 Install NOOBS
We Have to download and install NOOBS on an SD card. Follow instructions on the NOOBS page.
With NOOBS on your SD card, you should be able to boot the Raspberry Pi to the NOOBS operating system selection screen,

For installation just select LibreELEC or OSMC and press the Install button.
And then a pop-up message will appear for confirmation. That will remove all data from your micro SD card, so if you have previously installed Raspbian on it, so to make sure to back up your files first.
If you are sure that you have not any data on a micro sd card, then just click Yes to continue and begin the installation. This will take some time to make it fully complete; when your operating system just completed NOOBS will show a window saying:
OS(es) Installed Successfully
Click OK and your Raspberry Pi will restart into the distribution you selected.

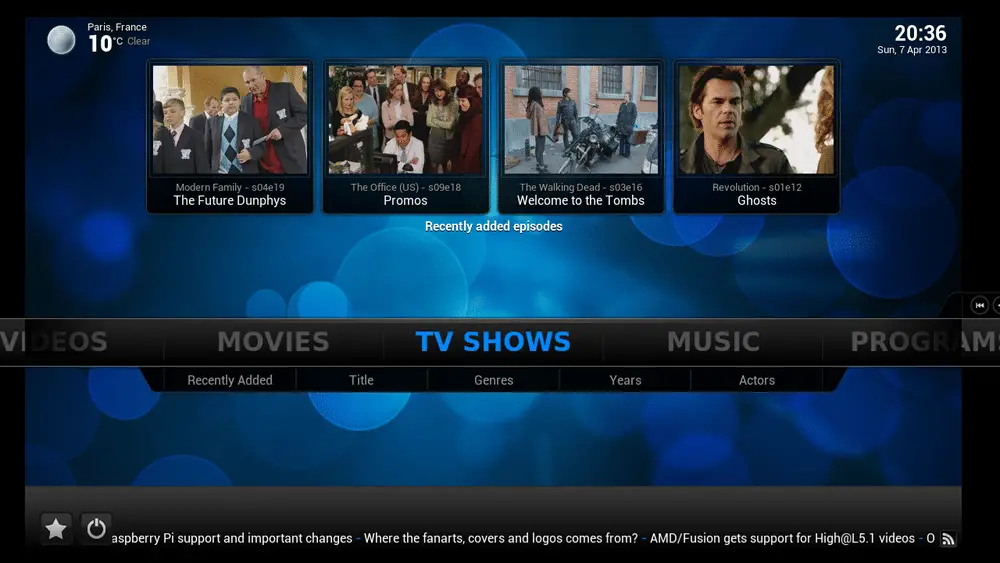
Using Kodi
Now that you have the kodi distribution installed, you can play media files, configure your system, and install plug-ins to add more functionality.
You may see a welcome screen that will help you configure your settings and get started.
Power
You can use your wall jack USB mini cable to power your projector in the traditional way or, if your TV has a USB port, you can connect directly with a USB mini cable This means your benefits will be on when the TV is on Power on and turn off when the TV is off.
control
You can use the keyboard and mouse on Kodi, the TV remote control on a USB receiver, or even a presenter with a directional button.
You can also use the Kodi app on your smartphone; search Kodi on your phone’s app store. Once configured to connect to your Kodi Pi’s IP address, you can use the on-screen remote control or browse files in your phone and select what to play.
Play video files
You can copy the video files to your PiSSD card or play them on a USB memory stick or external hard drive by simply selecting VIDEOS on the main screen’s slider and selecting the file and then selecting the source file The inserted media is seen in the list. Choose your device and you should be able to navigate the same way as on your computer. Find the desired video file, select it and it will play.
Connect to the network drive
You can use a wired connection to connect to a network device on your local network, such as a NAS (network attached storage). Connect the Raspberry Pi to the router using an Ethernet cable. To connect to your device, select VIDEOS from the home screen and click Add Video ….
. Add Video Source screen will display Choose to Browse and select the type of connection For NAS, select Windows Network (SMB); it will use the Samba protocol, an open source implementation of the Windows file sharing protocol. If the device can be found on the network, the device will display come out. With this device as a location, you will be able to navigate its file system and play its media files.
Set
Kodi has many configurable options. You can change the screen resolution, choose a different look and feel, set up a screen saver, a profile view, set localization options, configure subtitles, and more. From the main screen enter the system and settings.
Add-ons
Add-ons provide additional functionality or enable connections to other web services such as YouTube.
YouTube Plugin showing search results:
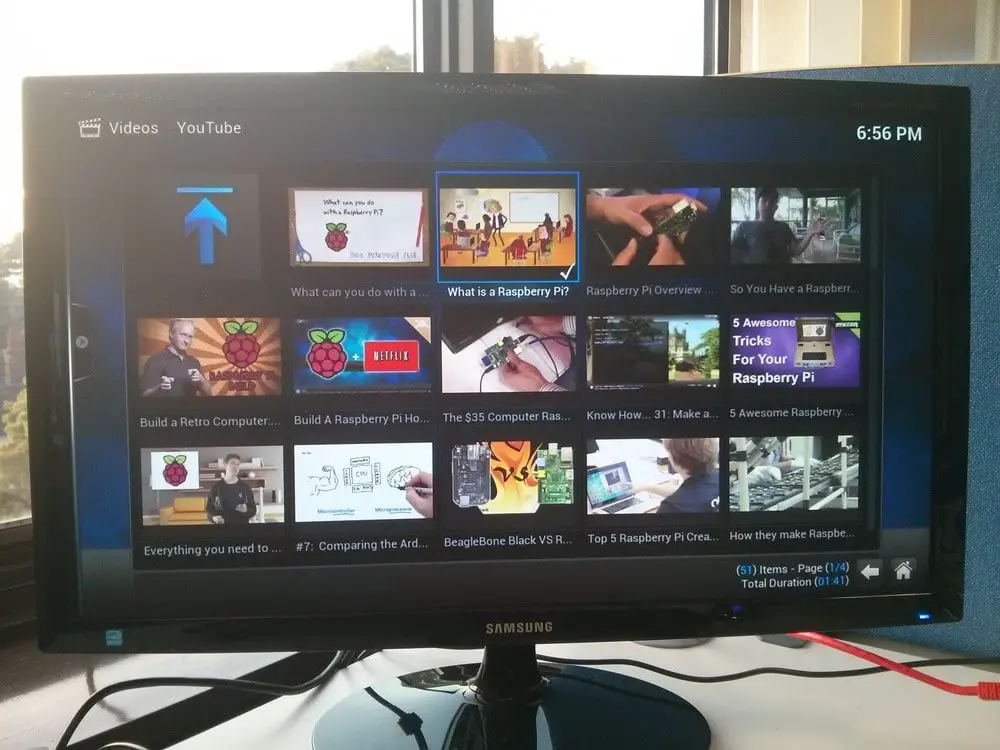
You can configure add-ons from the settings menu; a selection is available for you to browse. Select one and you’ll be prompted to install it. Each add-on has its own configurations.
Here is the Test Video of Raspberry Pi with Kodi

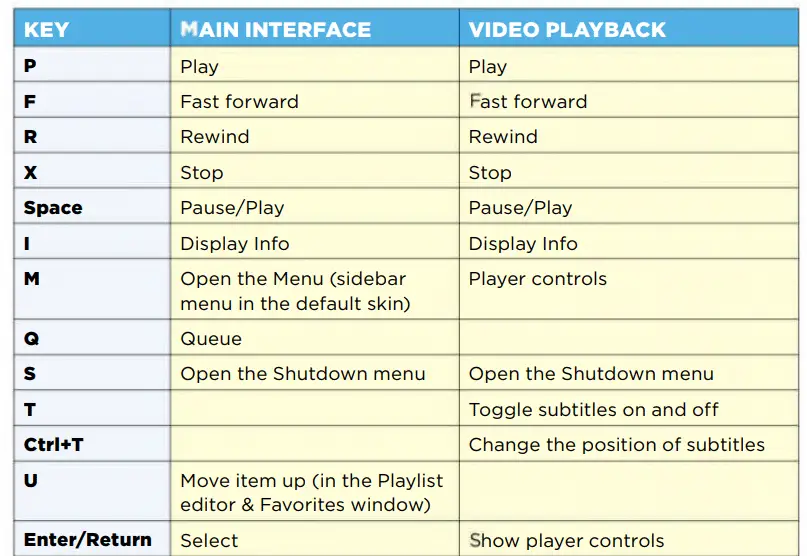
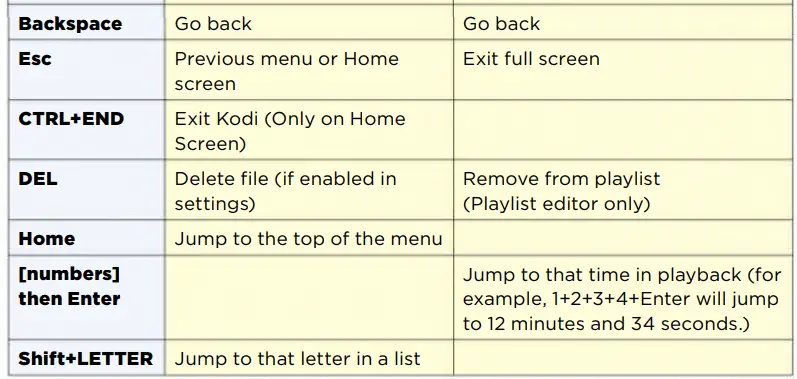
Kodi Keyboardard Shortcuts
Save Yourself a lot of clicking by using your keyboard to control Kodi’s main functions. Here are the most useful shortcuts.
You may also like to read our some other awesome articles,
How to manage official Kodi add-ons
How to control Kodi from a web browser
Hope my article “How to install KODI in Raspberry Pi 3 and turn old TV/Monitor into Smart TV” helps you to know How to install KODI in Raspberry Pi 3. if you have any query, feel free to comment.


