


Minecraft players create and join Minecraft servers because it allows a lot of customization options in the game amongst other things. Updates to Minecraft come often too and that’s why you will need to learn how to update Minecraft servers.
When updates to the Minecraft game version are available, you will have to also update your server to ensure that folks with the new version of Minecraft can connect.
A General Step-By-Step Breakdown Of How To Update Minecraft Servers
The first four steps are all about making backups about important config files before even updating the server.
These backups must be made. I recommend creating a folder on your desktop and putting the backups there because you will need them again after the update is done.
Step 1 – Finding Server Location
I’m assuming you already went through the process of creating a Minecraft server and you know where your server folder is located.
If you do, then navigate to your server folder and open it (I always advise folks to place it on your desktop for easy access).
Step 2 – Backup Server Settings
This step is all about making sure to backup important settings already made on your current server.
If you do it correctly, your current server settings will also be present in the new updates server.
Server settings that might be important to back up include
- Banned IPs
- Banned players
- Server properties
If you have banned some players or IP addresses from connecting to your server, you won’t need to perform that action again.
All you need to do is backup these essential config files and restore them when you update the server.
Other config files like server properties will also ensure the updated server starts running with the same settings you made on the current one.
There might be other important config files to backup, do this according to personal preference.
Step 3 – Backup World Folder
The next thing to backup or copy your World folder. You must do this. You will also find the World folder in the server folder you copied the config files from.
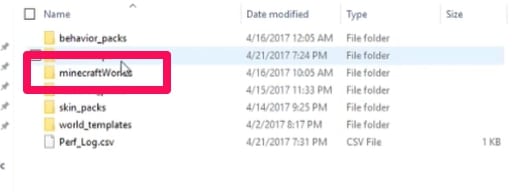
The reason for this is apparent. It is to ensure that you can still access your saved world after you update your server.
All you have to do is restore it to the new server folder and you will be able to access your saved world on the new server.
Step 4 – Backup Batch files
Most creating Minecraft server guides tout using scripts (batch files) to start servers. If that’s what you’re using, backup the batch file that you use to start up the server.
After doing that, delete the files in your server folder. Don’t leave anything behind. It might cause issues with your new server files if any file is left behind.
Remember that it is just the files you delete, don’t delete the server folder.
Step 5 – Download the Update
The next step involves downloading the new server update. You can use this link or download it from other sources as long as the sources are verified.
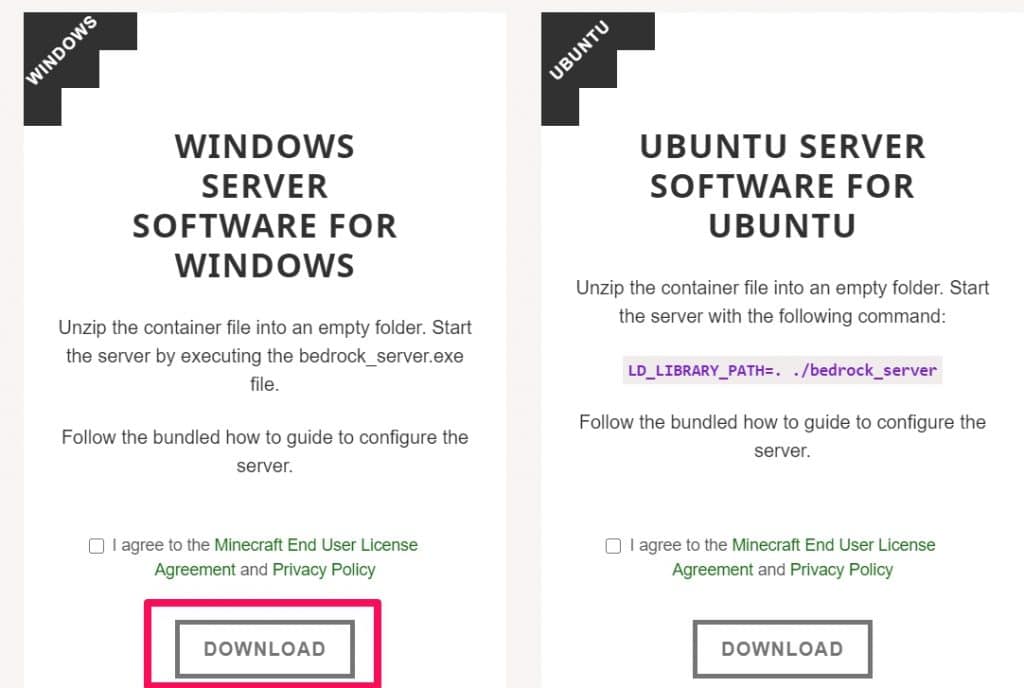
Depending on whether you’re using Windows or Linux or OS X, download the .exe file (Windows) or the .jar file (Linux and others).
Then move the downloaded server file to your server folder.
Step 6 – Rename Server
There is a little bit of renaming to do. The one thing you might want to rename is the name of the server file you just downloaded.
The reason is to make sure that the old script or batch file you used formerly to start up your previous server can also be used in starting up this new server file.
You could just easily change the server file name to minecraft_server by getting rid of the version number. That’s assuming the above name is also what’s in your batch file.
Step 7 – Update and Move Backup Files
The next step in the update process is to run the new server .jar or .exe file you downloaded. This immediately creates the files needed for the server to run.

Then afterward, go back to the backup files you created in the first 4 steps of this guide and move them to the server folder.
You will get a prompt asking if you want to Replace The Files In This Destination. Click on that option and your old config files will replace your new ones in the new server update.
Step 8 – Update EULA Value
The next step is to accept the EULA agreement. If you created your Minecraft server yourself, you did this before and you know it’s pretty simple.
Find the EULA text document in the server folder and open the file.
Change eula=false to eula=true.
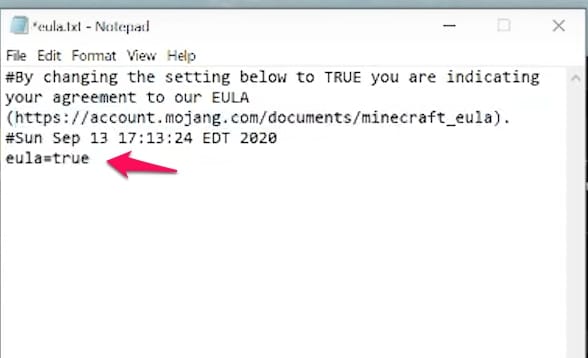
Go to File and click on it. Then click on Save to complete the process of accepting the EULA agreement.
If you don’t do this, chances are your server will crash immediately after you open it.
When you’re done, run your updated server and it should work just fine.
Important Info for How To Update Minecraft Servers
- In cases of you wanting to downgrade your server, it is only possible if you saved the server files of the downgrade you want.
- Folks running on modded servers like CraftBukkit servers should not instantly update Minecraft when updates come out.
They have to wait for some time for server updates (for their servers) to be made.
- Modded servers are also different in the way they are updated. You might want to look into the specifics if you’re trying to update one.
- You can backup your nether world to ensure that all you built isn’t lost when you upgrade your server. Just replace the backed up nether with the new one in your server folder.
Conclusion
This is a general guide that helps explain how to update Minecraft servers in easy to follow steps.
Based on your game version, your device, and your server type, there might be little differences between these steps and the ones you have to take.
But if it’s just a Minecraft server update process, then the above steps should work exactly as outlined. You can even use the steps above to create a new server if you’re tech-savvy.

