


Are you ready to take your cybersecurity skills to the next level? In today’s digital landscape, where threats lurk around every corner, staying ahead of malicious actors has become more critical than ever.
If you’re passionate about cybersecurity and want to explore the cutting-edge tools professionals use, you’ve come to the right place.
In this article, we’ll introduce you to a game-changing tool called Kali NetHunter.
Whether you’re an aspiring ethical hacker, a cybersecurity professional, or simply curious about mobile penetration testing, Kali NetHunter is the ultimate solution that will empower you to uncover vulnerabilities and secure your digital environment like a pro.
In the following sections, we’ll dive deep into what Kali NetHunter is, how it works, and why it’s revolutionizing the world of mobile cybersecurity.
By the end, you’ll understand why this powerful tool has gained immense popularity and how it can assist you in performing robust penetration testing on various mobile devices.
So, let’s embark on a journey into the realm of Kali NetHunter, where we’ll explore its features, benefits, and real-world applications.
Get ready to discover the transformative potential of this tool and equip yourself with the knowledge to defend against emerging cyber threats.
Let’s begin!
What can Kali NetHunter do?
Kali NetHunter, a powerful mobile penetration testing platform, offers various capabilities to bolster your cybersecurity arsenal.
This cutting-edge toolset, built on the foundation of Kali Linux, provides unprecedented access to perform security assessments, identify vulnerabilities, and strengthen the defenses of mobile devices.
With Kali NetHunter, you can conduct advanced reconnaissance and gathering of intelligence on target networks and devices, enabling you to pinpoint weaknesses and plan your penetration testing strategy effectively.
Its extensive suite of powerful tools encompasses wireless attacks, web application exploitation, reverse engineering, and more, granting you unmatched versatility in mobile security.
Kali NetHunter is not limited to smartphones and tablets; it extends its reach to smartwatches, wearables, and other embedded devices.
This enables you to test the security of a broader range of IoT devices, ensuring that your organization’s entire digital ecosystem remains fortified.
Furthermore, Kali NetHunter’s unique features, such as full customization and modularity, allow you to tailor the toolset to your specific requirements.
You can create customized scripts, integrate additional tools, and leverage community-driven resources to enhance your testing capabilities.
By utilizing Kali NetHunter, you gain the power to identify and exploit vulnerabilities in mobile devices, assess the resilience of your organization’s infrastructure, and reinforce your cybersecurity posture.
Stay one step ahead of potential threats, safeguard sensitive data, and foster a culture of proactive defense with Kali NetHunter—the ultimate solution for comprehensive mobile penetration testing.
Warming-up for installation

Somethings to take care of before installing NetHunter –
- Device should be rooted.
- In case KingRoot was used for rooting, replace KingUser with SuperSu.
- Install BusyBox from playstore.
- Keep storage for installation
- Custom ROMs like CM12 CM12.1 CM13. (Desired, not mandatory)
Procedure for installing Kali NetHunter on your Android device
Step1:- Download Nethunter ROM from Offensive Security Web Site according to your Android Version.
Step2:- Extract the downloaded Zip file. Go to /data/app. Install the apps present in that folder one by one.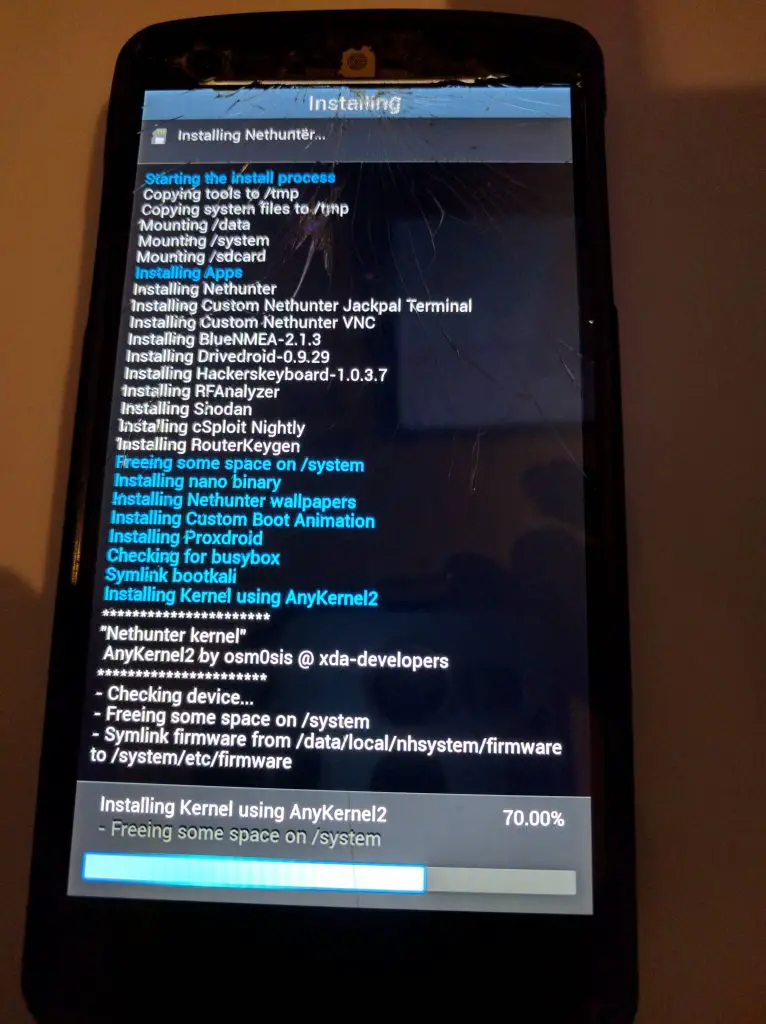
Step3:- Now with any root explorer app, go to /data/data/com.offsec.nethunter/files/scripts. Then copy all the files and paste into /system/bin.
Step4:- If you don’t see the content in files/scripts, open NetHunter app and then close it and check again.
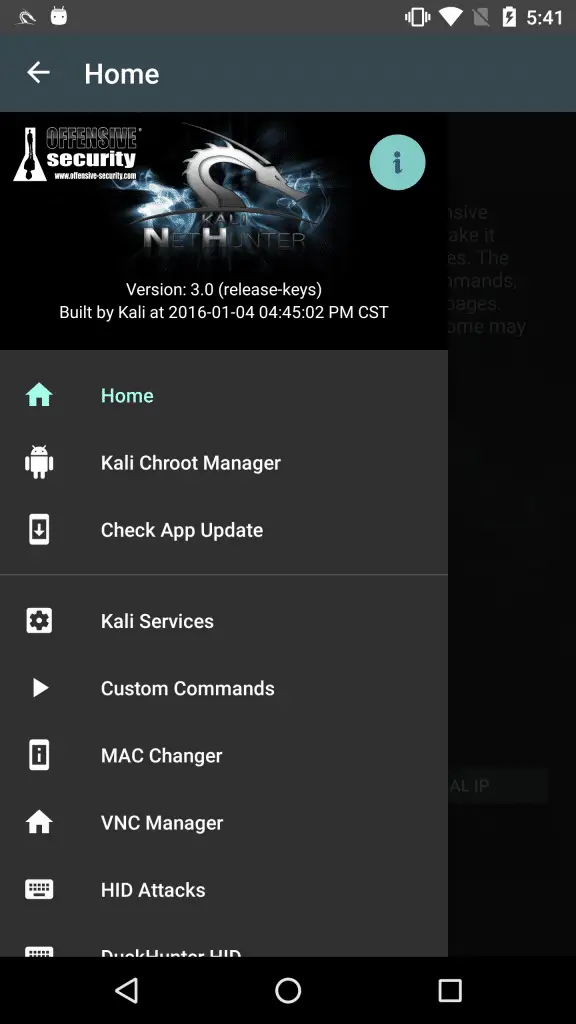
Step5:- Now, open the Nethunter App and Go to the Kali Chroot Manager and install the “Minimal Chroot“(Recommended).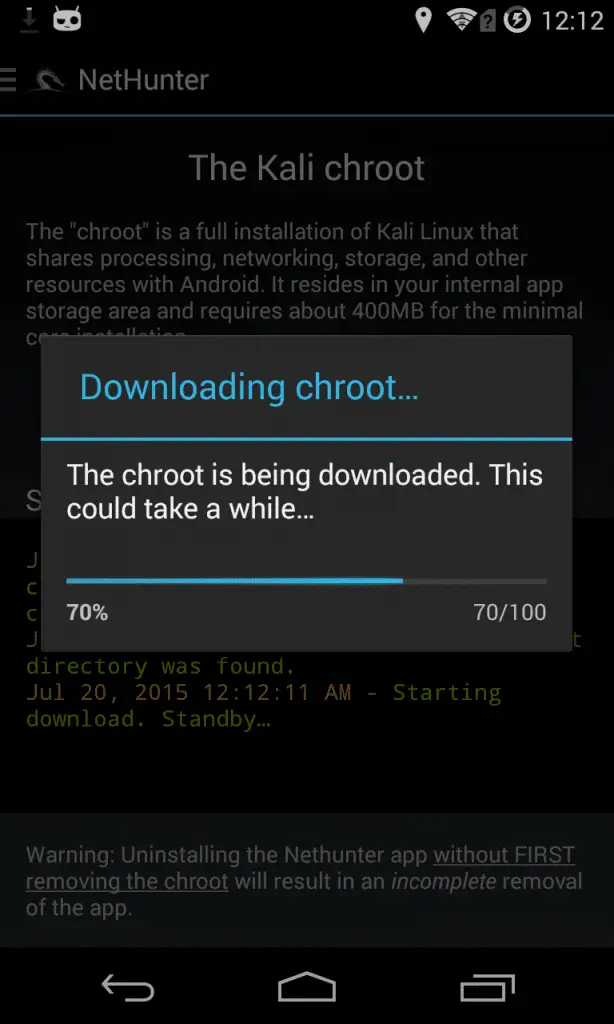
Step6:- Open Terminal Emulator/nh-terminal and select “Kali” as a result, this will open up kali terminal. You may be asked to allow root access. Just allow it and it’ll be nearly ready.
Note:- I have written a post for people looking for the best laptops for hacking to buy, do read it If you are interested.
Finally, run these commands one by one on your terminal –
- Firstly – apt-get update
- Followed by – apt-get upgrade
- apt-get dist-upgrade
- apt-get install kali-linux-nethunter

After running all these commands, you will be good to go. Mixing up is certainly not an option. To enjoy computer like exploits on phone, installing functions like metasploits, enabling VNC will help, rather discuss it in another article.

📗FAQ’s
Is Kali NetHunter legal?
Yes, Kali NetHunter is legal to use for ethical hacking purposes. However, it is essential to ensure that NetHunter is within the bounds of applicable laws and regulations. Using it for illegal activities or breaching someone else’s privacy without their consent can result in severe consequences.
Can I use Kali NetHunter on Android?
Yes, Kali NetHunter can be used on Android devices. It is designed to run on Android smartphones and tablets, supporting many popular devices. Users can download the NetHunter image from the official Kali Linux website and flash it onto their Android devices using the appropriate tools.
What is the difference between Kali Linux and Kali NetHunter?
Kali Linux is a popular Linux distribution used for penetration testing and ethical hacking. Kali NetHunter is a version of Kali Linux customized for mobile devices. NetHunter includes additional tools and features specifically designed for mobile penetration testing.
Can you hack with Kali NetHunter?
Kali NetHunter includes a wide range of hacking tools that can be used for penetration testing and security auditing. However, using these tools ethically and within the bounds of applicable laws and regulations is essential.
Using NetHunter for illegal activities or breaching someone else’s privacy without their consent is unethical and can result in severe consequences.
Why do hackers love Kali Linux?
Hackers love Kali Linux because it is a comprehensive and powerful penetration testing platform. It includes various hacking tools and can be used for various hacking tasks, from surveillance to exploitation. Additionally, Kali Linux is open-source and community-driven, making it a favorite among security professionals and hackers.
Do professionals use Kali Linux?
Many security professionals use Kali Linux for penetration testing and auditing. Kali Linux is a popular and powerful tool in the security industry and is widely used by professionals for various tasks, from network mapping to vulnerability assessment.
Can Kali Linux track you?
No, Kali Linux itself does not have any tracking capabilities. However, like any other operating system, Kali Linux can be used to track and monitor user activity. Configuring Kali Linux securely and taking appropriate measures to protect your privacy is essential.
Do hackers use Linux or Windows?
Hackers use both Linux and Windows, but Linux is generally more popular among them. Linux offers more flexibility, customization, and security features than Windows, making it an ideal platform for penetration testing and ethical hacking.
What tools are in Kali NetHunter?
Kali NetHunter includes many hacking tools, including wireless attacks, network mapping, and man-in-the-middle attacks. It also includes popular tools like Metasploit, Nmap, and Aircrack-ng.
Can I make calls from Kali NetHunter?
Yes, you can make calls from Kali NetHunter if your Android device supports cellular connectivity. However, it is essential to remember that Kali NetHunter is designed for penetration testing and ethical hacking and should not be used for illegal activities.
What is the best NetHunter device?
Kali Linux supports the best NetHunter device and meets your requirements. Many popular Android devices are supported by Kali NetHunter, including the Nexus 6P, Nexus 5X, Nexus6, OnePlus 2, and Samsung Galaxy Tab S4.
However, ensuring that the device you choose is compatible with Kali NetHunter and meets your needs is essential.
Does Kali NetHunter require root?
Yes, Kali NetHunter requires root access to run on Android devices. Root access is necessary to enable low-level access to the Android operating system and allow users to install custom ROMs and modify system files.
However, it is essential to remember that rooting your device can void your warranty and expose it to security risks if not done correctly.
Conclusion
In conclusion, Kali NetHunter is more than just a tool; it’s a game-changer in mobile penetration testing.
By harnessing its extensive features and capabilities, you can elevate your cybersecurity skills and fortify your digital defenses like never before.
With Kali NetHunter, you can confidently identify vulnerabilities, perform comprehensive security assessments, and stay one step ahead of malicious actors.
Whether you’re a seasoned cybersecurity professional, an aspiring ethical hacker, or an individual with a keen interest in mobile security, Kali NetHunter lets you easily explore the depths of mobile penetration testing.
Its user-friendly interface, extensive device support, and comprehensive toolset make it accessible and invaluable for anyone looking to safeguard their digital assets.
By embracing Kali NetHunter, you join a community of like-minded individuals committed to enhancing cybersecurity practices and protecting our digital world.
From testing the security of your own devices to performing ethical hacking assessments for organizations, this tool opens up a world of possibilities.
So, what are you waiting for? Dive into the realm of Kali NetHunter and unleash its transformative potential.
Arm yourself with the knowledge, skills, and tools to defend against evolving cyber threats. Together, we can create a safer and more secure digital landscape.
Begin your journey with Kali NetHunter today and embark on a path toward becoming a formidable force in mobile penetration testing.
Stay one step ahead, empower yourself, and make a lasting impact in the fight against cybercrime.
The future of mobile security starts with Kali NetHunter – are you ready to embrace it?


