


Whenever penetration testing tools are mentioned, all you can think off is Kali Linux. Yes, because the best is what one knows and easiest is what one loves. Kali is the king of digital forensics operating system in use right now.
Every exploit users dream is Kali and its penetration testing tools. Sometimes we either don’t have enough space or we don’t want our system to overcrowd, in that case, we find some other way to install it.
We, who like to experiment with operating systems, should know a secret. Why to install every operating system on your drive when you can work on it virtually. Confused? let me put it down for you. You can install an operating system on a software called VirtualBox.
Virtualbox is a software that lets you install software virtually on the space provided by you. You can install any operating system virtually on it and access it on a virtual window. That means one can use an operating system while running other. Thus making use of Kali while running your windows OS. Let’s see how to do this.
Top Kali Linux Tools For Ethical Hackers
Step-By-Step To Setup Kali Linux on VirtualBox
Step1:- Download VirtualBox and install
Download Virtual box from here. When it downloads, open the setup. It is pretty easy installing it as it has no classified access, just keep on clicking “Continue” till the setup ends. It’ll install in a while only.
Step 2:- Download Kali Linux
You will have to download the Kali Linux setup to mount it on the VirtualBox. You can download Kali Linux’s OS from here. Version should be chosen according to taste.
Step 3:- Create a new virtual drive in VirtualBox
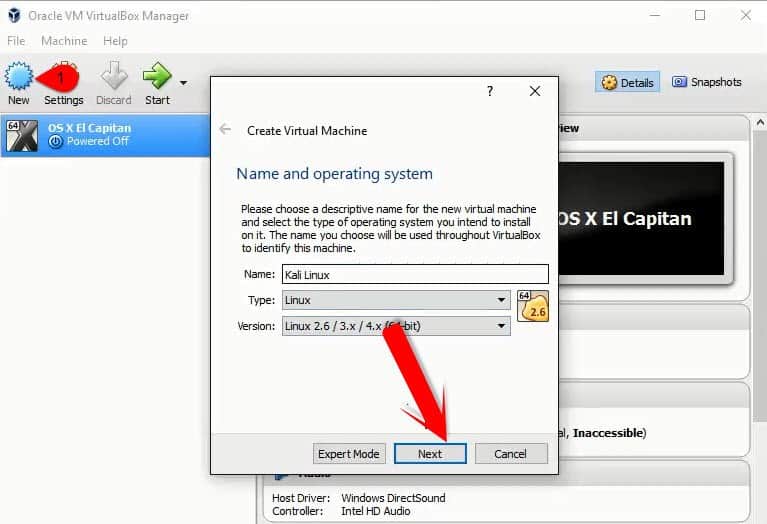
Open the VirtualBox application, the window shown above will pop up. Click on the new button present on the top leftmost corner. Another pop-up window with “Name”, “Type” and “Version” will be available. Add the needed information and click on next.
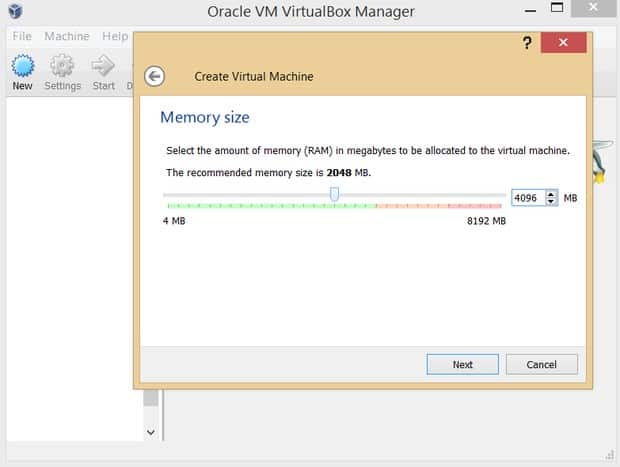
Step 4:- Define the space
Slide the slider to a minimum of 2GB, you can use more of the size but at least 2GB is recommended.
Step 5:- Creating Hard Disk
Circle the “Create a virtual hard drive now” option and click on Create button at the bottom of the popup window.
Step 6:- Choose the virtual hard drive file type
Choose VDI (VirtualBox Disk Image) and click on Next at the bottom of the pop up to proceed to the further steps.
Step 7:- Choose dynamic or fixed hard drive
By choosing a dynamic hard drive, the virtual operating system will dynamically consume memory of your hard disk according to your usage. While fixed hard drive will fix the amount of memory available to the virtual OS for a purpose. Choose this according to self-reference. Personally, I would prefer dynamic over fixed.
Step 8:- Creating file locating and size
In this step, choose the amount of space for the hard disk. If you’ve selected fixed size hard disk so at least 15 GB you should select the size of hard disk.
Step 9:- Virtual machine created
Finally, you have successfully created the virtual machine but still you need to do editing. It may have come to your notice that we didn’t add the setup of Kali Linux, and set video memory. Let’s do that.
Step 10:- Increase the video memory
Click on the “settings” option present at the function bar on top, you will see many options but navigate to Display and slide the slider to increase the video memory.
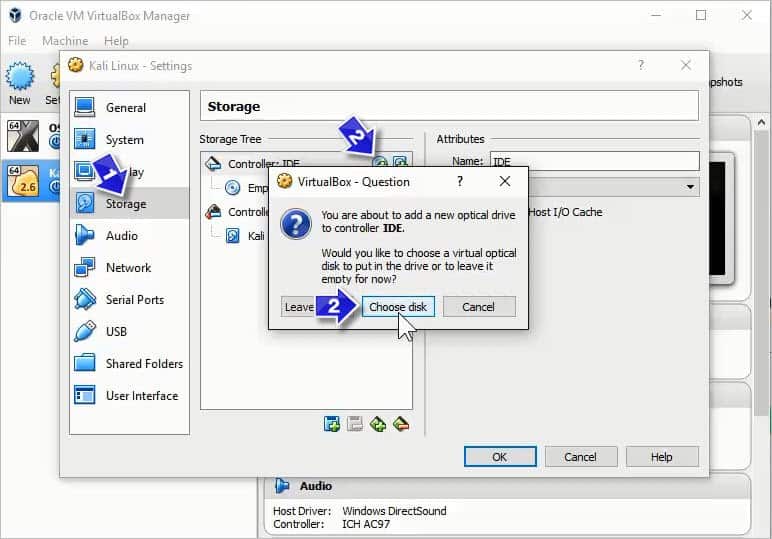
Step 11:- Adding Kali image
Navigate to the settings option, you’ll see a lost of options as General, System, Storage, etc, in the pop-up window. Click on Storage, you will see a “Disk” icon on the front of Controller: IDE, double-click on that. A new pop up will appear, as shown above. Click on “Choose disk” and navigate to you Kali’s ISO file, that was downloaded in the second step and you’re done.
Installing Kali On a Physical computer
In the above scenario we discussed about how to setup Kali on a virtual box. Now we are going to talk about how to install Kali on the virtual box like you do on a physical computer.
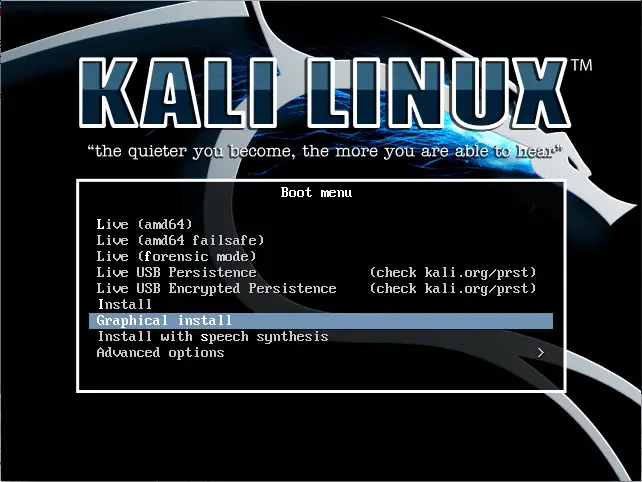
Step 1:- Starting the setup
We have previously planted Kali on the virtual box, now its time to run and use it. First of all, click on start, located at the head of the VB window. As it proceeds, you’ll see options popping up like in the boot menu –
- Live
- Install
- Install graphics
- Advanced options
- Install with speech synthesis
While here, only install and install graphics matter, as install will install the operating system in black and white. Install graphic will do it with a proper graphic interface. Its a users call but as the graphic install is more popular thus I’ll go with its installation process. Click on Install Graphic and proceed
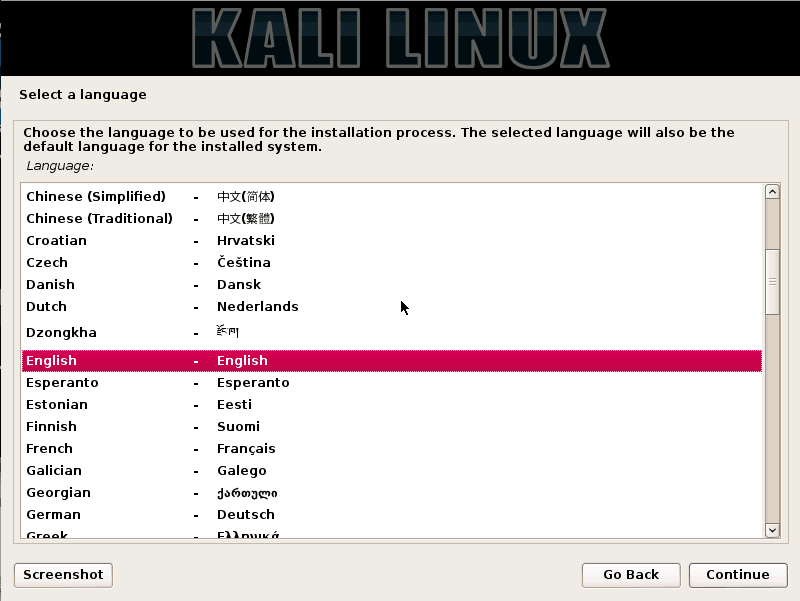
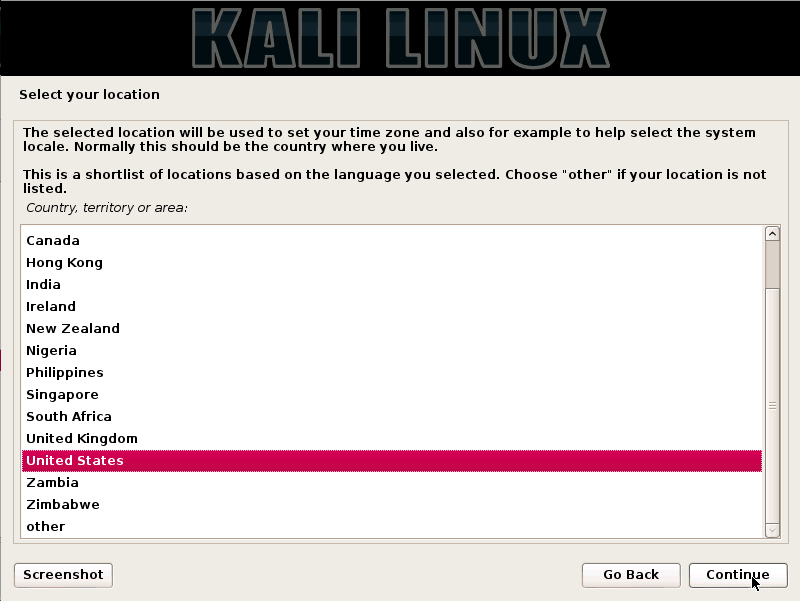
Step 2:- Choose a location and keyboard language
In this step, choose your default language for your system and keyboard. Enter your location too and then click on continue.
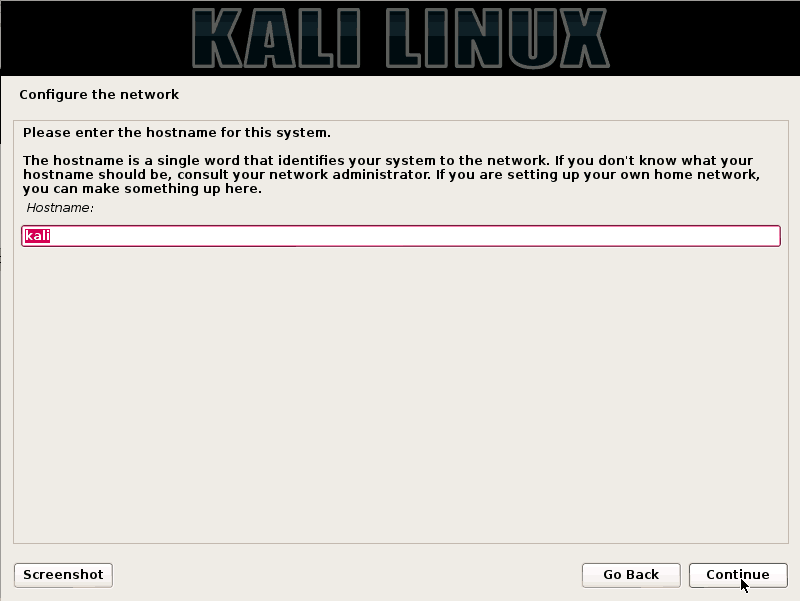
Step 3:- Choose a host name
A hostname is a single word that identifies your system to the network. If you have a workplace network, ask your authority for the Hostname. If you have a home network, set up your own. Proceed to the next step.
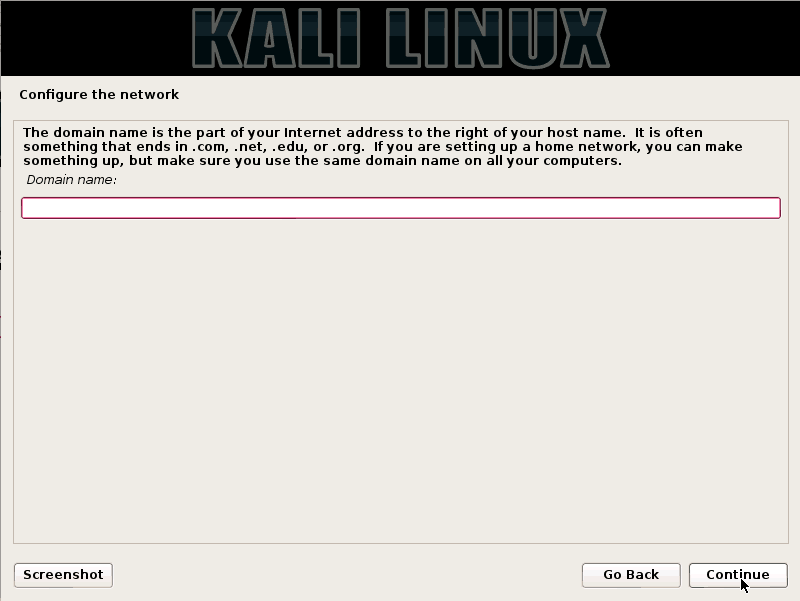
Step 4:- Choose a domain name
A domain name is the part of your Internet address to the right of your Hostname. If you have a domain name, add it otherwise just continue further.
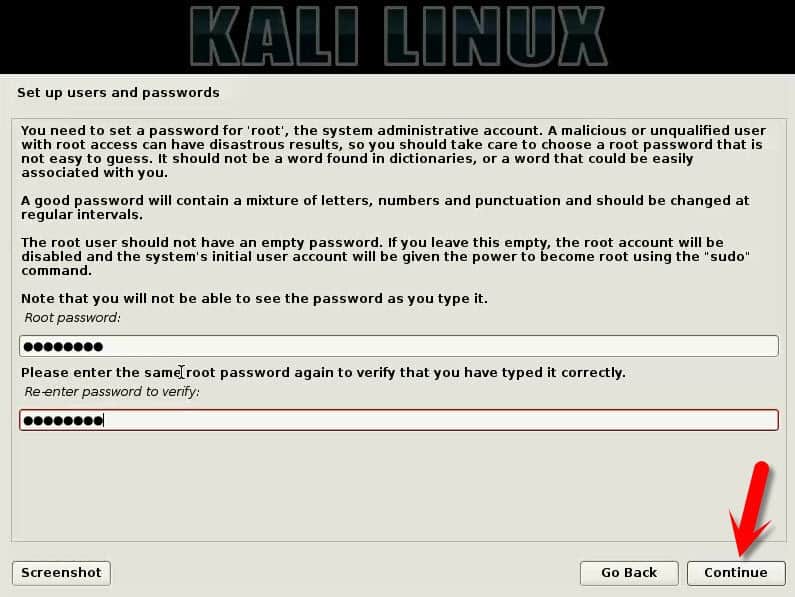
Step 5:- Set up a password for your “Root”
In this step, you need to show off your word complexity skills. Show your creative skills and set up a really complex one that takes days to Brute Force.
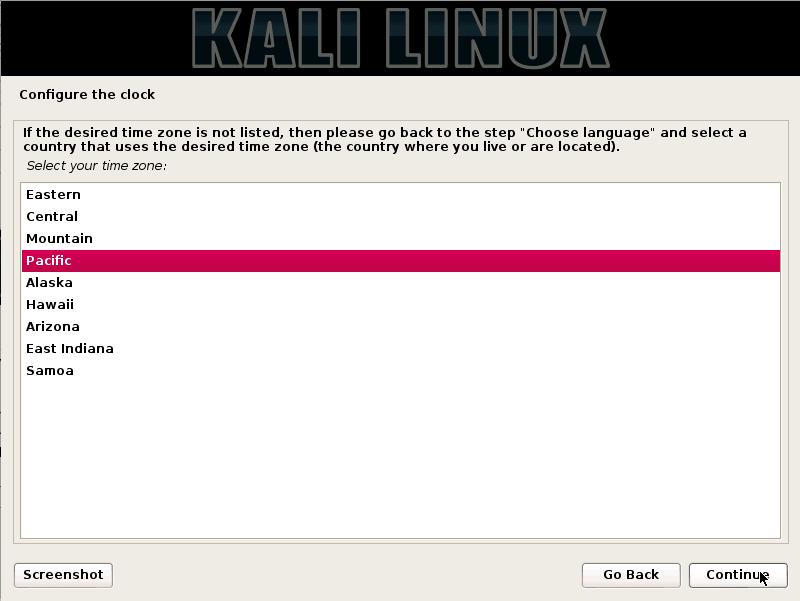
Step 6:- Select timezone
Furthermore, you need to select a proper timezone according to your location so that your network and general tasks work fine.
Step 7:- Creating Disk partition
Here, you have been provided numerous options for disk partition. Guided with LVM, with encrypted LVM or general guided. But I prefer the last one of all “Manual”. Choose one according to your taste but as Manual takes some more steps to brief upon, I’ll go with it.
In the next window after continuing, you see three other options.
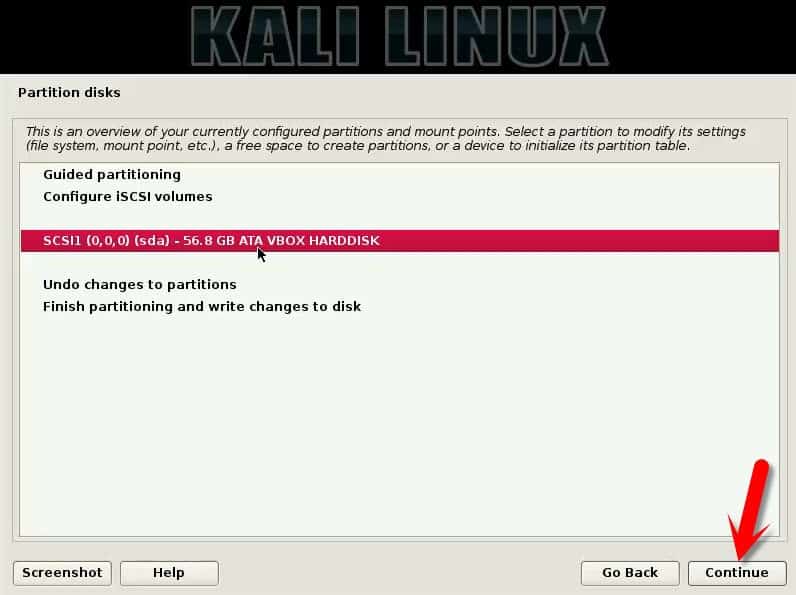
- Guided partition
- Configure iSCSI volumes
- SCSI1 (0,0,0)(sda) – 56.8GB Ata VBOX HARDDISK
Choose the third one here. And proceed.
In the next window you’ll see that you partitioned entire device. Which will clear the existing primary disk in Kali and make new one’s. You’ll see “Yes” and “NO” below “Create new participation table on this device. Choose yes and click on continue.
Next window will show you the overview of your just chosen options to recheck. Go through it and proceed
Step 8:- Create a new partition
This window will ask you about how you want to use this free space. Click on create new partition and continue. If you have lots of free space and no idea whatsoever about partitioning, maybe choose the automatically partition the free space option. Although personally I don’t recommend it.
Step 9:- Defining space
You can create single or multiple partitions in this step. You need to define the size to all of the disks while the maximum memory that can be used is displayed at the top. I suggest to make one partition greater than others for primary type.
Step 10:- Choose the type of partition
You just need to specify whether your new partition is a Primary or Logical(Secondary).
Step 11:- Choose spacing
In this step, you are asked if you want your partition to be created at the beginning or the end. Click on the “Beginning” and proceed to next step.
Step 12:- Final editing review
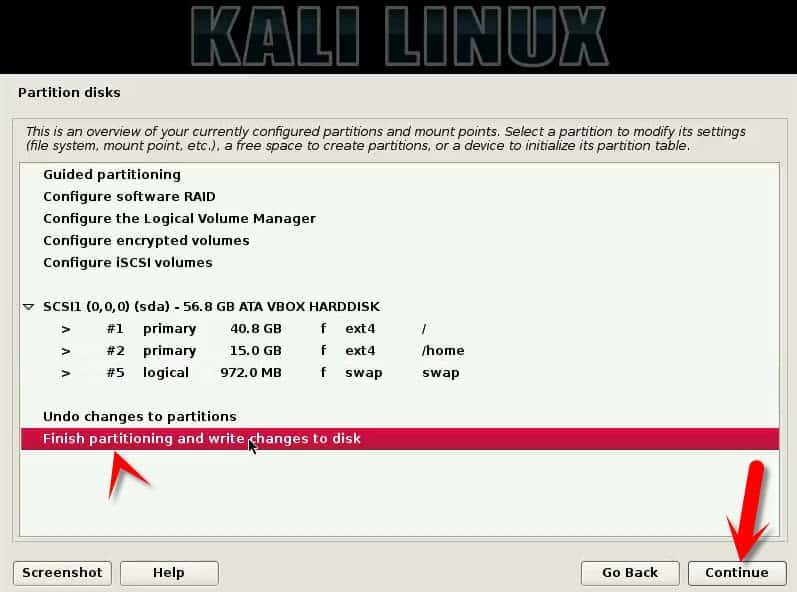
Here, you are given last overview of your partition. Either you can delete it, or you can solidify the deed. Choose “Done setting up the partition”. Similarly, create other partitions like you want to. One you create all the partitions. Choose “Finish partitioning and write changes to the disk” and hit Continue.
Step 13:- Confirmation
This step is the last confirmation and review for creation of your disk partitions. Review the statistics and tick on “YES” to proceed. Viola!! Your disk partitioning is successful. Following this, your system will take minutes or even around half an hour installing the changes. The speed depends upon your computer.
Step 14:- Mirror Network
Here, you are asked if you want to use a network mirror or not. A network mirror is something that can be used to supplement the software that is included on the CD-ROM. You can just choose “No” and jump to the next step.
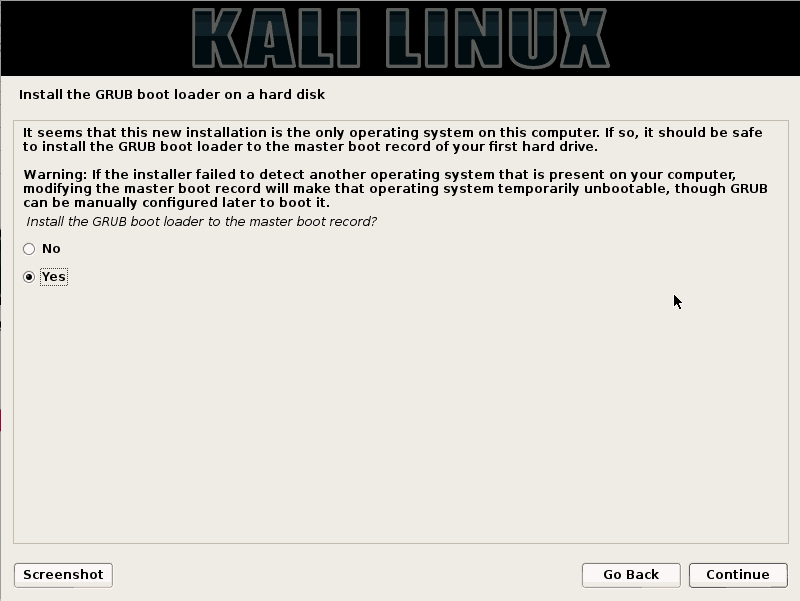
Step 15:- Install GRUP bootloader
As you are installing it in the VirtualBox, you have no fear of the Warning whatsoever. Just click on “YES” as you need a bootloader and proceed further.
Step 16:- Choose disk to install GRUB
When you clicked on “YES”, a new window popped up asking for the destination to install. Here, choose the second option and click on Continue.
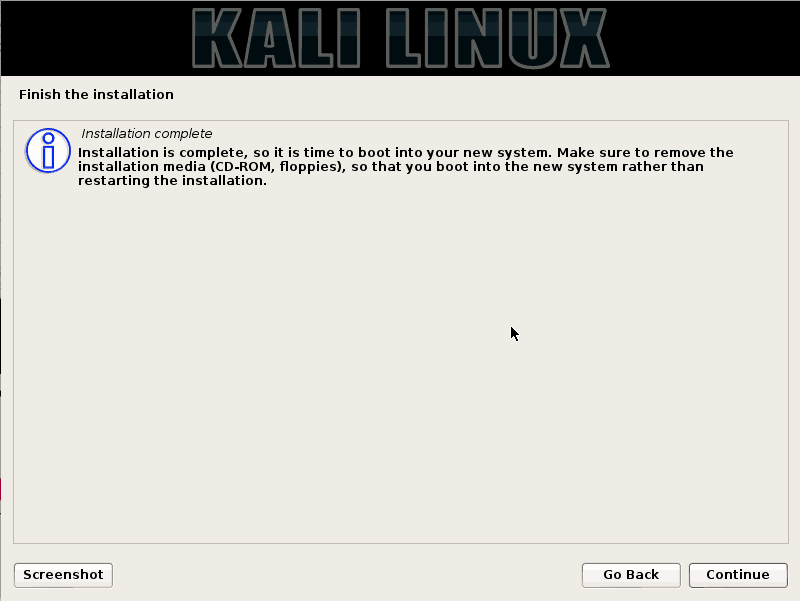
Step 17:- Ready to roll
After this step, your system starts restarting. It’ll take time to prepare and then, the interface will be finally on your screen. Username is “Root” which is default allocation by the system and the password is what you entered in “Step 5”. Enter the password and enjoy the invincible Kali Linux.

You may like to read some related posts


