






















A scrolling screenshot comes in pretty handy in many cases. First of all, it is more convenient to take one screenshot than multiple ones.
Also, a scrolling screenshot can be useful to share a web page with someone or an app page. But not many users are aware of how to take mac scrolling screenshots.
Although, taking a screenshot on Mac is not a big deal. As there are already tools and keyboard shortcuts available. But when taking a scrolling screenshot, things can be tough.
So If you are unaware of how to take a scrolling screenshot on Mac, I am here to help you. Here, you will find a step-by-step guide on taking scrolling screenshots on Mac. Plus, I will mention a bunch of tools for the same.
Here is all you need to know:
What is a Mac Scrolling Screenshot, and How is it Useful?
As you can see in the name only, a scrolling screenshot is a screenshot that gets captured as you move down your cursor. Whatever area comes in the capture area gets saved as a whole screenshot.
There are many ways to use a scrolling screenshot, which are pretty convenient. If you are showing an app error to someone, you can take a single screenshot instead of multiple screenshots.
You can also use a scrolling screenshot to share an entire webpage with someone. Although, you may think that I can send a link to the webpage instead. But if you wish to point out something, then a screenshot helps.
Quick Way To Capture Mac Scrolling Screenshot
When taking a scrolling screenshot, you may think you must install third-party software. And yes, it is true, but if you don’t want to install any software at all, then there is a quick method that you can try out.
Mac offers you a shortcut to capture scrolling screenshots and to get started with this; you have to follow the below steps:
Step 1:- First, open the view or the Window you need to take a Screenshot of.
Step 2:- Hold down the command+shift+5 keys simultaneously to launch the screen record function.
Step 3:- Once launched, you can look at it and make the edits on the menu bar. From there, Tap on the “Record Entire Screen” option.
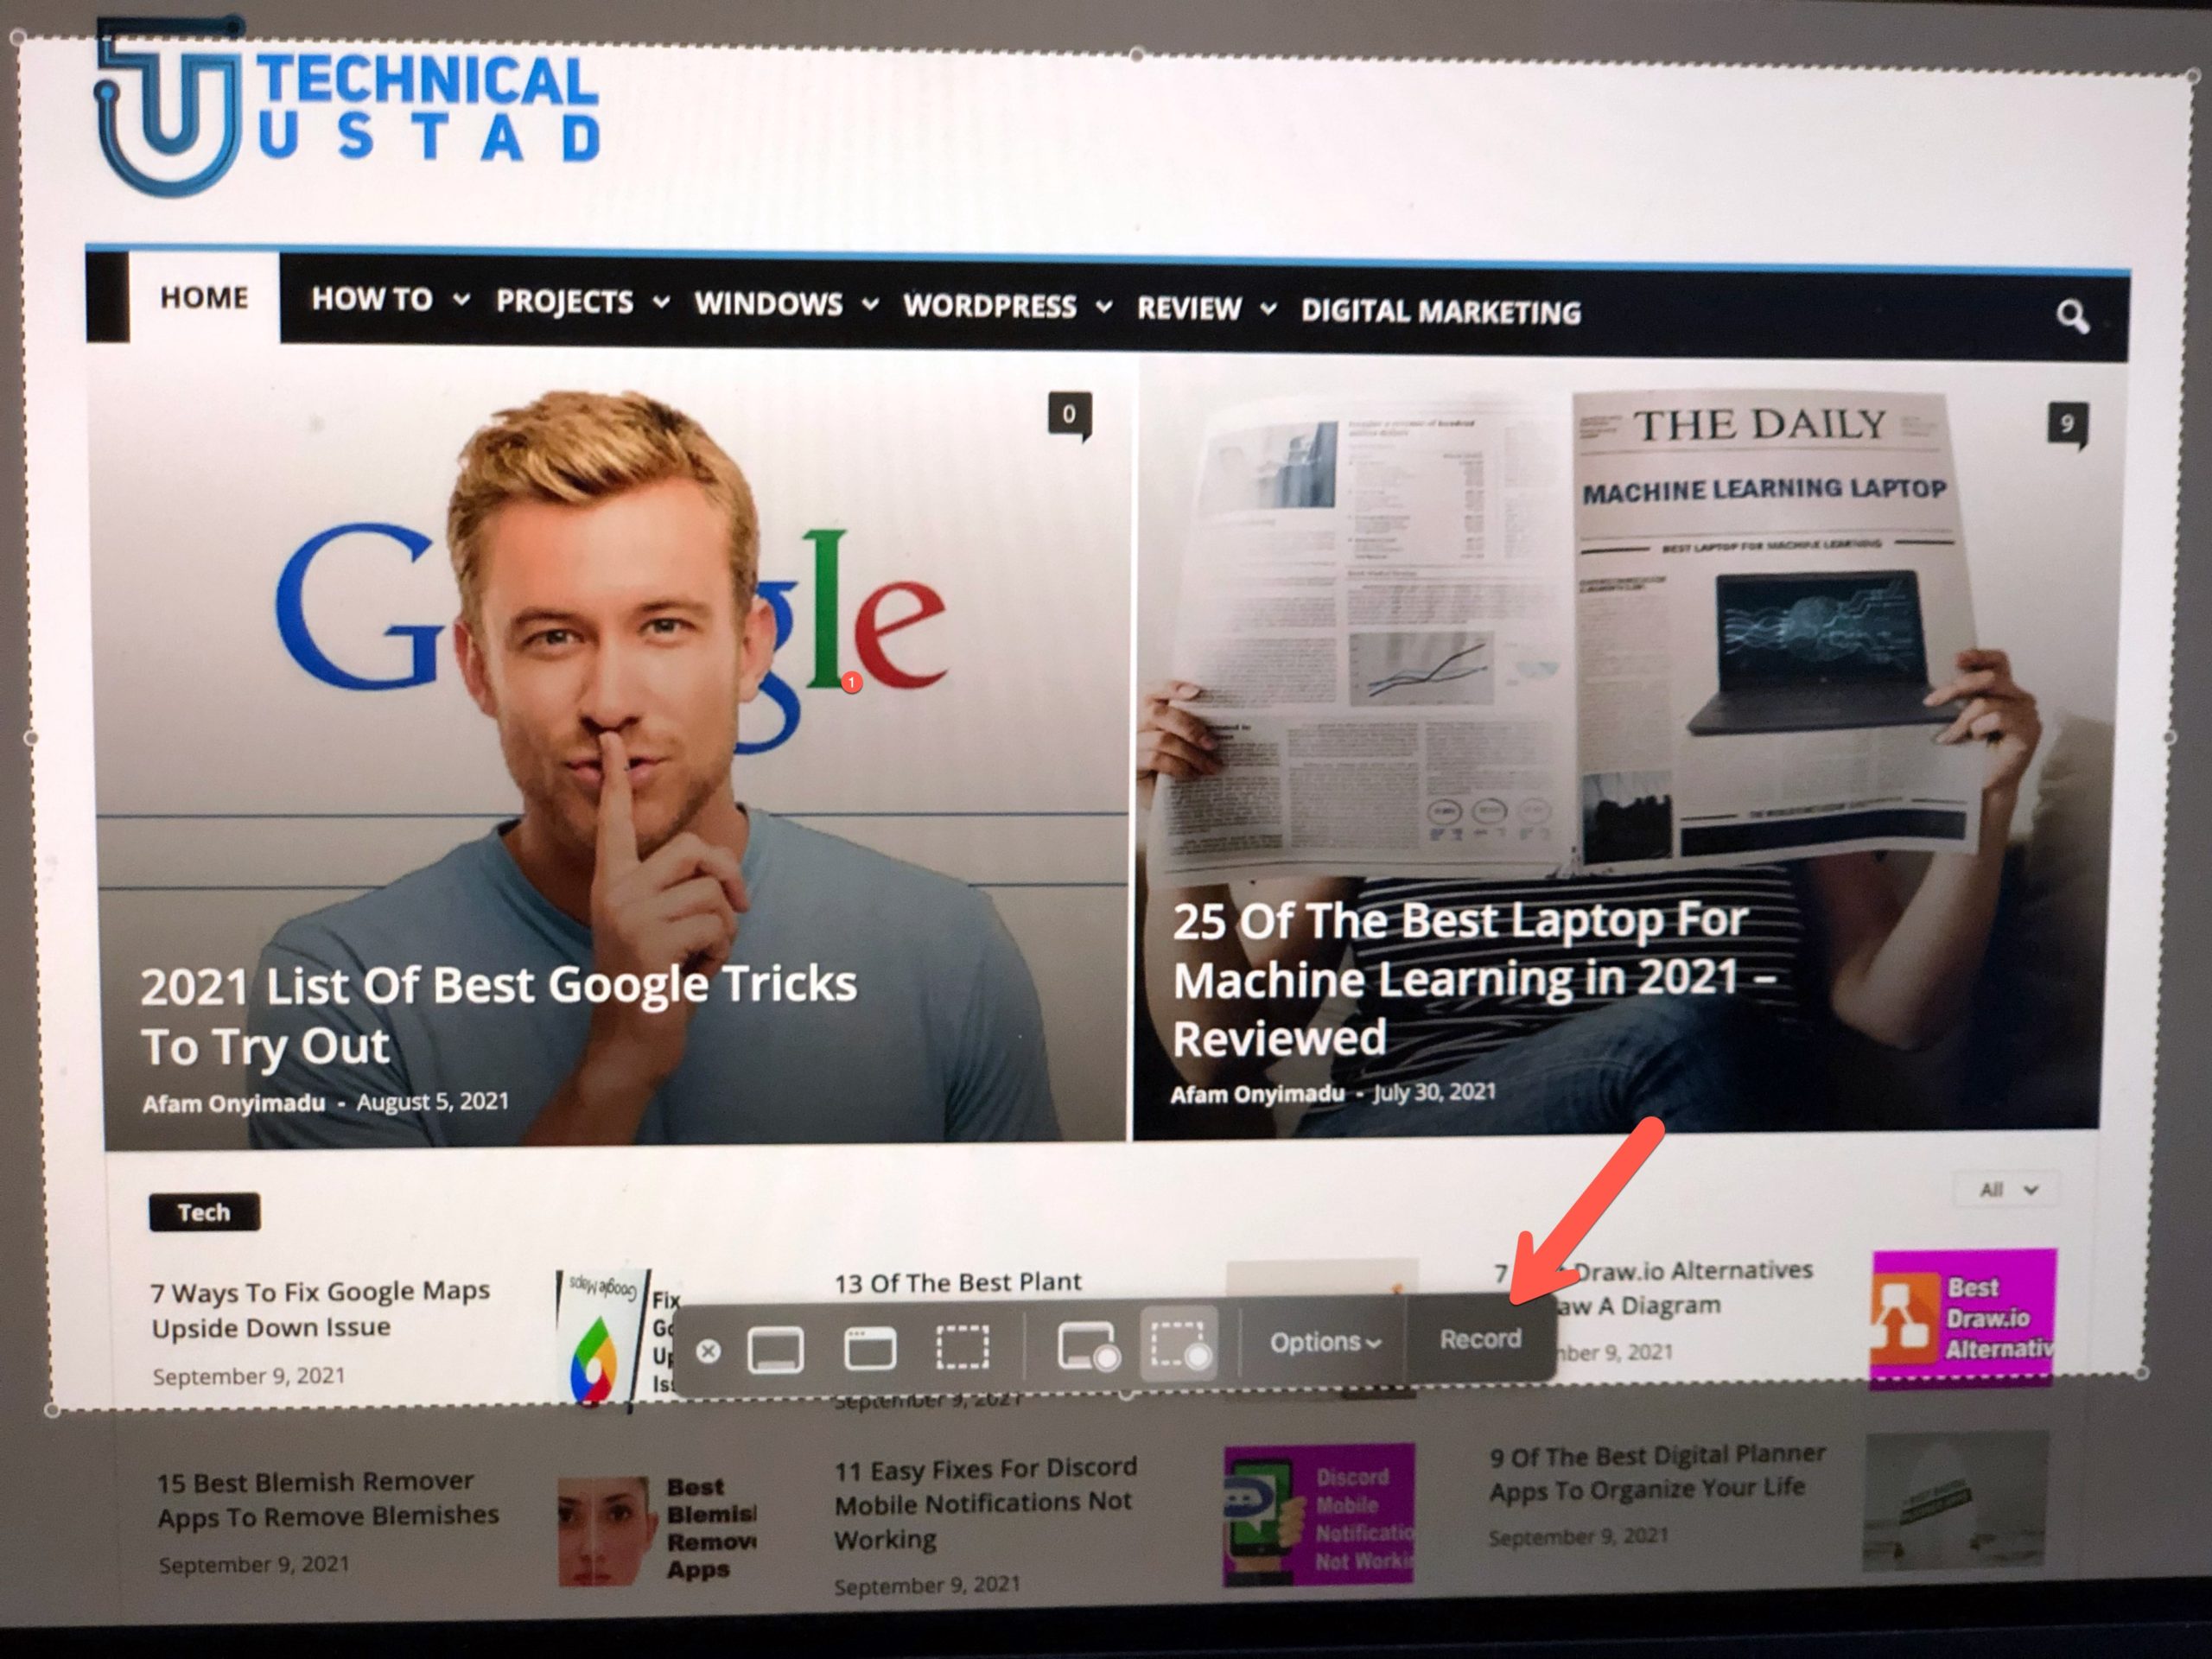
Step 4:- Next, your cursor will turn into a camera icon, and you have to click the camera icon anywhere on the screen.
Now, Keep scrolling on the page you for taking a screenshot of the entire thing.
Step 5:- Finally, simultaneously hold down the Command +Shift+5 keys.
This will open up a Window popup from which you must select the Stop Screen Recording button. That’s it. A scrolling screenshot is now saved on your Mac, and now you can edit the screenshot or share it with others.
How To Take a scrolling screenshot on a mac Using QuickTime Player?
If you followed the above steps, you might have found their steps confusing or inconvenient.
So in case, if you are looking for easier ways to take a scrolling screenshot on Mac, then you have to use an app or software program.
Most of the scrolling capture software for Mac is free to download, and they are pretty convenient to use.
Among such apps, one is the QuickTime Player. So go ahead and download and install the app from App Store.
Once you have installed the app, you can follow the below steps to take a Mac scrolling screenshot:
First, launch QuickTime Player from Mac’s dock or Application folder.
Go to the File Menu. From here, select New Screen Recording.
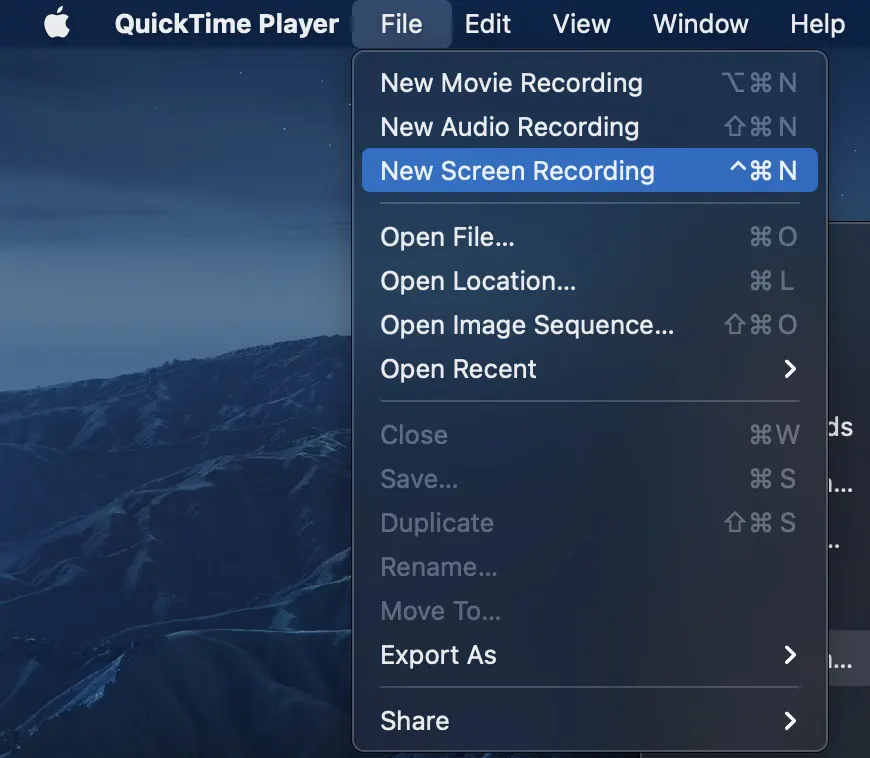
Next, you will find a toolbar at the bottom of your screen. From here, click on the Recording entire screen button.
Next, scroll through the entire page or document you wish to capture.
Go to the File Menu. Then select New Screen Recording from the dropdown menu.
Finally, click on Stop Screen Recording from the toolbar to capture a scrolling screenshot, and it will get saved on your Mac.
How To Take Mac Scrolling Screenshots Using Browser Extensions?
If you wish to screenshot a webpage, a browser extension can help. Mac scrolling screenshot chrome extensions make it extremely for us to take screenshots. Also, most of the tools are free to use. But they do come with limited functionalities.
Anyway, to get started with the browsers extension, you can follow the below steps:
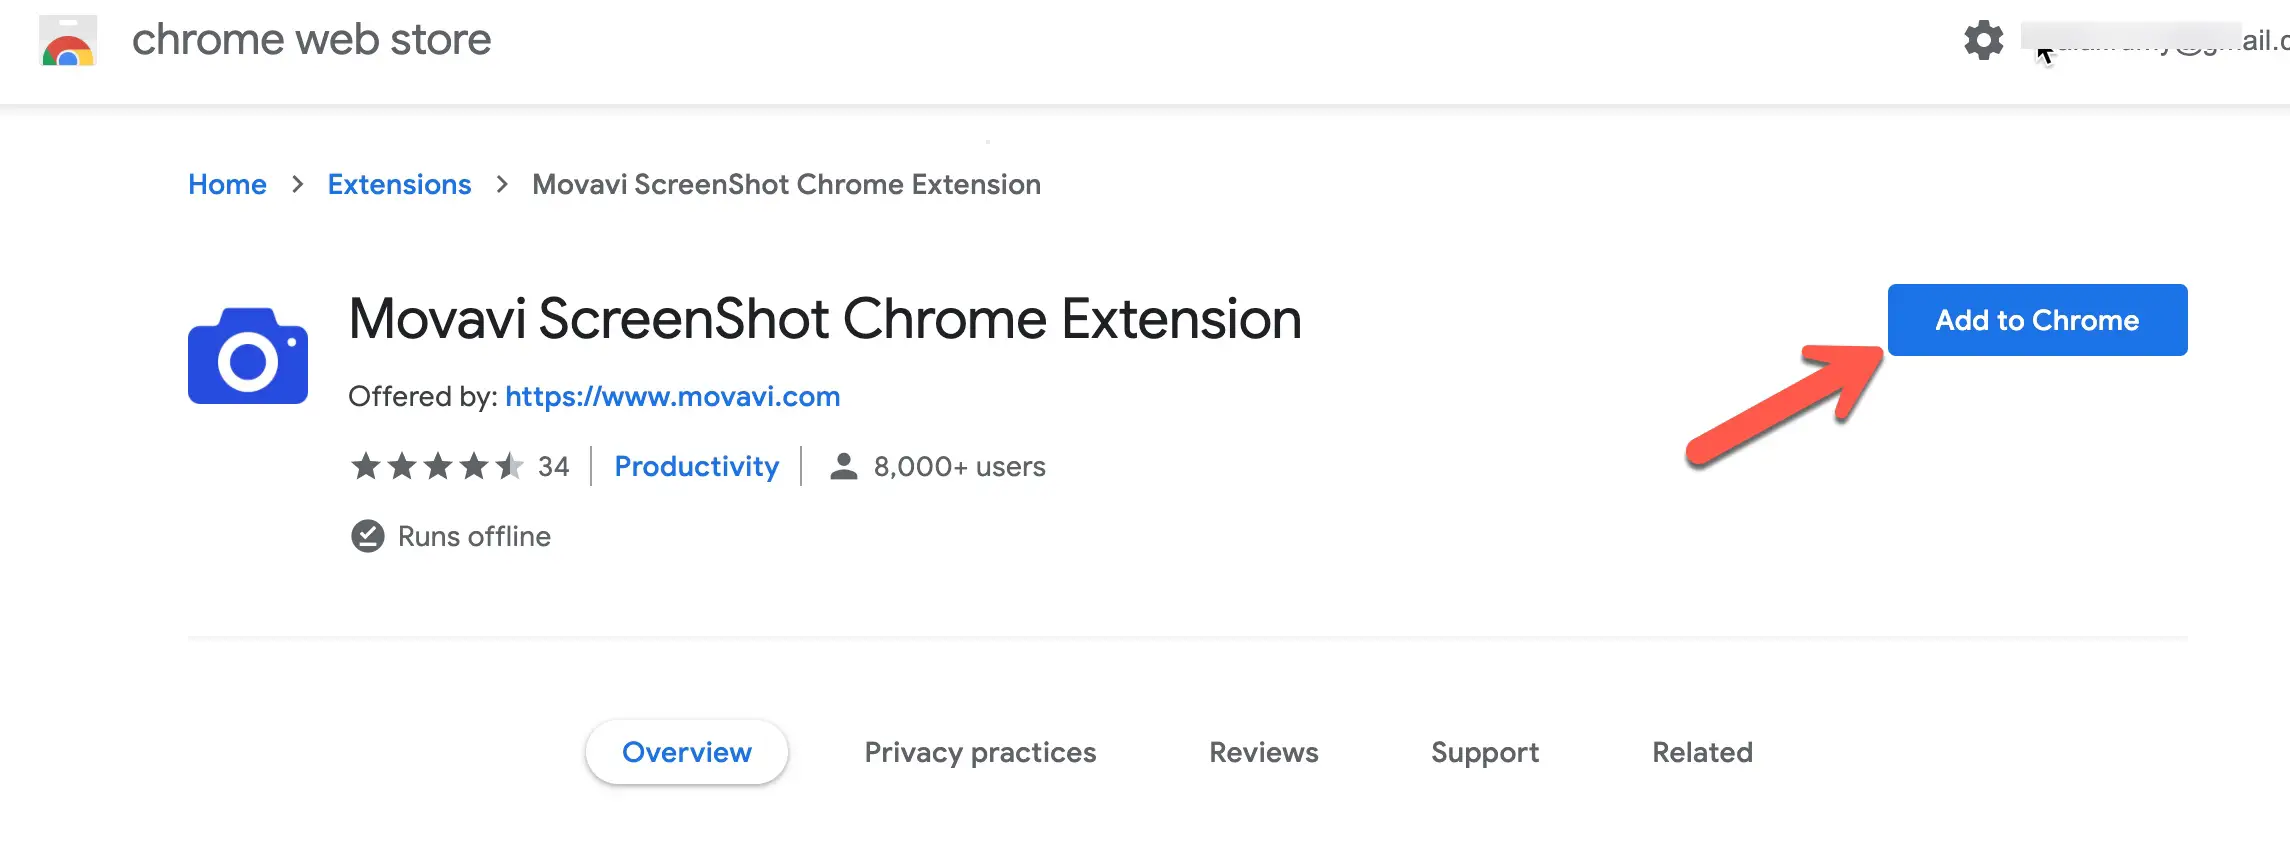
First, launch Google Chrome and go to Web Store.
Over here, search for the “Movavi Screenshot Chrome Extension” and click on the Add to Chrome button to add the extension to your browser.
Then click on the extension’s icon from the top right corner and pin the Movavi screenshot tool.
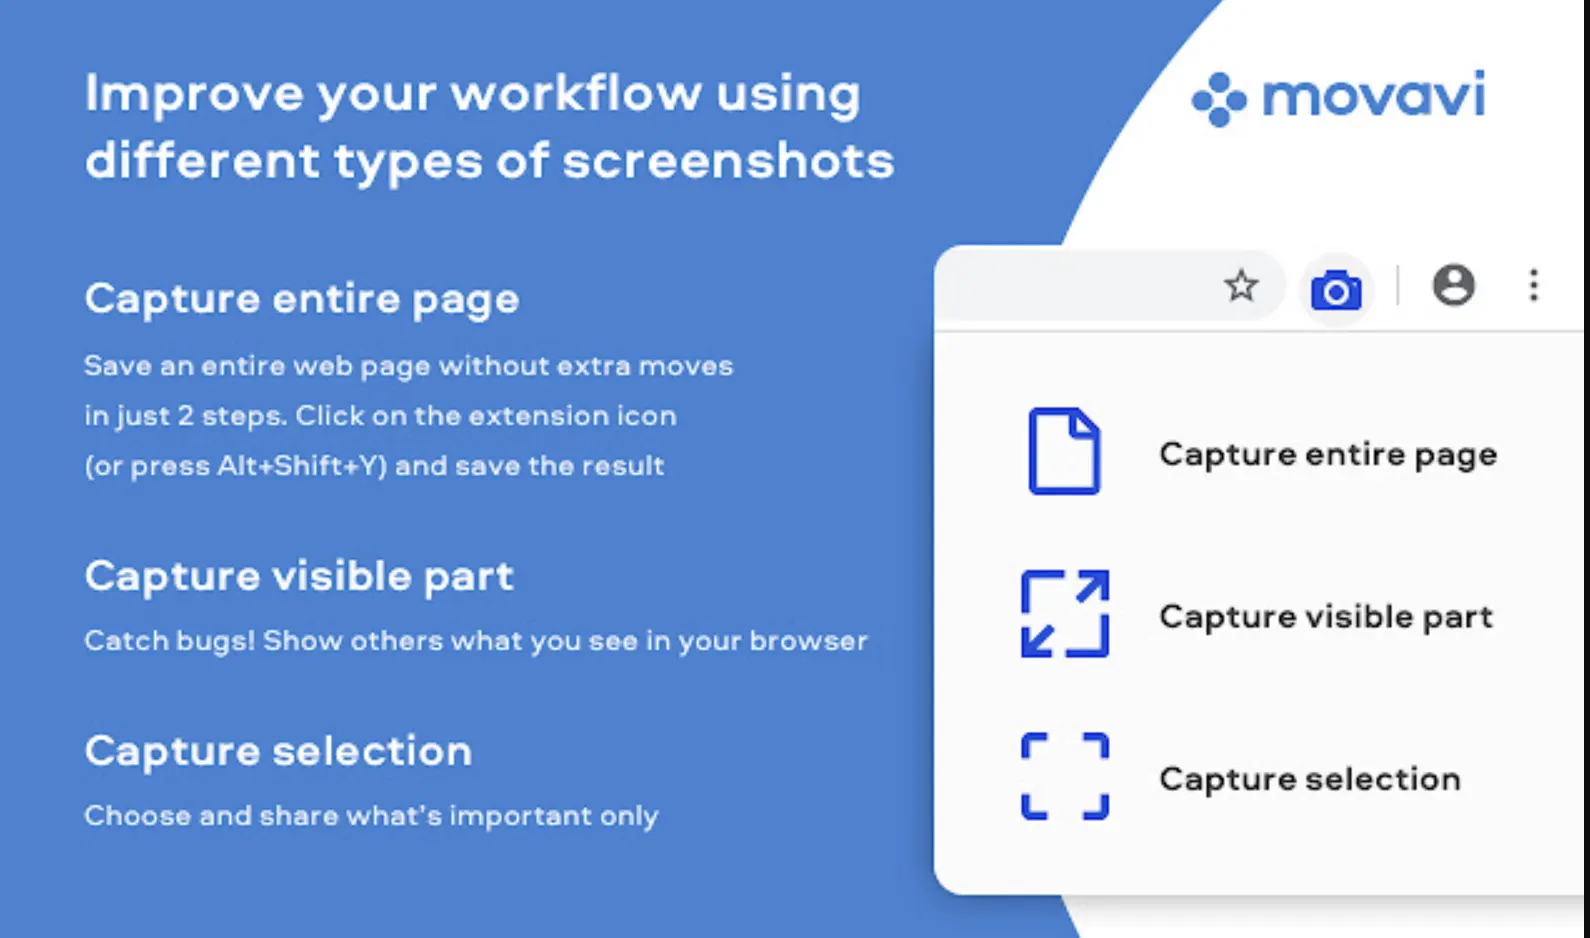
Then click on Movavi and select an action you wish to perform, such as capturing the entire page, visible page, or capture location.
Once done, you must select the area you wish to capture. After selection, you will get redirected to a new tab. From there, save the image, and you are good to go.
Best Apps To Take a Scrolling Screenshot on Mac
Both methods are convenient for scrolling screenshot mac free on Mac. But sometimes, you may need extra features, like screenshot editing tools, easy-to-share options, etc.
Sometimes you don’t need dedicated software for Mac to take scrolling screenshots. Instead, a browser-based tool would be sufficient.
I have handpicked some of the best apps to take Mac scrolling screenshots. And you can check out these names below:
1. Movavi Screenshot Chrome Extension
First of all, I have the Movavi Screenshot chrome extension. This is one of the best tools for capturing full webpage screenshots.
Plus, it offers additional editing tools and saves them to your preferred formats, such as PDF/JPEG/GIF/PNG.
Also, you can perform additional tasks like uploading, printing, and sending to OneNote, clipboard, or email right after capturing the screenshot.
It allows you to grab full and partial screen captures on Chrome. Also, getting started with the tool is extremely easy. Plus, it takes high-quality screenshots.
The extension works with Chrome, but you can use it with Mozilla Firefox. Also, it is capable of printing screenshots in multiple sizes.
Such as full-page screenshots, specific parts of the screen, or full-screen capture, including all open tabs. Also, you can use the extension in incognito mode.
Using the tool is very easy. All you need to do is click on the Screenshot icon at the right corner of your browser. Then click and choose the size of the area you want to capture. Then scroll down the page from top to bottom, and it will capture a screenshot automatically.
2. Awesome Screenshot & Screen Recorder
Next, there is the Awesome Screenshot & Screen Recorder. This one is also one of the best scrolling screenshot-capturing tools.
The best part is that you can also use the tool for recording your screen, which comes with an annotation tool.
Moreover, the extension also allows you to save recordings of the screen as well as screenshots to awesomescreenshot.com. Moreover, you can share your videos and images instantly by sharing links that will be unique for everyone.
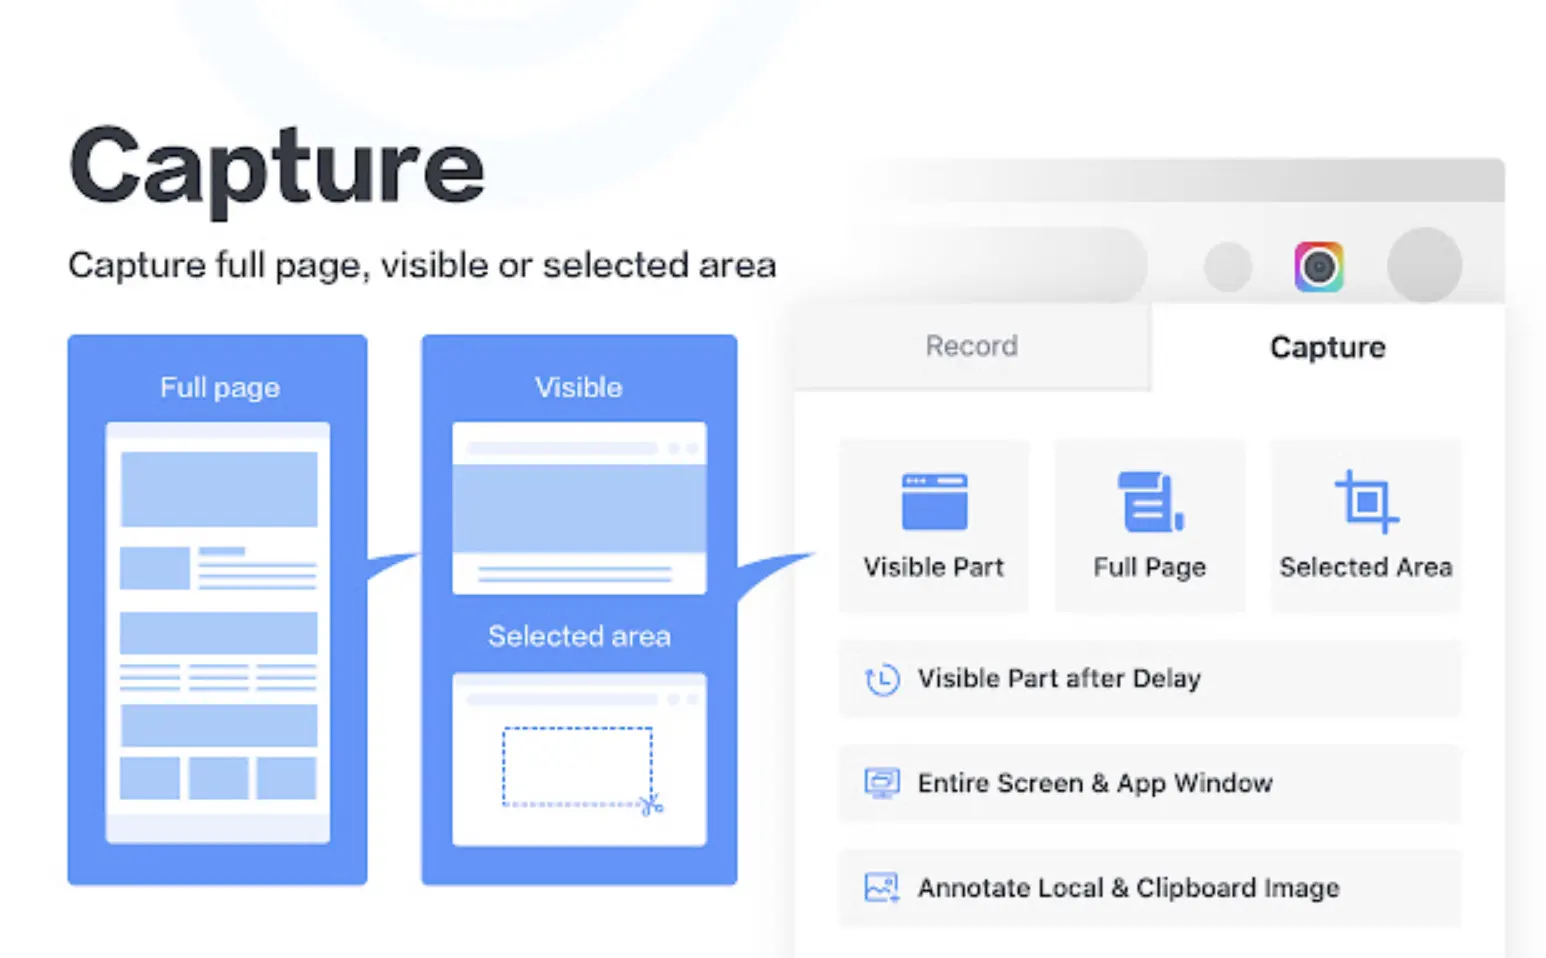
Also, it comes with a two-tab popup menu. This is pretty convenient for switching between screen recording and capturing instantly.
Talking about the recording features, with this tool, you can record your desktop, content tab, or camera only. You even have the option to include your voice in the recording with a microphone option.
Plus, if you wish to add your face to your video, you can embed your video. So if you are interested in recording tutorial videos, this would be helpful. Also, you can choose video dimensions from 720p, 1080p, or 4K.
3. GoFullPage
There is also the GoFullPage. This one is also one of the best browser extensions for capturing scrolling screenshots.
With this tool’s help, you can reliably capture a screenshot of the entire page. Getting started with this extension is very simple, click on the extension icon or press Alt+Shift+P.
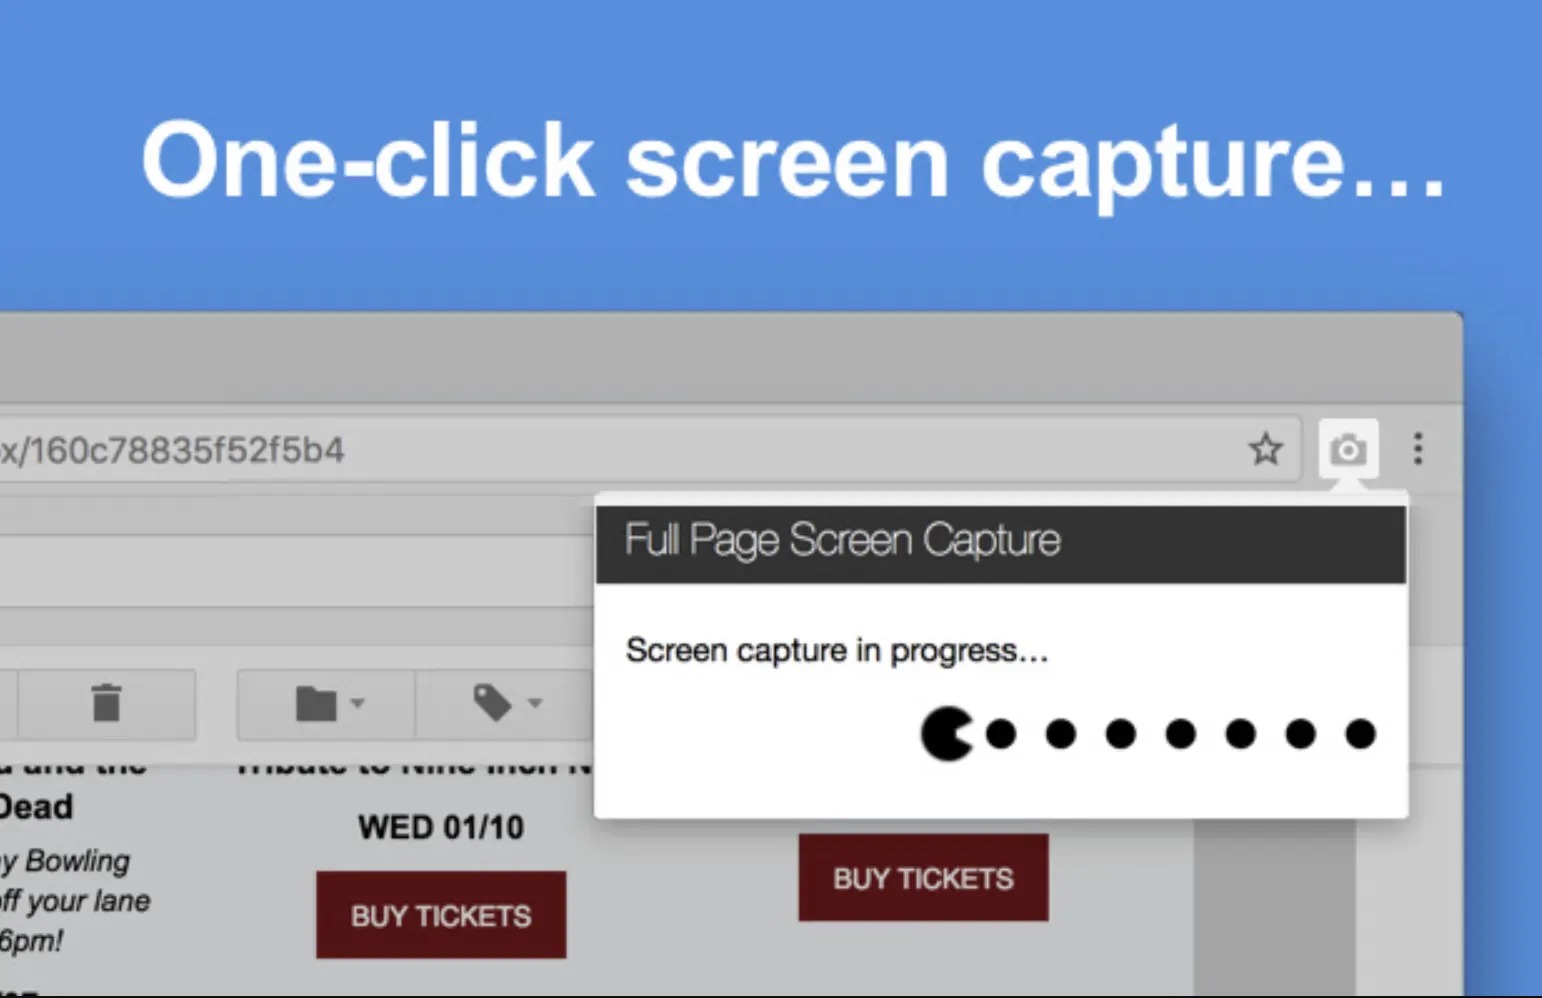
Then you have to capture each part of the page, which will be transported to a new tab of your screenshot. You can download the screenshot as an image or PDF or drag it to your desktop.
4. Full Page Screen Capture
Next, there is the Full page Screen Capture (Get Here). Unlike the other names, this one is a bit different. This one allows you to capture the website view below and fold it. Plus, it gives you a sharable link to manage the screenshots taken pretty neatly.
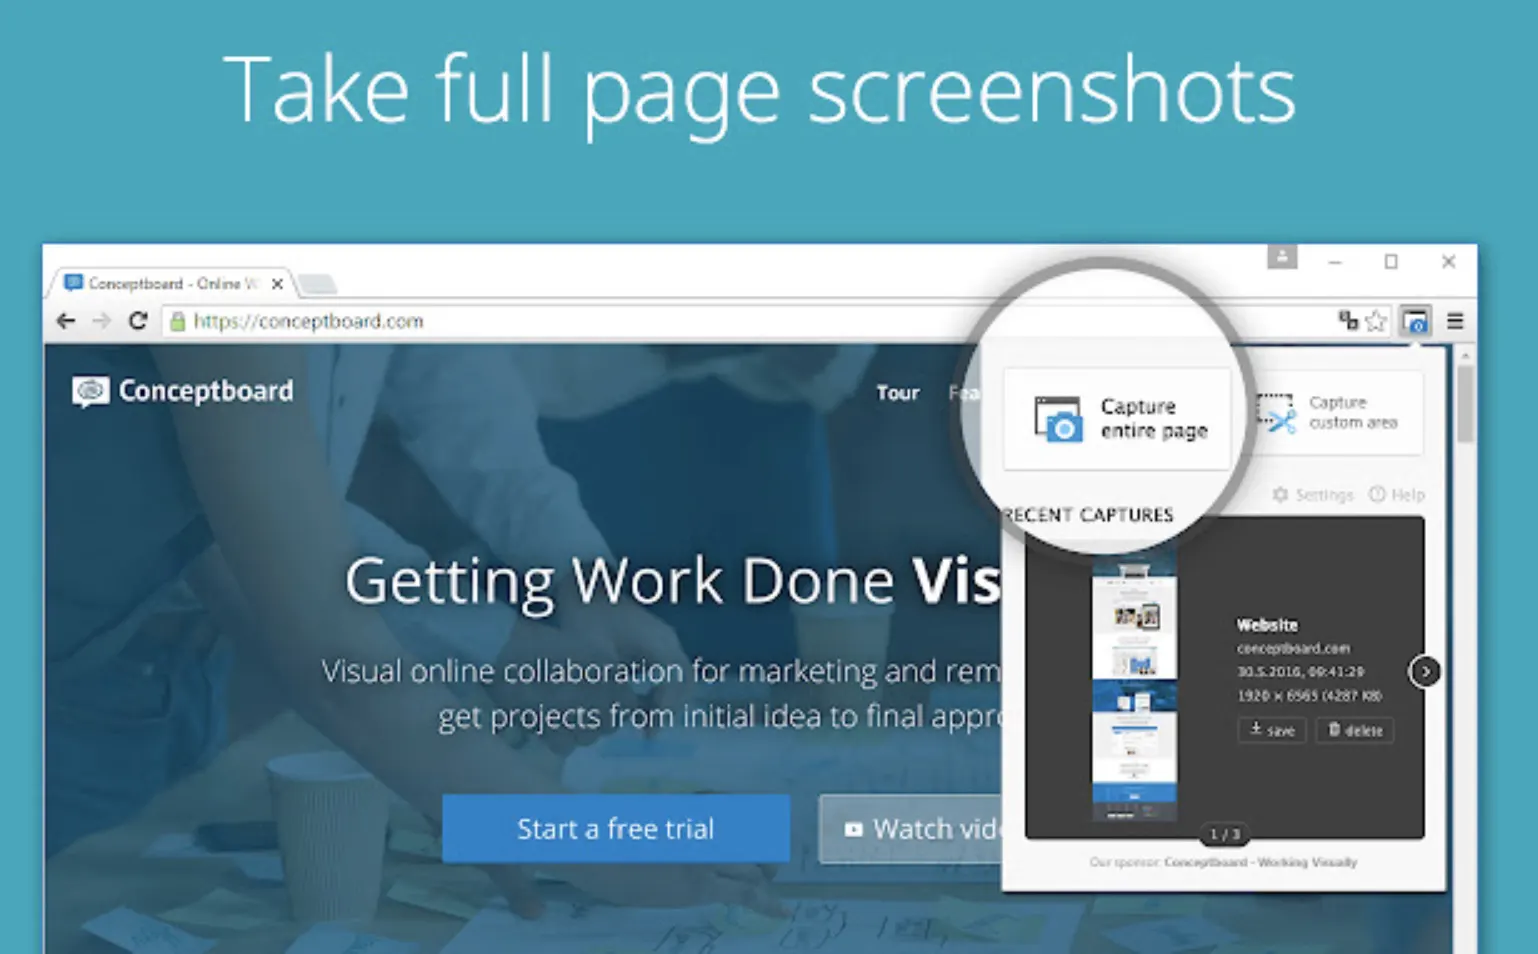
Getting started with this tool is straightforward. All you have to do is go to its website and copy and paste the webpage URL that you want to capture.
Then click the capture now button, and the website will start fetching the webpage. Then you will have all the options to save the screenshot or share it with others.
5. Screenshot.guru
Screenshot. Guru is another webpage-capturing tool that requires no installation or signups.
The tool has been designed for capturing screenshots of tweets. But the tool is not limited to that; you can also use it to capture scrolling screenshots.

However, the only disadvantage of the website is that it cannot capture a screenshot of those websites requiring a login or even sites like Google Maps solely based on Ajax.
But it provides a simpler way to take scrolling screenshots, and getting started with the tool is pretty easy.
All you have to do is go to the screenshot.guru website and copy and paste the webpage link you wish to capture and click on the screen capture button.
After that, the website will fetch the URL you have pasted and take a screenshot of the full page. Then right-click on the image and save it. However, it doesn’t provide additional tools for editing the screenshot.
6. Web-capture.net
Web-caputre.net is another easy-to-use web-based tool for saving web pages. The tool lets you capture a full web page screenshot in simple steps.
The best part is that it can convert screenshots into different file formats. Such as JPG, PDF, or a bunch of other formats. You can also download the picture in the form of a Zip File.
Being a web-based tool, you do not need to download or install it in your system. Instead, you must copy and paste the website link on the Web-capture.net website.
Then the site will check your link and convert it to create a high-quality file. Moreover, you can also use the tool to convert HTML files to SVG and take a screenshot of an entire web page in one go.
7. Capto
Websites are not the only thing you might want to capture; this is where Capto can be a great help.
This is one of the most powerful screens and video recording and editing tools. With the app’s help, you can easily create informative and compelling captures.
Capto can be used for recording a video of your screenshot or taking a screenshot and sharing it with just a click.
It also comes with a wide range of image and video editing tools and offers easy to navigate folder-based organizer for your screen captures.
Furthermore, you can also share screenshots or your recordings on popular platforms like YouTube, Dropbox, FTP/SFTP servers, and so on.
Moreover, the tool can also take full-screen screenshots, scrolling screenshots, or capture a selected area.
Apart from screenshot tools, it can also be used to record your screen and audio and edit the videos before saving them. So this tool would come in handy if you want to create tutorial videos.
However, this tool is not free, unlike the other names on this page. Instead, it comes with a price tag; you can download it from App Store.
8. Print and Save the File
You can also use the print and save the file option to capture an entire webpage. As you probably already know, browsers allow you to print web pages. However, we must save it as a PDF file instead of printing it.
This method is pretty quick compared to browser extensions or other recording tools. To get started with this, you will need to follow the below steps:
First, launch a web browser and visit the page you want to save as a PDF. Then go to the print option from the settings. Or you can press the Command + P shortcut.
Then click the save button to download the webpage as a PDF file, and you can share it with others.
9. Firefox Screenshots
Not many users know, but Mozilla Firefox offers you a built-in screenshot tool. So if you prefer using Mozilla Firefox (Visit Here), you can use this screenshotting tool.
The best part about this built-in tool is that it offers high-resolution images. Along with that, you can also create a shareable link.
To start using the tool, you will need to follow the below steps:
- At first, Tao was on the “Take a Screenshot” option.
- Now, choose the “Save full-page” option.
- Once the screenshot is captured, please save it to the desktop or copy a shareable link.
10. Parallels Toolbox
For my next pick, I have the Parallels Toolbox. This one is a tool you can easily download on the Mac that gives you all the necessary features. Although, the software is not free. But with this one, you are getting tons of features.
The tool has been designed for creative individuals, students, business owners, or people from other professions.
You can use this single app as a screen capturing tool, window capturing tool, barcode reader, blocking the camera, muting the microphone, make GIFs, downloading audio and video, close apps, convert videos, clipboard history, etc.
However, if I talk about the cons of the app, it only works with the Safari browser for capturing online screenshots.
11. Developer Tools
Using Google Chrome, you can use developer tools to take screenshots. Of course, this option doesn’t offer you many options to take a screenshot.
Also, the method is not so convenient as it requires finding the required settings. But if you are familiar with HTML codes, you may want to give this method a try. So go ahead and follow the below steps:
- First, open Developer Tools by tapping the screen’s three dots icon in the top right corner.
- Now, open the search area and type a screenshot.
- Next, choose the size of the screenshot and then click the preferred size with your mouse.
- Finally, click the screenshot and save it on your system.
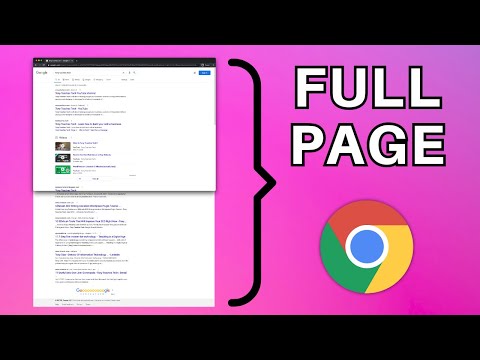
12. Mojave Hotkeys
If you are running macOS 10.14, it offers a keyboard combination that allows you to take a scrolling screenshot on Mac. For this, you have to press Shift + Command + 5 at the same time.
Another window will appear on the screen. From there, select the entire screenshot function. Also, there is an option that grabs the whole page. You have to press Shift + Command + 3, and a screenshot will get captured.
13. Scrolling screenshots on safari
Open the Safari browser on your iPhone and press the Power button + Volume up key to take the screenshot that you are always doing to take the screenshot.
After taking the screenshot, tap on it; here, you will get two options. One is the screen where you are; now tap on the Full Page option to take the full page of a screenshot.
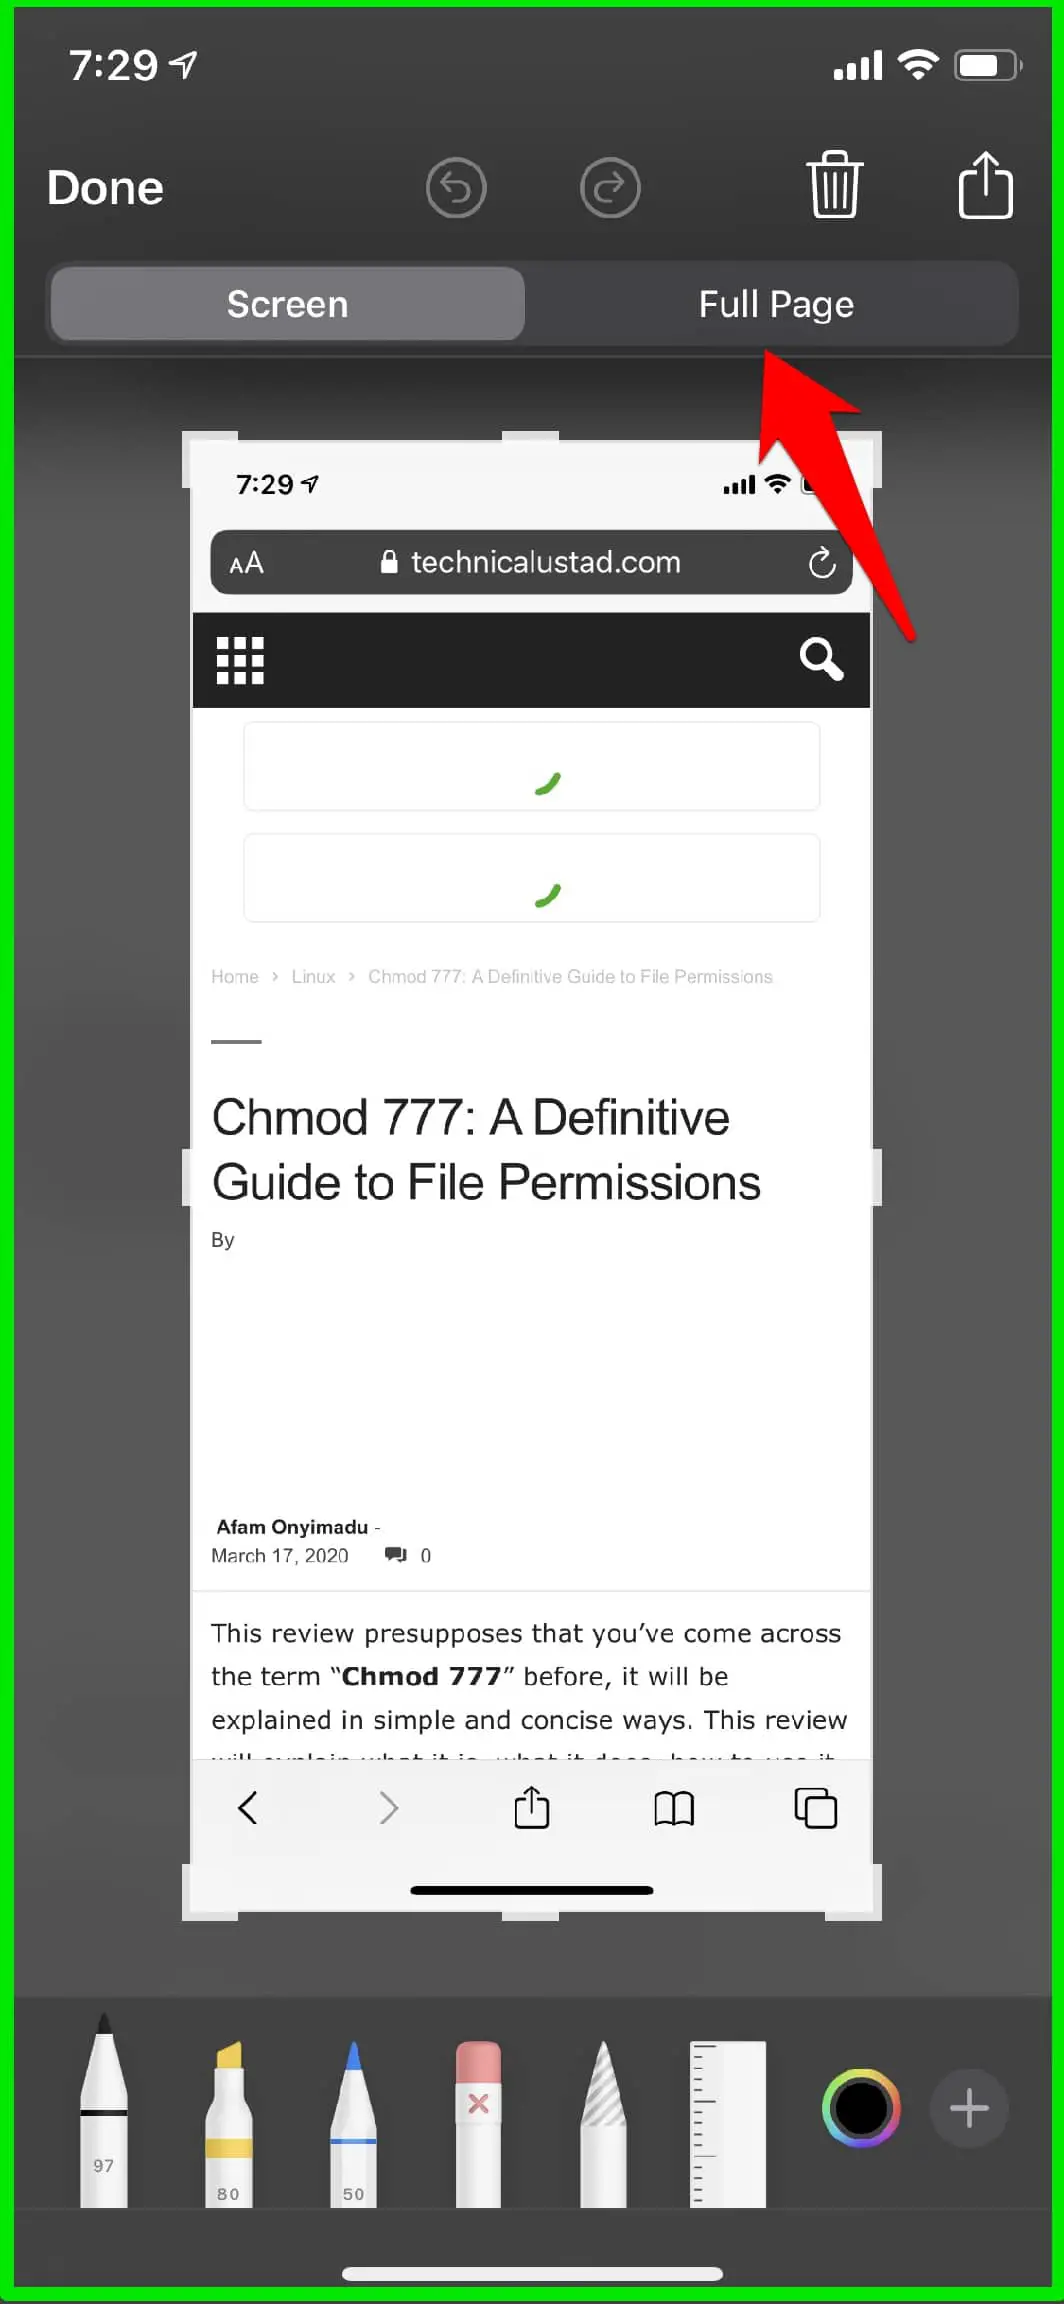
Now you will see the full webpage here. 🙂
📗FAQ’s
We already covered your query on the “can you scroll while taking a screenshot” now, let’s explore some common FAQs.
How Do I Take A Scrolling Screenshot On A Mac?
You can take scrolling screenshots on your Mac device using key combos. You can press Shift + Command + 5 key combo together to take a scrolling screenshot on Mac.
How Do You Take A Screenshot Of A Long Webpage On A Mac?
To take a screenshot of a long webpage, you must use the keyboard shortcut Shift+Command+3.
This keyboard shortcut takes a screenshot of the entire screen. The screenshot will be saved to the clipboard. You can paste the screenshot anywhere by pressing the Command + V key combo.
What Are The Best Tools For Taking Scrolling Screenshots on A Mac?
Suppose you are looking for the best tools for scrolling screenshots on a Mac.
You can use Movavi Screenshot, GoFullPage, Screenshot Guru, Capto, Web Capture, Mojave Hotkeys, Parallels Toolbox, Firefox Screenshot, The Print and Save Tools, and others.
How Do I Take A Scrolling Screenshot in Chrome On A Mac?
You don’t need additional software to take scrolling screenshots on Chrome on Mac. Firstly, open the webpage you want to capture. Press Command + Option + I and then press Ctrl/Command + Shift to open Developer tools.
Type Screenshot in the search box. Now, select the type of screenshot you want to take, and it will take a screenshot in Chrome on your Mac.
How Do I Screenshot A Window Larger Than A Screen On Mac?
You can take a screenshot of a window more significant than the screen on a Mac as a scrolling screenshot. Press the Command + Shift + 5 key combo to take a scrolling screenshot on your Mac.
How Do You Paste A Screenshot on Mac?
Firstly, you must capture the screenshot or copy your screen by pressing Ctrl/Command + Shift + 3 key combo.
Now, head to the location where you want to paste the screenshot and press the Command + V key combo to paste the screenshot.
Does Apple have a scrolling screenshot?
Apple’s devices have a scroll screenshot feature that captures entire web pages or documents longer than the screen.
To use this feature on an iPhone or iPad, take a regular screenshot by pressing the Home button and Sleep/Wake button (Volume Up button and Side button on iPhone X or later) together.
Then, open the thumbnail that appears and select “Full Page.” The device will capture a full-length screenshot that you can edit or share.
On a Mac, press Command + Shift + 5, then select “Capture Entire Page” in the toolbar to take a scrolling screenshot of a webpage or document.
How do I enable scrolling on my Mac?
To enable scrolling on your Mac, follow these steps:-
Step 1:– Open System Preferences by selecting “System Preferences” from the Apple menu in the top left corner of the screen.
Step 2:– Choose either the “Mouse” or “Trackpad” option.
Step 3:– Click on the “Scroll & Zoom” tab.
Step 4:– Select or deselect the “natural” scrolling direction option to enable or disable scrolling.
Step 5:– Adjust the scrolling speed by moving the “Scroll speed” slider.
How do you take a scrolling screenshot on a Mac?
To take a scrolling screenshot on Mac, you can use its keyboard shortcut Command + Shift + 5. Alternatively, you can use a third-party application named QuickTime Player.
How do I screenshot an entire webpage on a Mac?
You can use browser extensions for the job to take a screenshot of an entire webpage on Mac. So if you use browsers like Google Chrome or Mozilla Firefox, you can use extensions like Awesome Screenshot & Screen Recorder or GoFullPage.
Go to screenshot if you don’t wish to use a browser extension.guru website and paste the webpage link to take a quick screenshot.
How do I screen scroll on a Mac for free?
Most tools available for scrolling screenshots on Mac are free to download. Also, Mac offers you a keyboard shortcut to take scrolling screenshots easily. Press Command + Shift + 5 simultaneously, and you will get all the options.
Final Words
So that was all about how to take a Mac scrolling screenshot. There are many tools available out there. Also, Mac comes with a keyboard shortcut that lets you quickly capture a scrolling screenshot.
Now it is your call to go ahead and check out the tools and see which works best for you. I would strongly recommend you to be aware of the keyboard shortcuts. This boosts your productivity and makes it easy for you to capture screenshots.
Anyway, if there is anything else you want to ask, please feel free to comment below, and I will help you out.