


The rise of voice interfaces and artificial intelligence may be the most interesting thing in the modern computing world. This Raspberry Pi tutorial is a simple and fun project that you can build without any additional components.
his will make your raspberry pi talk to you! We will use Amazon’s Alexa Voice Services (AVS) to do the job. It will also help you enter the world of artificial intelligence and introduce the basic concepts of artificial intelligence.
Amazon’s echo is great. This is a music speaker, Amazon’s excellent Alexa voice control digital assistant, and a useful smart home controller. But why buy Echo from Amazon? That’s it:-
Materials needed:-
Hardware
- Raspberry pi (raspberry pi recommended 2/3, but any RPi will work)
- USB mini microphones (headphones / camera microphones with USB sound card can also work, any normal USB microphone can be)
- Raspberry pi case (optional)
- Raspberry Pi WiFi Dongle (if you do not use any Ethernet connection, Raspberry Pi 3 has built-in WiFi)
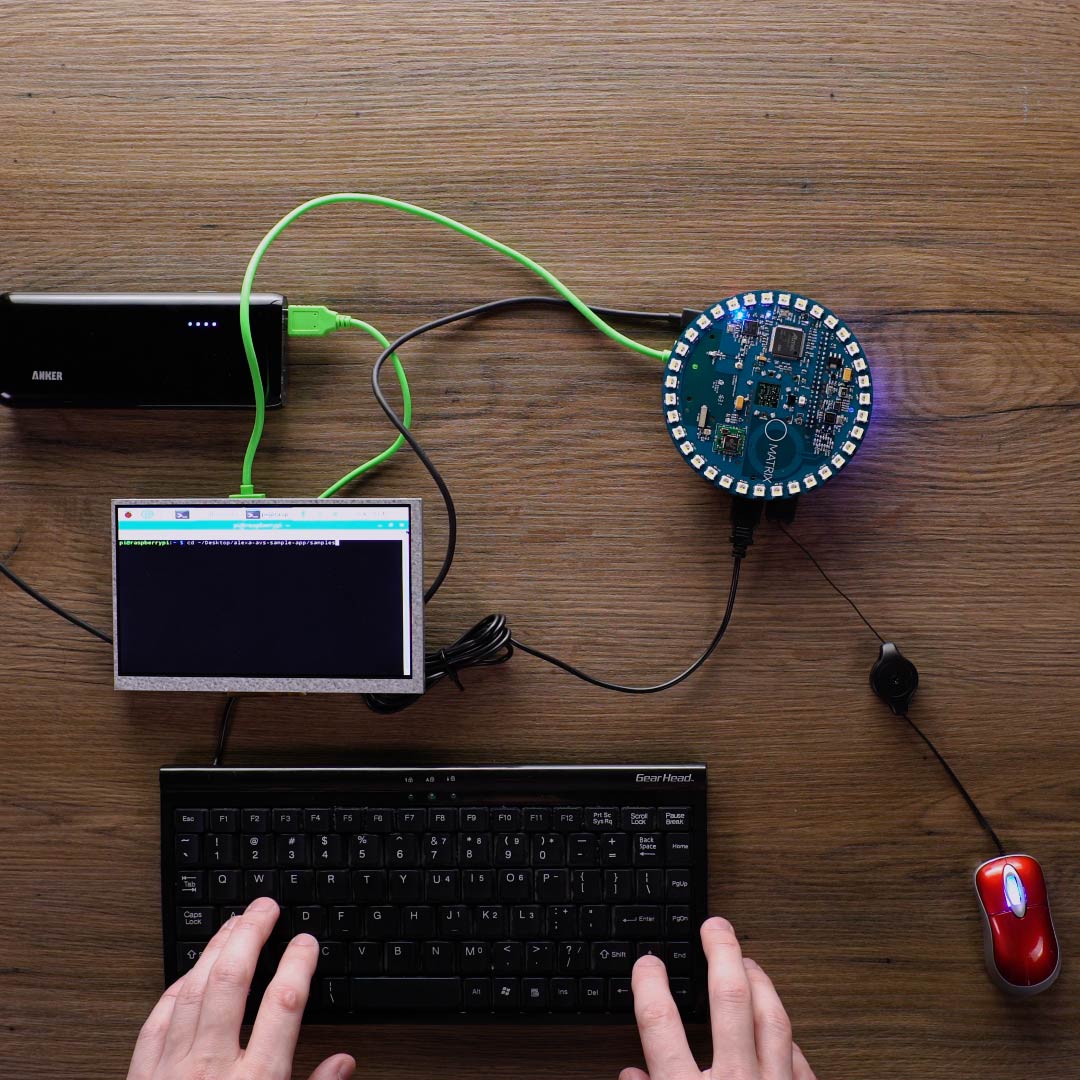
- Raspberry pi setup (with all keyboards, mice and screens connected to RPi to Raspbian, Raspberry Pi can also be launched remotely)
- Speaker (any active speaker works, I will use a Bluetooth speaker)
Software
- Raspbian Jessie and Pixel Desktop (burn it to an SD card and insert it into your RP i)
Resources and repositories
- Alexa resources, repositories, and instructions on Github
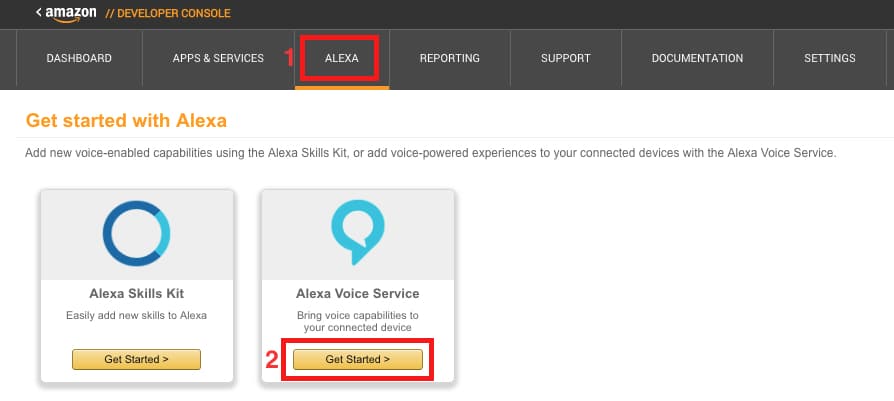
- Amazon Developer Account
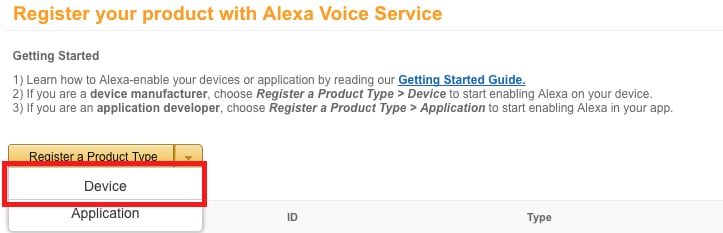
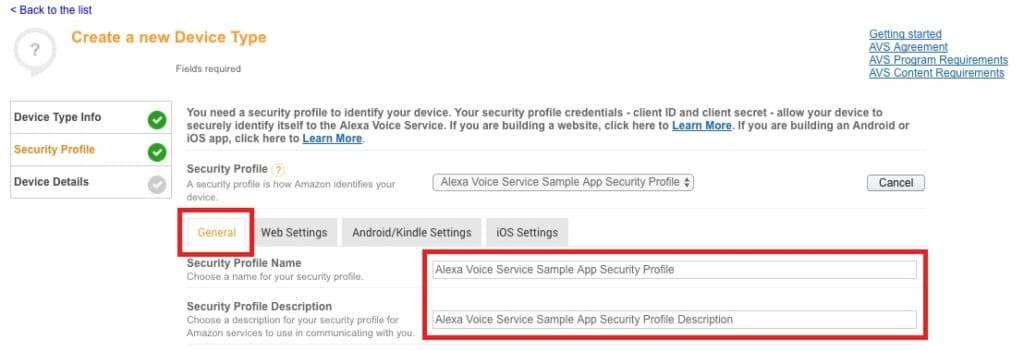
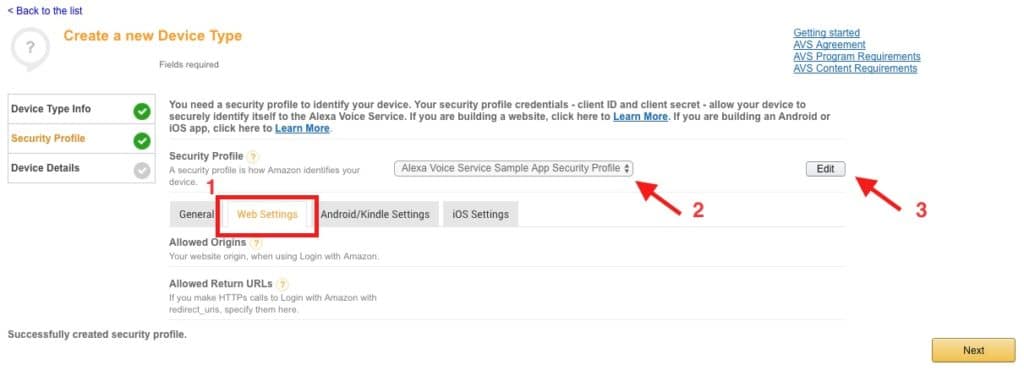
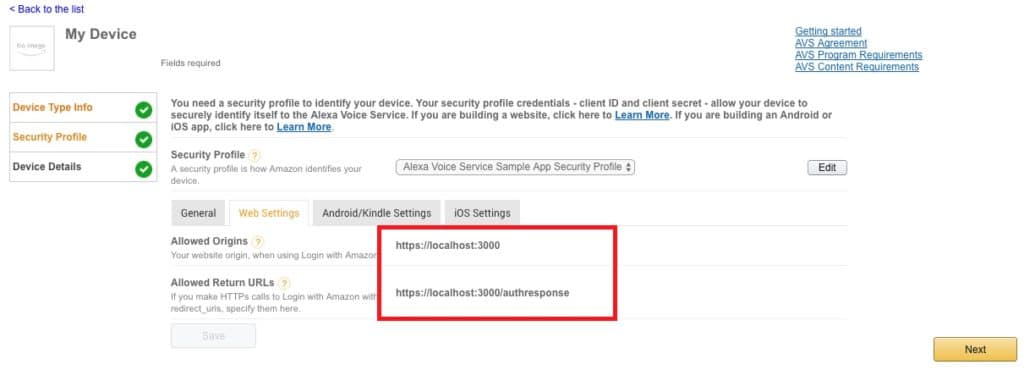
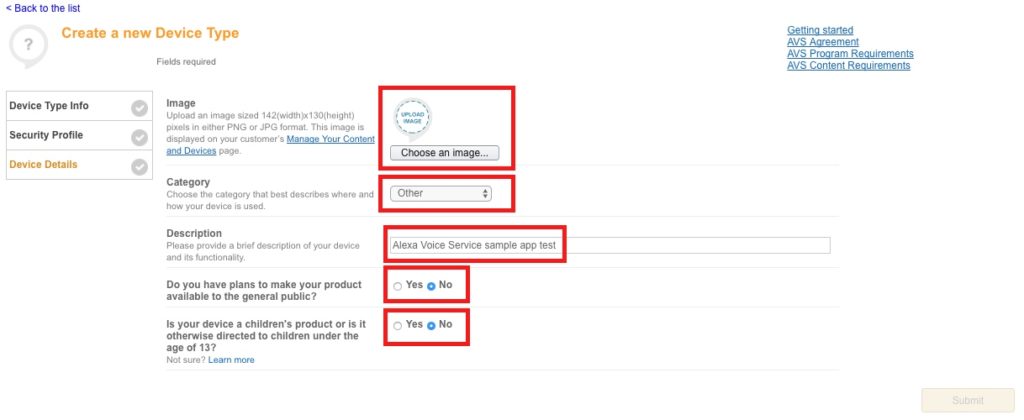
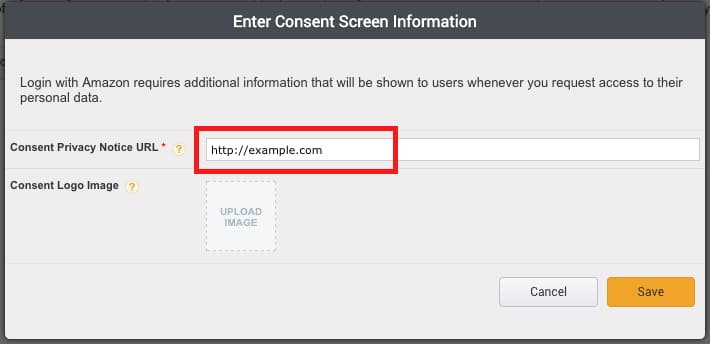
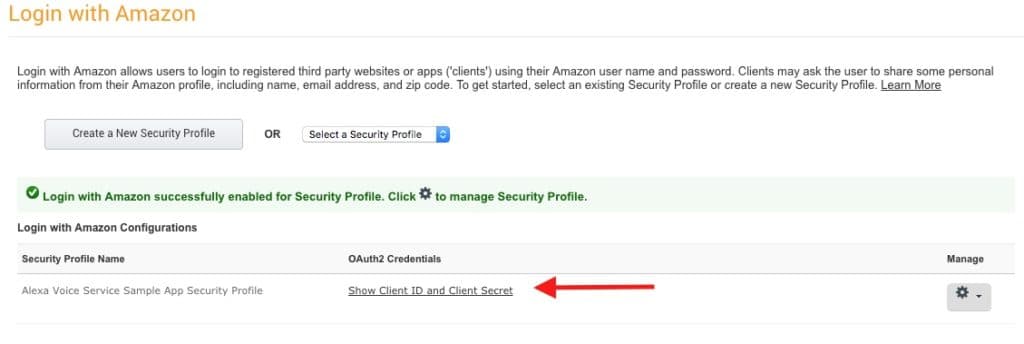
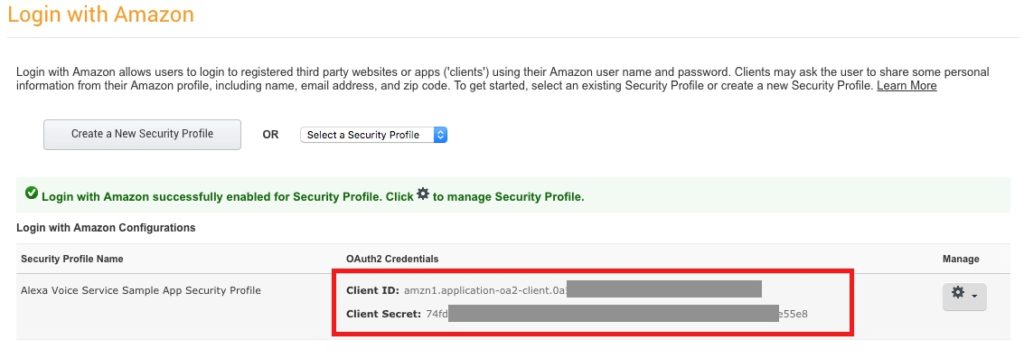
- Create a security profile
- After you log in to your Amazon Developer account, enable the security profile that you created
- The company is located in:
How does it work?
We must first register for Amazon Developer Accounts so that we can access Amazon Developer Services. We use Alexa Voice Services (AVS) from Amazon to install Alexa AI for free on the Raspberry Pi. Once AVS is downloaded and installed on our Raspberry Pi, we can ask anything like today’s weather, jokes, information about random people or anything else you want to know. RPi connects to Amazon’s Alexa server through our installed AVS and finds the right answer to answer your questions.
Setting Up the Software (This Is From GitHub Quickstart)
MATRIX Creator! To enjoy your new motherboard, you need to set it up. First, you need to install Raspbian on the Raspberry Pi. If you do not have it, you can download it and follow the instructions.
Creating an Amazon Developer Account
Unless you already have one, go ahead to Developer.amazon.com. Verify your email and you have completed the first step!
Then you need to install software that allows you to program MATRIX Creator. To do this, you need to configure APT. The following steps should do this:


Note:- I have written a post for people looking for the best motherboard for i5 9600k to buy?, do read it If you are interested.
Clone the Sample
Open terminal, and type the following:
cd Desktop
git clone https://github.com/alexa/alexa-avs-sample-app.git
Install Script with Your Details
Before you run the install script, you need to update the script with the credentials that you got in step 3 – ProductID, ClientID, ClientSecret. Type the following in terminal:–
cd ~/Desktop/alexa-avs-sample-app
nano automated_install.sh
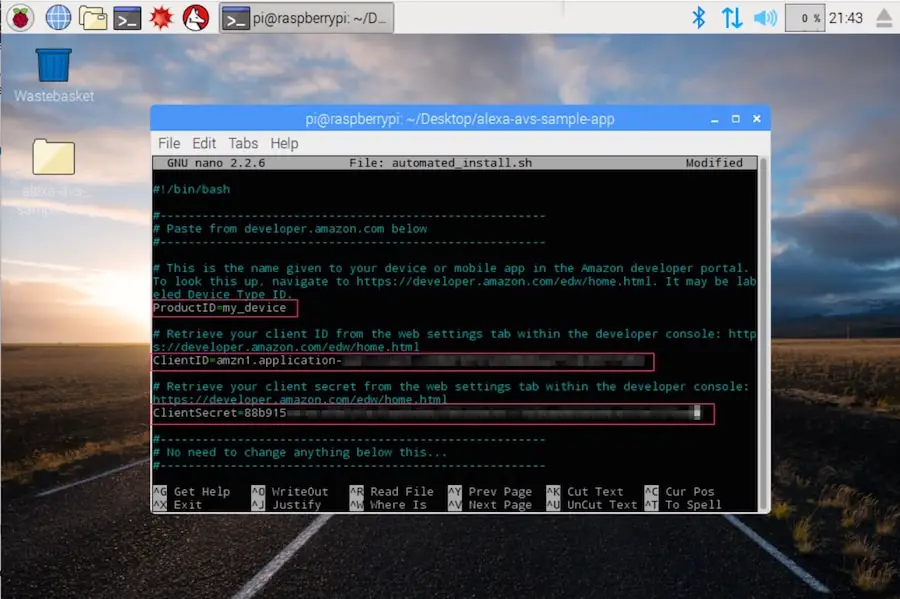
Paste the values for ProductID, ClientID, and ClientSecret that you got from Step 3 above.
The changes should look like this:
ProductID=”RaspberryPi3″
ClientID=”amzn.xxxxx.xxxxxxxxx”
ClientSecret=”4e8cb14xxxxxxxxxxxxxxxxxxxxxxxxxxxxx6b4f9″
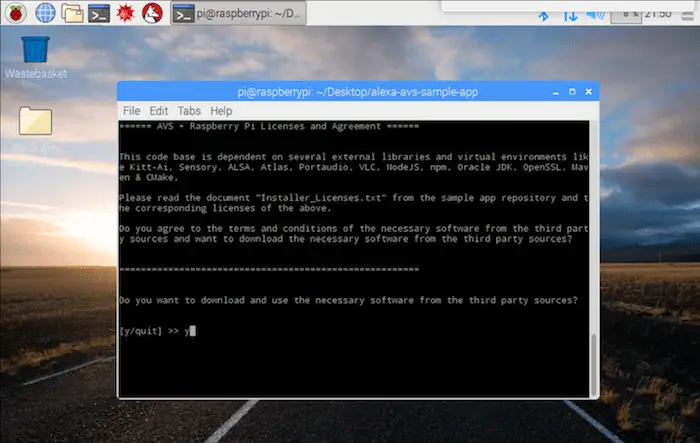
Running the Installation Script
You are now ready to run the install script. This will install all dependencies, including the two wake word engines from Sensory and KITT.AI.
cd ~/Desktop/alexa-avs-sample-app
. automated_install.sh
Run The Web Service
Terminal Window 1
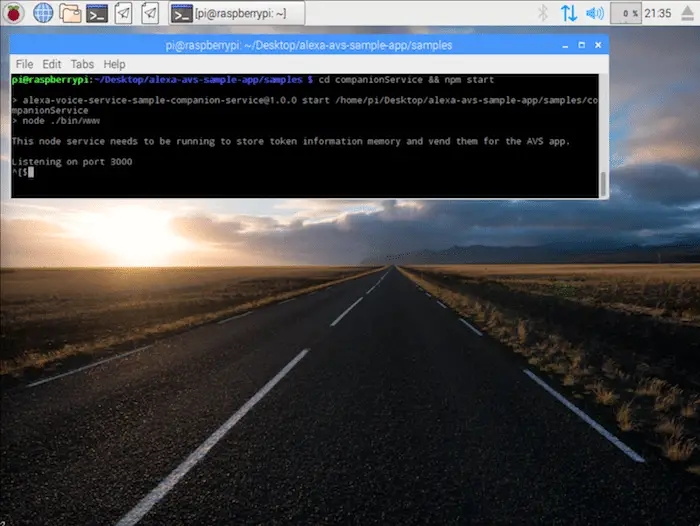
d ~/Desktop/alexa-avs-sample-app/samples
cd companionService && npm start
Terminal window 2
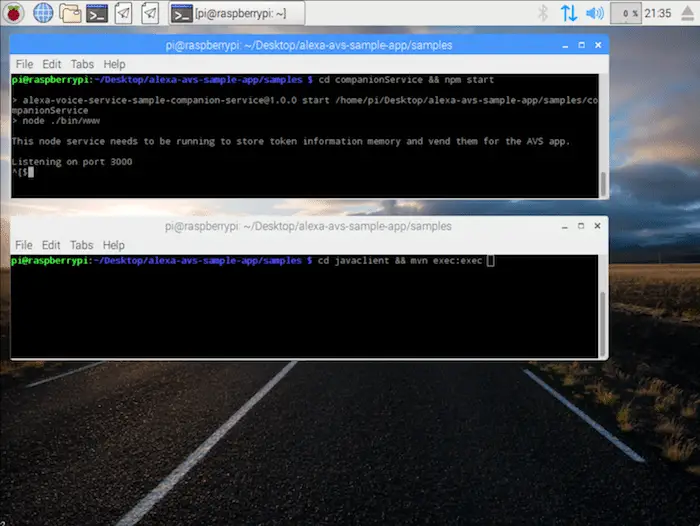
cd ~/Desktop/alexa-avs-sample-app/samples
cd javaclient && mvn exec:exec
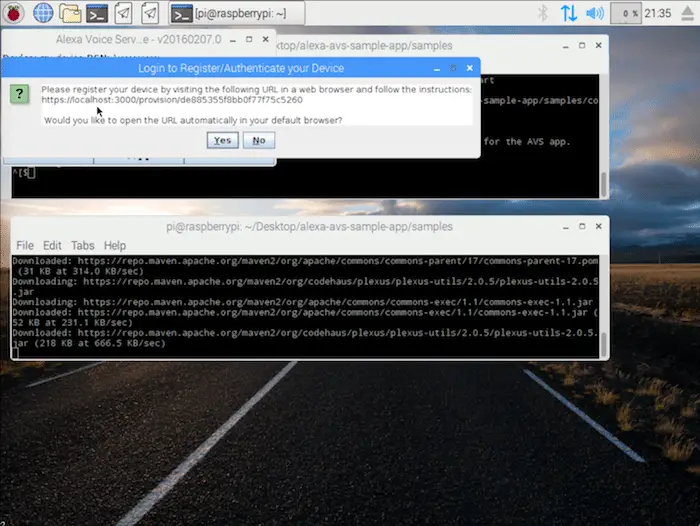
Click on “Yes” to open the URL in your default browser.
So here we go You will listen voice of alexa !
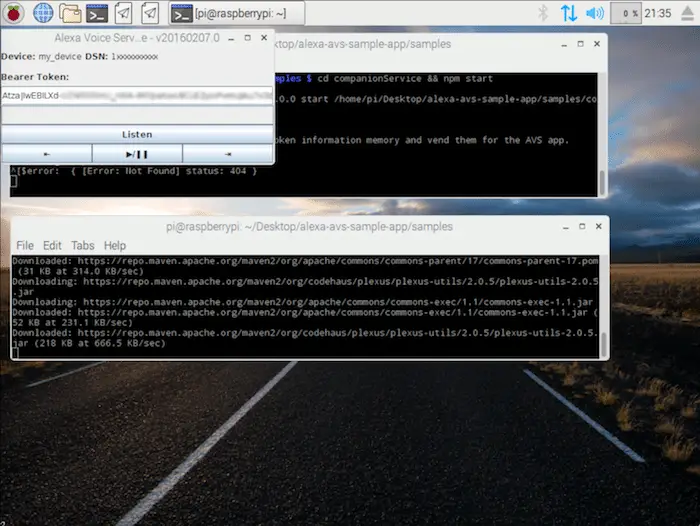
Last Step: Talk with Your Raspberry Pi, ENJOY!
You can now talk to Alexa by simply using the wake word “Alexa”. If you prefer, you can also click on the “Listen” button instead of using the wake word. Click the Listen button and wait for the audio cue before beginning to speak. It may take a second or two before you hear the audio cue.
You may also like to read this
How to Install Kali Linux on Raspberry Pi 3


