


With Windows 10 Creators Update, Microsoft is downgrading Command Prompt, which has been in Windows since the early days and promoting PowerShell, which is more powerful.
with this article, we will try to cover “PowerShell vs Command Prompt” in all expects however it’s not possible to cover Powershell topic in a single article but we will try to write more and more on this.
You don’t have to wait for the update, though – you can use it now. Press Windows+i and click Personalisation. Select Taskbar on the left and look for the switch in the settings on the right that lets you choose between PowerShell and Command Prompt. Currently, this switch is off, but in future Windows versions, it will be on.
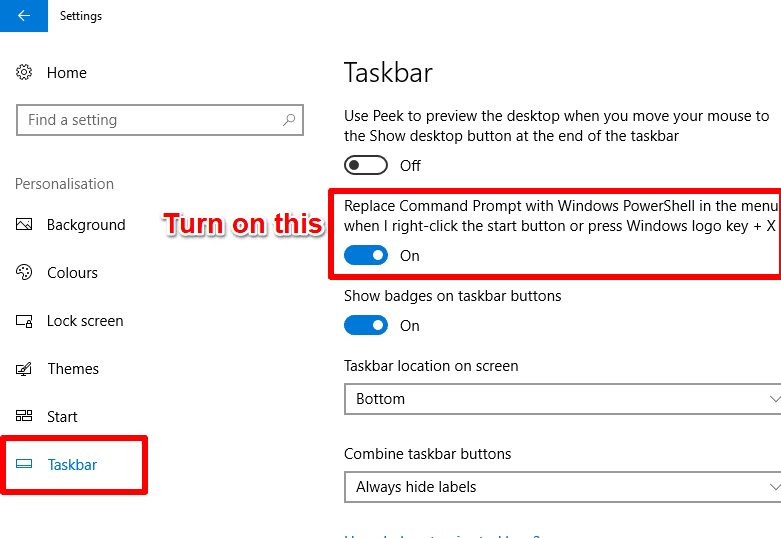
This switch controls whether Command Prompt or PowerShell appears on the menu when you right-click the Start button or press Windows+X, and which tool File Explorer opens. Use the switch to turn on PowerShell and try out our tips.

Start PowerShell
To start PowerShell in Windows 10, right-click the Start button and select it from the menu, or run it from the Start menu. PowerShell is the 64-bit version and PowerShell (x86) is the 32-bit version. The 64-bit version is the one to use, presuming you’re running
a 64-bit version of Windows.
PowerShell is not new and has been around for years. You can even run it in Windows 7 by clicking Start, All Programs, Accessories, Windows PowerShell.
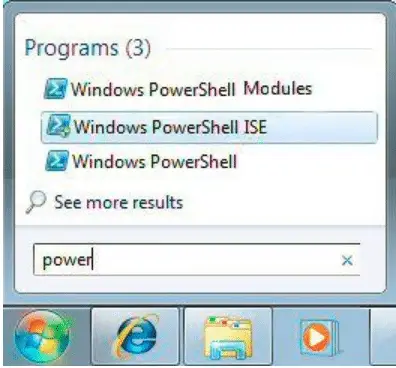
since Windows 7, but was rarely used
Like all programs, PowerShell can be run in normal or administrator mode. Most functions work in normal mode, but a few require an administrator.
In Windows 10 right-click Start and select Windows PowerShell (Admin). In Windows 7 right-click Windows PowerShell on the Start menu and select ‘Run as administrator’.
Learn new Windows Powershell commands
To make it easier to switch from the old Command Prompt to the new PowerShell, many familiar commands work as they did before.
For example, you can still type dir for a directory listing and type cd XYZ to change the
current directory to folder xyz. As with Command Prompt, you always have to press the Enter key when you’ve finished typing.
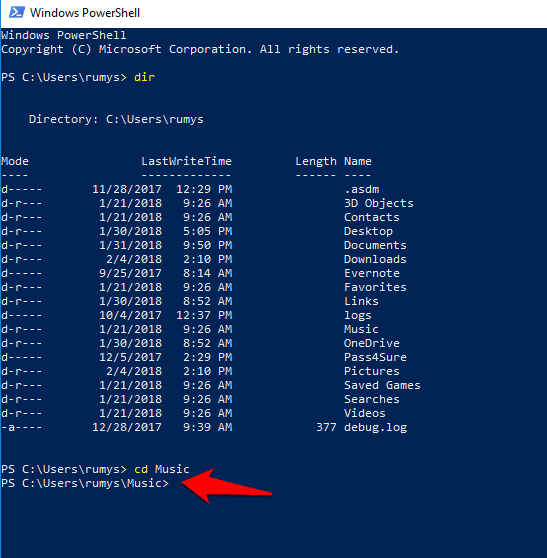
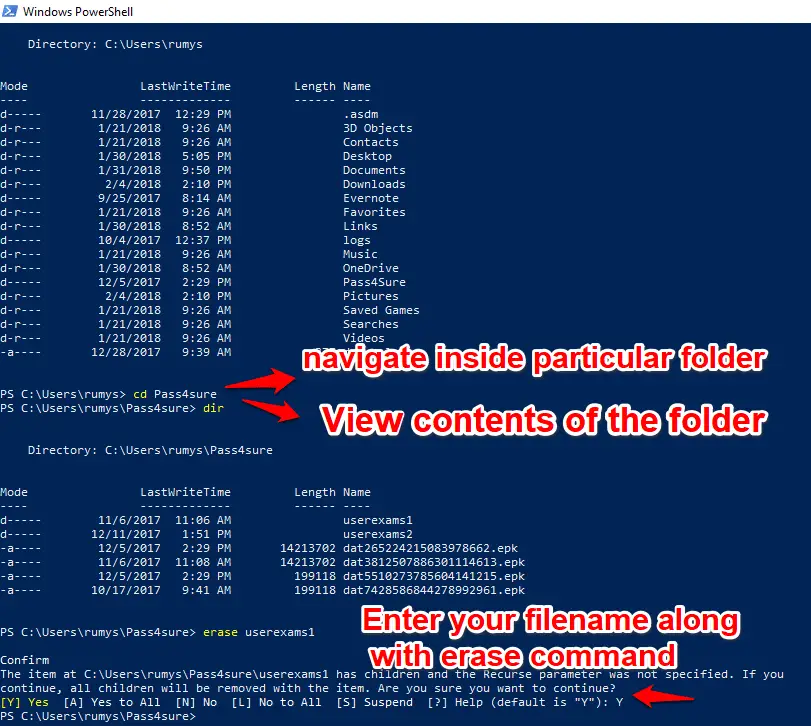
For example, when you open PowerShell, it will start in C:\Users\ YourName by default. Type cd downloads and then dir to see a list of the files and folders in your
Downloads folder. To delete a file, type erase followed by the filename.
To delete a folder, type rm or rmdir (short for remove directory) followed by the name. To rename a file, type ren oldname newname
These old commands aren’t actual PowerShell commands but aliases. They are automatically converted into the new commands before being run.
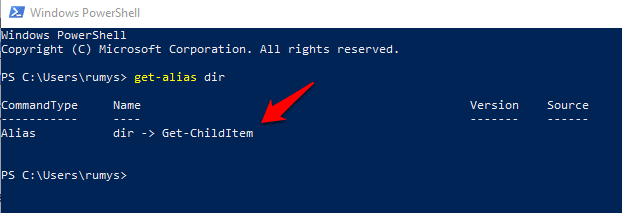
To see the PowerShell equivalent of an old command, type get-alias followed by the name. For example, type get-alias dir and you’ll see the real command is Get-ChildItem.
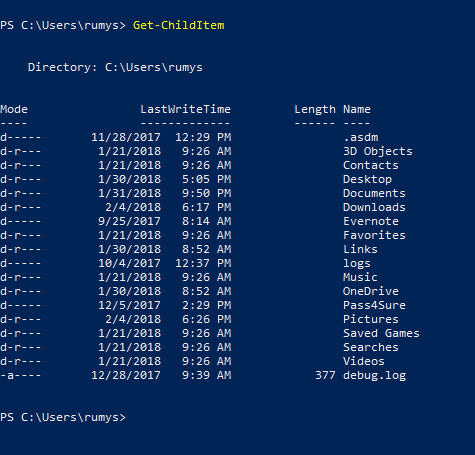
Type Get-ChildItem and it displays a directory listing showing the files and folders in the current location.
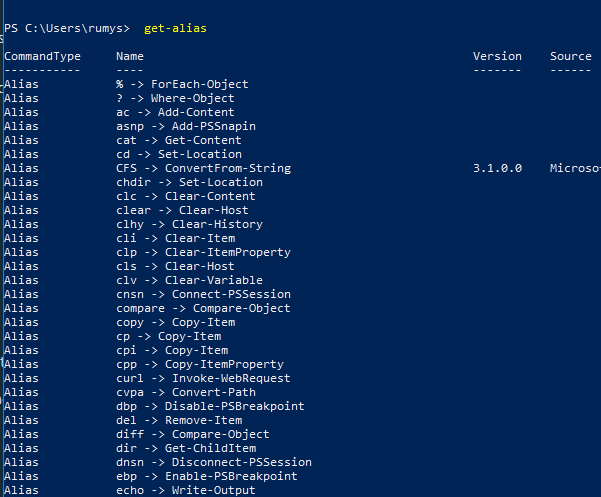
To see all the old commands and their new versions, type get-alias on its own. New commands use both upper- and lowercase letters, but they work when typed all lowercase.
Get help with commands
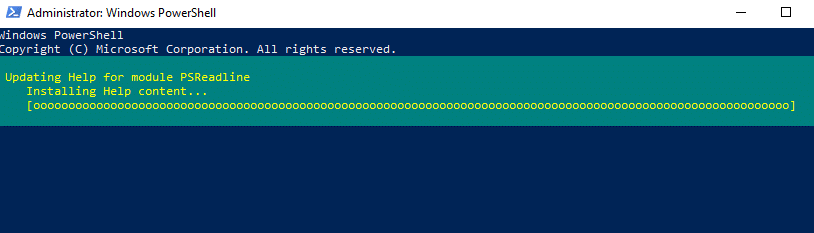
PowerShell is complicated but help is available within the software. However, this option isn’t installed by default so you have to add it. Open PowerShell in administrator mode and type update-help. It takes a few minutes to download and install, and you’ll see
the progress at the top of the window.Don’t worry if some things don’t install.
To use the Help system, type gethelp followed by the name of the command you are interested in.For example, type get-help renameitem.

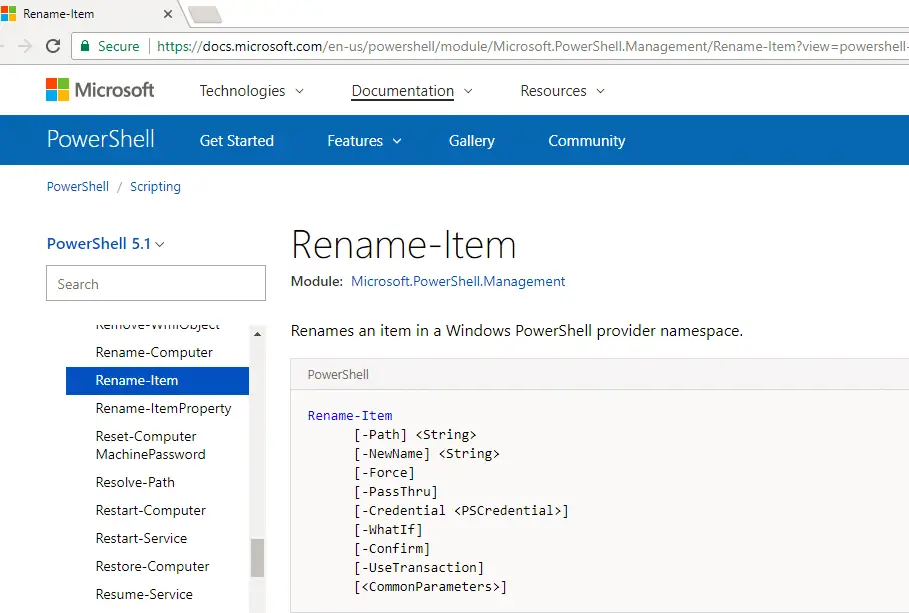
If you don’t want to install the Help files or if there is a problem installing them, you can view online Help instead.
For example, type get-help rename-item –online and a browser window opens displaying the Help page for that command.
The Help can still be confusing, so ask it to display some examples of usage by adding -example to the end, such as get-help rename-item –example.
To see everything that’s known about a command, add -full, such as get-help rename-item –full.
Test your connection
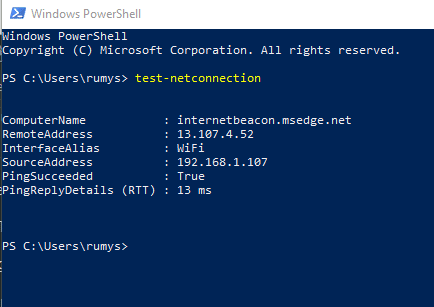
If you’re having problems with your internet connection, you can use PowerShell to test it. At the PowerShell prompt, type test-netconnection.
The results appear after a few seconds and if everything is fine, information such as the remote address and IP, your computer’s IP, and the results of a ping test (lower numbers indicate faster internet) are displayed.
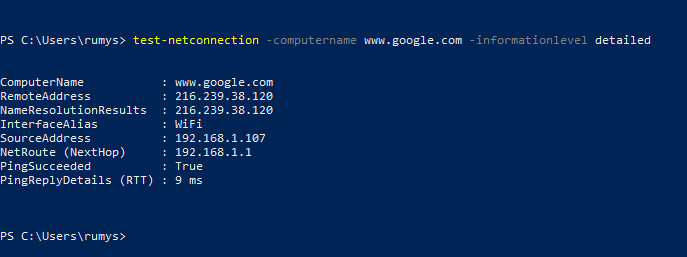
Several parameters can be included with this command and you can specify which
website you want to check, and get more detailed information.
For example:test-netconnection -computername www.google.com -informationlevel detailed.
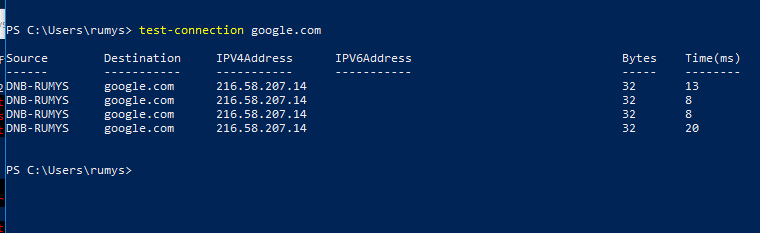
There is a related command called test-connection, which pings websites and devices. For example, you can check that Google can be reached with test-connection google.com.
TAKE IT TO THE NEXT LEVEL
System Restore settings
PowerShell is more powerful than the old Command Prompt and it can perform tasks that weren’t previously possible.
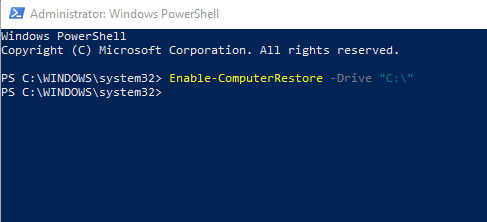
For example, you can turn System Restore on or off with a quick command instead of searching through menus, windows, and settings. To enable System Restore,
type Enable-ComputerRestore.
To disable it, type DisableComputerRestore. Suppose you are going to install some software or customize Windows settings. It’s a good idea to use System Restore to save the current Windows configuration in case anything goes wrong, so you can put things back the way they were.
To create a restore point, open PowerShell and type:
Checkpoint-Computer -Description “Install app”
This creates a restore point and names it ‘Install app’. Change the description in quotes to whatever best describes the restore point.
Copy files and folders
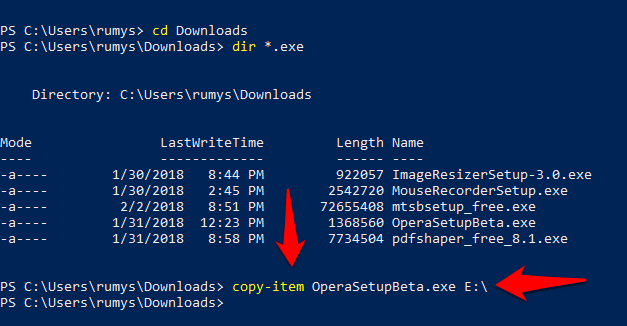
Files and folders can be copied from one place to another, such as from one folder to another on the hard drive, or to another drive. You can either type the full path to the file you want to copy or change to the folder first with cd. So you could open a PowerShell window and type
cd downloads to change to it, then copy a file to drive F: by typing
copy-item filename f:\.
Copy-Item can also be used to copy folders but the command needs an extra parameter to to do this. Type:
Copy-Item “C:\Folder1” -Destination “C:\Folder2” -Recurse
If C:\Folder2 already exists, then the contents of Folder1 are copied to Folder2. If Folder2 does not exist, it is created and then the contents of Folder1 are copied into it.
Try PowerShell ISE
PowerShell ISE (Integrated Scripting Environment) is a programmer’s editor that lets you develop, test and run PowerShell scripts. It’s included in Windows and aims to make working with commands and scripts easier. Here is a simple example.
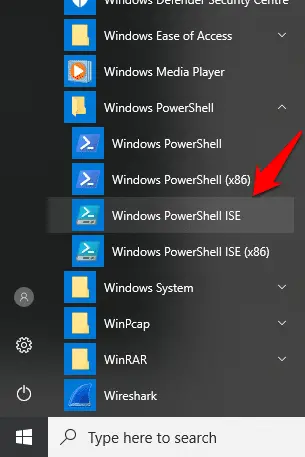
Go to the Start menu, find Windows PowerShell in the list of all programs, click the drop-down arrow to expand it and click Windows PowerShell ISE.
In the Commands panel on the right, type start into the Name box. All the commands that include start are listed. Select Start-Process and, in the FilePath box below (you may need to press ‘Show details’ to see it), enter notepad.exe. Windows knows
where to find Notepad, but you may need to specify the full path with other programs.
Click the Run button at the bottom and a PowerShell script is created, entered and executed. Our example simply starts Notepad and you will see the window open. Look in the main window and you’ll see it says StartProcess-FilePath notepad.exe.
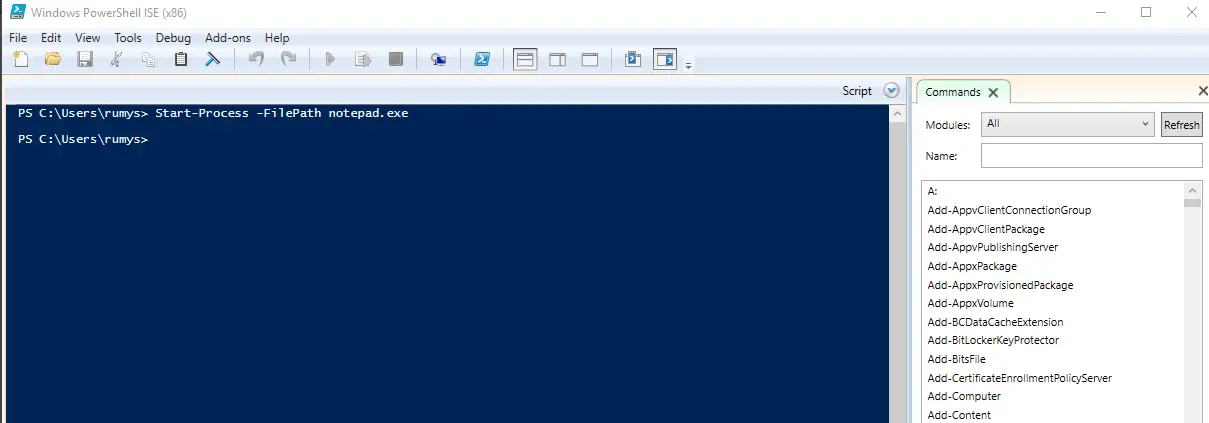
Typing this into a PowerShell window would produce the same result.
How to Take Windows 10 Drivers Backup Using Powershell
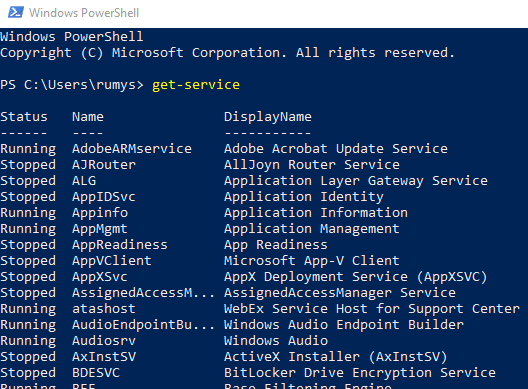
Check running services
Services are special types of programs that run in the background and perform essential tasks. Press Windows+R, type services.msc and press Enter to see them. They can also
be seen in PowerShell. Type getservice to see a list of services and whether they are running or stopped.
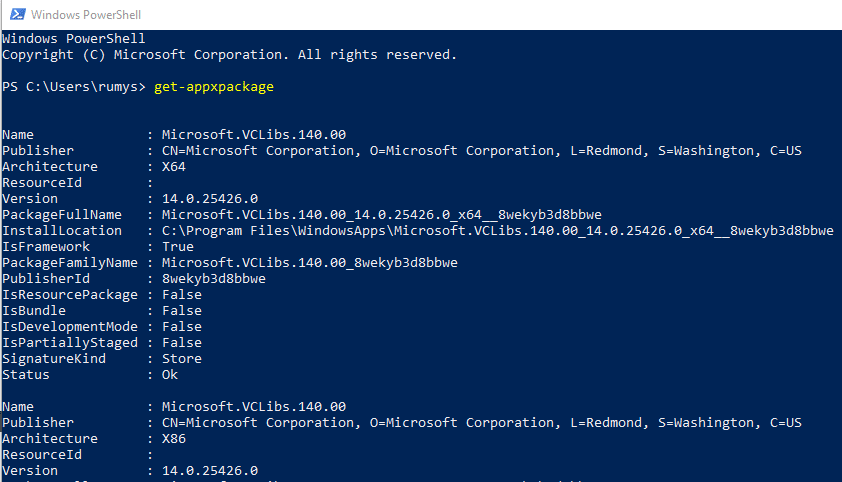
List all Windows apps
To see a list of all your installed Windows 10 or 8.1 apps, type Get-AppxPackage.
It displays very detailed information so several screens will fly by. Scroll back through
the screens to see all the apps.
How to remove windows 10 apps using PowerShell

Hope this article “PowerShell vs Command Prompt: Getting Started with Windows PowerShell” helps you to understand PowerShell vs Command Prompt. if you have any query, feel free to comment.


