


In this tutorial, we’ll extend the previous lesson (to sense motion) by porting a button with a PIR sensor. This article outlines how to assemble a circuit with a PIR sensor and a buzzer to trigger a buzzer when the sensor detects motion.
What is a PIR sensor?
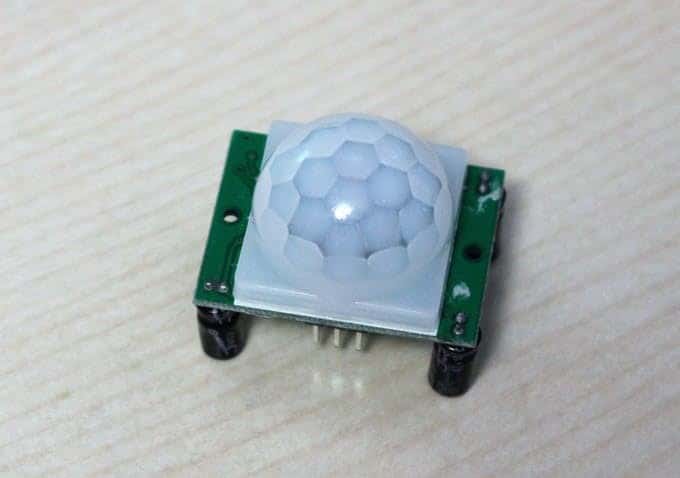
PIR sensors are often referred to as “passive infrared” or “infrared motion” sensors that allow you to sense motion. Everything emits a small amount of infrared radiation, while the hotter thing emits more radiation. PIR sensors are capable of detecting changes in the IR level of their detection zone (eg, when a person enters a room) and therefore sense motion.
The PIR sensor that we will use in this tutorial has three pins: ground, digital output, and 3-5VDC input. When idle, the digital output stays low when no motion is detected, but when motion is detected (3.3V), we will use our Raspberry Pi to sense this! The PIR sensors we will use in this tutorial have a range of approximately 7 meters and a detection range of 110 ° x 70 °, making them ideal for monitoring the corners of doors or rooms.
PIR Motion Sensor and Buzzer using Raspberry Pi
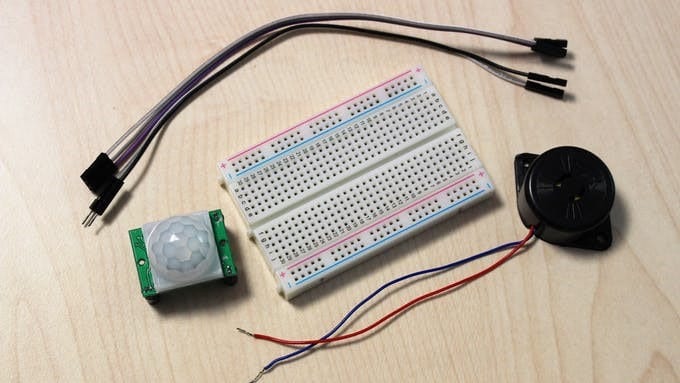
Hardware requirements
- Raspberry Pi (Buy Amazon)
- PIR motion sensor(Buy Amazon)
- Buzzer (Buy Amazon)
- Breadboard (Buy Amazon)
- Jumpers (Buy Amazon)
PIR motion sensors detect any movement of an object, person or animal. Mainly used to automatically start the lighting and burglar alarm system.
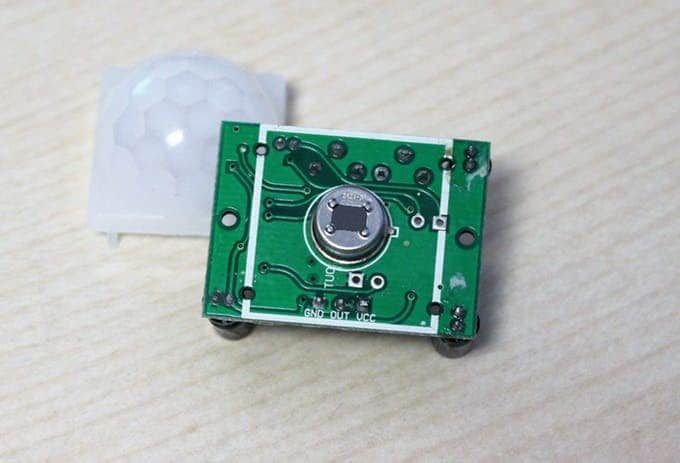
Every object with a temperature above absolute zero will heat in the form of infrared radiation. The PIR motion sensor detects the change in infrared radiation impinging on it. As any object or human body passes the front of the PIR sensor, the temperature in the sensor’s field of view rises from ambient to object temperature and then back to ambient. The PIR sensor converts this temperature change into a change in the output voltage and considers the voltage change as a motion detection.
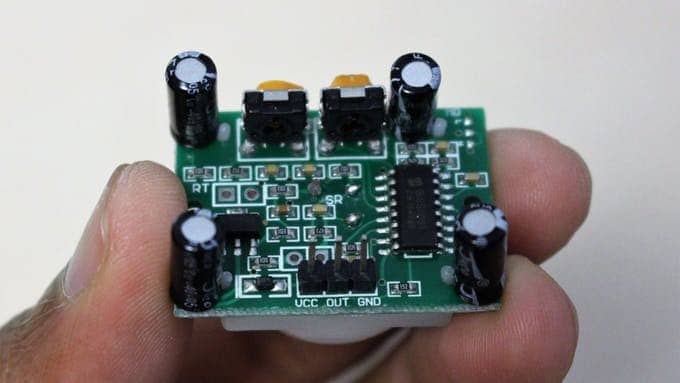
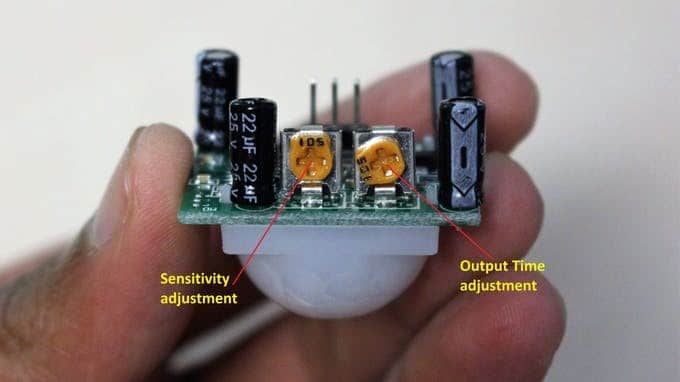
The sensor has three pins. Power (VCC), Ground (GND) and Output (OUT) pins, providing a logic high if motion is detected. It has two potentiometers. One for sensitivity adjustment and the other for adjusting the time that the output signal stays high when motion is detected.
VCC, OUT and GND pins
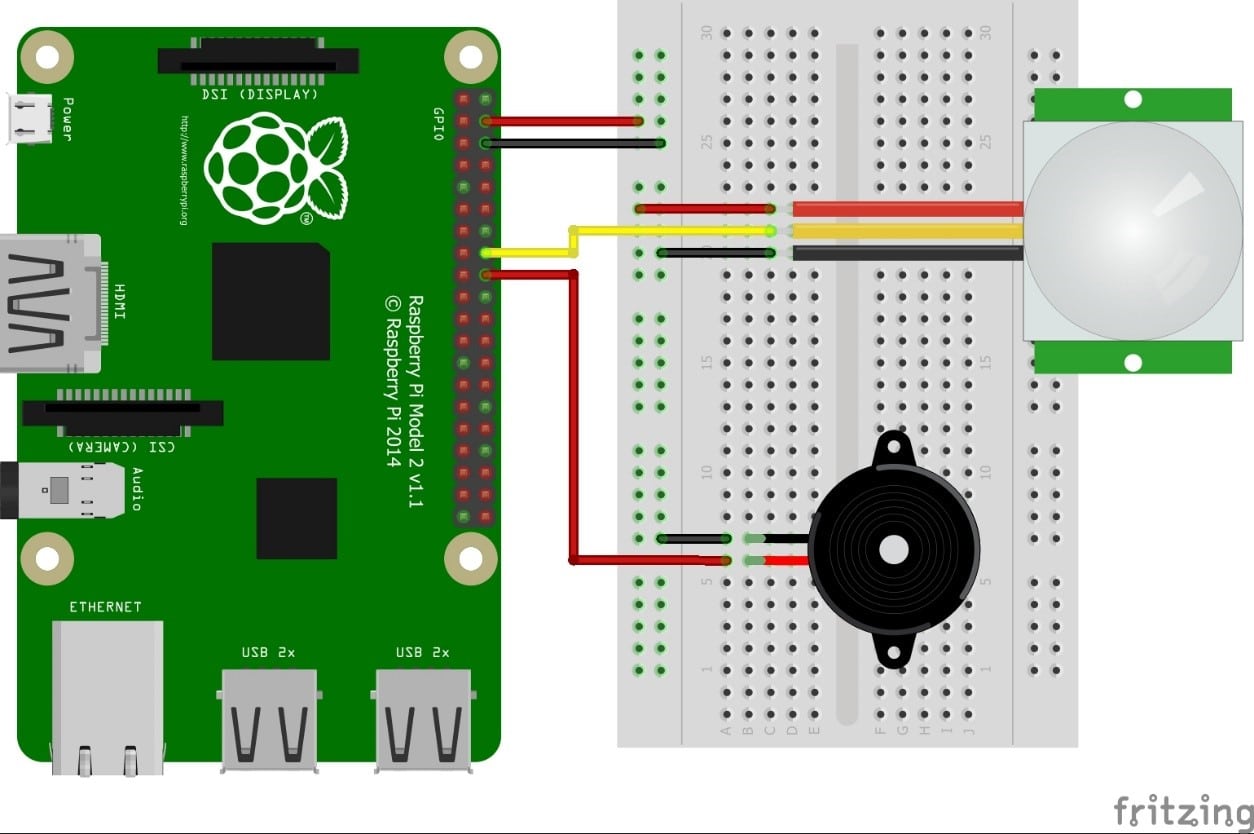
Make Connection
Run Python Script
Create a new python file PIRSesnor.py and enter the following code.
To run the code, open the terminal and go to the directory where your PIR.py is located. Then enter the command “sudo python PIRSensor.py” and press Enter
import RPi.GPIO as GPIO
import time
GPIO.setmode(GPIO.BCM)
GPIO.setup(23, GPIO.IN) #PIR
GPIO.setup(24, GPIO.OUT) #BUzzer
try:
time.sleep(2) # to stabilize sensor
while True:
if GPIO.input(23):
GPIO.output(24, True)
time.sleep(0.5) #Buzzer turns on for 0.5 sec
GPIO.output(24, False)
print(“Motion Detected…”)
time.sleep(5) #to avoid multiple detection
time.sleep(0.1) #loop delay, should be less than detection delay
except:
GPIO.cleanup()
Here is the Test Video for this project
POST VIDEO HERE
it will work just great if you face any problem with then please do comment write below!
Visit similar tutorials on Raspberry Pi
How to Build your own Super Computer with Raspberry Pi 3 Cluster
Build Super Computer with 5$ Raspberry pi zero using Cluster HAT


