


In this Raspberry Pi Light Sensor article, I showed you how to properly connect a photoelectric sensor to a GPIO pin. Finally, I’ll show you how to use it in a simple Python script to be able to collect and use data from.We have covered many raspberry pie projects with many sensors in this article we will cover Raspberry Pi Light Sensor.
You will need the following devices to complete this Raspberry Pi Light Sensor tutorial. You can do it without any breadboard equipment, but I strongly recommend investing some if you are going to do a lot of circuit work.
What is a photoelectric sensor (light sensor)?
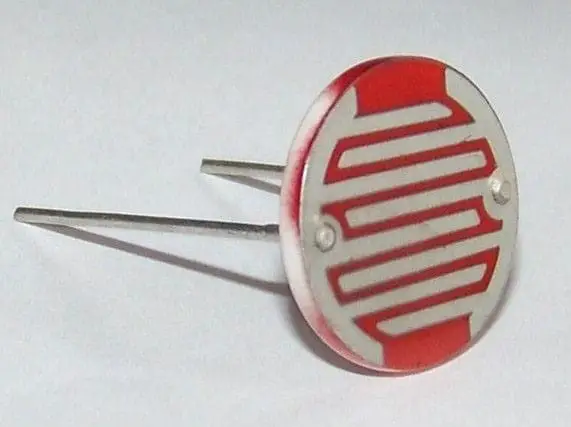
A photoresistor or photo-resistor (LDR) or photocell is a type of resistor whose resistance decreases as the intensity of incident light increases; in other words, it exhibits photoconductivity. Photoresistors are made of high-resistance semiconductors. If the light on the device has a sufficiently high frequency, the photons absorbed by the semiconductor give enough energy to the tethered electrons to jump into the conduction band. The resulting free electrons (and their hole partners) conduct, reducing their resistance.
Collect Hardware
- Raspberry Pi Buy Now
- 8GB SD card or Micro SD card (if you use Raspberry Pi 2 or B +) Buy Now
- Ethernet cable or Wifi dongle
- Light Sensor (LDR Sensor)
- 1 1uF capacitor
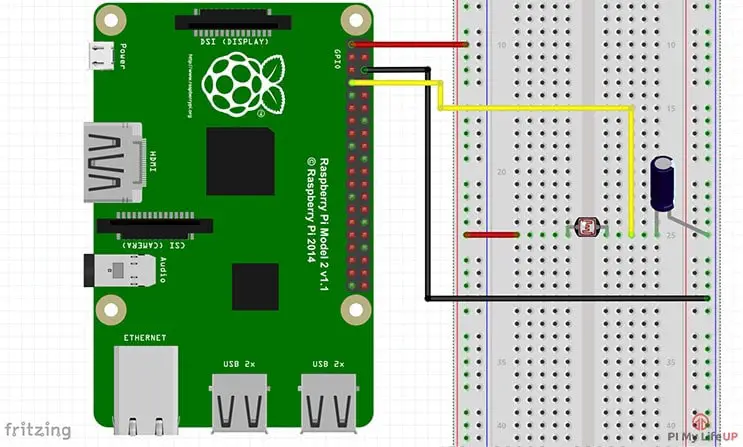
Raspberry pi light sensor circuit
The circuit we are going to make for this tutorial is very simple and very good for those who are just beginning to use the circuit.
Photoresistors, also known as LDR sensors, are the most important devices in our circuit (obviously). Without it, we will not be able to detect whether it is dark or light. From this perspective, this sensor has only a few hundred ohms of resistance, and in the dark, it can have a few megaohms of resistance.
The capacitance in our circuit is there, so we can measure the resistance of the LDR sensor. The capacitor is essentially like a battery that is charged while receiving power and then discharged when it is no longer receiving power. Using this in series with the LDR, we can calculate how much resistance the LDR gives so that it is light or dark.
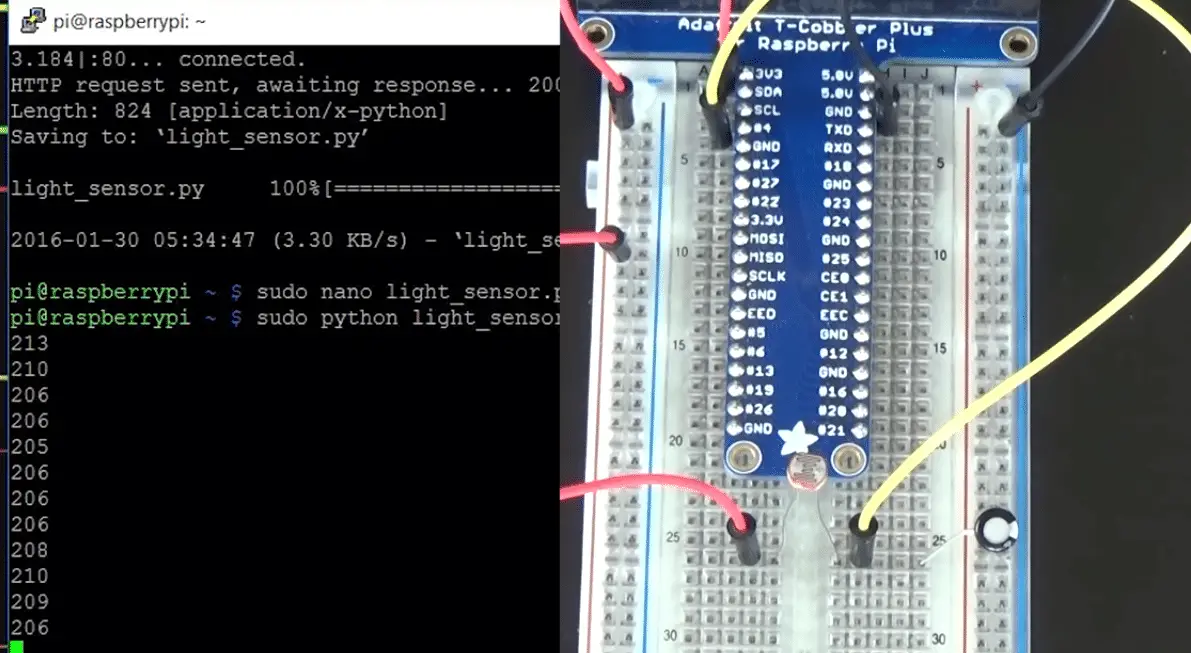
To properly build the photosensor circuit, follow the steps below or check the circuit diagram below the step. In the following steps, I refer to the pin’s physical number (logical order).
- First, connect pin # 1 (3v3) to the positive rail on the breadboard.
- Connect pin # 6 (ground) to the ground rail on the breadboard.
- Now place the LDR sensor on the circuit board and connect the lead from one end to the positive rail.
- Place a wire back to the raspberry pi on the other side of the LDR sensor. Hook this needle # 7.
- Finally, place the capacitor from the wire on the negative rail on the breadboard. Be sure to have a negative capacitor lead on the negative rail.
Note If you are Beginner in Raspberry pi Then I will Suggest you To Have a look on my previous Tutorial How To Setup noobs in raspberry pi
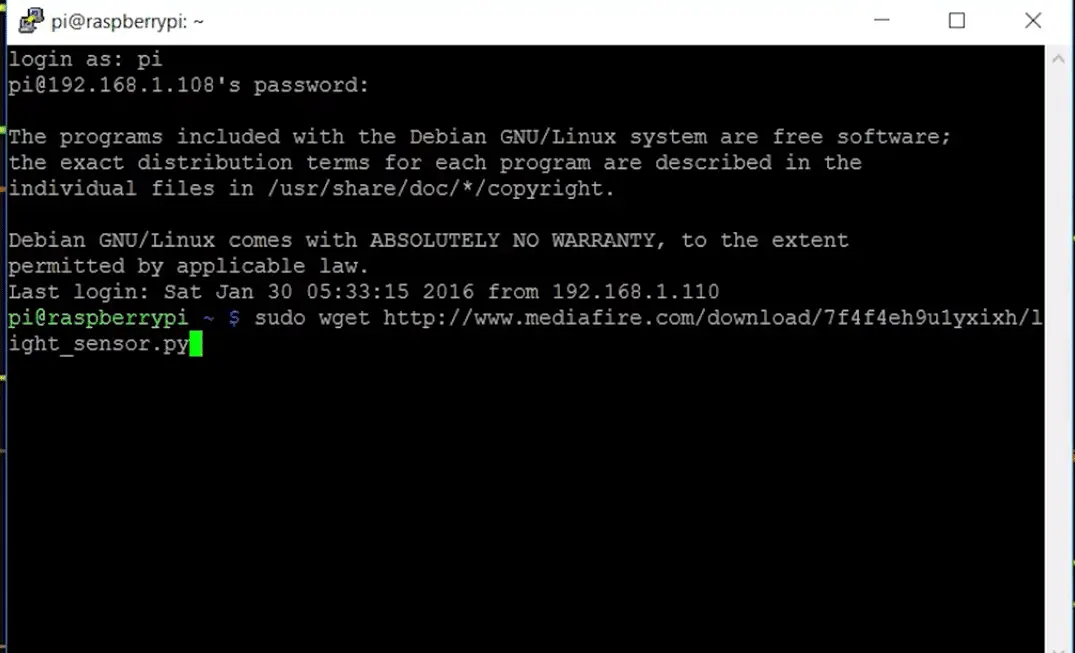
Source Code
You can simply use git clone to download the code. The following command will do the following:
git clone https://github.com/pimylifeup/Light_Sensor/
cd ./Light_Sensor
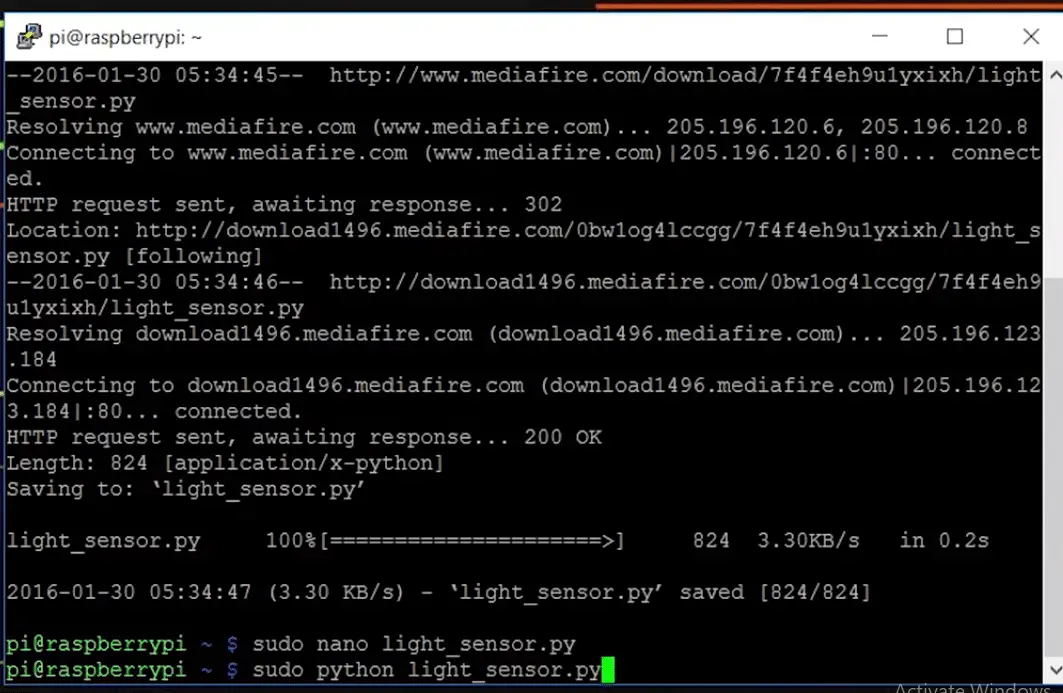
sudo python light_sensor.py
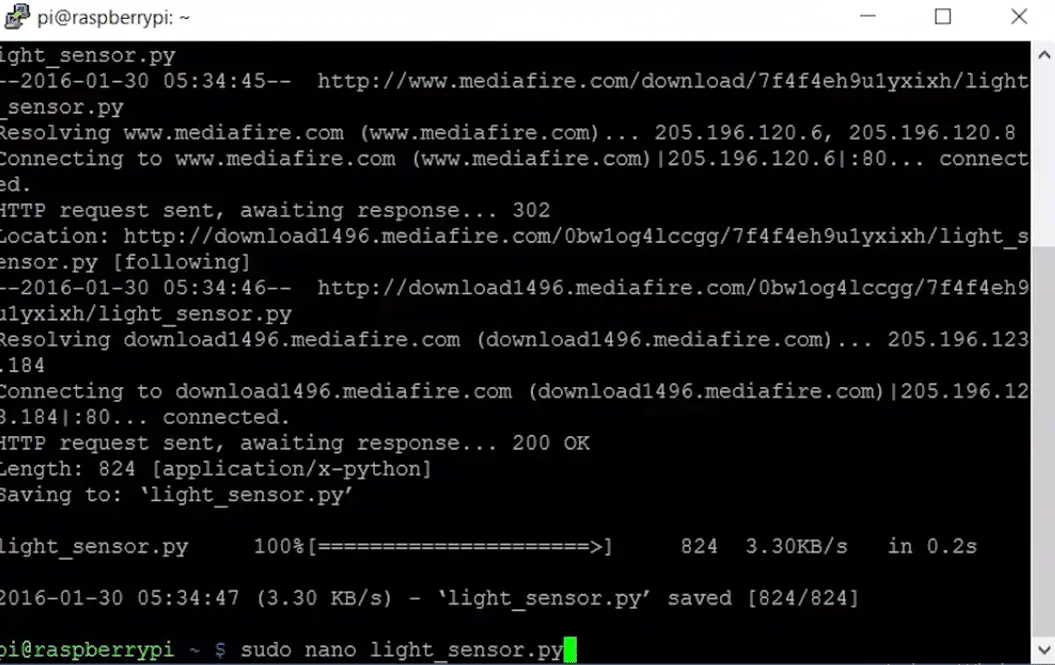
Now Just Run the Python Code as mention below command
Sudo python light_sensor.py
It will start showing the result like this
it will work just great if you face any problem with then please do comment write below!

Visit similar tutorials on Raspberry Pi
How to Build your own Super Computer with Raspberry Pi 3 Cluster
Build Super Computer with 5$ Raspberry pi zero using Cluster HAT


