


There are many situations where you need to Record your PC screen, like helping your less techy friend to navigate their PC or capturing live streaming to watch later.
There is lots of free or paid desktop screen recording software are available for this job but you can easily do this job with your pre-installed VLC media player.
Recording your screen with VLC doesn’t require any additional software because everything you need is built in.
Step-by-Step Process to Record Your Screen With VLC
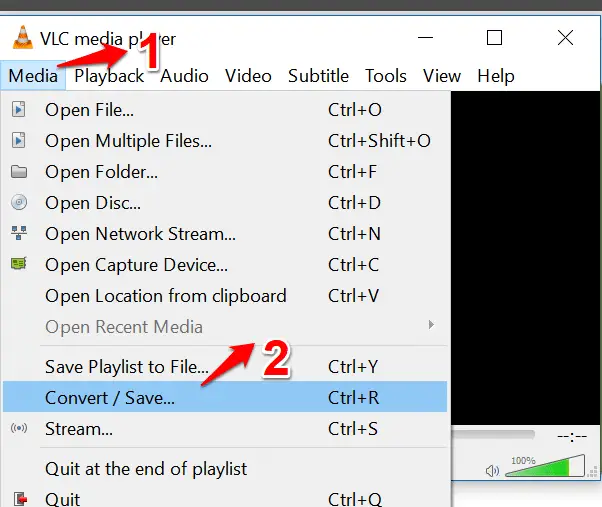
Step1:- To record your on-screen activity, install VLC (if you haven’t already done so) and launch the software. Click the Media menu and select ‘Convert / Save‘. This opens the Open Media window, which lets you configure the software’s screen-capture tools.
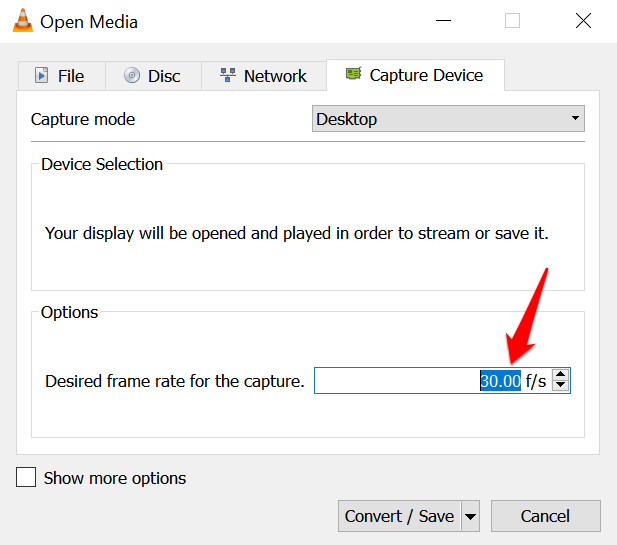
Step 2:- In the new window, click the Capture Device tab. This displays the current ‘Capture mode’, as well as the Device Selection and Options.
Click the ‘Capture mode‘ drop-down menu and switch from DirectShow to Desktop. The options below will change as a result.

Step3:- By default, VLC captures your desktop activity at a rate of 1 frame per second (fps), which will produce a jumpy and gappy video.
You can change the framerate to a smoother 25 or 30fps. Bear in mind that the higher the framerate, the larger the finished recording’s file size will be.
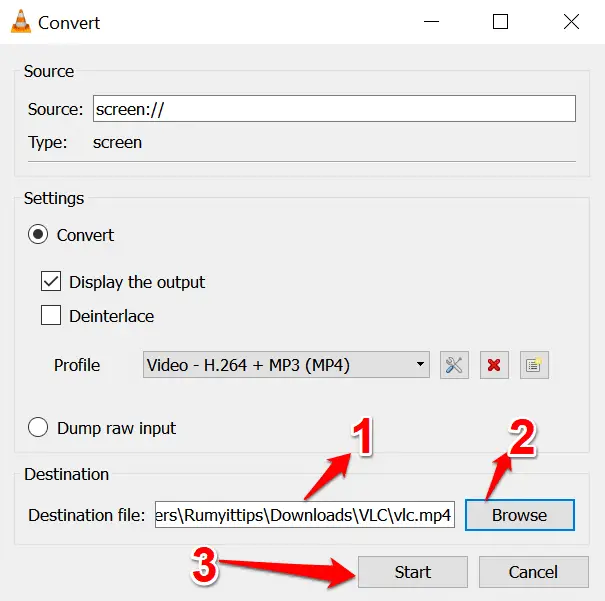
Step4:- Click the ‘Convert / Save‘ button at the bottom of the window, and a new window opens.
The source of the capture should be screen: \ There are options to ‘Display the output‘ and Deinterlace the captured video. The latter option is mainly used for capturing old TV programmes.
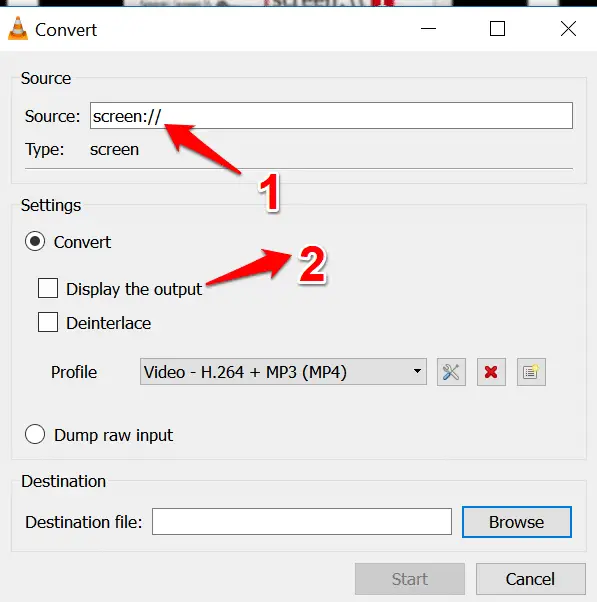
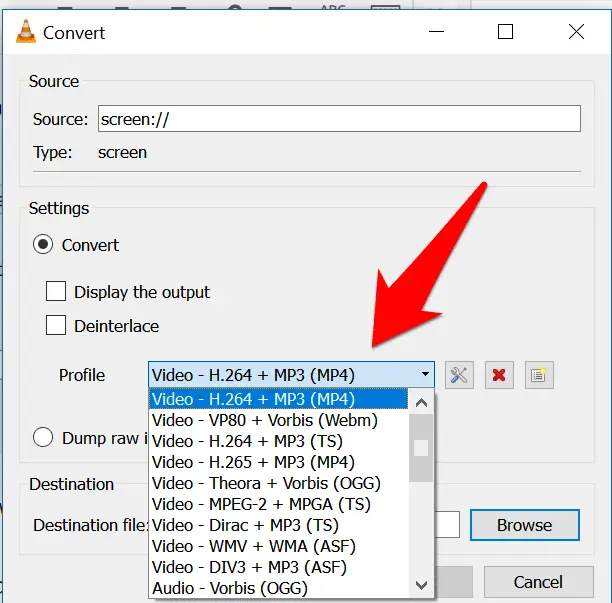
Step5:- Click the Profile drop-down menu to select the video and audio format. The top choice of ‘Video – H.264 + MP3 (MP4)’ is fine for most purposes.
Click the spanner icon to choose your own audio and video setup (see Step 6). Your PC may not support all the choices offered.
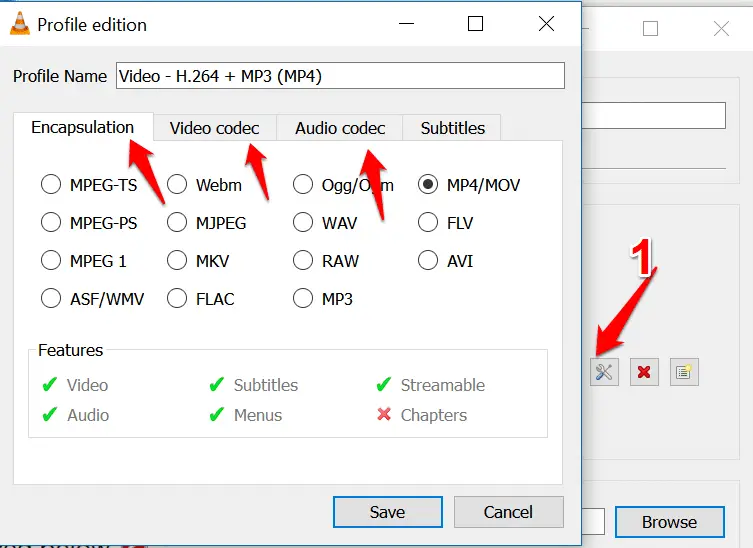
Step 6:- Pick the encapsulation (video format) by selecting one of the options. The features offered by a particular format are displayed below.
You can choose a different video codec and audio codec, and add subtitles. The Video and Audio codec tabs offer lots of options to play around with.
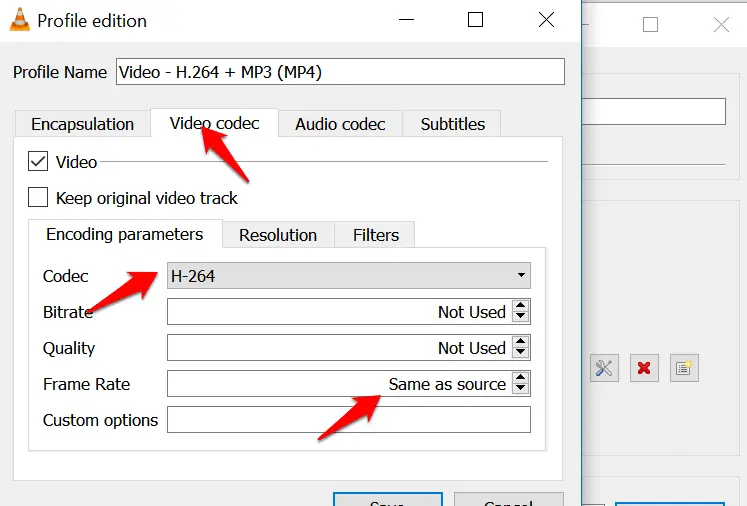
Step 7:- The Video tab lets you pick a different codec, and set the bitrate and quality. You can also adjust the video resolution and apply a selection of effects.
E Filters on offer include ‘VHS movie’, ‘Old movie’, Rotate, Sharpen, Cropping and ‘Magnify/Zoom interactive’. Tick any you require and click Save.
Step 8:- Enter a name for your screen capture and click Browse to navigate to the save location. Click Start and VLC will begin capturing your screen.
When you’ve finished your on-screen activity, click the Stop button to end the recording, which is saved to your PC for viewing or editing.
How To Record Your Screen With VLC Media Player

You may also like to read these awesome articles

