


It is super convenient to use a desktop PC either be it Windows or Mac since you can do multiple tasks at once. You can open your browser on half of your screen while listening to music on the other easily.
This increases your productivity on a massive level. But since you are here, we do know that you might have just got a new mac system and have no idea on how to split screen on Mac.
Well, not everyone can afford to go for multiple monitors for multi-tasking hence you need to take the easier path that saves time and also money. Split Screen allows you to use multiple apps side by side.
You can watch videos while working or make notes side by side. Most of the apps these days support split-screen on Mac so there is no special software that you will need for this.
So, here we have certain steps you can follow to enable the split-screen feature. It is super easy and hardly takes seconds to do so. Here we go.
How to use Split Screen on Mac?
If you have been using the older versions of Mac and have not yet updated to macOS Catalina, you can follow the steps below.
Also, the latest version does involve similar steps. So everything has been mentioned below that you can follow accordingly. Here we go.

macOS Catalina
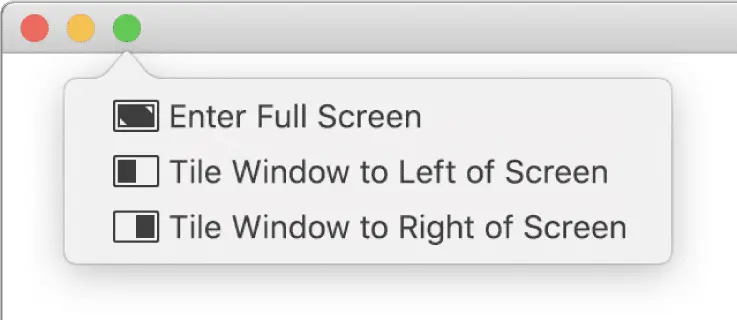
- Open the tabs you wish to use on the split-screen.
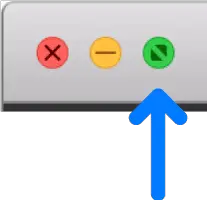
- Now, press and hold the full screen (green button) on the top-left corner of the tab.
- You will have three options: Enter Full Screen, Tile Windows on the left of the Screen, and Tile Windows on the right of the screen.

- If you have selected the window will now be on the left or right side.
- Click on the tab on the other side to cover the other half of the screen.
macOS Older Versions
- Open the tabs you wish to work on simultaneously.
- Press and hold the full screen (green button) on the top-left corner of the tab.
- Select the next half the screen you wish to put it into and release the button.
- Click on the tab on the other side to cover the other half of the screen.
There it is. All you need to do to split the screen on your mac so that you can open multiple tabs and perform multitasking.
How to adjust the Split Screen on Mac?
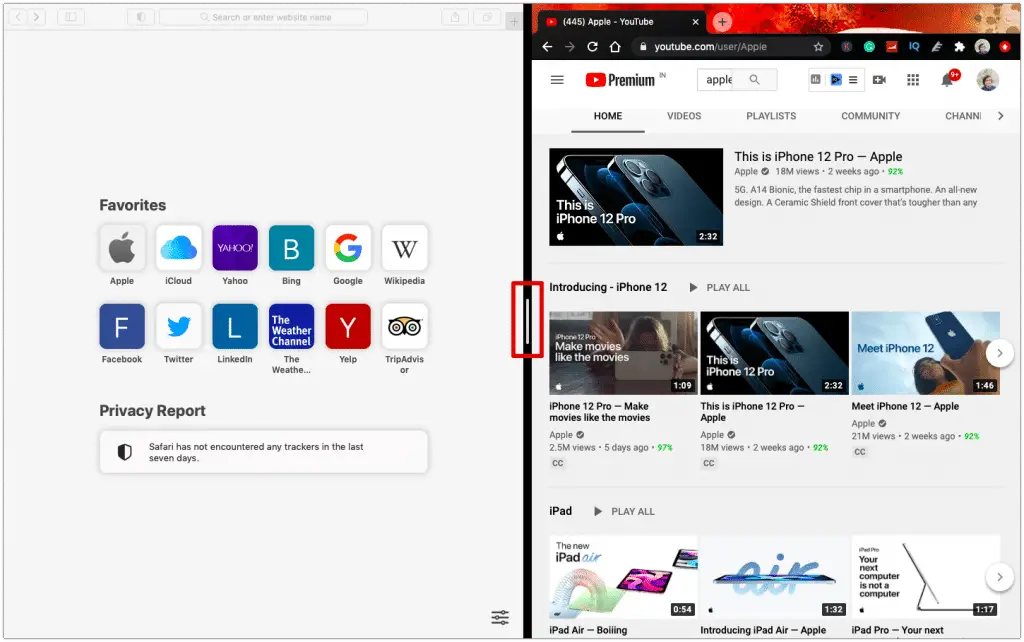
Once you have finally got your split-screen feature to work on your Mac, well, the system allows you to adjust the size or the space each tab takes from the other. It can be adjusted with a simple dragging.
For this, you need to move your mouse pointer between the two tabs opened on the screen. There is a small bar appearing on the screen.
Now hold and move drag it to make the changes. You can choose the space you wish to give to each window and work accordingly.
Well, it does not matter whether you have updated to the latest version. They all use the same method to adjust and make changes to the window by simply dragging and dropping the bar.
How to exit Split Screen on Mac?
Next up, you need to know how to come out of the Split Screen on Mac. As of now, you might have understood the very easy process to use and adjust the screen. For all the versions either be it the latest one or the old one, you can follow the same steps.
Choose the window you wish to keep working on and click on the green (full-screen) button to exit the Split Screen view on Mac.
The other window or the tab will now be in the full-screen mode you can access by using the four-finger swipe feature on the touchpad.
[su_noteYou may like to read our guide on How To Split Screen on Windows 10.[/su_note]Mac Split Screen not working
Well, if none of the above methods seems to be working out for you, just like everybody else there, you might need to check an option on your system that might be causing the problem.
By default, all the settings have been selected to make it work. However, just to be sure, you can follow the steps below.
- Move your cursor to the top-left corner of the screen and tap on the Apple icon.
- Click on System Preferences.

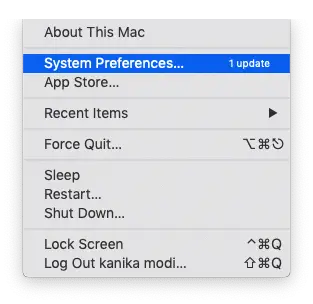
Open Mission Control from the list.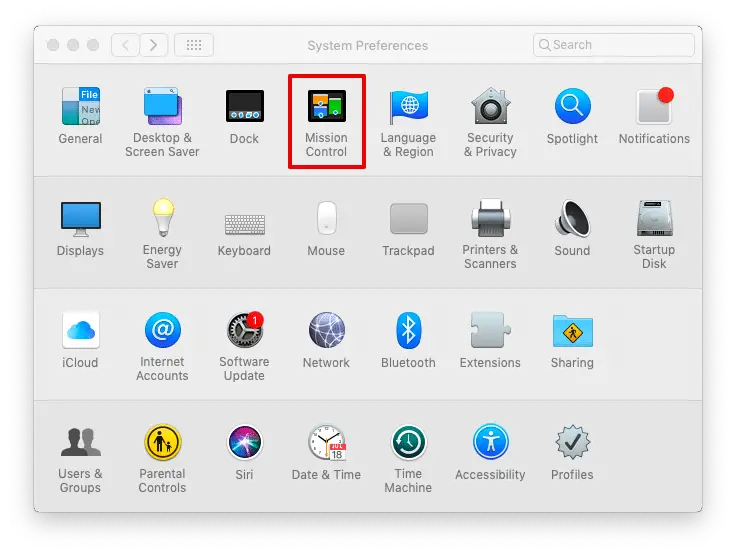
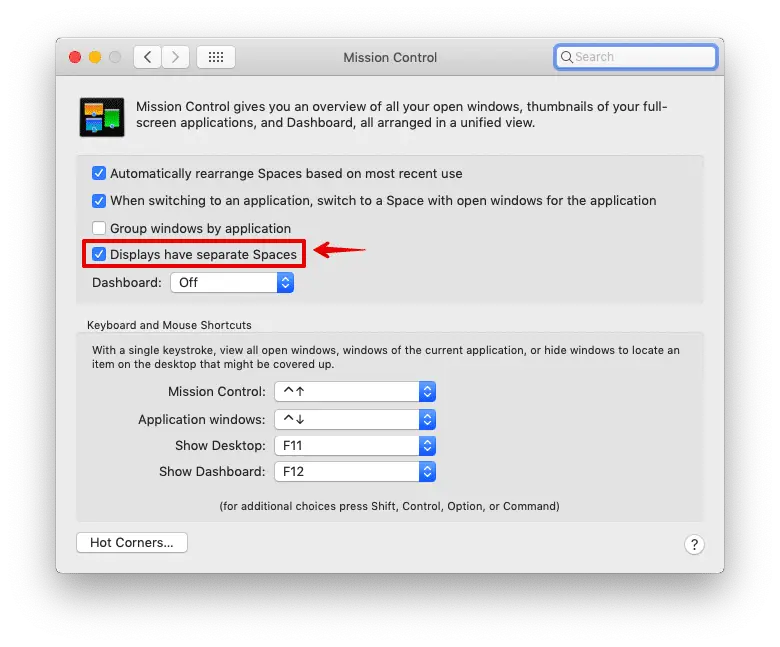
Enable the “Displays have separate Spaces” option.
After doing the above, you can try to follow the steps to make the Split Screen on mac work again. If still, it isn’t working for you; the app might not support the feature.
As we said, some apps, such as VLC media player, might not simply support this particular feature in case you can try out other third-party apps on the system available on the web.
Conclusion
Here it goes for the multiple aspects that you need to know about the Split Screen on Mac. It will not take you more than a few minutes to understand how everything works once you have tried the steps above.
For starters, holding on to the button and releasing it for split-screen might be a little confusing, especially if you are using the older versions.
The newest macOS has improved the feature and made it much easier and simpler.
Moreover, ensure you are aware that even though macOS supports Split Screen, you can only split it into two windows for multitasking. There are no direct methods that you can try in any manner for 3 or 4-screen splits.
For this, you may find other apps on the web that you can try out at your convenience. However, it may not be as useful to you since working on four tabs at once might not be easy.
Furthermore, if you have any issues with your mac, you can let us know in the comment section so we can help you at the earliest. There are chances that you may have errors when it comes to Split Screen on mac, do leave your queries here.

