


NAS stands for Network Attached Storage. Through the local network so that anyone can access the hard drive method for storage, backup and so on.
The most common thing in the enterprise department is that NAS allows you to send a common location for all backups, saved by the employee’s stored work, or a common file that everyone needs to access.
Most can be programmed to store data in a RAID 1 array, or data mirroring. Basically, NAS can be configured to store data on two different hard disks on the same NAS computer. This gives a degree of redundancy.
If one of the two drives fails, the data on the second drive will be secure. Western Digital is the “my cloud” for the brand, to provide consumers with the most popular commercial NAS system.
Western Digital My Cloud System is my advice to anyone looking for a redundant storage method for their home or small business, except for their own making and configuring.
NAS solutions can cost hundreds of dollars. If you have an unused Raspberry Pi and several hard drives, you can do it yourself without spending a penny.
Network hard drive super convenient. No matter what computer you use, or even the remote control, you can access the files over the network.
Although you can connect the Wifi and access the files wirelessly in a network
But they are expensive unless you use Raspberry Pi. Because raspberry pi is cheaper than NAS Server computers, it’s just a 35$ credit size computer
If you happen to have several hard drives, you can create your own, very cheap NAS settings, and use them well with Raspberry Pi. My current settings are two 1TB hard drives hard drive that connects to my network and can be accessed from anywhere using Raspberry Pi.
Also, need to pay attention to is that before we understand, is the file format. As long as the hard drive is initialized as a file store, the drive must be formatted using the file format type. Some type of index to help the drive communicate with the computer, and a logically meaningful way to store data. Today there are three most popular formats worth knowing.
Windows NTFS (New Technology File System)
MAC: HFS / HFS + (hierarchical file system)
General: exFAT
Assuming that you have a NTFS format on your drive, we will write this guide only because most commercial external hard drives are pre-formatted as NTFS.
That’s it
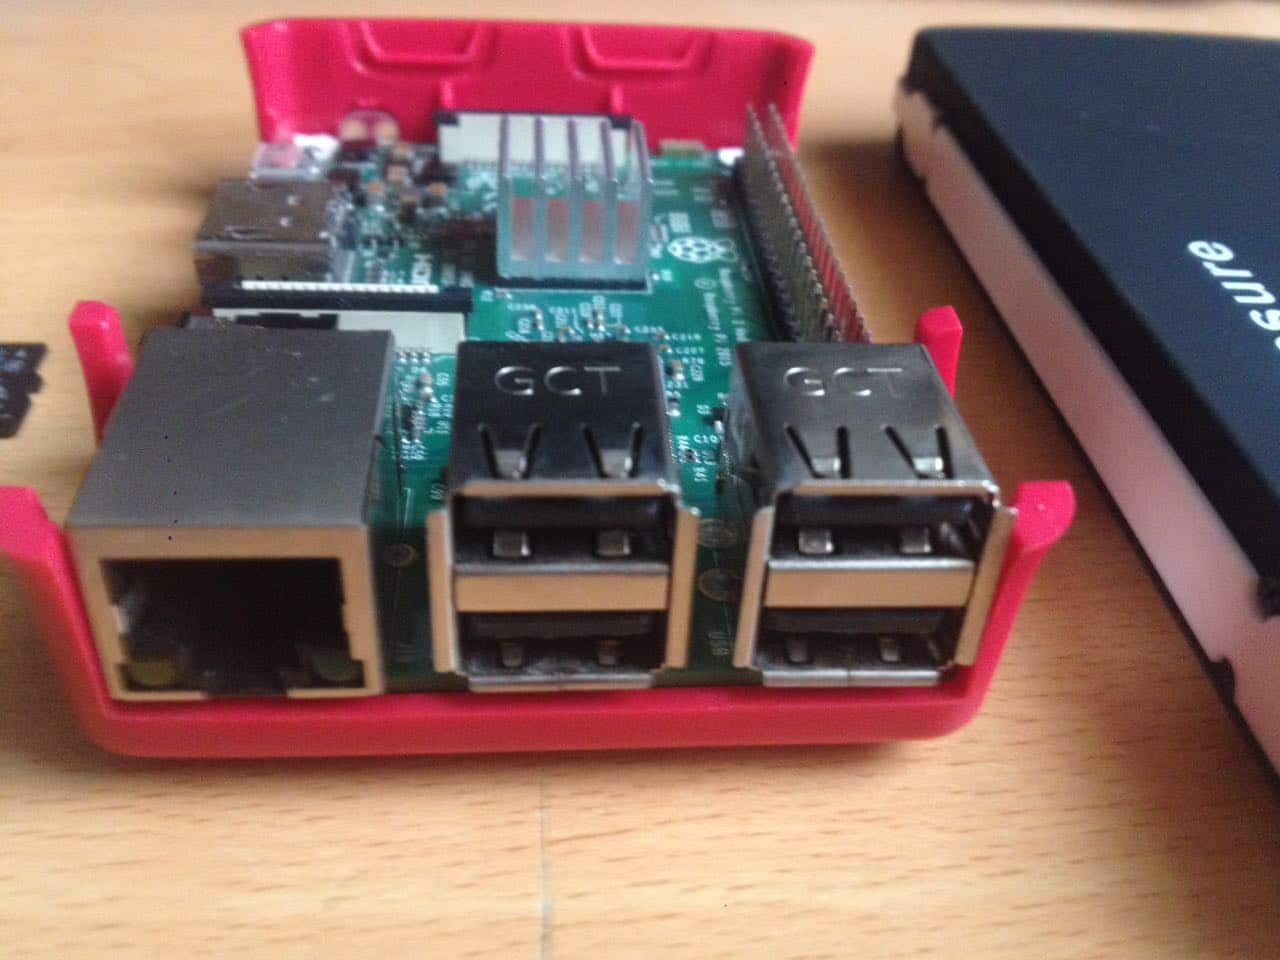
Step 1 Collect the Necessary Hardware
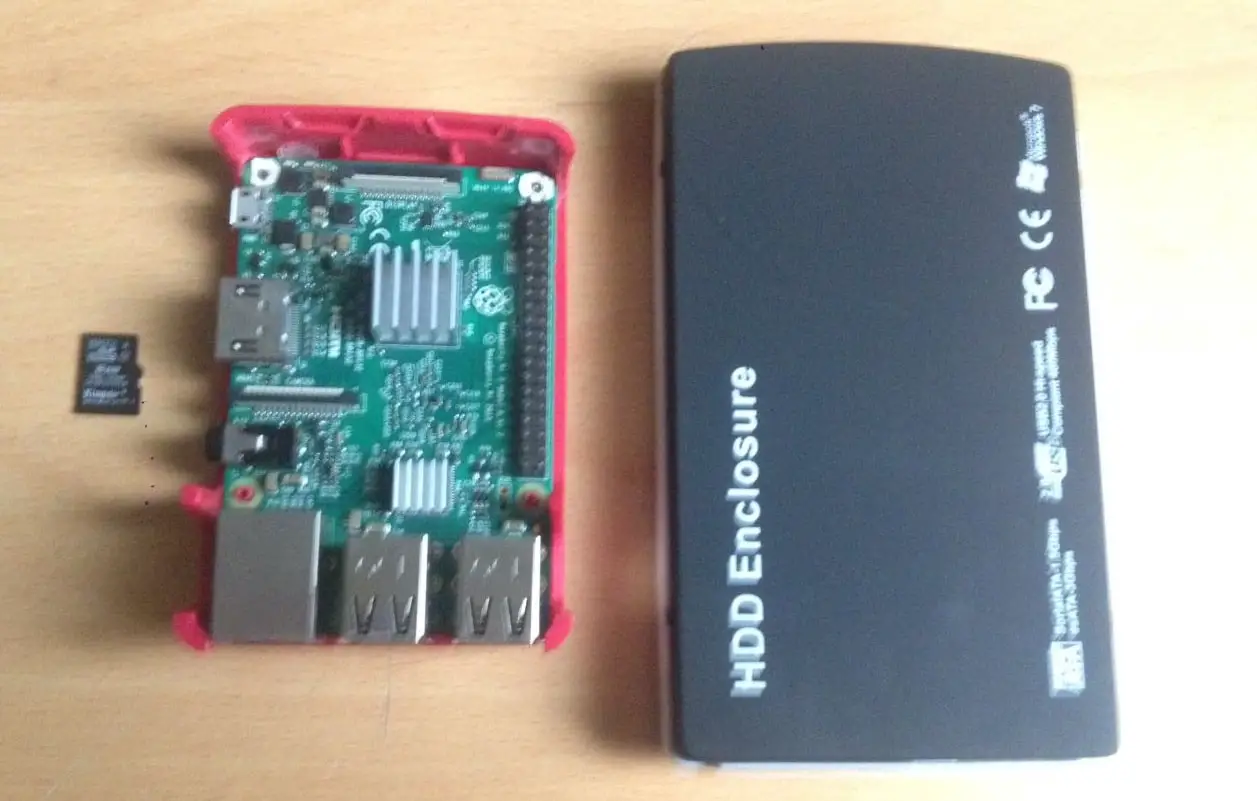
You also need a Raspberry Pi. Models 1 and 2 apply to this application, but you will get better support from Raspberry Pi 3. With Pi 3, you are still limited to USB 2.0 and 100Mbps via Ethernet. However, I can supply Pi 3 as an external HDD, and Pi 2 B cannot provide enough power for the same HDD.
So I Recommended for Raspberry pi 3 Model B
1.External USB Hard Drive for NAS
2.MicroSD Card 8GB is Recommended
3.LAN Cable for givingve connection to Router of Network.
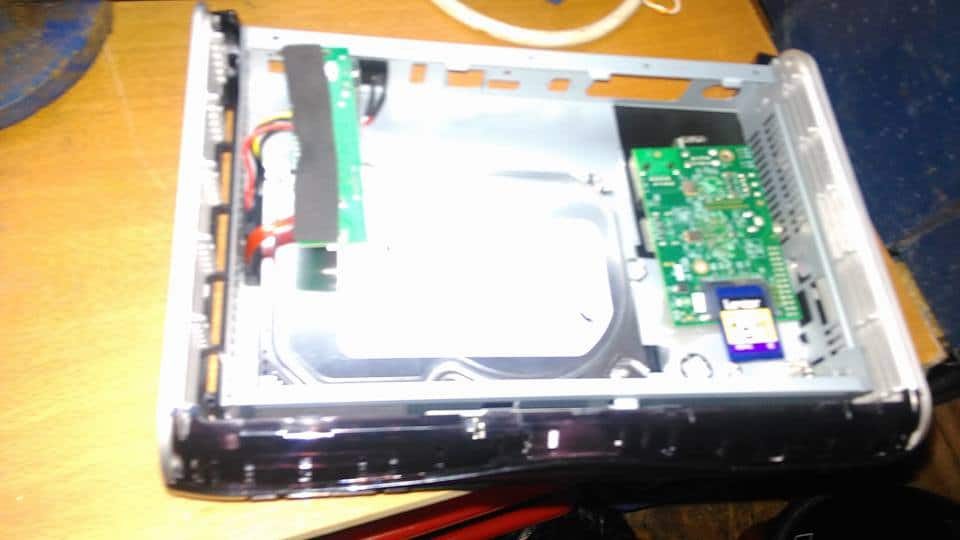
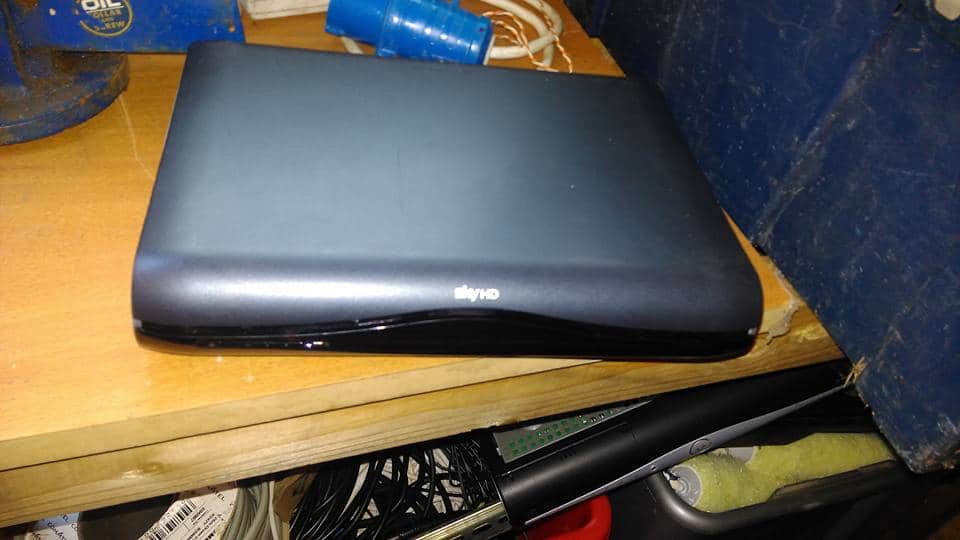
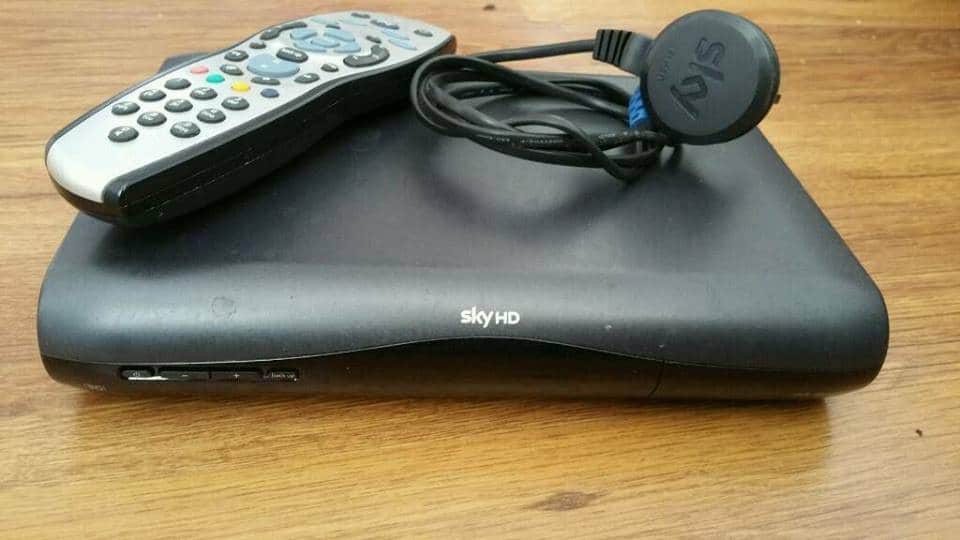
Setup all things in a case of SKYHD TV BOX for my personal Use
Step 2 Setup Software
Format the MicroSD card to FAT32 using SD Formatter.
Download the Operating System image file of NAS from Sourceforge.
Unzip it using 7zip in Windows or The Unarchiver in Mac.
Burn the extracted image to the SD card using Win32 Disk Imager on Windows or ApplePi-Baker on Mac.
Step 3 Setup OpenMediaVault
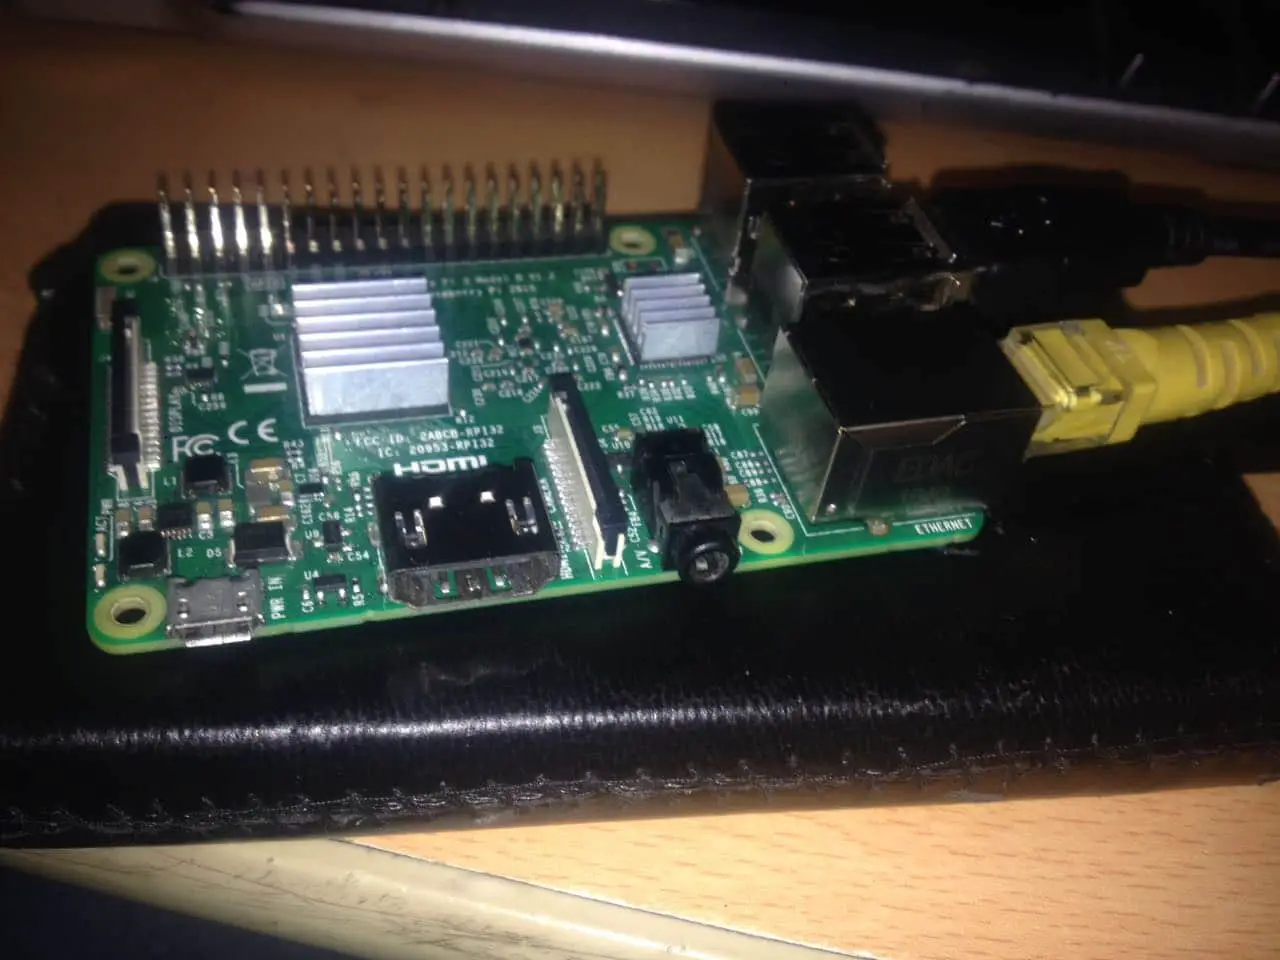
After writing the image to the SD card, connect the peripheral device to Raspberry Pi. Make sure you connect the LAN CABLE Raspberry pi 3 to Network HUB
For the first boot, you need to connect via an Ethernet keyboard, monitor and local network. Next, connect the power to Raspberry Pi, let it complete the initial startup process.
To know the what is the IP address of you raspberry pi Scan the Network via Advance IP Scanner
Once completed, log on using the default Web interface credentials. (By default, the username is admin and the password is openmediavault.) This will provide you with the IP address of Raspberry Pi. After that, you will no longer need the keyboard and monitor to connect to Pi.
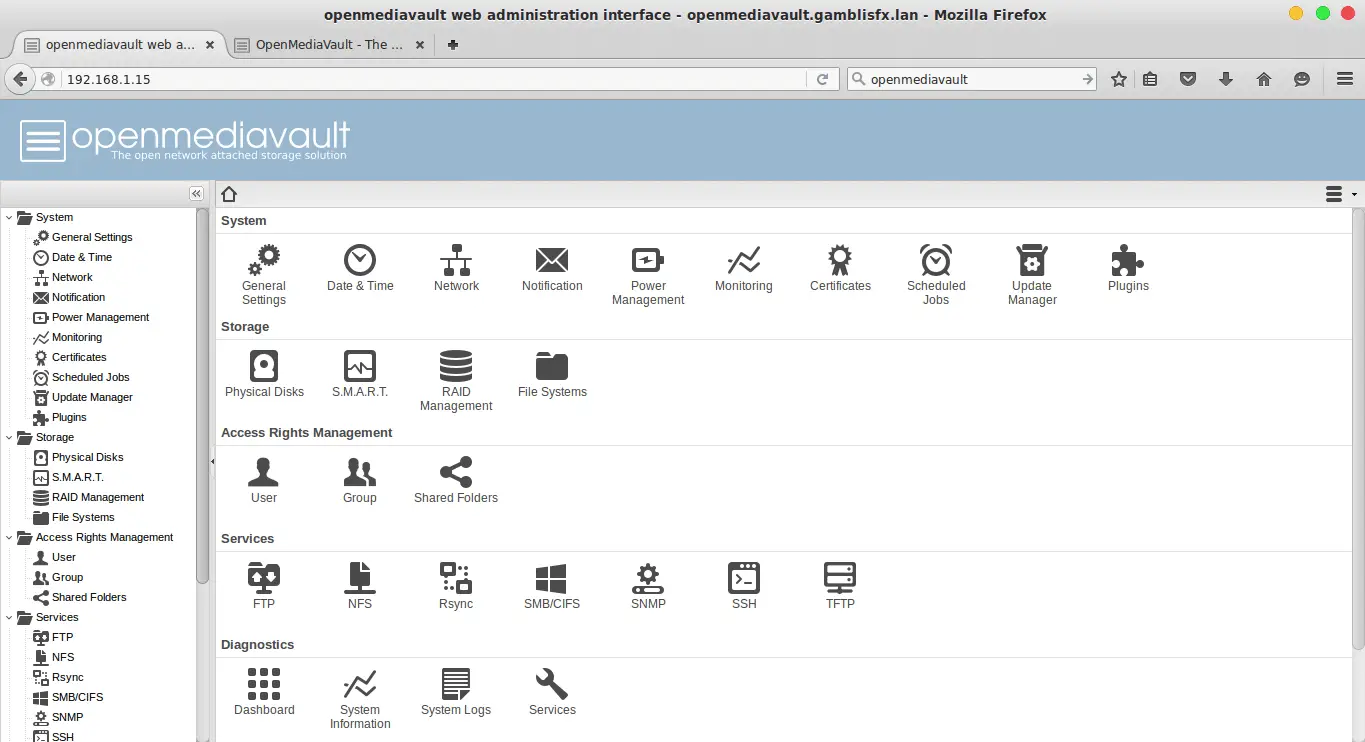
Connect the storage drive to Raspberry Pi and open the Web browser on the same network computer. Enter the IP address in the address bar of the browser and press Back. Re-enter the same login credentials (username admin, password is openmediavault) and you will be taken to the Web interface where OpenMediaVault is installed.
Mounting Storage
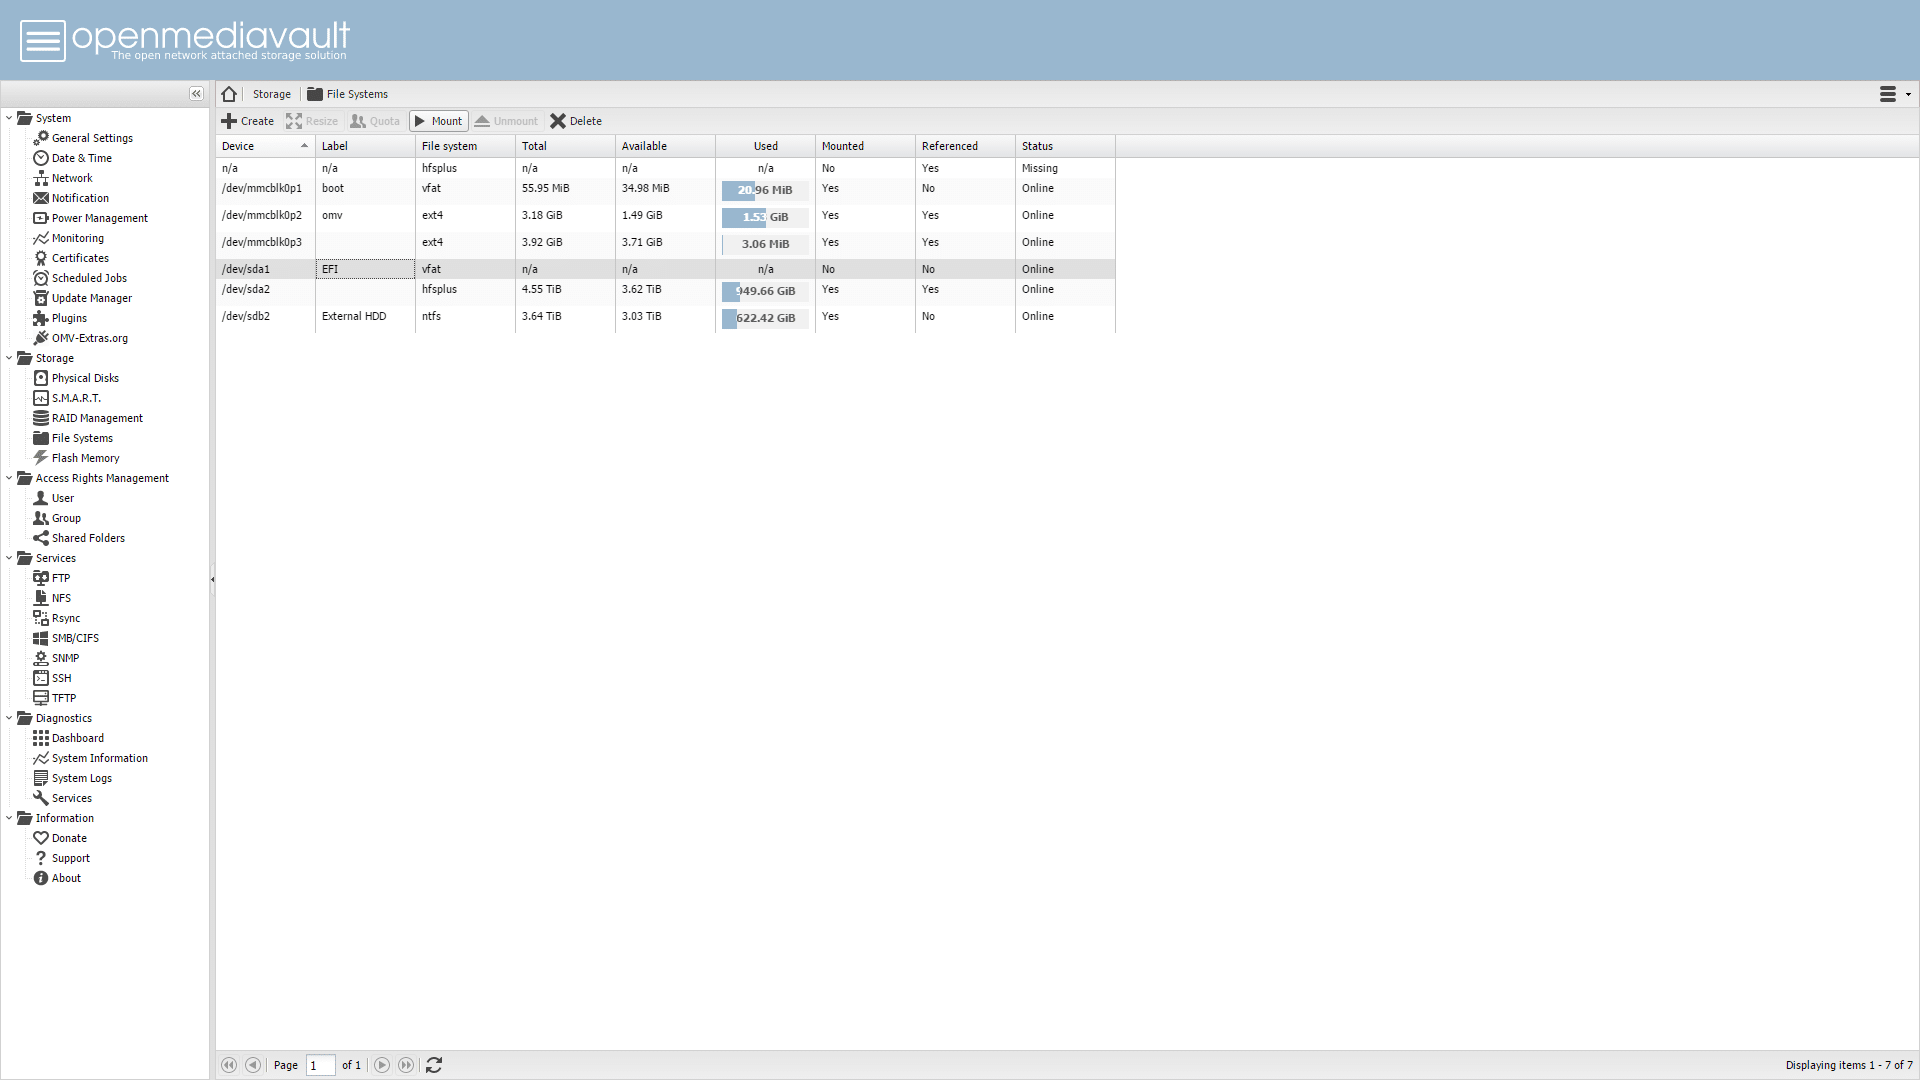
The first thing you will have to do is get your NAS to install your external drive online. Click the file system in the left navigation menu under Save.
Locate your storage drive and list it under the Devices column, such as / dev / sda1 or / dev / sdc2. Click a drive to select it, and then click Install. After a few seconds, click on the application in the upper right corner to confirm the operation.
Repeat this step to install any other drives.
Create Shared Folder
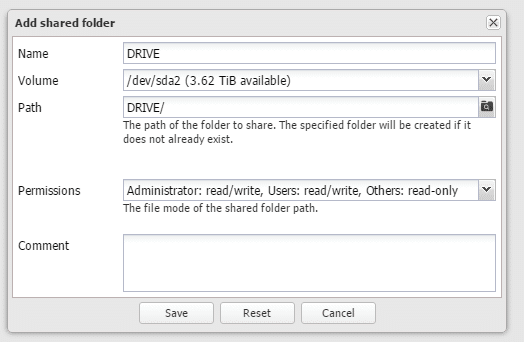
Next, you will need to create a shared folder so that other devices on the network can access the drive. To do this:
In the navigation pane under Access Rights Management, click Shared Folders.Click Add and give the folder a name.Select one of the storage drives in the drop-down menu on the right side of Volume.Specify the path (if you want to be different from the name).Click Save.
Enabling SMB/CFIS
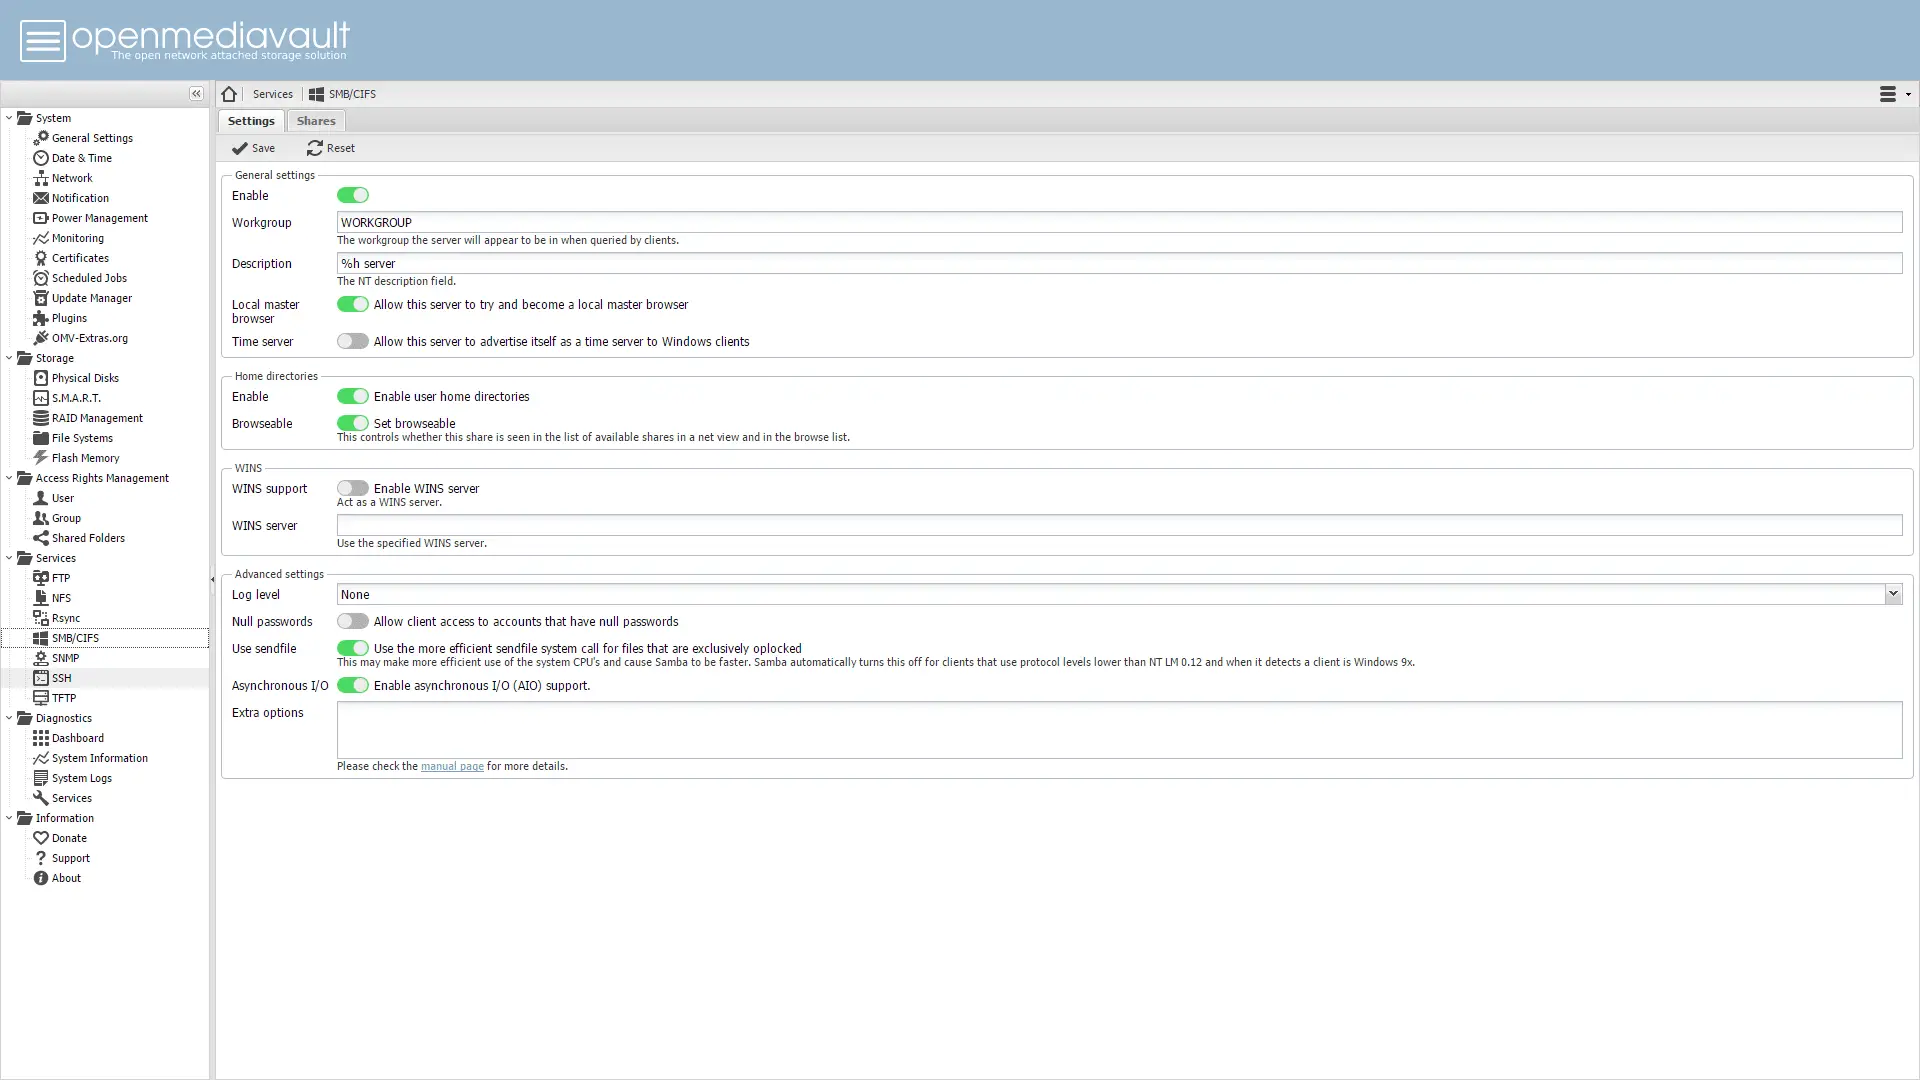
Finally, to access these folders and drives from an external computer on the network, you need to enable SMB / CFIS.
Click “SMB / CFIS” under “Services” in the left navigation pane, and then click the toggle button next to “Enable“. Click Save and apply to confirm the change.
Next, click the “Share” tab near the top of the window. Click Add, select one of the folders that you created in the drop-down menu next to the shared folder, and then click Save. Repeat this step for the shared folder you created.
Access the drive over the network
Now that your NAS is up and running, you need to map these drives from other computers to see them. This process is different for Windows and Mac, but it should take only a few seconds.
WINDOWS
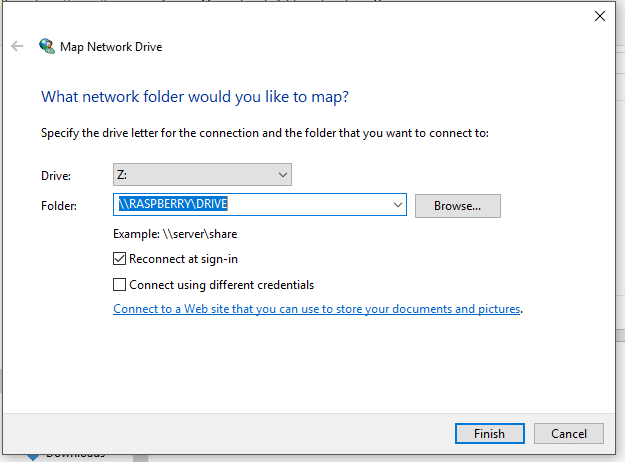
To access a network drive on Windows, open File Explorer<span style=”font-size: medium;”> and click on this PC. Select the Computers tab and click Map Network Drive.
Select an unused drive letter from the drop-down menu next to Drive. In the Folders field, enter the path to the network drive. By default, it should look like \\ RASPBERRYPI \ [folder name]. (For example, one of my folders is an HDD, so the folder path is \\ RASPBERRYPI \ HDD).
Click Finish and enter the logon credentials. By default, the user name is pi and the password is raspberry. If you change or forget the user’s login information, you can reset or create a new user and password in the Web interface under “User” in “Access Management“.
Mac
To open a network folder in OS X, open the Finder and press Command + K. In the window that appears, type smb: // raspberrypi or smb: // [IP address], and then click Connect. In the next window, highlight the volume you want to load, and then click OK.
You should now be able to view and access these drives in the Finder or File Explorer and move the file to a network drive or remove it from a network drive.
OpenMediaVault built a lot of settings, including remote restart NAS, set the date and time, power management, plug-in manager and so on. However, if you need a network storage solution, you do not have to dig deeper.
Have Fun!
You may read to like this
How to Block wifi signals from neighbors
How to Whitelist Your WiFi in Windows 10


