Many Windows 10 users have experienced the issue of receiving the “Windows could not automatically detect this network’s proxy settings” message while troubleshooting Internet-related issues.
In this article, I will be working you through steps to fix this issue. There are a few options to fix this. I recommend you work yourself down my list of fixes to get a solution for your issue.
Note that the fix that works on one computer may not necessarily be the fix that will work on a different system.
Solutions to “windows could not automatically detect this network’s proxy settings”
Option 1: Check Proxy Server Settings
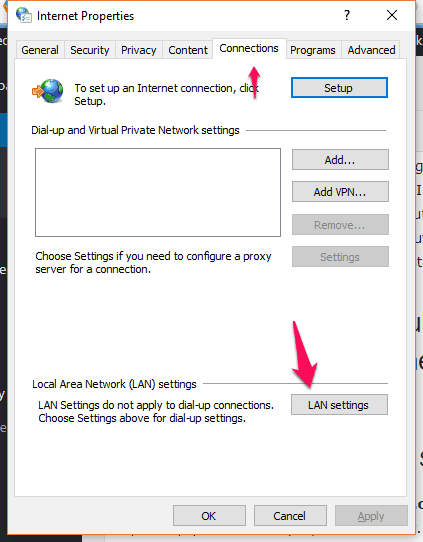
Open your Run Window and type inetcpl.cpl then hit Enter. This opens up your internet properties window. Click the Connections tab, and then click the LAN settings button below.
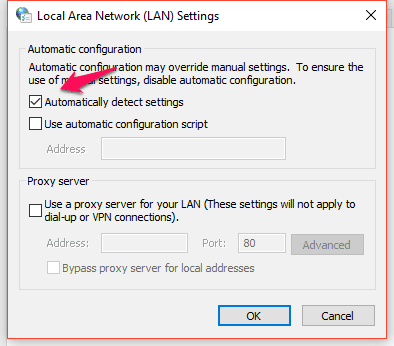
On the LAN settings windows, check to see your “Automatically detect settings” check-box is checked. The other textbox should remain unchecked.
Option 2: Resetting your TCP/IP
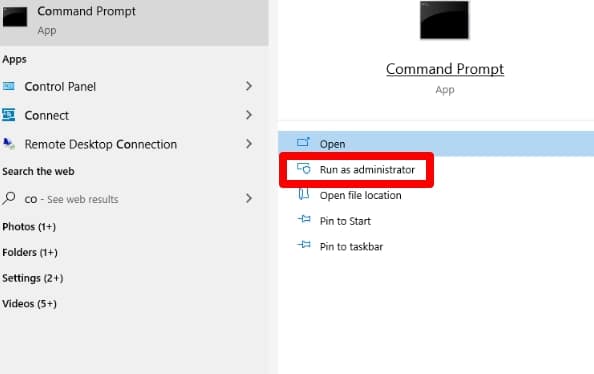
Open up your command prompt with administrative privileges. to do this search for command prompt under your start menu or with the search tool on the taskbar. Right-click on it and chose “Run as administrator“.
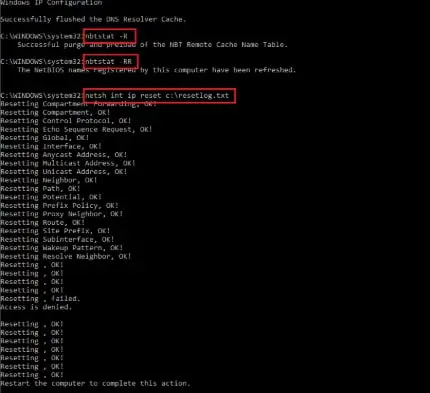
Once the command prompt is open, type netsh int ip reset resetlog.txt. click enter.
Wait to restart your computer afterward.
Option 3: Uninstall your antivirus
As much as this is not the most likely cause of the problem, it is an option to try once the first two fail. It is possible one is running an antivirus that is not best suited for his computer or OS.
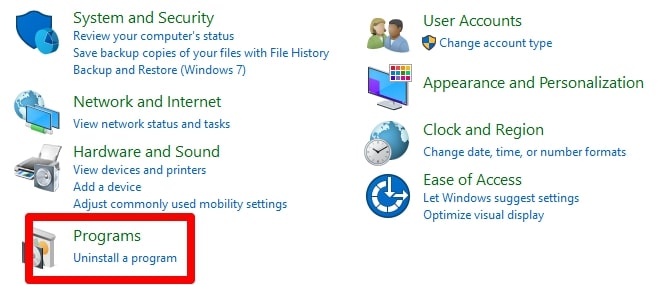
To uninstall the antivirus open your control panel and click on uninstall a program.
Search for your antivirus under the list of programs or use the search box to search for your antivirus. Once located, click uninstall. Depending on your antivirus program, you will get a process to complete the uninstall. If the default windows defender is used as it is my case, then this option can be skipped. If uninstalling the antivirus solves the problem, opt to use a different antivirus that will be better suited for your computer.
Option 4: Resetting Internet settings
Resetting internet often helps resolve the “Windows could not automatically detect this network’s proxy settings” Use hotkey Windows + S and enter internet options, here select Internet Options from the menu.
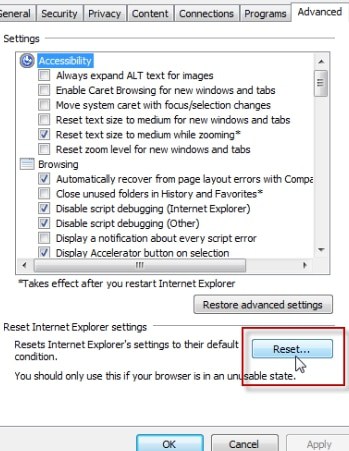
In the internet options window, head to the “Advanced” tab. At the bottom of the tabs interface, click the reset button.
On the window that pops up, you could choose to clear personal settings before hitting the reset button. One could optionally select Restore advanced settings. And finally, click on Apply and OK to save changes.
Option 5: Restart the network adapter
This fix often proves a problem solver. Right-click on the network icon at the bottom right corner of your taskbar and choose Open Network and Sharing Center.
Next click on “change adapter options“.
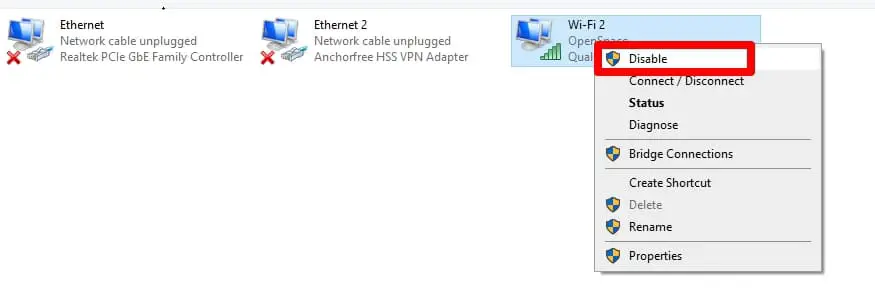
Next, locate your network, right-click on it and select disable. After that, right-click on it again and select Enable.
This fix may not be a permanent solution and will have to be repeated when the problem persists.
Conclusion
In fixing the “windows could not automatically detect this network’s proxy settings” I would advise one tries troubleshooting using these steps in order.
The first steps are more likely to get your issue fixed and also easier. Latter steps are more daring alternatives if it is not still working.


