


ESP8266 is an extraordinary hardware. What we originally thought – and initially sold products – the simple UART-to-WiFi bridging via Hayes modem commands has become one of the best-embedded platforms. It is a powerful small microcontroller with WiFi and can send raw frames. The last point is awesome, because it allows some pranks or happy productions, depending on your point of view.
Although violates the license for [spacehuhn] (non-open source) code, the code for this WiFi hacking tool is taken from the creator of the ESP8266 deauth toolkit [spacehuhn].
actually, it’s uses management packets to send deauth frames, which stops any device to connect to Wifi Router. it’s mostly good for a prank.
Although there are many ways to prevent deauth attacks, most routers do not have management frame protection.
Step-by-Step process to Build a Wifi Jammer using Arduino Esp8266
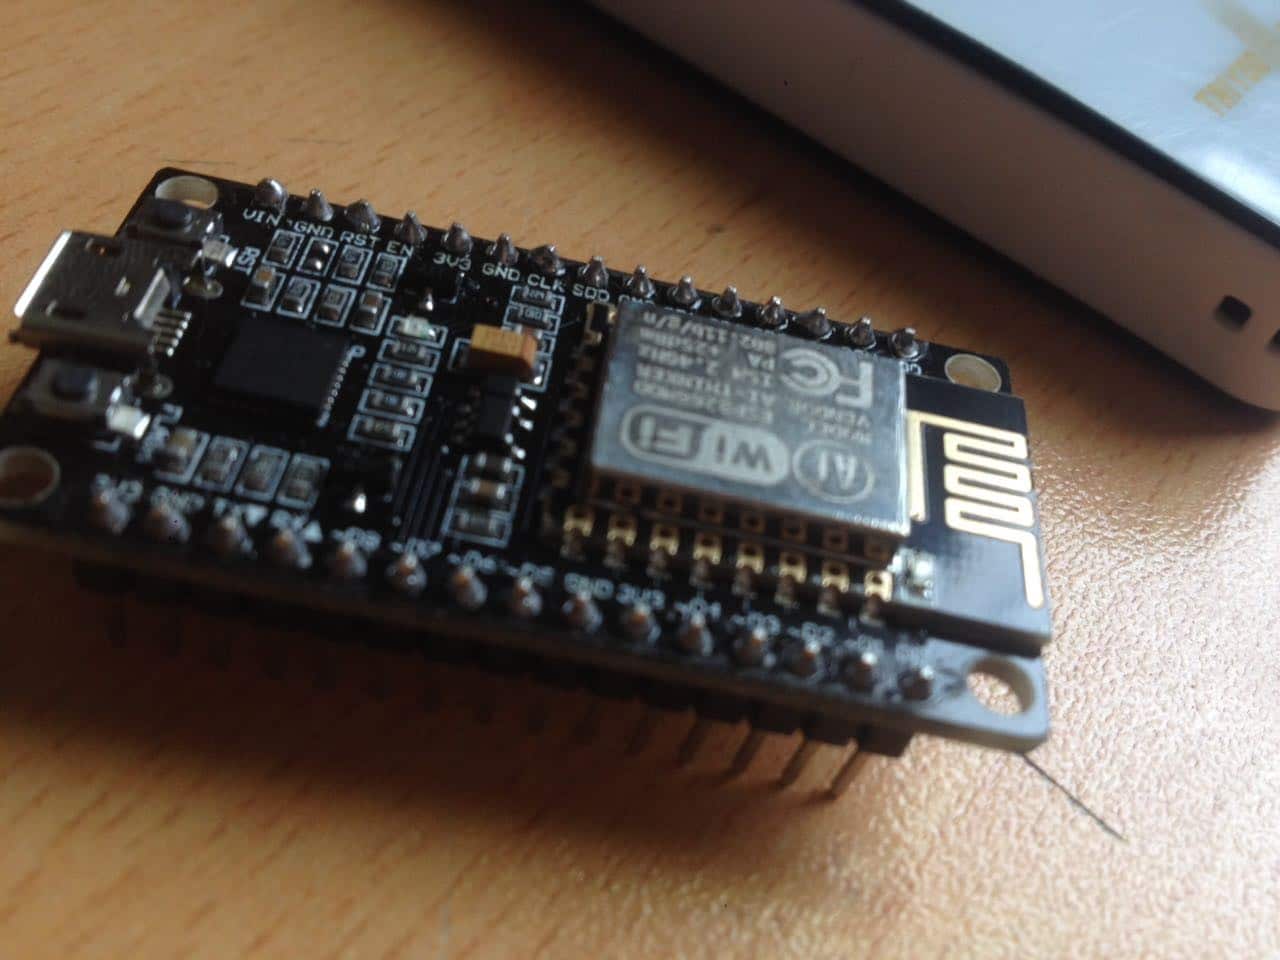
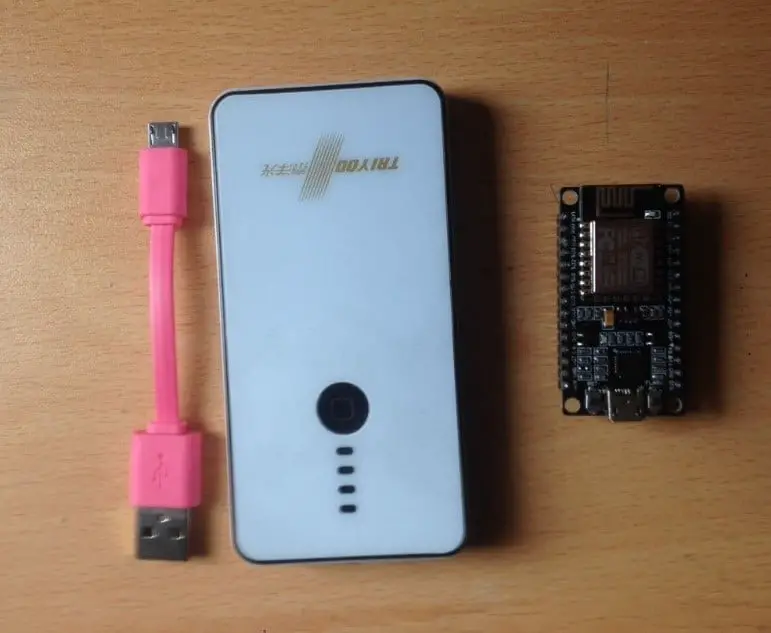
Hardware used in this project.
- ESP8266 (Buy Now)
- Powerbank (Optional)
Step1:-
In this project, we will try to make IoT more secure by WiFi interference. In short, this experiment scans the available WiFi and WiFi networks, and we are able to select a specific network and use different attacks.
In order to make this WiFi jammer, you mainly need only part of it: ESP8266.
You can purchase a specific version of the ESP8266 with the NodeMCU firmware, and it is easy to program without any programmer. The ESP8266 has a built-in programmer. You can buy here
Step 2:- Set software and compile the firmware
- Download the Arduino compiler from the official website of Arduino from here.
- Install the software and execute it,
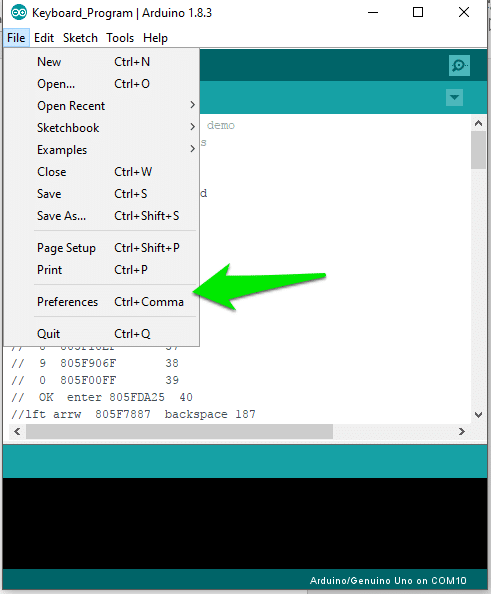
- Go to File -> Preferences
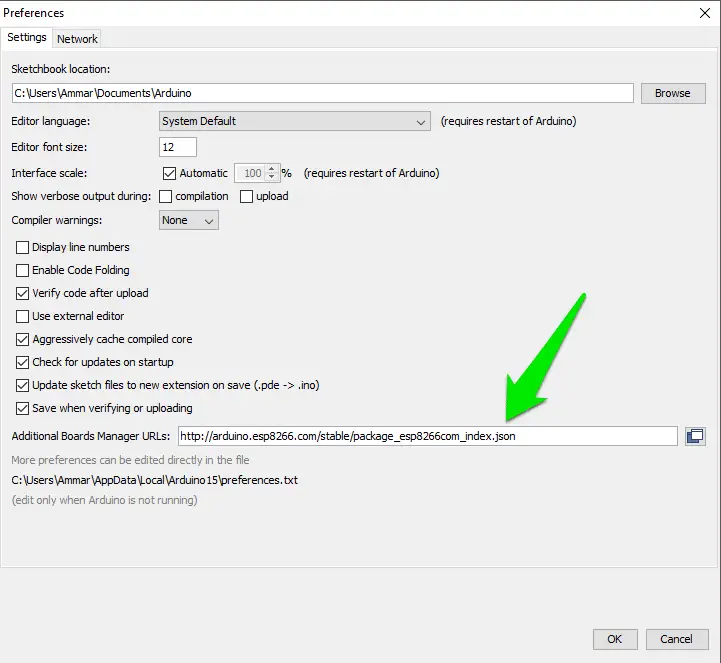
 4.Add https://arduino.esp8266.com/stable/package_esp8266com_index.json to the Additional Boards Manager URLs.
 5. Click to Tools -> Boards Manager
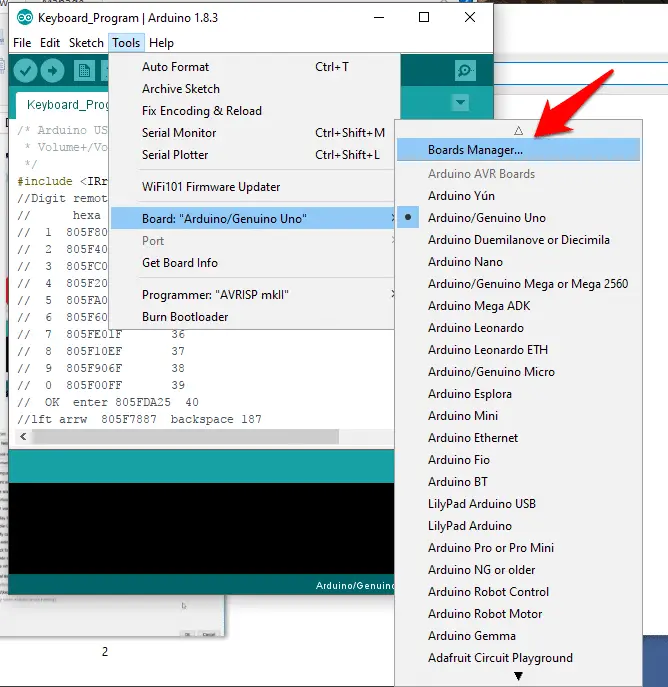
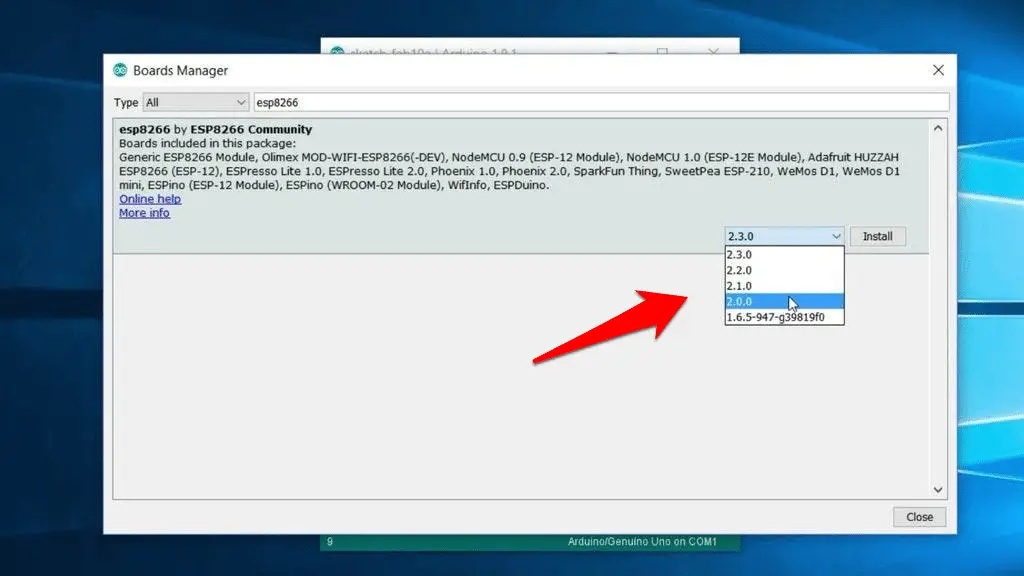
- Type keyword ‘esp8266’
- Select 2.0.0 and click on Install (must be version 2.0.0 never go for latest).
- Click File -> Preferences
- Open the folder path under More; preferences can be edited directly in the file. Don’t forget to save!
- Click on packages -> esp8266 -> hardware > esp8266 -> 2.0.0 -> tools -> sdk -> include
- Open user_interface.h file with your favourite text editor or just Wordpad.
- Scroll down and, before #endif, add following lines:
typedef void (*freedom_outside_cb_t)(uint8 status);int wifi_register_send_pkt_freedom_cb(freedom_outside_cb_t cb);void wifi_unregister_send_pkt_freedom_cb(void);int wifi_send_pkt_freedom(uint8 *buf, int len, bool sys_seq);
Save the file!
Step 3 Get the Firmware files for ESP8266
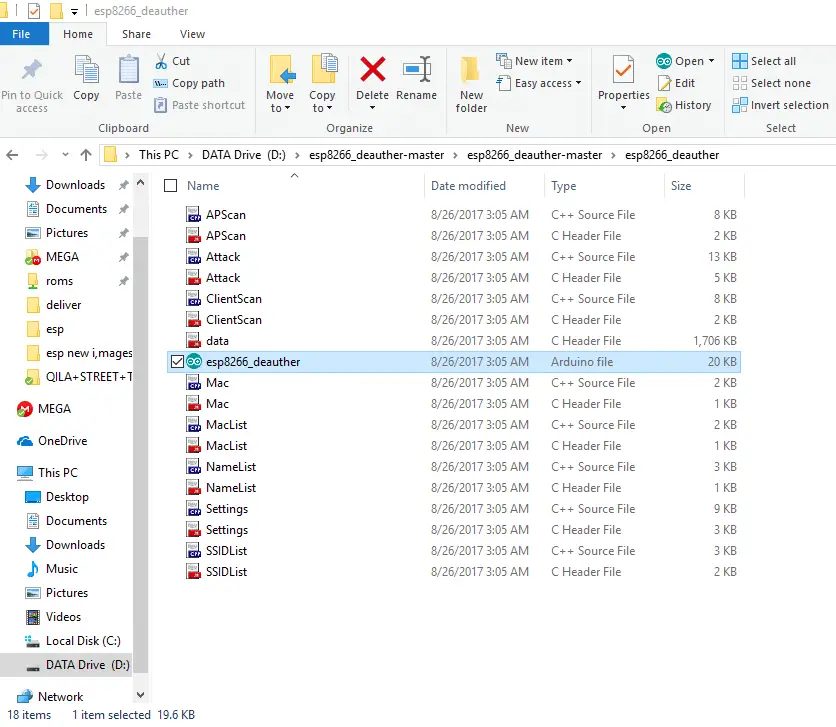
- Just Download the files from GitHub link here (that firmware credit goes to Original Developer:spacehuhn)
- Click folder WIFI Jammer -> esp8266_deauth -> esp8266_deauther.ino in Arduino
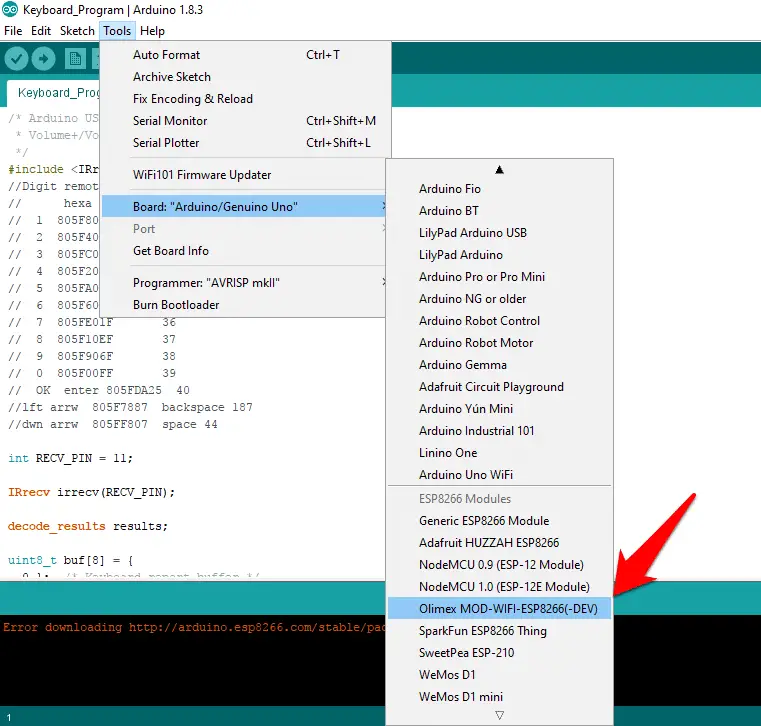
- Click at your ESP8266 board at Tools > Board. I used NodeMCU 0.9 but you can try NodeMCU 1.0 or the generic ESP8266 module.
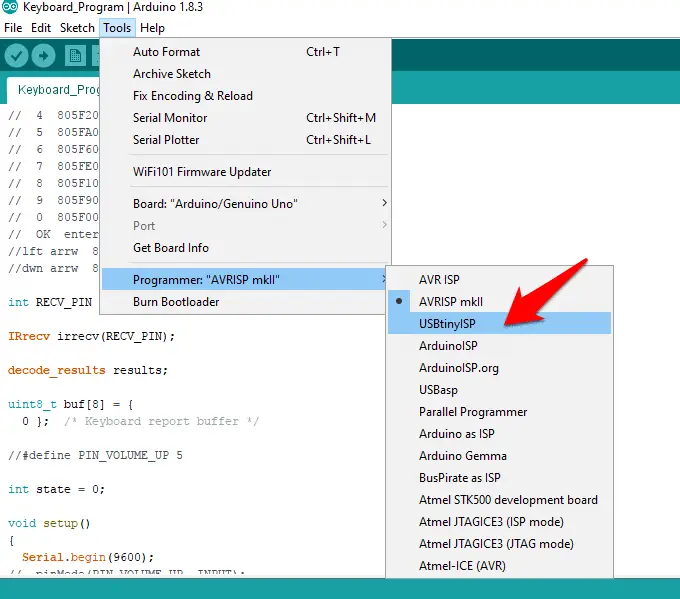
- Select your programmer at Tools > Programmer > ArduinoISP
 5. Select the right port number. at Tools > Port. If there aren’t any ports that show up, you may have to reinstall the drivers.
6.Upload! (Ctrl +U)
Your WIFI Jammer Device is Ready!
How To Use
1. First power your ESP8266. If you have a USB OTG cable or a mini USB cable with a power supply or USB wall adapter or a Power bank, you can use your smartphone.
2.Now you can use any smartphone or PC to control the interference by simply connecting to the ESP8266 module so that you can scan WiFi networks from mobile or PC or MAC and connect to AndroidAP. The password is ‘killwifi‘. You can change this SSID and password from the code you uploaded.
3.After Connection to the ESP8266 you can run the ip in your Browser 192.168.4.14.Just Hit the SCAN and Select the WIFI SSID
4.Select the attack tab, choose deauth all. Everyone on the WiFi should be disconnected. Now you can try other attacks as well. Happy hacking.
Note:-Please Do it at your Own Risk this is for Only Educational Purpose.
You may also to read these articles
Top Best Arduino Board to Buy in 2018
How to Drive and Build Project with Nokia 5110 LCD using Arduino


