


Microsoft DirectX is a collection of application programming interfaces (APIs) for handling tasks related to multimedia, especially game programming and video, on Microsoft platforms.
Definitely, if you are a gaming enthusiast chances are that you have heard about DirectX. There is however just like with almost every other technology chance for malfunction and sometimes a need for troubleshooting or Diagnosis, hence the DirectX Diagnostic Tool.
The DirectX Diagnostic Tool displays a host of information about DirectX and also lets you perform basic diagnostic tests on the DirectX system. There are a few things you could achieve using this tool. I will guide you on how to use the tool in Windows.
What is your version of DirectX (and DirectX Diagnostic Tool)
DirectX’s first version debuted with Windows 95. the most recent version comes with Windows 10 and is called DirectX 12. The version one runs depends on 2 factors;
- Windows version
- DirectX version supported by your graphics adapter.
This implies on Windows 10 you would be running DirectX 12 but may still be running DirectX 11if you’re using a card that was designed for DirectX 11.
To confirm what version of the tool, open it up. To get this tool opened up, click on the Start menu and type “dxdiag” Press Enter to open the DirectX Diagnostic Tool.
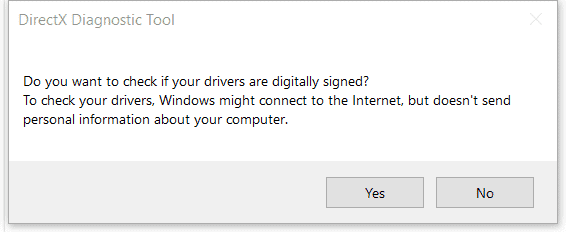
If it is the first time you are running the tool, you will be asked whether you want to check to see if your video drivers have been signed by Microsoft. Click Yes. This will imply that the tool will let you know whether they are signed or not. It is best practice to use signed drivers.
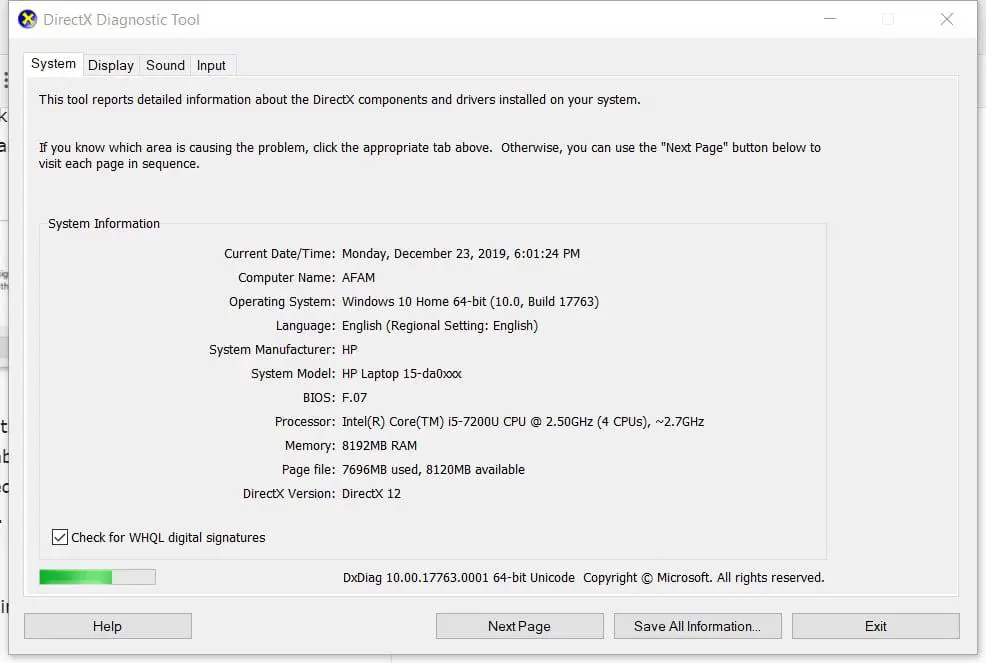
 Once the check is done, the DirectX Diagnostic Tool will open by default on the System tab. This tab gives general information about your system. Notedly is information about what version of the tool you are running. In my case, as shown below, Version 12.
Using the DirectX Diagnostic Tool
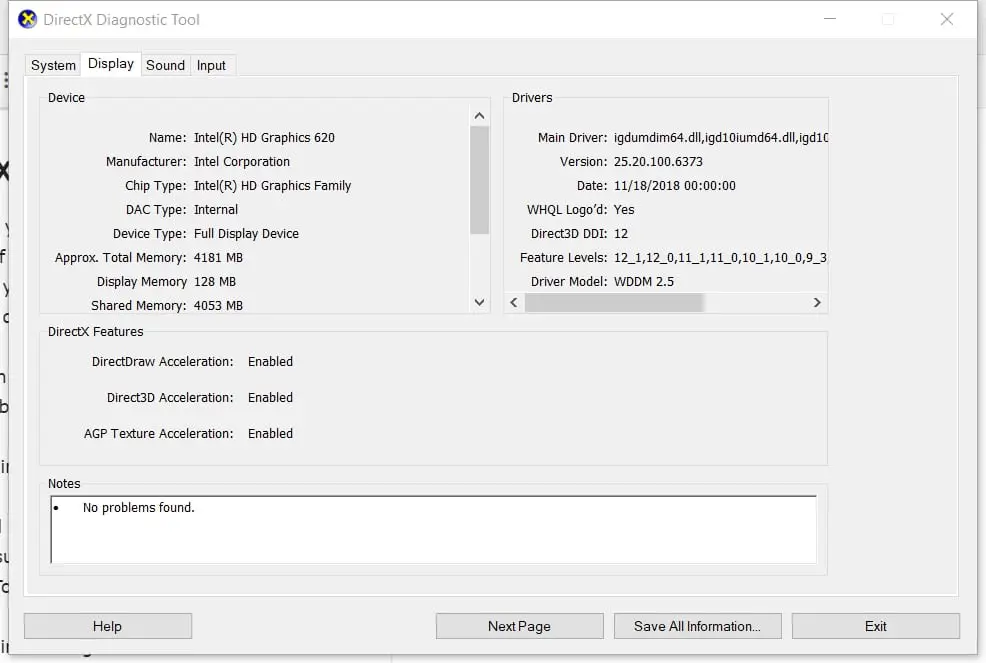
Once the tool is opened, you will notice that there are tabs for “Display”. The number of display tabs will depend on the number of displays connected to your computer. Information specific to your graphics adapter is displayed by the display tabs.
It also shows information about your graphics drivers and which DirectX features are enabled.
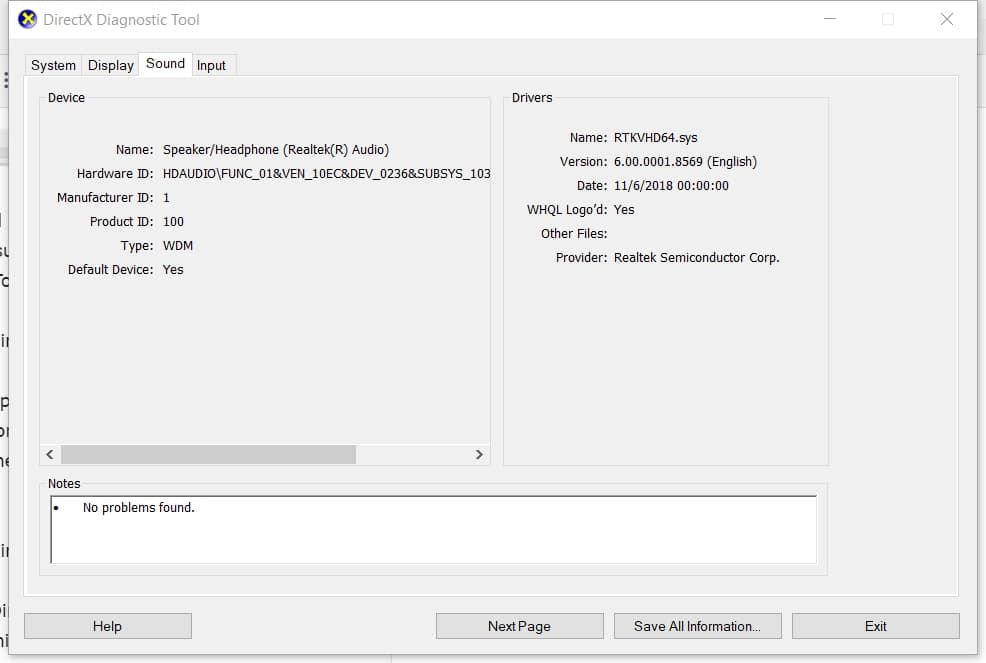
Information about sound hardware, drivers, and output devices in use on your system is usually displayed on the sounds tab of the DirectX Diagnostic Tool.
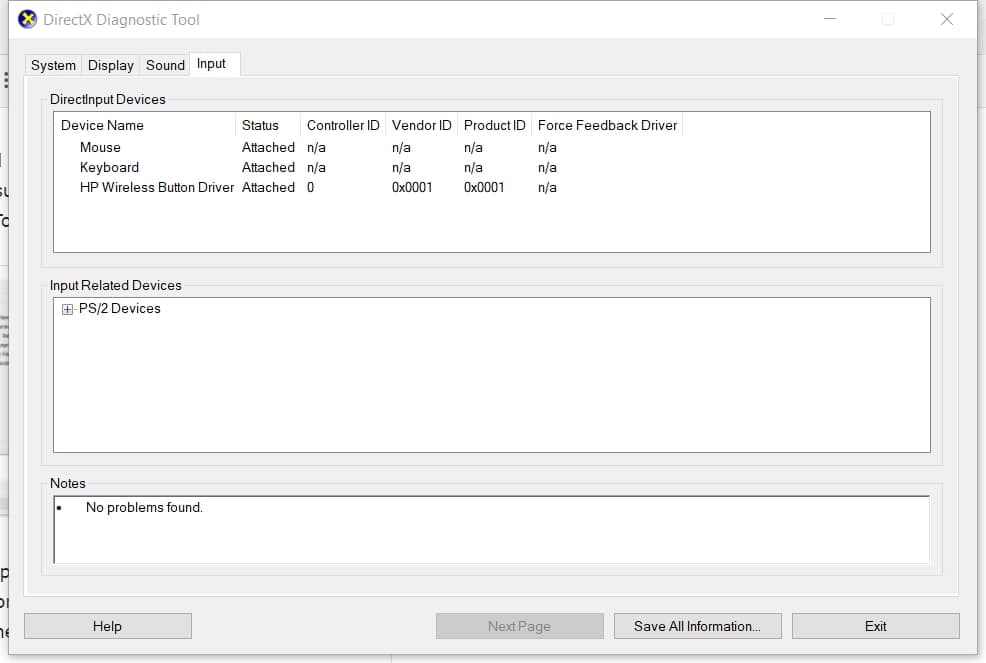
Information about the input devices like your mouse and keyboard that are used on your system and also related devices like the USB controller the devices are connected to are displayed on the Input tab.
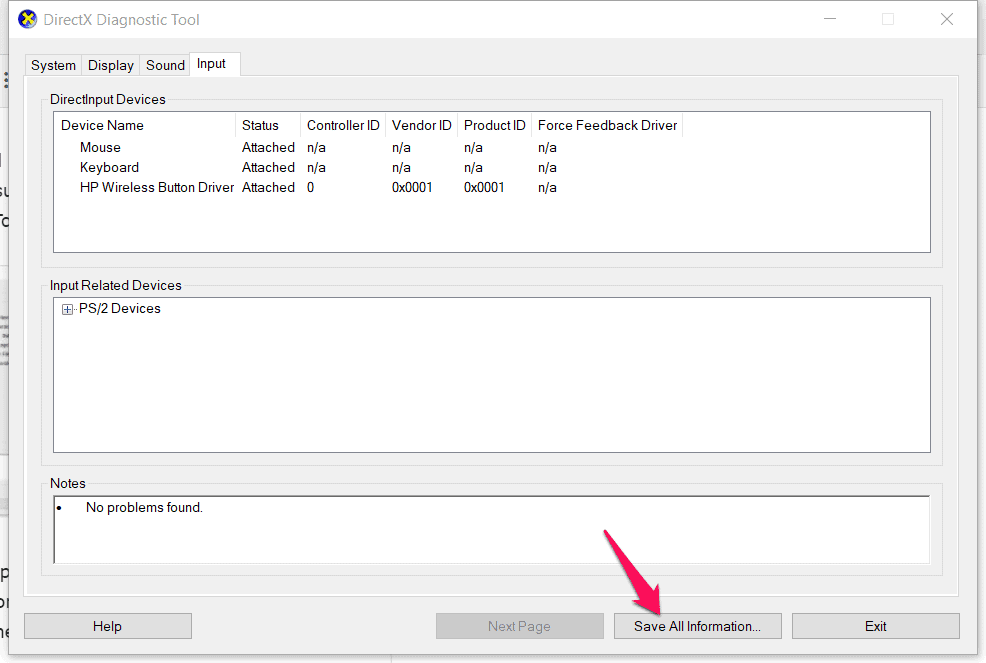
One key feature of the Directx Diagnostic Tool is its “save all information” button. This feature permits on to save information on the tabs to a text file which can be shared or kept for reference sake.
This comes in very handy if you have to work with support personnel. Click the “Save All Information” button to create the text file and save it wherever you like.
![What is dxdiag? [PC for Beginners]](https://i.ytimg.com/vi/r_D5B0fw-n4/0.jpg)
Conclusion
This tool provides a quick way to ensure DirectX is properly installed and running. It is a great source of information about devices and drivers on your system related to multimedia and video. With is ease of use, you obviously do not have to be the techiest person to get around it.


