


Avago’s gesture and ambient light sensor APDS-9960 helps us create simple and powerful gesture control projects. The sensor uses four directional photodiodes to sense reflected IR light to convert physical motion information into digital information (simple gesture information).
Summary sensor
Before you start using the APDS-9960, there are some concepts that you should be familiar with. Before continuing, please consider reading some of these tutorials:
What is Arduino? – We will use Arduino to control APDS-9960
I2C – I2C is the communication protocol used by the APDS-9960
Serial Communication – We program the Arduino using serial communication (using an FTDI breakout board) and provide information to our computers from Arduino
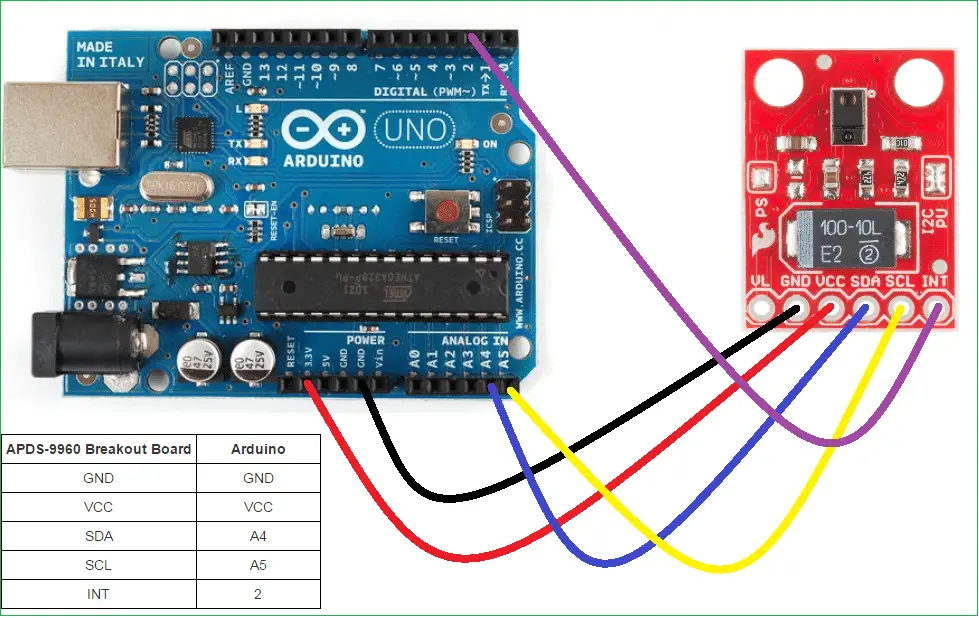
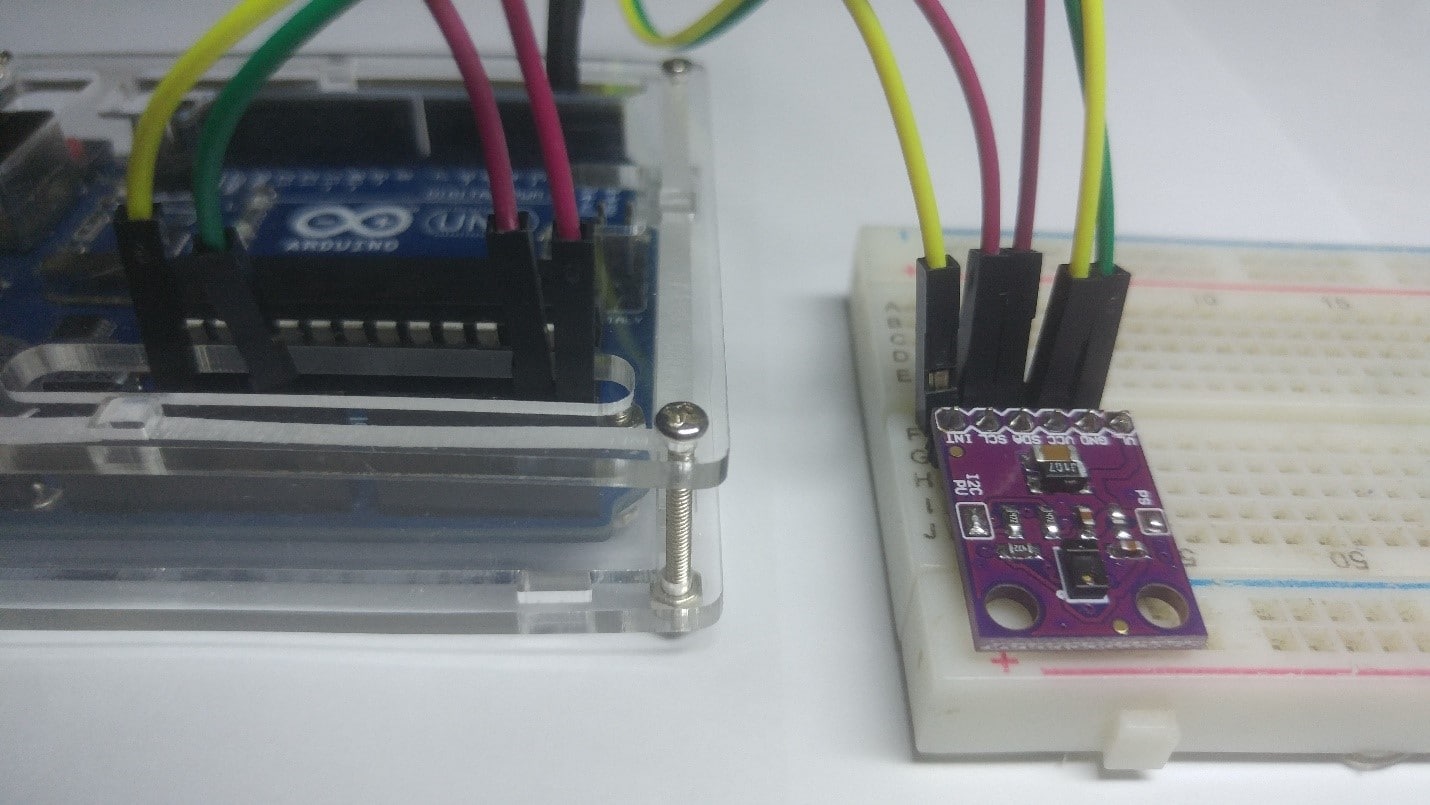
How to use Breadboard – Breadboard connects Arduino to APDS-9960 Breakout BoardBoard Overview

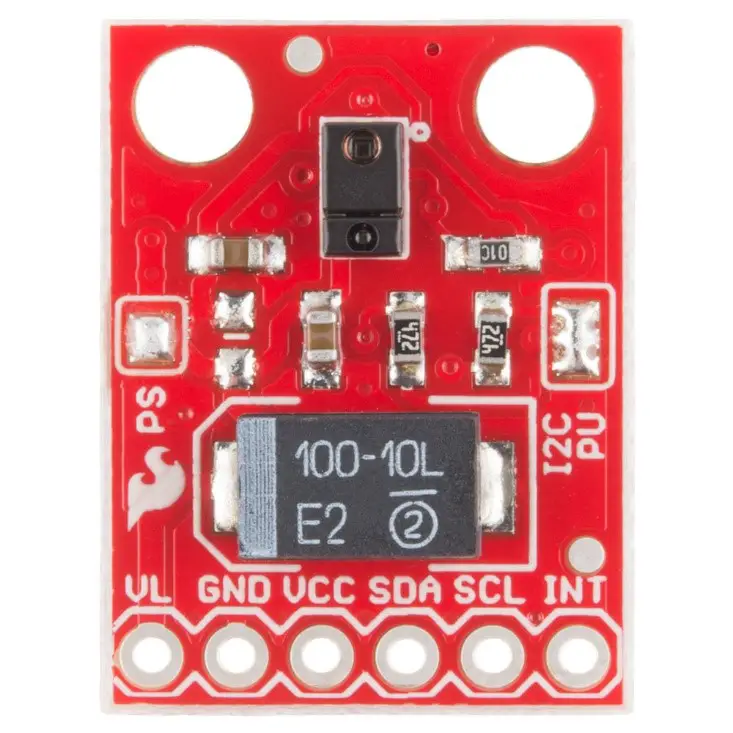
Pin Descriptions
| Pin Label | Description |
| VL | Optional power to the IR LED if PS jumper is disconnected. Must be 3.0 – 4.5V |
| GND | Connect to ground. |
| VCC | Used to power the APDS-9960 sensor. Must be 2.4 – 3.6V |
| SDA | I2C data |
| SCL | I2C clock |
| INT | External interrupt pin. Active LOW on interrupt event |
The APDS-9960 Breakout Board provides 6 pins for powering the sensor and I2C bus.
The gesture engine architecture has automatic activation (based on Proximity engine results), ambient light subtraction, crosstalk cancellation, dual 8-bit data converters, power-saving inter-switch latency, 32-data set FIFO, and interrupt-driven I2C bus communication. The Gesture Engine adapts to a variety of mobile device gestures requiring simple upper, lower, left, and right gestures or more complex gestures to be accurately perceived. With adjustable infrared LED timing, power consumption and noise can be minimized. (Credit Avago Technologies).
Collect Hardware
Source Code
#include <Wire.h>
#include <SparkFun_APDS9960.h>
// Pins
#define APDS9960_INT 2 // Needs to be an interrupt pin
// Constants
// Global Variables
SparkFun_APDS9960 apds = SparkFun_APDS9960();
int isr_flag = 0;
void setup() {
// Initialize Serial port
Serial.begin(9600);
Serial.println();
Serial.println(F(“——————————–“));
Serial.println(F(“SparkFun APDS-9960 – GestureTest”));
Serial.println(F(“——————————–“));
// Initialize interrupt service routine
attachInterrupt(0, interruptRoutine, FALLING);
// Initialize APDS-9960 (configure I2C and initial values)
if ( apds.init() ) {
Serial.println(F(“APDS-9960 initialization complete”));
} else {
Serial.println(F(“Something went wrong during APDS-9960 init!”));
}
// Start running the APDS-9960 gesture sensor engine
if ( apds.enableGestureSensor(true) ) {
Serial.println(F(“Gesture sensor is now running”));
} else {
Serial.println(F(“Something went wrong during gesture sensor init!”));
}
}
void loop() {
if( isr_flag == 1 ) {
detachInterrupt(0);
handleGesture();
isr_flag = 0;
attachInterrupt(0, interruptRoutine, FALLING);
}
}
void interruptRoutine() {
isr_flag = 1;
}
void handleGesture() {
if ( apds.isGestureAvailable() ) {
switch ( apds.readGesture() ) {
case DIR_UP:
Serial.println(“UP”);
break;
case DIR_DOWN:
Serial.println(“DOWN”);
break;
case DIR_LEFT:
Serial.println(“LEFT”);
break;
case DIR_RIGHT:
Serial.println(“RIGHT”);
break;
case DIR_NEAR:
Serial.println(“NEAR”);
break;
case DIR_FAR:
Serial.println(“FAR”);
break;
default:
Serial.println(“NONE”);
}
}
}

You may also like to read these awesome projects
How to Program ESp8266 Esp01 with Arduino UNO
How to Drive and Build Project with Nokia 5110 LCD using Arduino


