


With the booming of smartphones, Internet of Things (IoT), industrial automation, and smart home automation systems, the demand for the Internet has also grown exponentially.
The technology is growing so fast that everything from cars to refrigerators needs to be connected to the Internet. This raises other questions, such as: Do all of these devices have enough bandwidth? Will this data be safe? Is the existing system fast enough for all of this data? Is there too much connection to network traffic?
All of these issues will be addressed by the upcoming technology called Li-Fi. So what is LiFi? The term Li-Fi stands for “Light Fidelity”. This is considered the next generation of the Internet, where Light will be used as a medium for transmitting data.
Yes, you are not mistaken; it is the same as the lights you use at home and in the office, and can be modified to transfer data to all the devices you need on the Internet. In this project, we will build a simple circuit that uses Li-Fi to transmit audio data. But first we will understand Li-Fi technology.
Hardware requirements
- 5-6V solar panel
- 1 W LED or NeoPixel LED strip
- Auxiliary cable
- 5 mm Jack
- 9V battery
- Pre-amplified speaker
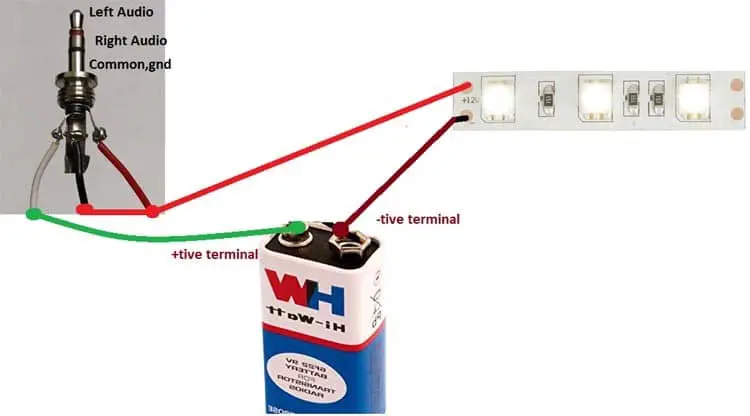
Li-Fi transmitter circuit:
On the transmitter side, we have a white Bright LED and a battery connected to a 3.5mm jack that will connect to the audio source. Here, we use the battery to power the LEDs because there is less power from the audio source, which is not enough to power the LEDs. The connection is shown in the circuit diagram below:
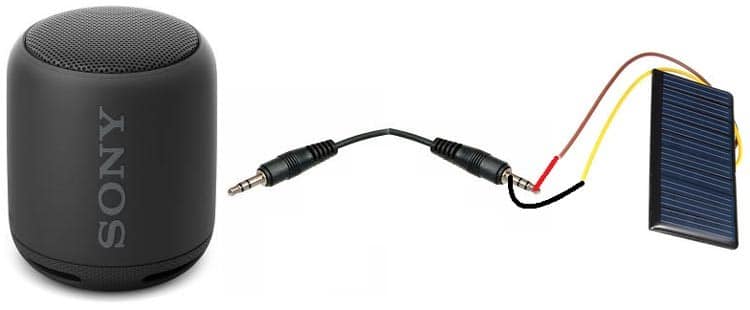
Li-Fi receiving circuit:
On the receiver side, we used a solar panel and a speaker connected via an Aux cable. You can also use your own receiver amplifier circuit, which will be explained later in this article.
Use Li-Fi to work with audio transmission circuits:
On the transmitter side, when we connect the 3.5mm jack to the audio source, the LED will illuminate, but when the audio source is off, the light intensity does not fluctuate.
Once the audio is played, you will see that the light intensity changes frequently. As you increase the volume, the intensity of the LED changes more quickly than the human eye can follow.
Solar panels are very sensitive and can capture very small changes in intensity, and accordingly, the output voltage of the solar panel changes. Therefore, when the LED’s lamp falls on the panel, the voltage will vary depending on the intensity of the light.
The solar panel’s voltage is then fed into an amplifier (speaker) that amplifies the signal and provides an audio output through a speaker connected to the amplifier.
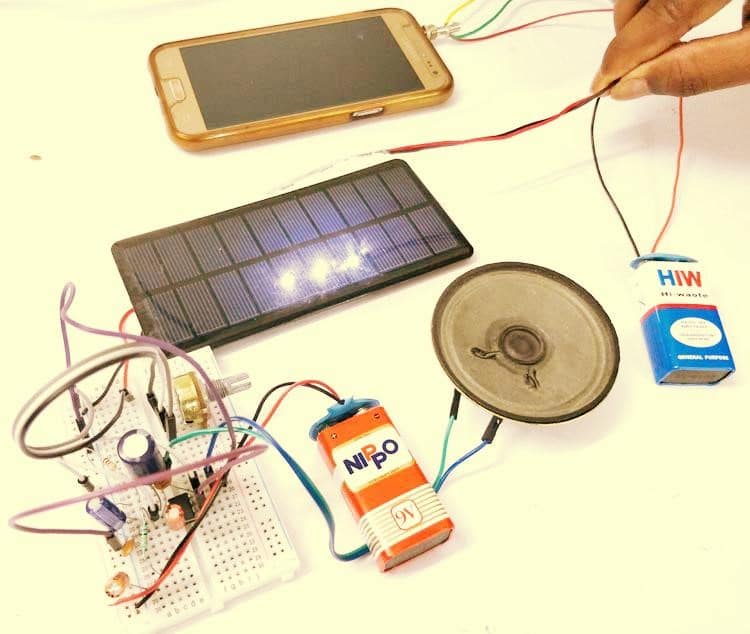
As soon as the solar panel is in contact with the LED, the output will come. You can put the LED at the maximum. 15-20 cm from the solar panel for clear audio output. You can further increase the range by increasing the area of solar panels and higher wattage power LEDs.
You can make your own amplifier circuit to improve voice quality as shown below.
Let your own amplifier receive Li-Fi audio:
As mentioned above, you can use your own amplifier to reduce noise instead of using off-the-shelf speaker sets. This is an LM386 based audio amplifier circuit for receiving his li-fi audio.
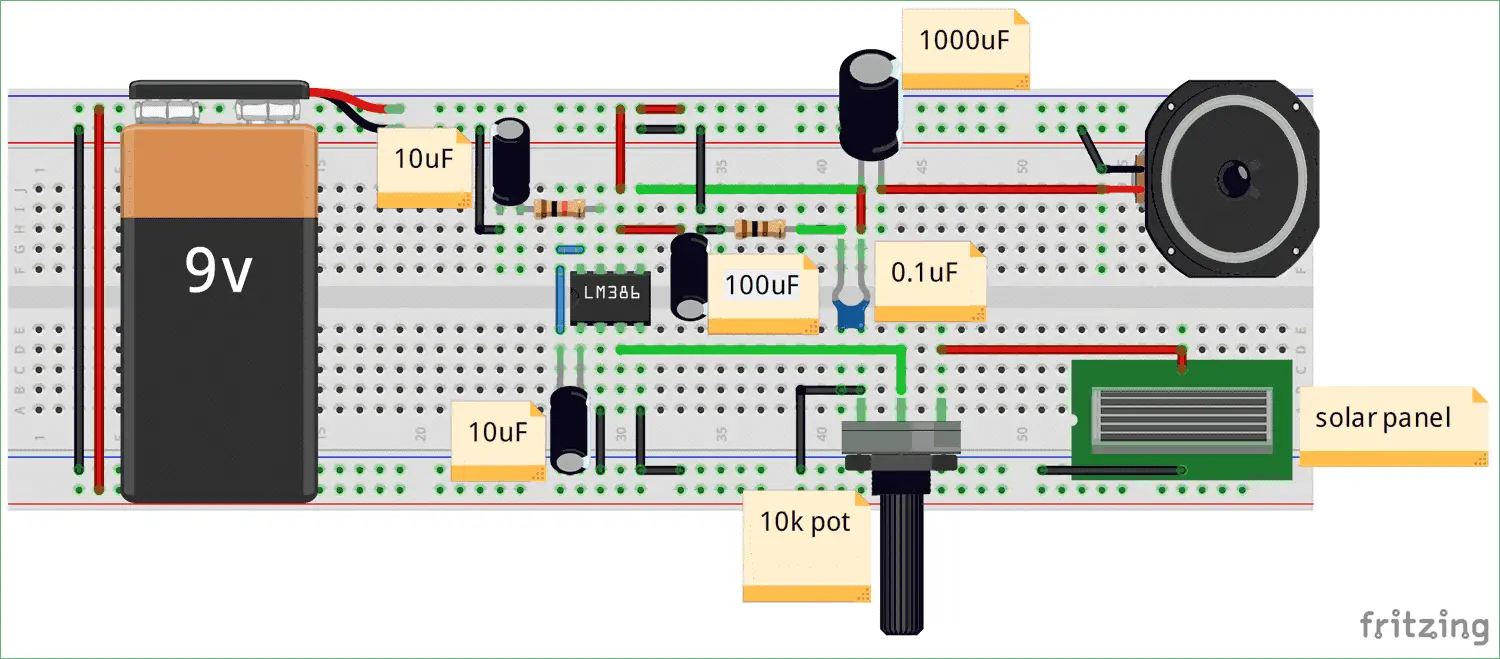
- A 100μF capacitor between the positive and negative rails is used to decouple the power supply.
- Place a 0.1μF capacitor between pins 4 and 6 to more accurately decouple the power supply to the IC.
- A 10K ohm resistor and a 10μF capacitor are placed in series between pin 7 and ground to decouple the audio input signal.
If you can’t hear the sound through the speaker, turn the knob of the potentiometer until the sound is not clear. Learn more about LM386-based audio amplifiers here.
Please note that the component values we use are not important. If you don’t have a component with the values given in the figure, try to get close to it and it should work and bring the connection close to the IC, using a short-line connection because it creates extra noise.


