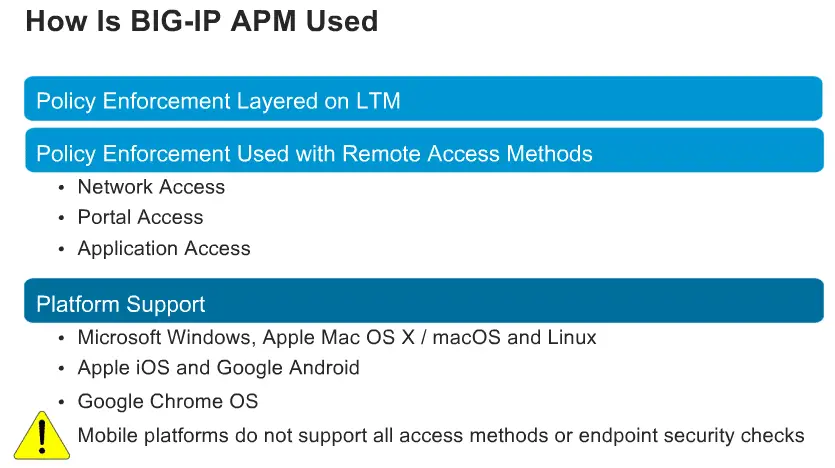
BIG IP APM is two solutions rolled up in a single solution, First is Remote access solution ( network access – SSL VPN, Portal access and App tunnel – Single Application tunnel including remote desktop) and second solution is Policy enforcement Point ( Authentication and authorization, Endpoint inspection, Access control lists, Single Sign-On ( including OAM, Kerberos, SAML, and OAuth).
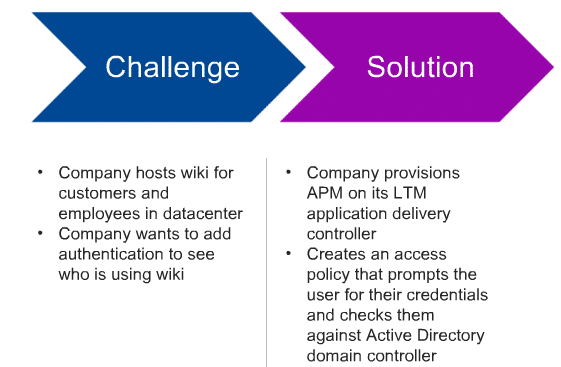
Here is the Authenticated LTM user Scenario,
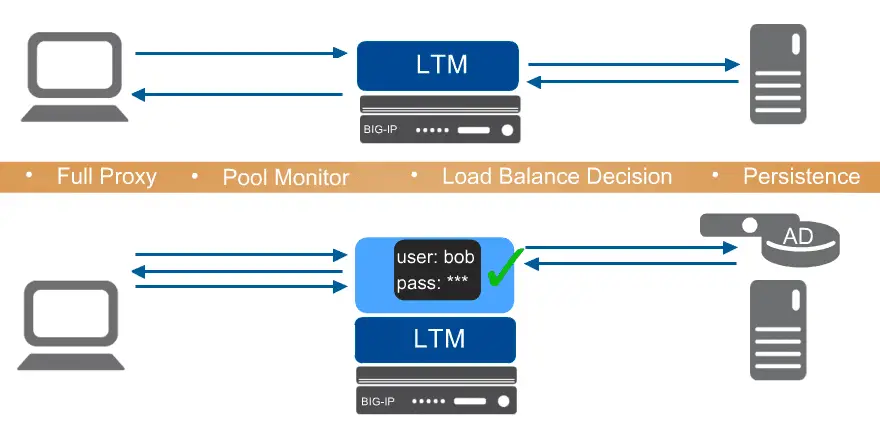
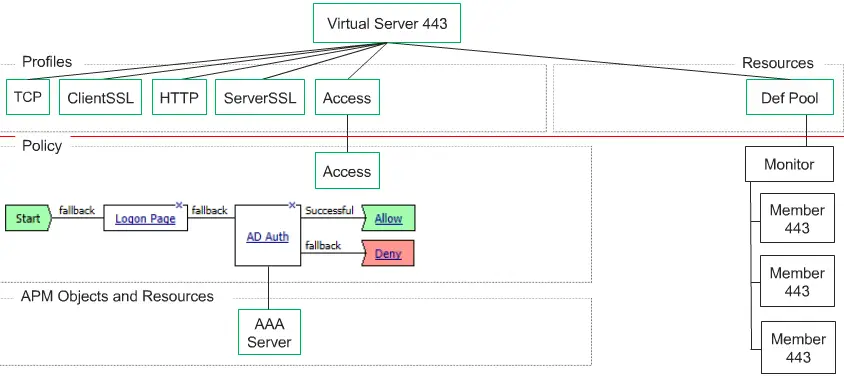
LTM + APM Technology overview
LTM and APM are provisioned on the same box and when any user request comes it will go to APM to check user is valid or no, APM will validate this user identity through AD.
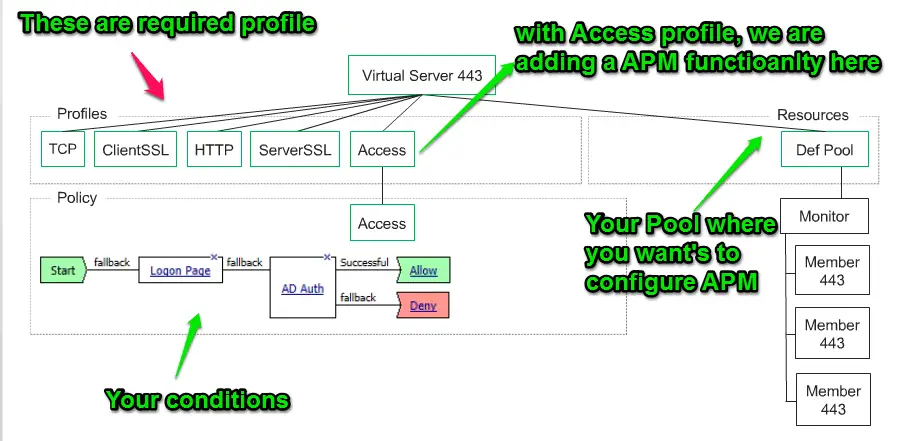
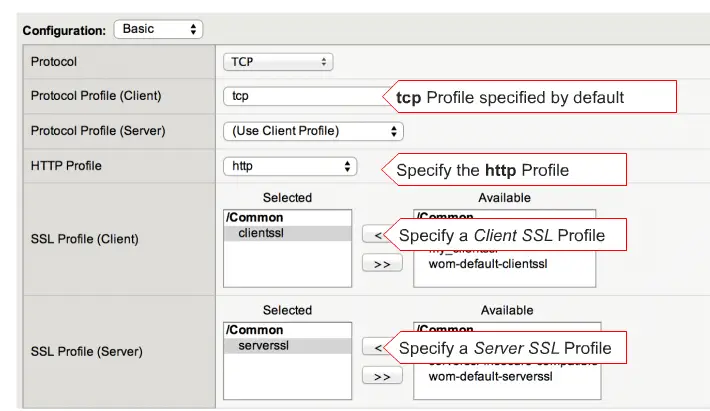
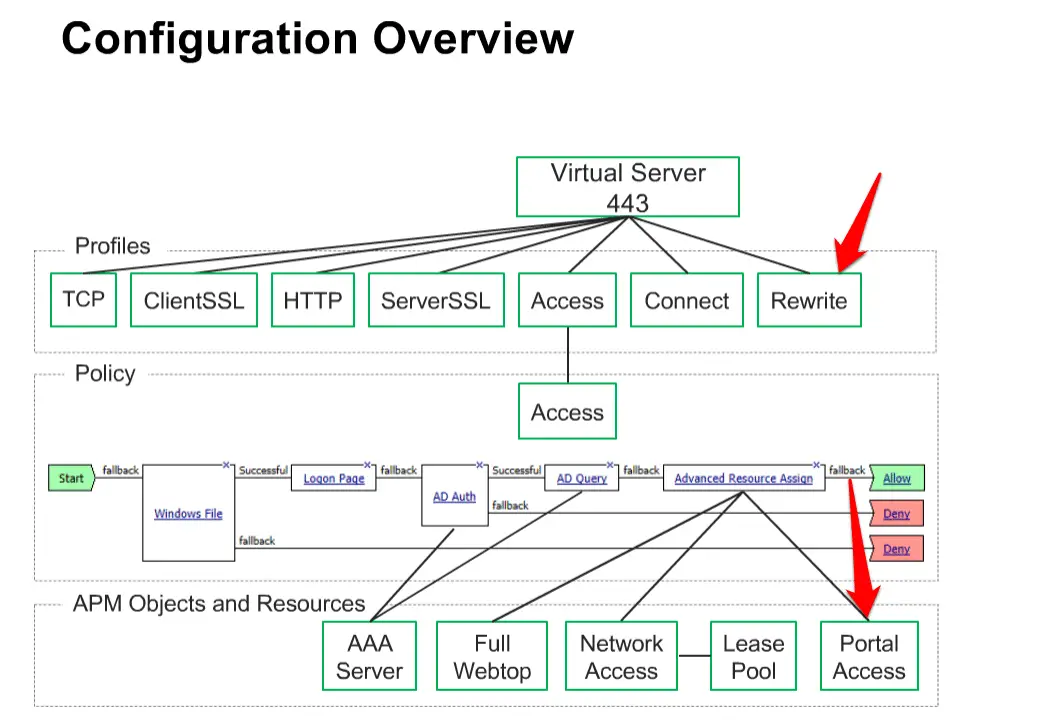
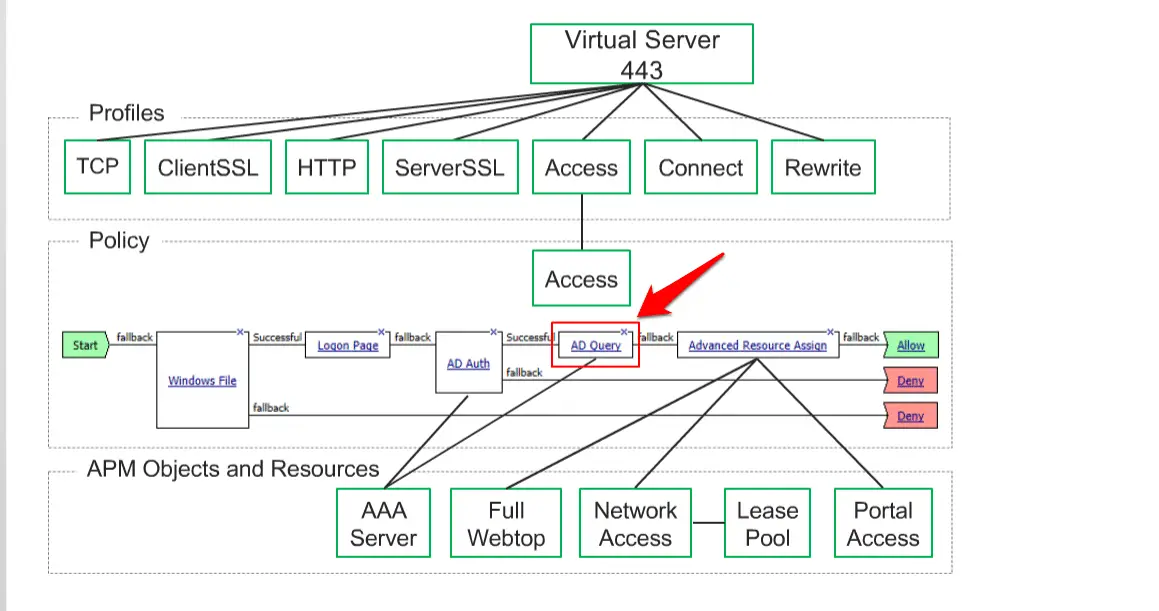
The first thing we required is Pool and create a Virtual Server and associate TCP, ClientSSL, HTTP, Server SSL and Access profiles. With Access profiles, we are implementing APM features on LTM pool.
For AD auth, first, you need to add ADD server.
Here is Complete Process to Authenticating LTM User through APM
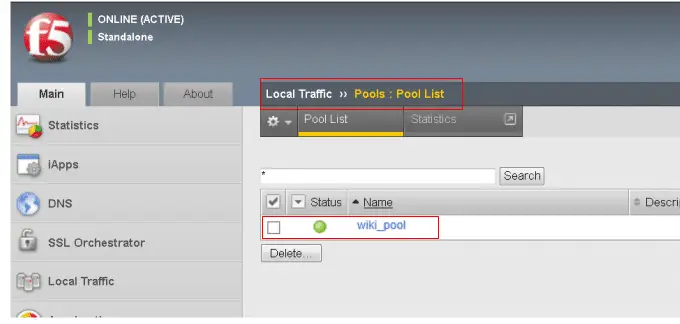
Before configuration, you need to confirm Pool exists by navigating to Local Traffic, Pool > Pool list. if you don’t have exiting pool, create a new one
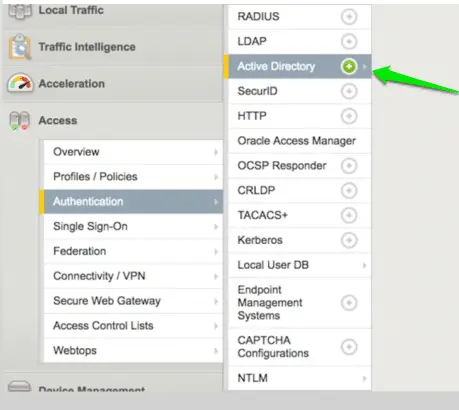
Now we need to create an AAA server, Navigate to Access > Authentication > Active Directory.
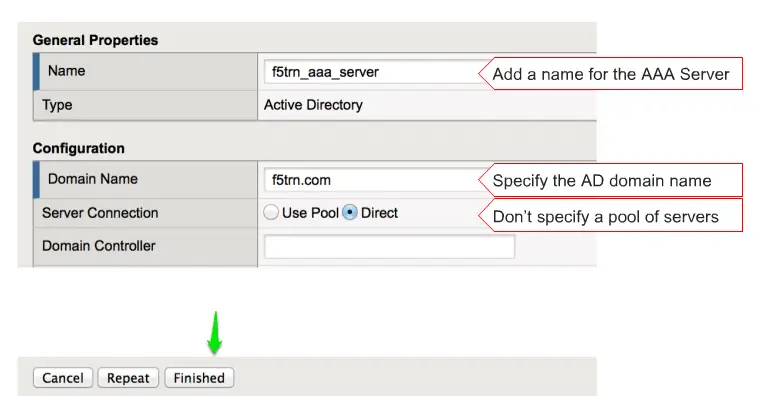
Now enter the name of your AAA server and put your domain name here and click on the Finish to finish it.
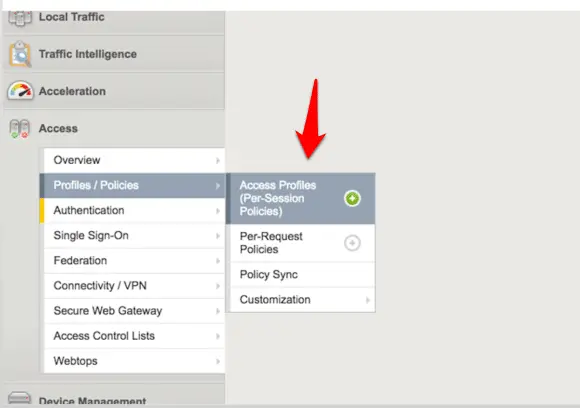
now next step is to create an Access Policy, to do that Click on the Access > Profiles /Policies > Access Profiles ( Per -session Policies), click on the + icon to create a new one.
and enter the name of profile and leave profile type ‘All” and also select accepted language here and click on the finish.
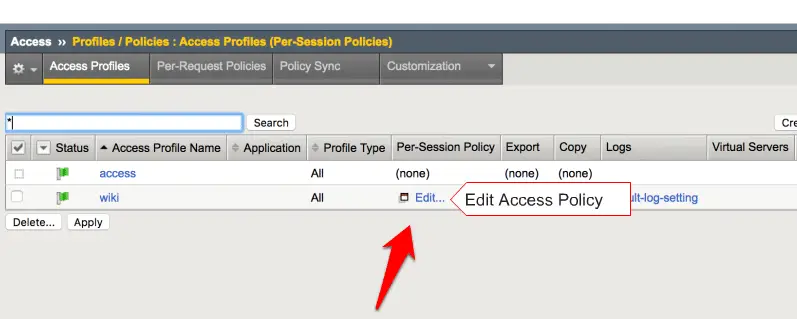
now we need to edit your created access policy by clicking Edit option.
it will open in new browser window
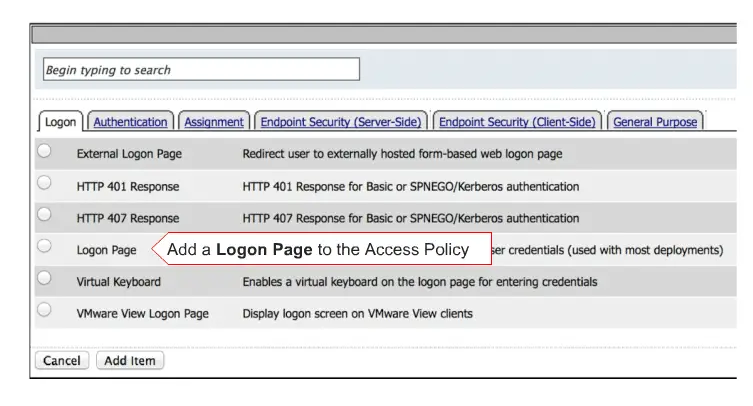
now select the “logon Page ” radio button and click on the “add item ‘ option to add here.
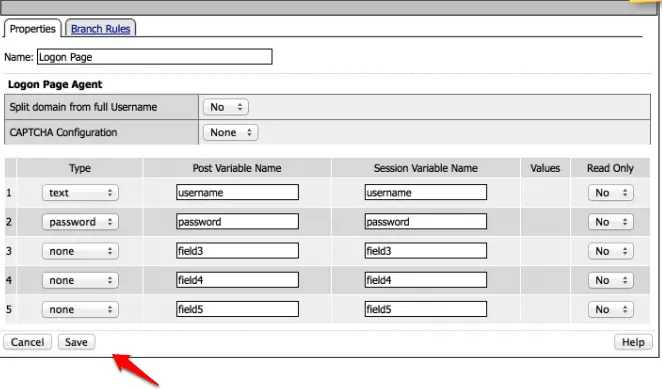
and now click on the save option to save your settings.
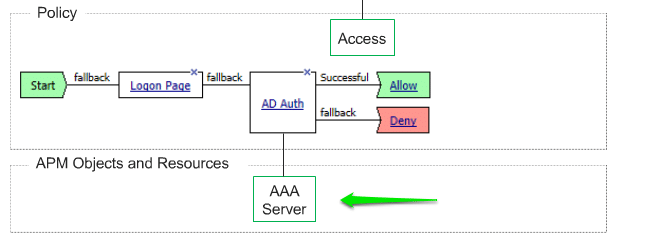
Now our login page is created and now we need to add other parameters here like AD authentication. To do so click on the + sign here.
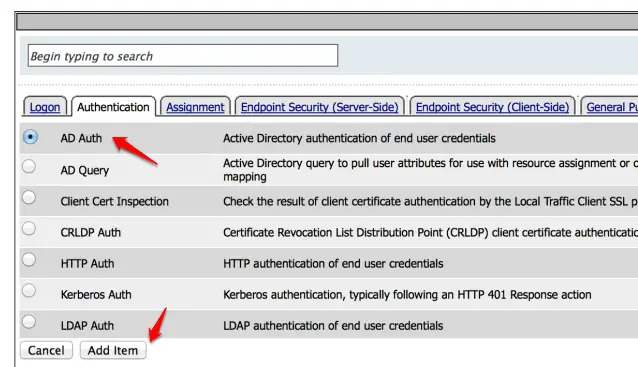
and select the “AD Auth” and click on the ‘Add item ” here.
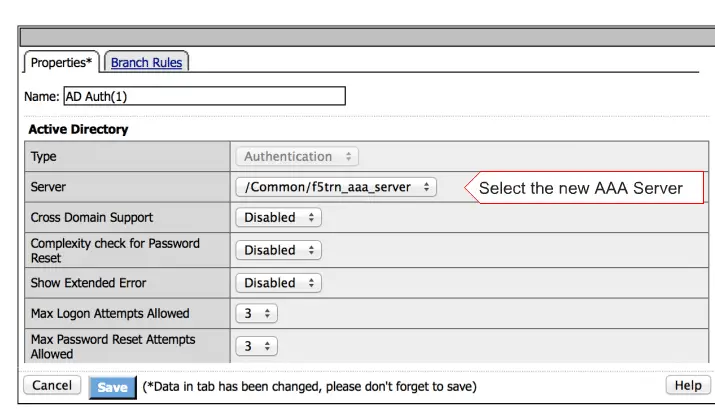
Select your AAA server here and click on the Save option to save your settings.
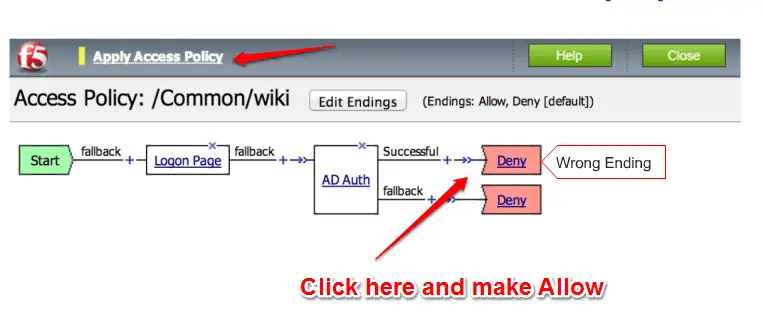
Now you need to correct your Successful ending by click on it, select Allow and Finally click on the “Apply Access Policy ” here.
Click on the Close button to close this editing.
Now we need to create a Virtual Server and associate this policy with that server.
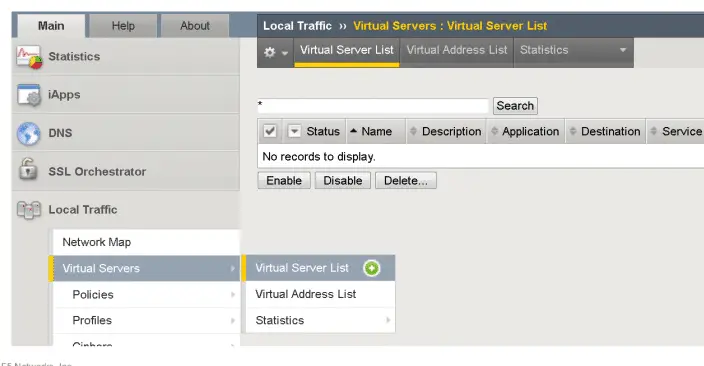
To create a new virtual server, click on the Local Traffic > Virtual Server > Virtual Server List and click on the + sign to create a new Virtual server.
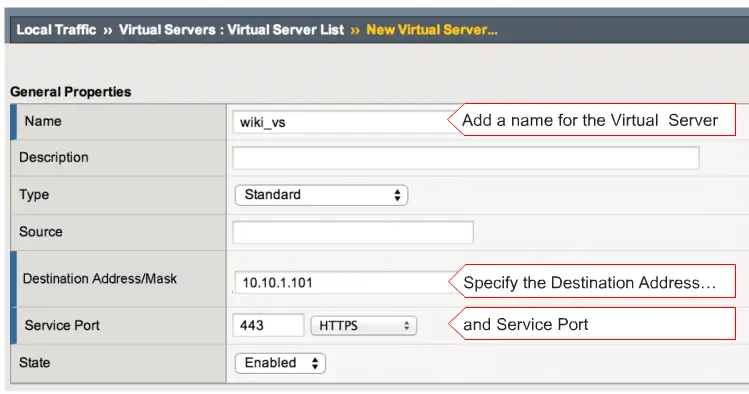
and enter a name , IP-address and service port here.
and now select HTTP profile, ClientSSL and ServerSSL profile.
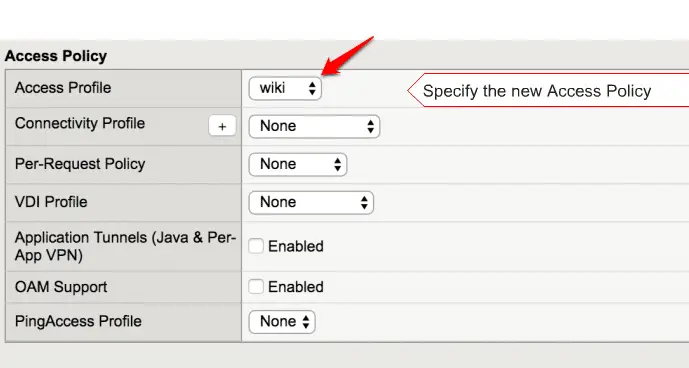
Select your Access Policy here
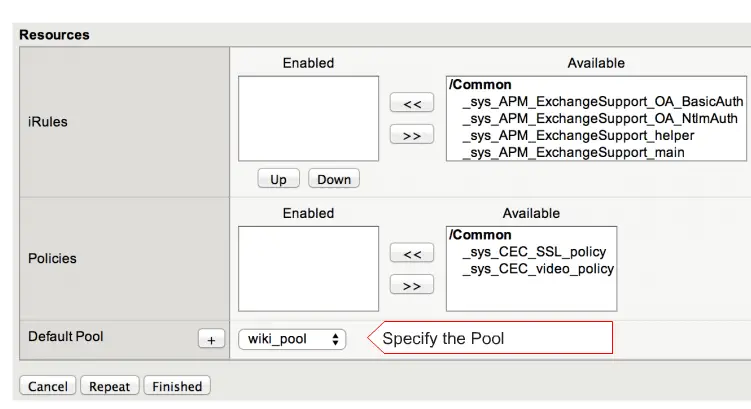
and select your pool here and click on the finish to finish your settings.
Your Configuration part was done, it’s time to test. Now enter your Virtual server IP in your Browser, it will prompt you F5 Login page. Remember one thing here, User needs to enter his/her credentials three times then it will authenticate the first time.
Also, Check Most Common F5 101 exam question and Answers
https://youtu.be/CAd99UHWLZU
Configuring Portal Access
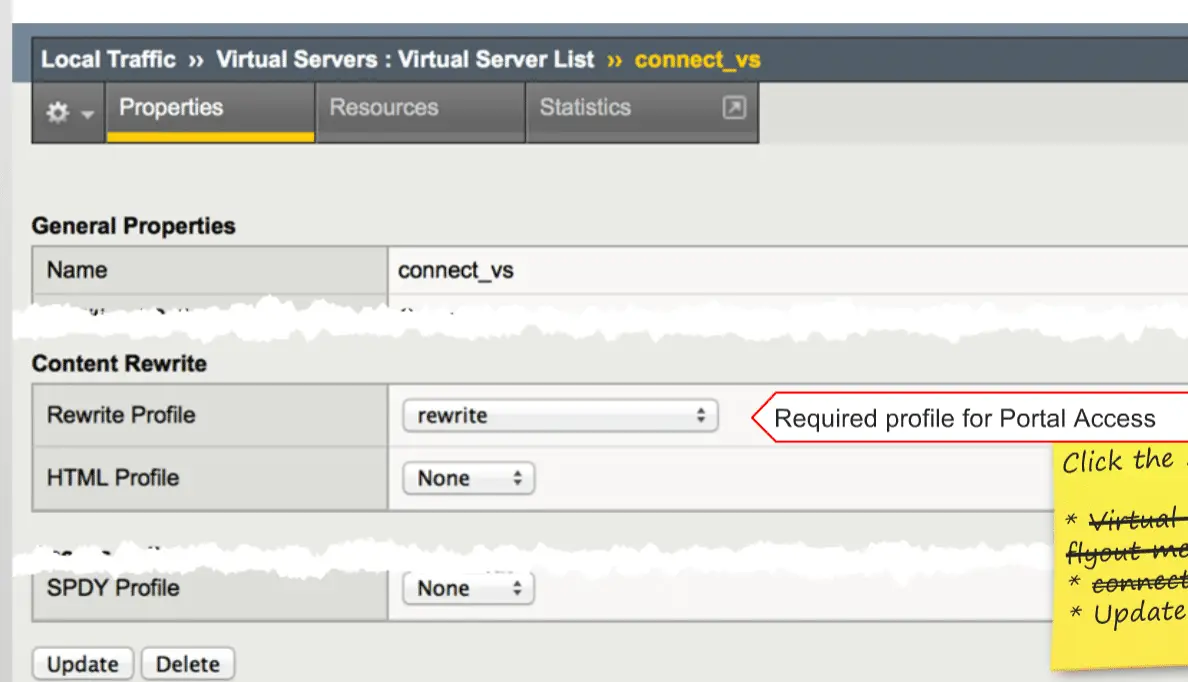
We require adding “Rewrite ” profile on the Virtual Server to enable Portal access.
Navigate to Local Traffic > Virtual Server > Virtual Server List and select “Rewrite ” profile here.
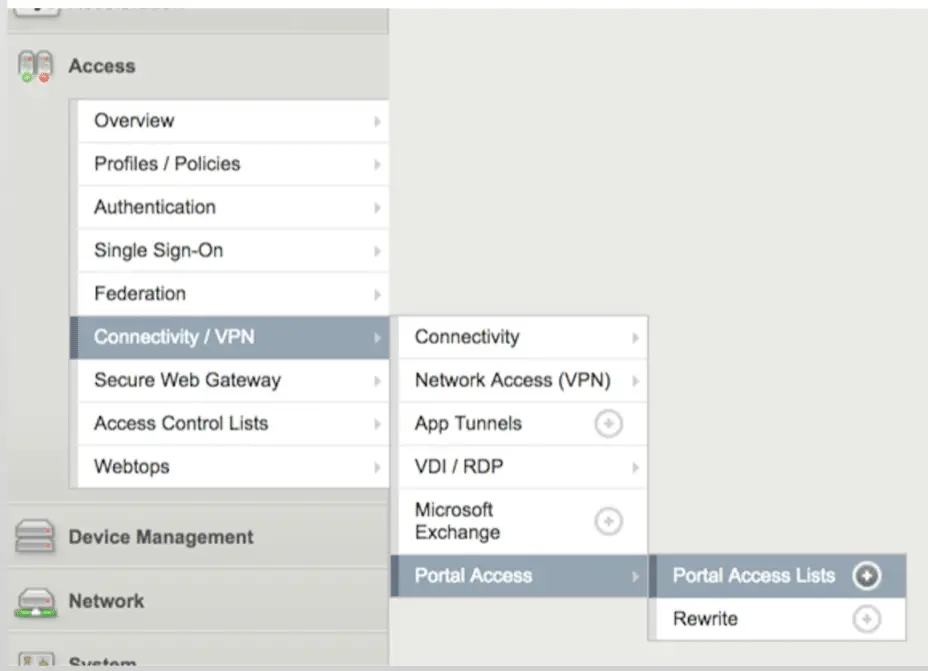
Then navigate to Access > Connectivity / VPN > Portal Access > Portal Access List.
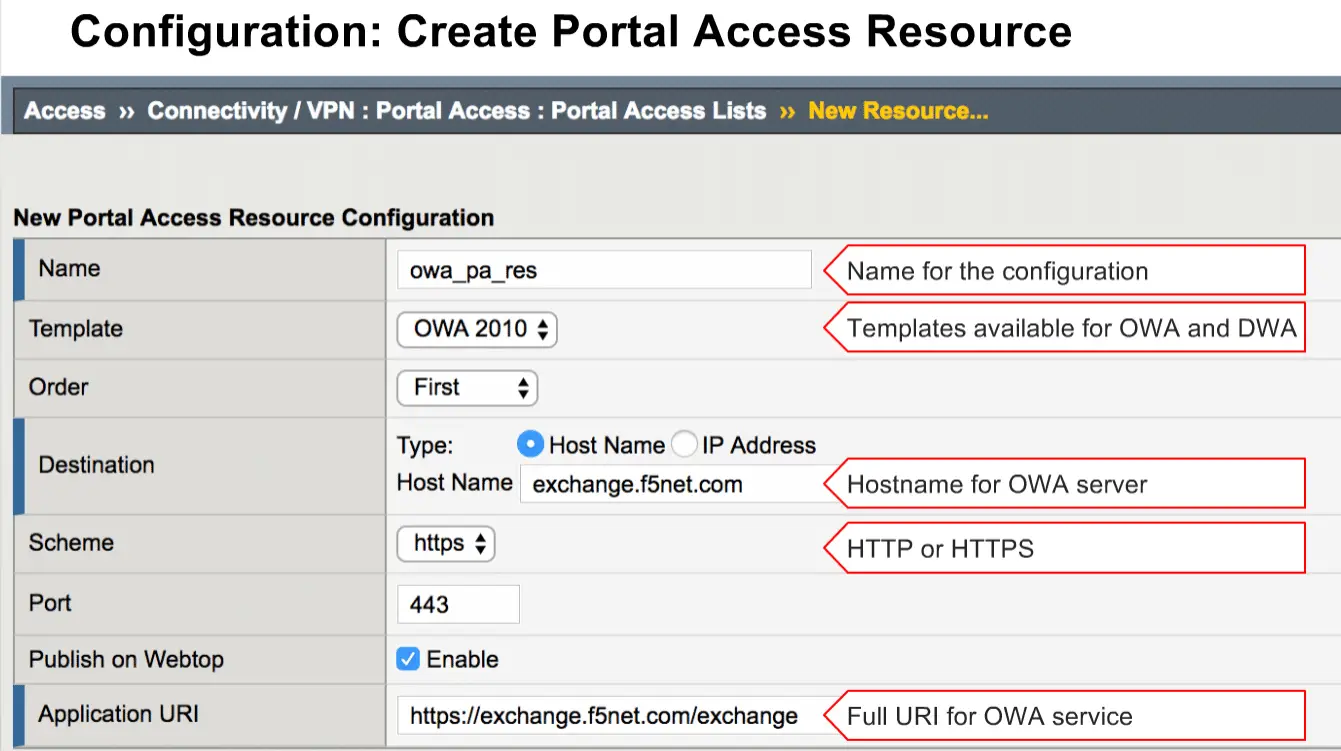
Click on the “Create With Template” option here.
and select your OWA template and provide your Hostname or IP-address along with Application URI here.
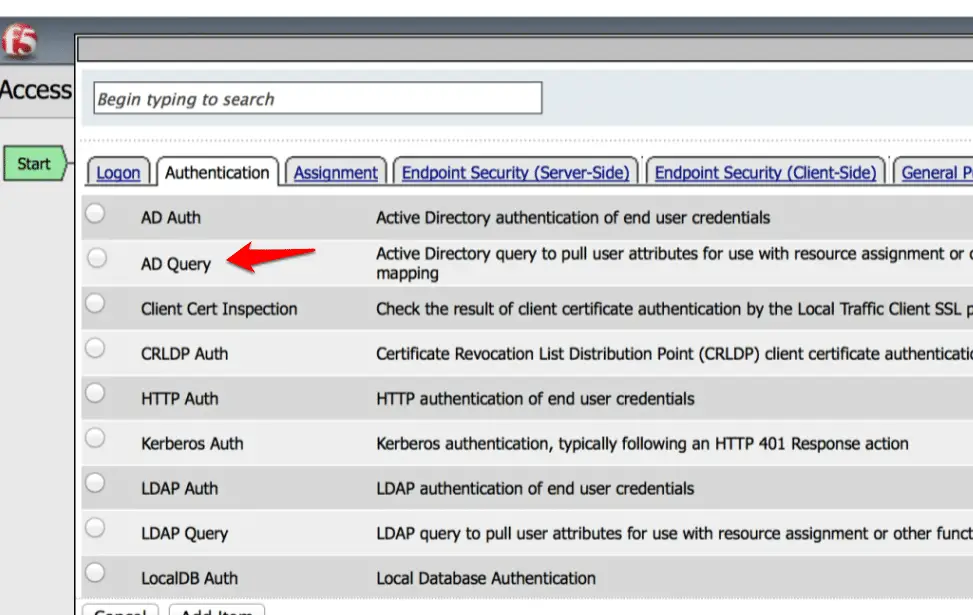
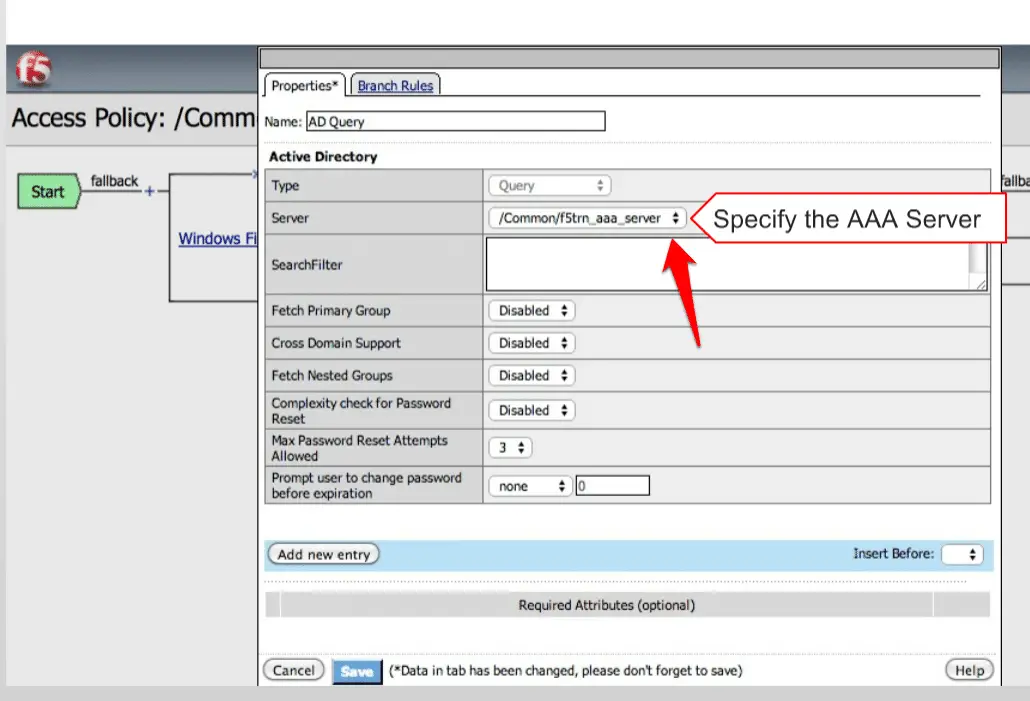
Finally, you need to modify “AD Query“.
Click on the “AD Query” option and click on the “Authentication”
Select your AAA server here.
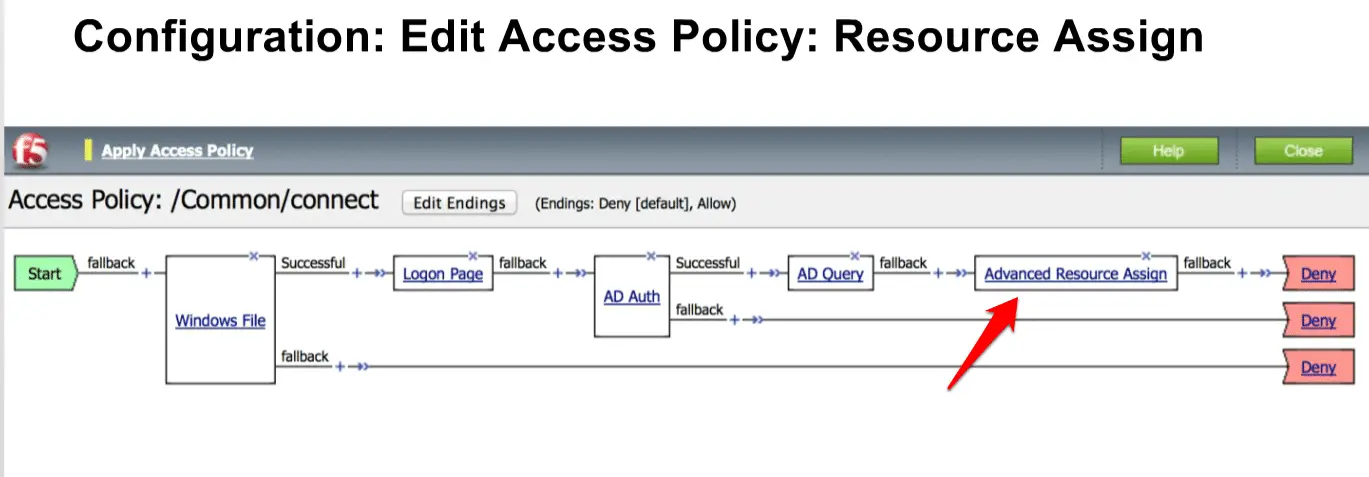
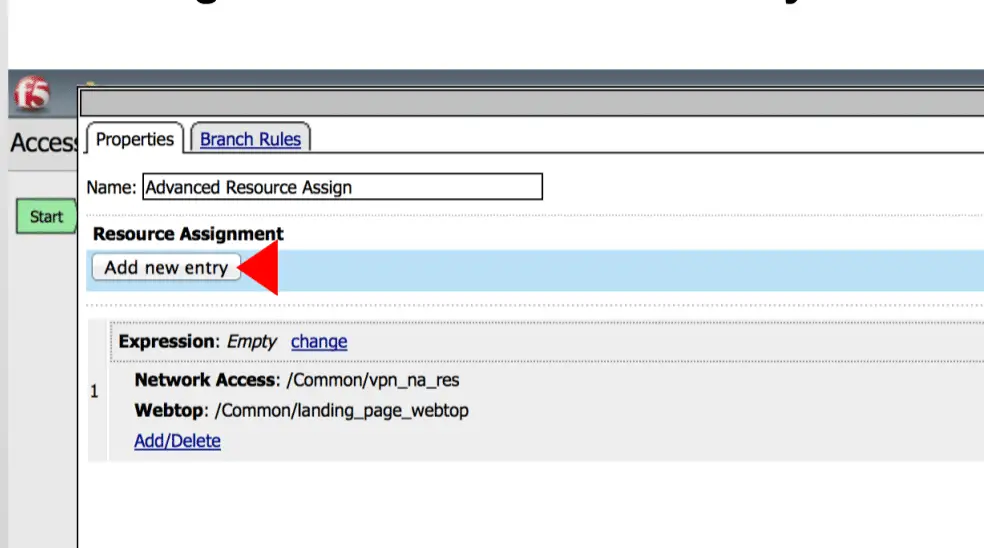
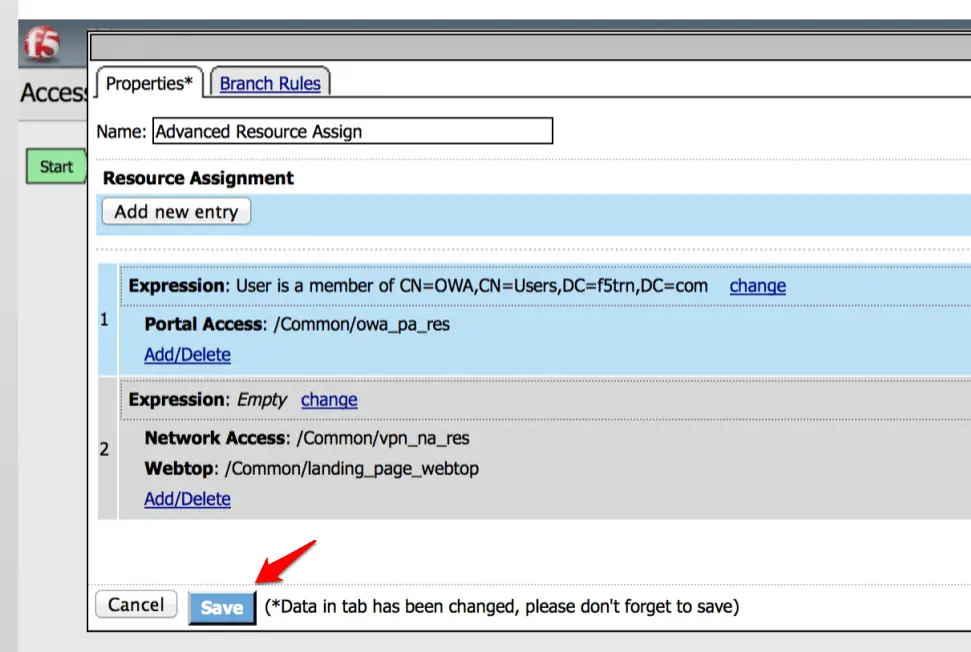
Finally, we need to modify “Advanced Resources Assign“.
Now click on the “Add new entry” option.
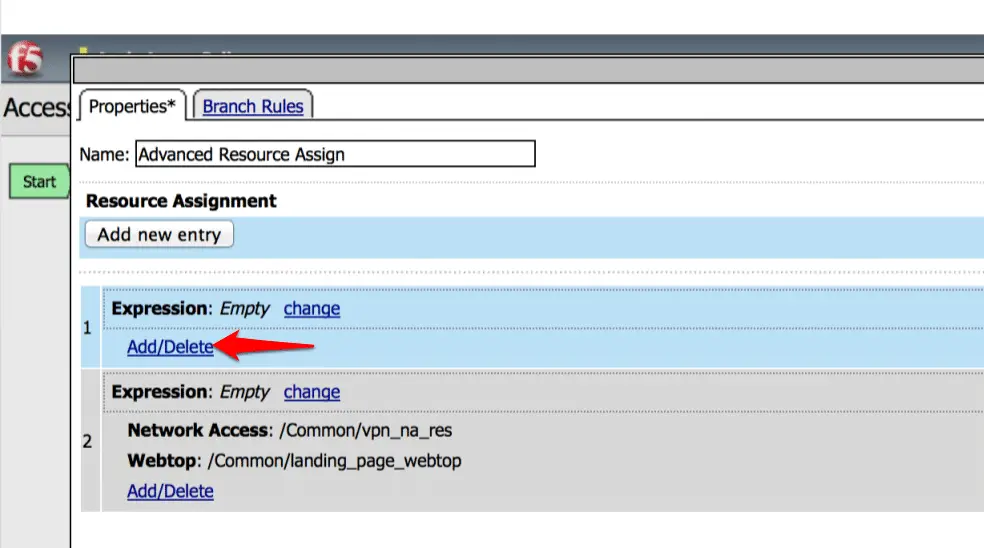
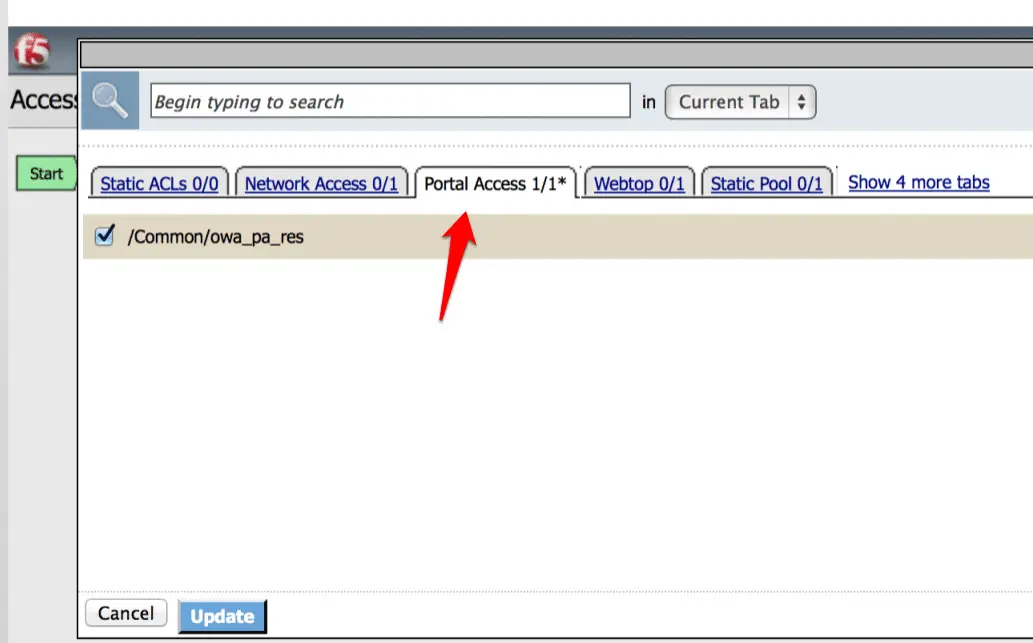
Click on the “Add/Delete” under expression.
Now click under “Portal Access” and Select your resources here.
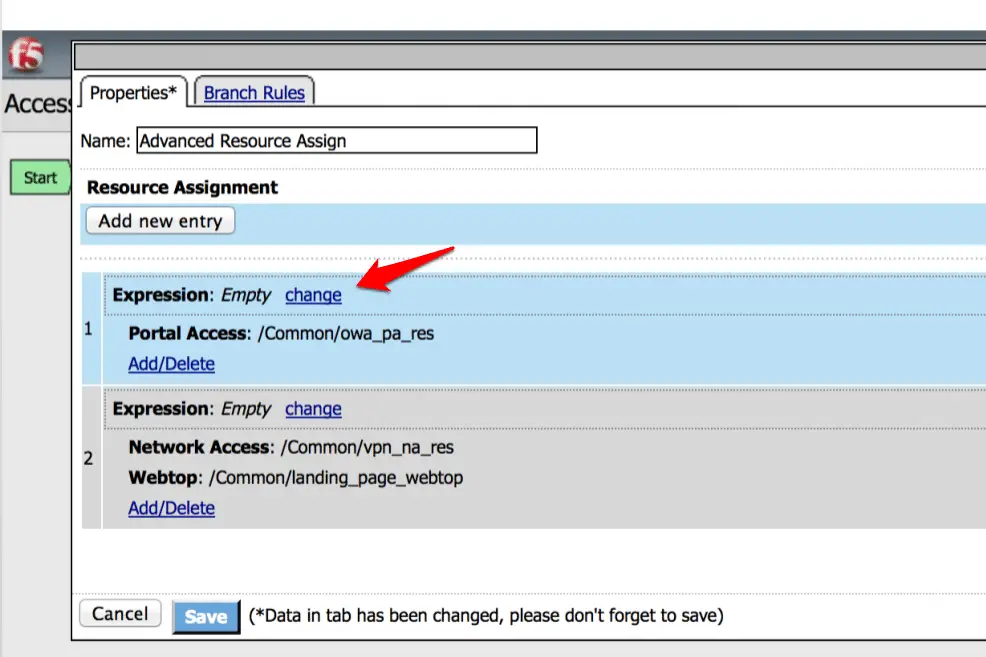
Now click on the “Change” option under Expression.
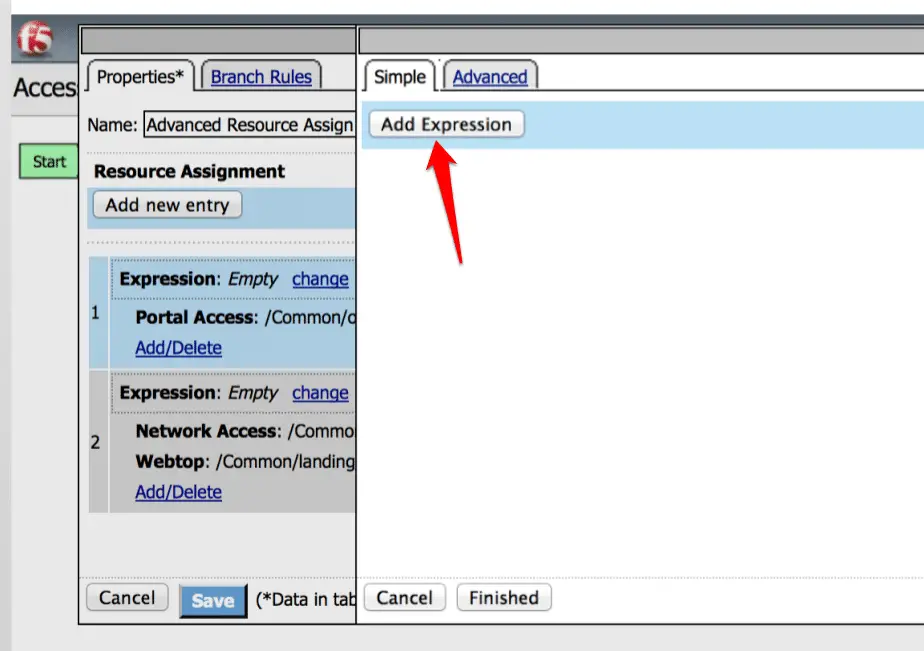
Now click on the “Add Expression”
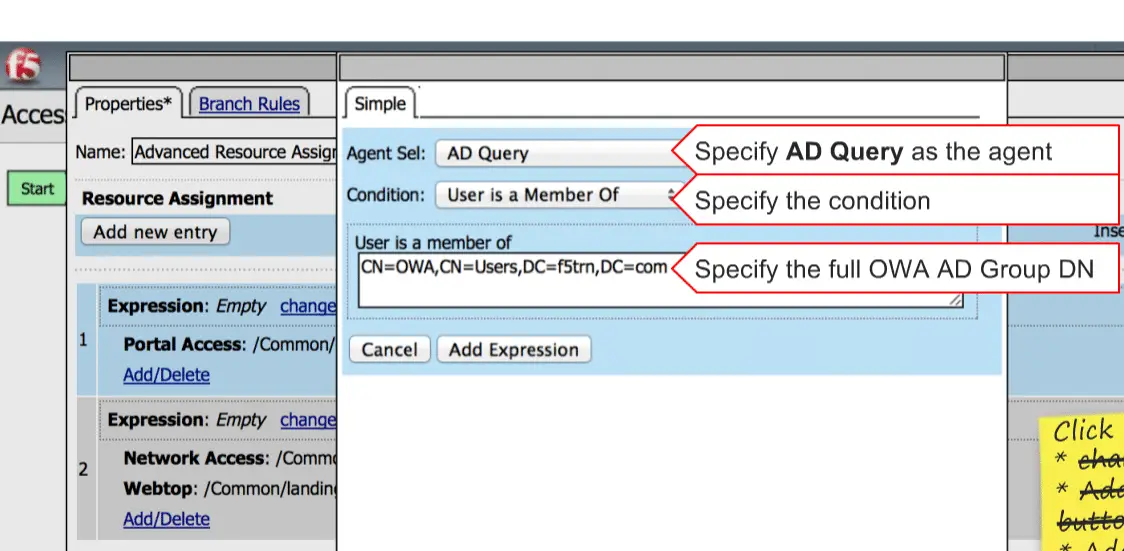
Specefy AD query here.
Finally, click on the Save to Save the policy.
Now your policy will be like below policy. That’s it.
Now test your OWA from outside. That’s it.
Hope my article “Authenticating a Local Traffic Manager (LTM) User through APM” helps you to configure APM in your environment. If you have any query, feel free to comment.


