


In this article, I will guide you how to set up your own DIY real-time clock, and then you can use your own project to integrate this project, but I found it very difficult to use the RT323 chip DS3231 when using the Arduino. Just set the time is very complicated and will not mention the code. Therefore, I found a very useful library that really enhances the use of the DS3231 chip. Let’s take a look at it.
What is DS3231?
The DS3231 is a very cheap cost and as well as very accurate I2C real-time clock (RTC) that integrates a temperature-compensated crystal oscillator (TCXO) and a crystal oscillator. The device integrates battery input and maintains accurate timing when the main power source of the device is interrupted. The integration of crystal resonators enhances the long-term accuracy of the device and reduces the number of parts on the production line. The DS3231 offers commercial and industrial temperature ranges and is available in a 16-pin, 300 mil SO package.
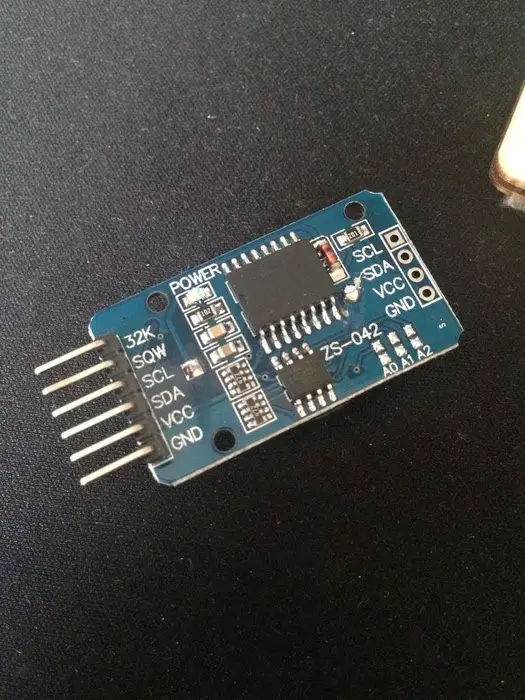
RTC saves seconds, minutes, hours, date, date, month and year information. The date at the end of the month is automatically adjusted to the month within 31 days, including corrections for the following year. The clock is either 24-hour or 12-hour and uses an active-low AM/PM indicator. Two programmable time alarms and one programmable square wave output are provided. Addresses and data are serially transmitted over the I2C bidirectional bus.
Abstract
This is part of my own project and I think this small part can be used as a display share. Anyone who is interested in creating their own clock can consider this.
Using the DS3231 RTC allows the project to count timing even if it is not powered up. After the date and time are set, the RTC module will count according to the updated time. So the next time you turn on the Arduino and the LCD module, the date and time will still be displayed correctly.
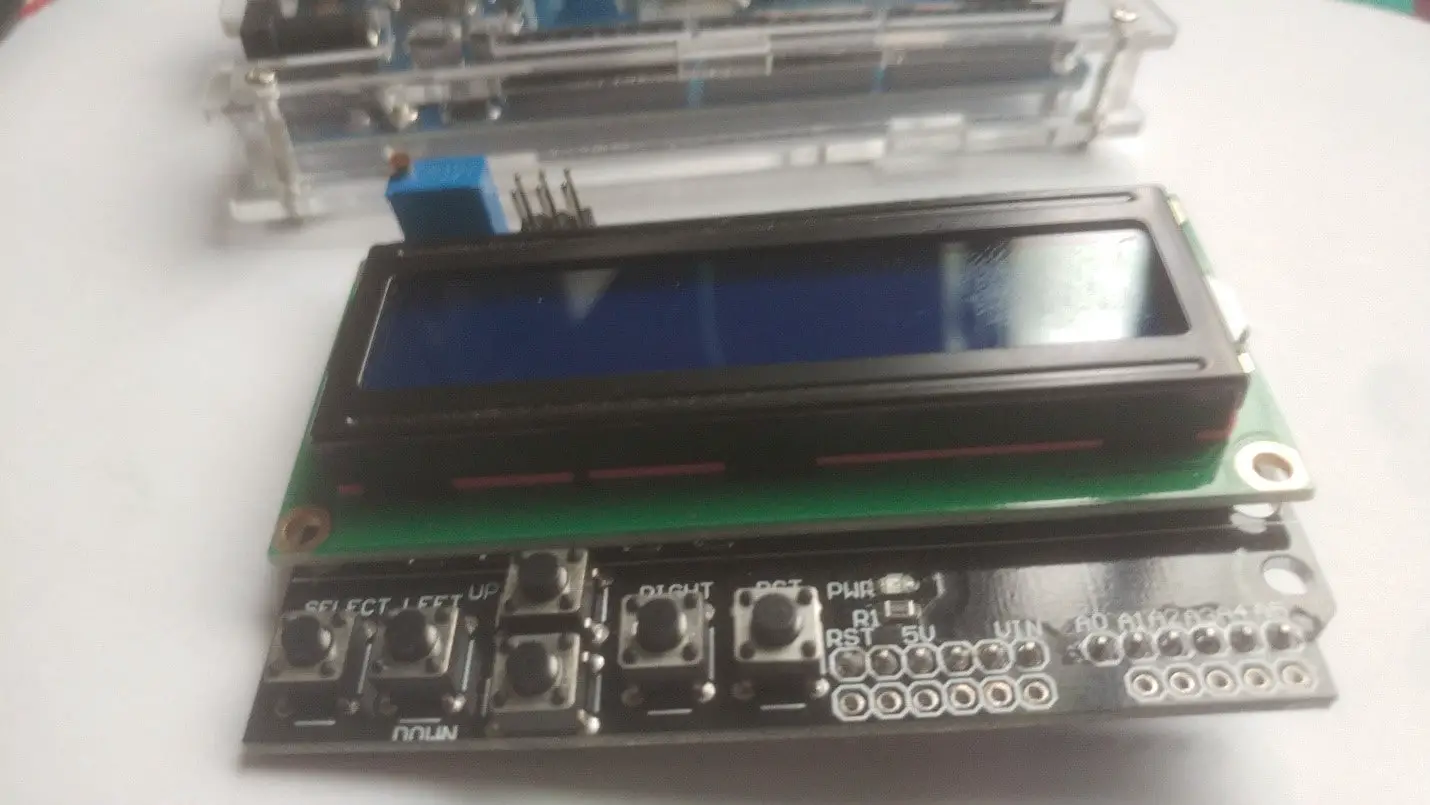
The project only needs to follow the normal wiring of the LCD keypad shield and RTC module, but because of the short circuit of the VCC pin, I program pin 53 as an output pin and provide the DC voltage to the RTC module.
Collect hardware
Make wiring
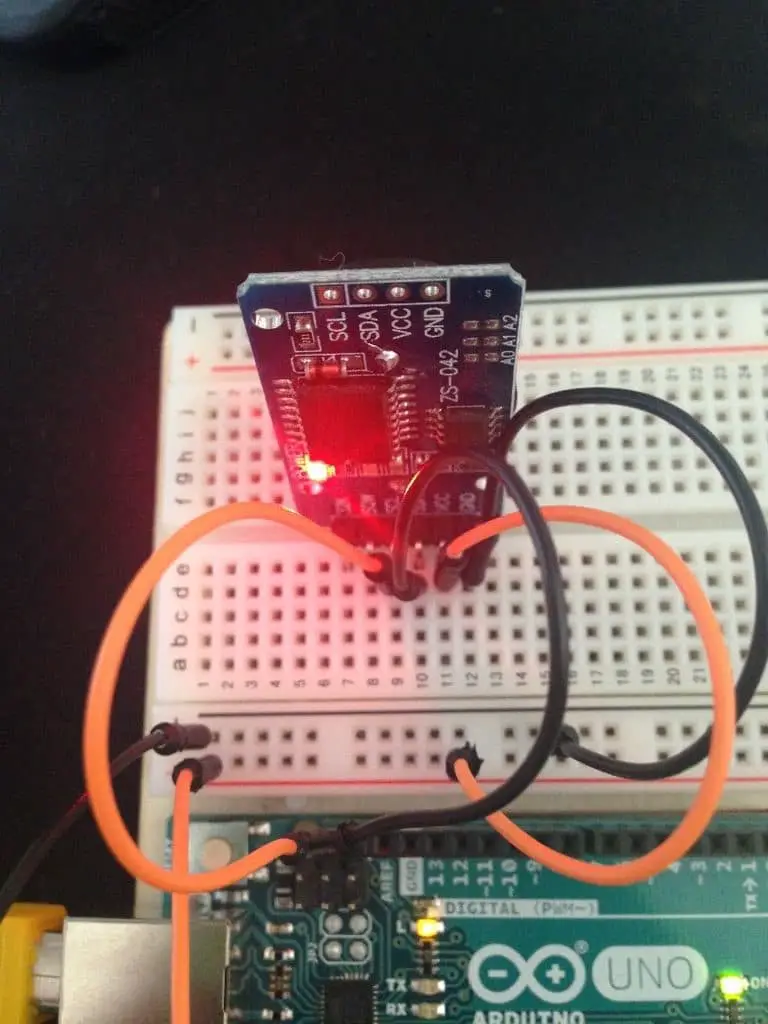
Of course, you need to connect the chip first. This is easy, according to the following picture:
VCC – > Arduino 5V
GND -> Arduino GND
SCL -> SCL or A5
SDA -> SDA or A4
As long as I know, there are dedicated SCL and SDA pins on the Arduino UNO and MEGA.
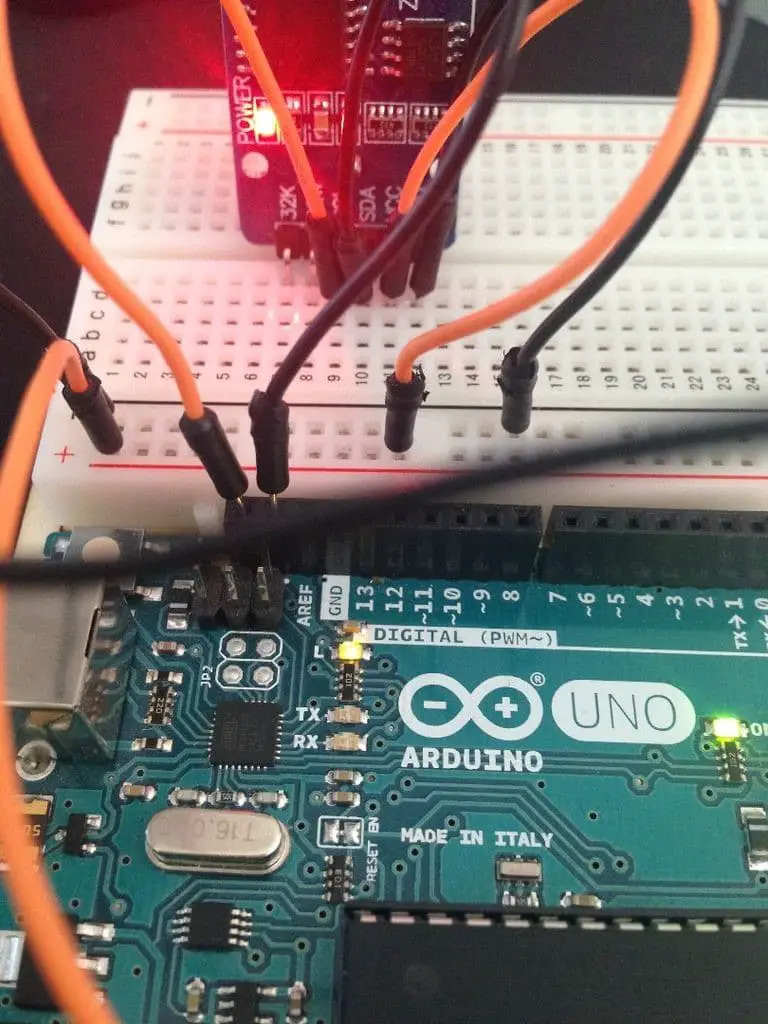
There are two other pins that are 32K and SQW pins, but we won’t use them because we get full functionality through the I2C interface.
Arduino Library
We will use Henning Karlsen’s library, which is great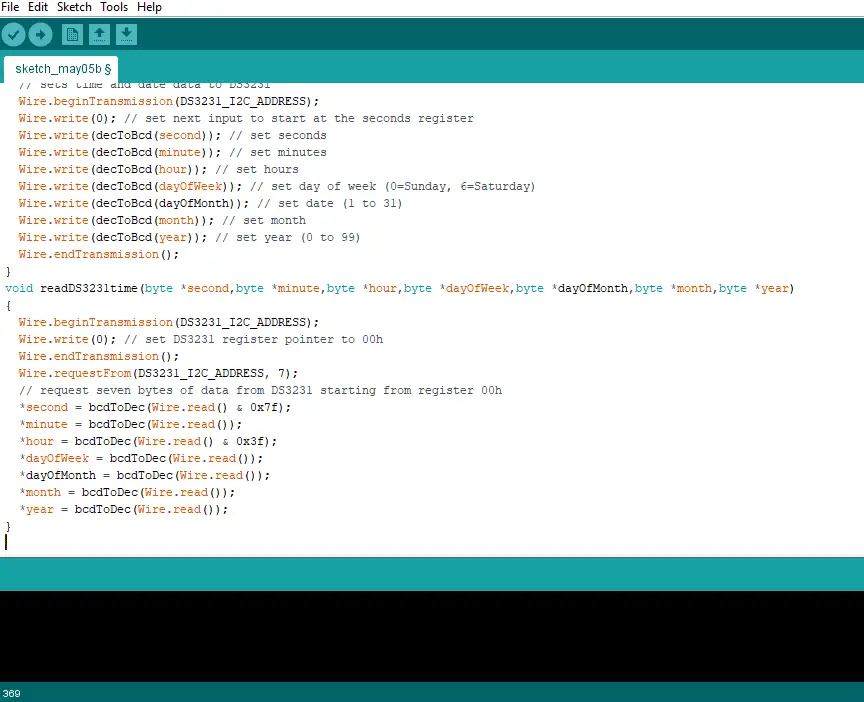 . Thank you very much for this! There are some basic functions such as reading time and date and writing time and date. Download the library here:
Http://www.rinkydinkelectronics.com/library.php?id=73
Upload source code
// DS3231_Serial_Easy
// Copyright (C)2015 Rinky-Dink Electronics, Henning Karlsen. All right reserved
// web: https://www.RinkyDinkElectronics.com/
//
// A quick demo of how to use my DS3231-library to
// quickly send time and date information over a serial link
//
// To use the hardware I2C (TWI) interface of the Arduino you must connect
// the pins as follows:
//
// Arduino Uno/2009:
// ———————-
// DS3231: SDA pin -> Arduino Analog 4 or the dedicated SDA pin
// SCL pin -> Arduino Analog 5 or the dedicated SCL pin
//
// Arduino Leonardo:
// ———————-
// DS3231: SDA pin -> Arduino Digital 2 or the dedicated SDA pin
// SCL pin -> Arduino Digital 3 or the dedicated SCL pin
//
// Arduino Mega:
// ———————-
// DS3231: SDA pin -> Arduino Digital 20 (SDA) or the dedicated SDA pin
// SCL pin -> Arduino Digital 21 (SCL) or the dedicated SCL pin
//
// Arduino Due:
// ———————-
// DS3231: SDA pin -> Arduino Digital 20 (SDA) or the dedicated SDA1 (Digital 70) pin
// SCL pin -> Arduino Digital 21 (SCL) or the dedicated SCL1 (Digital 71) pin
//
// The internal pull-up resistors will be activated when using the
// hardware I2C interfaces.
//
// You can connect the DS3231 to any available pin but if you use any
// other than what is described above the library will fall back to
// a software-based, TWI-like protocol which will require exclusive access
// to the pins used, and you will also have to use appropriate, external
// pull-up resistors on the data and clock signals.
//
#include
// Init the DS3231 using the hardware interface
DS3231 rtc(SDA, SCL);
void setup()
{
// Setup Serial connection
Serial.begin(115200);
// Uncomment the next line if you are using an Arduino Leonardo
//while (!Serial) {}
// Initialize the rtc object
rtc.begin();
// The following lines can be uncommented to set the date and time
//rtc.setDOW(WEDNESDAY); // Set Day-of-Week to SUNDAY
//rtc.setTime(12, 0, 0); // Set the time to 12:00:00 (24hr format)
//rtc.setDate(1, 1, 2014); // Set the date to January 1st, 2014
}
void loop()
{
// Send Day-of-Week
Serial.print(rtc.getDOWStr());
Serial.print(” “);
// Send date
Serial.print(rtc.getDateStr());
Serial.print(” — “);
// Send time
Serial.println(rtc.getTimeStr());
// Wait one second before repeating 🙂
delay (1000);
}

You may also like to read these some awesome projects
How to Build DIY Calculator using Arduino Uno, Keypad and character LCD


