


There has been some confusion over the distinction between Windows PowerShell and PowerShell Core, and how to install or update them. In this article, I will explain the various methods to update PowerShell to both Windows Powershell 5.1 and PowerShell Core 7.
PowerShell is a cross-platform framework for task automation and configuration management. It consists of a command-line shell as well as a scripting language which makes it easy to perform administrative tasks on your computer.
Before I get into the details on how to update PowerShell, first I need to give you a brief history lesson about PowerShell.
PowerShell: A Brief History Lesson
Note that PowerShell 5.1 and PowerShell Core are different. It is possible to have both Windows PowerShell and PowerShell Core on your computer. To understand the difference, a little explanation of the history behind PowerShell is in order.
PowerShell is a Command Line Interpreter. Command Line Interpreters are facilities that allow the computer to automate administrative tasks. Every version of Windows has had these. Even the predecessor to Windows—MS-DOS—had these.
The earliest Command Line Interpreters had a few basic internal commands and a basic scripting language. There were several limitations, however. For instance, the Command-Line Interpreter could not be used to automate every aspect of the graphic user interface.
There were several attempts to address these limitations. In 2002, Microsoft announced the beginning of a new approach to command line management. This approach will include a command-line interpreter called Monad (or Microsoft Shell, also MSH).
Monad had a new, different design, and was able to automate a wider range of administrative tasks than its predecessors. On April 25, 2006, Microsoft renamed Monads as Windows PowerShell.
Windows PowerShell was only available on Windows computers. On August 18, 2016, Microsoft announced that they had made PowerShell open-source and cross-platform. This cross-platform version of PowerShell was called PowerShell Core.
PowerShell Core has support for Windows, macOS, CentOs, and Ubuntu. The source code for it is published on GitHub.
While Windows PowerShell had versions up to 5.1, PowerShell Core had versions from 6.1 upwards. However, they are not the same.
This guide will show you how to update Windows PowerShell to version 5.1 and PowerShell Core to the latest version.
How To Upgrade To Windows PowerShell 5.1
Upgrading to Windows PowerShell is a process that involves several steps. The actual upgrade process is not difficult. First, you need to check the version of PowerShell you are currently using.
The other processes involved are:
- Finding out your existing operating system.
- Checking your computer for prerequisites; and
- Deploying the actual upgrade
I will explain these steps below.
Finding Out Your Existing System
PowerShell 5.1 will not work in every system environment, so understanding your operating system is an important, albeit underrated step.
PowerShell was released as a part of the Windows 10 anniversary update and in the RTM version of the Windows server 2016. This means that if you use any of these or a newer version of Windows, you don’t need to upgrade to PowerShell 5.1.
If you use the old Windows XP or Server 2003, then you won’t be able to make the upgrade. The best you can do is PowerShell V2.
For Windows 7 SP1/ Windows Server 2008R2 SP1 or higher, PowerShell 5.1 can be installed if the computer meets the prerequisites.
Checking For Prerequisites
Making sure your computer meets the prerequisites is another important step before you can update PowerShell to version 5.1.
An important prerequisite to meet is to ensure that the .NET Framework 4.5.2 or higher is installed. You can use this command to make sure it is installed:
(Get -ItemProperty ‘HKLM\Software\Microsoft\NET Framework Setup\NDP\V4\Full’ -Name Release).Release.

This is not an installation requirement, but it is needed to ensure all features of PowerShell work.
If it is not installed, here is an offline download link.
Also, PowerShell 5.1 preview must not be installed. Furthermore, if you have PowerShell V3 installed on your Windows 7 or Server 2008R2, you have to either first upgrade to V4 or save the value of PSModulePath.
If you use DSC on Windows 7 or Server 2008R2 machines, you have to enable WinRM.
Deploy Upgrade
Once the prerequisites have been met, you can then deploy the upgrades without a hitch. Deploying the upgrade is similar to other software upgrades.
There is more than one way you can go about this. I suggest you install Windows Management Framework 5.1. After the installation, perform a system reboot. After the reboot, check for the update.
How To Update PowerShell Core
PowerShell Core has versions 6.0, 6.1, 6.2, 7.0 and 7.1. The latest version available for Windows PowerShell is 5.1. Despite the way they are named, they are two different software. PowerShell core 6.0 is not an update of Windows PowerShell 5.1.
PowerShell Core 6.0 focused on bridging the cross-platform gap, making PowerShell compatible with other Operating Systems apart from Windows. PowerShell 7.0 focused on being a viable replacement for 5.1 and bringing near parity with Windows PowerShell.
If you have PowerShell Core 6.0 installed, you can upgrade to 7.1. You can also choose to install both PowerShell 5.1 and PowerShell Core 7.1 together. The backward compatibility mode of version 7.1 makes it possible.
There are several ways to update to version 7.1, and I will explain some of them
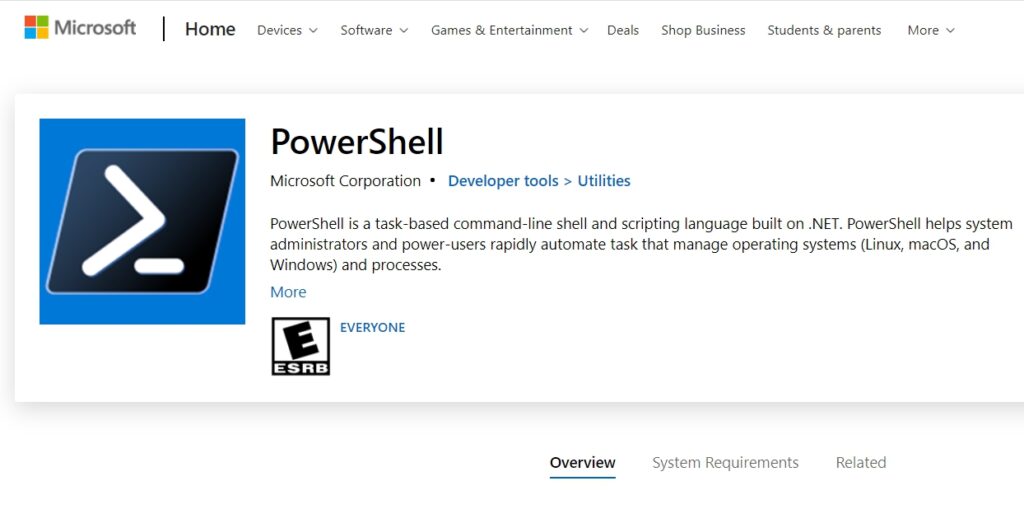
1. Download Updates From Windows Store
You can search for updates for PowerShell on the Windows Store. Windows Store is a good place to find safe and easy-to-install versions of software used on your Windows computer.
When you find PowerShell Core 7.1, follow the prompts to download and install it.
2. Manual MSI Package Installation
Since PowerShell Core is open-source software with its code found on GitHub, the updates of PowerShell Core can also be obtained from the website. If you want to install PowerShell Core using an MSI package, this is one way to do it.
Go to the project page on GitHub to find the latest releases. Expand the asset list and choose the package best suited to your Windows version (or your Operating System).
This file would look like this:
PowerShell-7.1.3-win-x64.msi
or
PowerShell-7.1.3-win-x86.msi
This would depend on what version you are downloading. The 64-bit version is about 95 MB large.
Follow all the prompts to install. This would mean answering positively to the install questions:
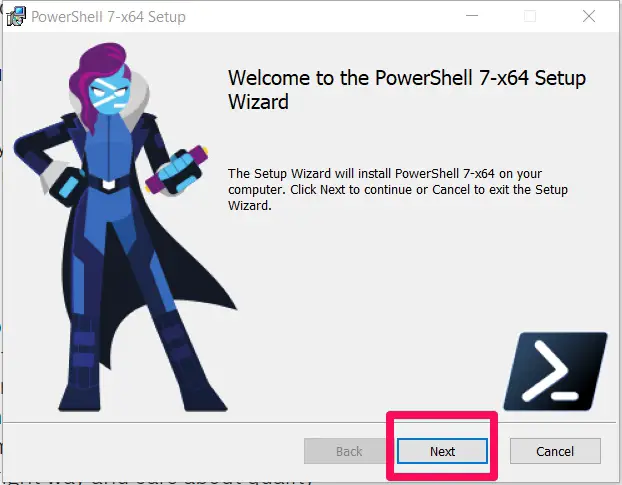
The installer comes with several options such as Enable PowerShell Remoting.
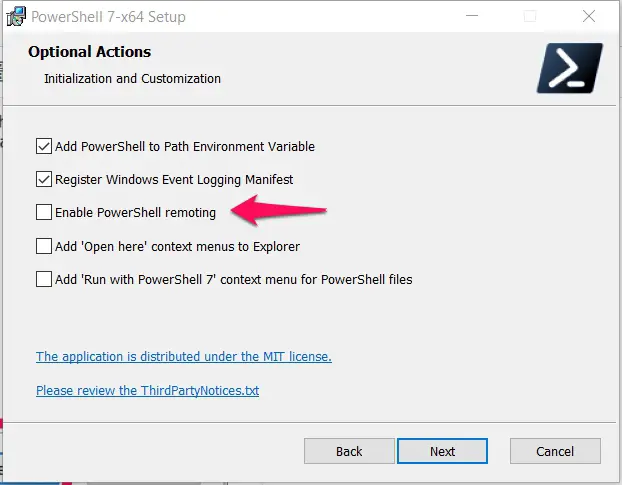
Follow the prompts till the end of the installation.
3. Command-Line MSI Package Installation
PowerShell Core can also be installed and updated using the command line. This has the advantage of not needing your attention to be installed. To install PowerShell Core using the command line, use the following command:
msiexec.exe /package “c:\Temp\PowerShell-7.1.0-win-x64.msi” /quiet ADD_EXPLORER_CONTEXT_MENU_OPENPOWERSHELL=1 ENABLE_PSREMOTING=1 REGISTER_MANIFEST=1

The use of the command line also has the added advantage of flawlessly enabling PowerShell Core 7.1 remoting.
You can also use the PSExec tool to install PowerShell Core. Use the following command to do this:
\PsExec.exe \\srv msiexec.exe /package “c:\Temp\PowerShell-7.1.0-win-x64.msi” /quiet ADD_EXPLORER_CONTEXT_MENU_OPENPOWERSHELL=1 ENABLE_PSREMOTING=1 REGISTER_MANIFEST=1
Finally, the installation of PowerShell Core can be done using PowerShell 5.1 remoting. Use the command:
Invoke-Command -ComputerName srv -ScriptBlock {Start-Process msiexec.exe -ArgumentList ‘/package “c:\Temp\PowerShell-7.1.0-win-x64.msi” /quiet
ADD_EXPLORER_CONTEXT_MENU_OPENPOWERSHELL=1 ENABLE_PSREMOTING=1 REGISTER_MANIFEST=1
This use of PowerShell 5.1 is tricky because you will often get an error message even though the installation is successful.
4. Zip Package Installation
PowerShell can be installed as a ZIP package. After downloading from GitHub, extract it to any location of your choosing and run pwsh.exe.
This method of installing/updating PowerShell Core is particularly useful if you need to run the PowerShell Core 7.1 simultaneously with an earlier version such as 6.0.
If you are installing via this means, PowerShell Core will not check for any prerequisites needed for demoting and there will be no registry keys created.
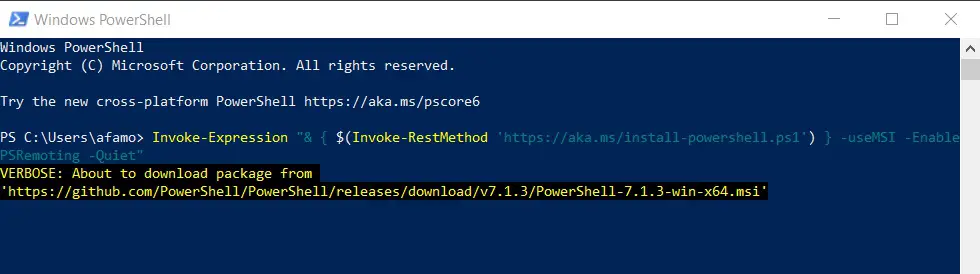
5. Install / Update PowerShell With One-Liner Script
During a PowerShell session, run this line to install/update to the latest version of PowerShell Core:
Invoke-Expression “& { $(Invoke-RestMethod ‘https://aka.ms/install-powershell.ps1’) } –useMSI -EnablePSRemoting -Quiet”
For Linux users, they can use this line of code:
wget https://aka.ms/install-powershell.sh; sudo bash install-powershell.sh; rm install-powershell.sh
6. Update PowerShell Using Winget Command Line
The Winget command line on Windows can also be used to update PowerShell. Winget is a utility that enables you to discover, install and upgrade applications on Windows. You can also use it to remove and configure applications.
Run this line to install PowerShell:
winget install PowerShell
📗FAQ
How do I update my PowerShell version?
You can adhere to the following methods to upgrade PowerShell on Windows:-
Step 1:– Search for “Windows PowerShell” in the Start menu.
Step 2:– Run as administrator by right-clicking on “Windows PowerShell”.
Step 3:– Type the following command into the PowerShell window:
Get-WmiObject -Class Win32_OperatingSystem | Select-Object -Property Version, ServicePackMajorVersion, ServicePackMinorVersion
This will show you the PowerShell and Windows versions that are currently installed on your computer.
Step 4:- If PowerShell has to be updated, check the version number. PowerShell has to be updated if the version number is older than the most recent version.
Step 5:- Downloading and installing the most recent version of PowerShell is required. To achieve this, download the most recent PowerShell version to the Microsoft website.
Step 6:– After downloading, double-click the installation file to install the most recent PowerShell version.
Once the installation is finished, you may open PowerShell and use the following command to make sure you are using the most recent version:
$PSVersionTable
This will show the PowerShell version you are presently using.
Note:- It’s possible that you won’t be able to install the most recent PowerShell version if you’re using an earlier version of Windows. In this situation, upgrading to a more recent version of Windows is required to use PowerShell.
Can we update Windows PowerShell?
It is possible to update Windows PowerShell. PowerShell is a scripting language and command-line shell that comes preinstalled with Windows.
It is intended to give users on Windows computers a more robust and adaptable method of managing and automating operations.
The instructions I gave earlier can be used to update PowerShell on Windows. You need to check the PowerShell version you’re using, decide whether you need to upgrade, then download and install the most recent version from the Microsoft website.
It’s vital to remember that the PowerShell version you can use will depend on the Windows version you are using. For instance, you can use the most recent version of PowerShell if you are using Windows 10.
However, installing the most recent version of PowerShell might not be possible if you use an earlier version of Windows. In this situation, upgrading to a more recent version of Windows is required to use PowerShell.
How can I tell if PowerShell is up to date?
You can take the following actions to see if PowerShell is current:-
Step 1:- Search for “Windows PowerShell” in the Start menu.
Step 2:– Run as administrator by right-clicking on “Windows PowerShell.”
Step 3:- Type the following command into the PowerShell window:
$PSVersionTable
This will show you the version of PowerShell you are presently using, along with other installation-related details.
Step 4: The value of the ” PSVersion ” property should be verified. This will display the PowerShell version you are presently using.
Step 5: You can visit the Microsoft website and compare the PowerShell version number to the most recent version that can be downloaded to see if this is the most recent version. PowerShell has to be updated if the version number is older than the most recent version.
To see whether there are any PowerShell updates available instead, use the command below:
Get-Module -Name PowerShellGet -ListAvailable | Select-Object -Property Name,Version
If there are any updates for PowerShell, this will show a list of them. After that, you can install the updates using the “Install-Module” command.
Note:- It’s possible that you won’t be able to install the most recent PowerShell version if you’re using an earlier version of Windows. In this situation, upgrading to a more recent version of Windows is required to use PowerShell.
Final Thoughts On How To Update PowerShell
PowerShell is an important tool for your computer. It helps you run commands and also create and test scripts. It helps automate the management of systems.
Though PowerShell was originally designed for Windows, recent changes have made it accessible on other operating systems. As part of these changes a new type of PowerShell: PowerShell core was created.
In this article, I have explained how to update Windows PowerShell to the latest version 5.1. I also discussed how to update PowerShell Core to the latest version.
Lastly, I must note that if you use Windows 10 and higher, you probably already have PowerShell installed and may only need to update it.
I would like to know if you have other tricks or hacks that have helped you install or update Powershell.


