


This is for educational purposes only. Hopefully, this will help others evaluate the safety / non-safety of the so-called safety lock mechanism, which is fixed on the door of a car or family garage.
This hacker can be used to unlock a wide variety of security locks used in cheap aftermarket car safety systems and almost all inexpensive remote garage doors.
There are currently two major RF remote key methods. At a high level, these are active and passive systems. Passive entry into the system each time using a fixed code (usually 24/40) to verify the key. Therefore, this is just a matter of capturing signals and retransmitting to gain access. Even with this major loophole, these types of security systems are still widely used. The main reason this approach is still prevalent is that it is not practical to force the code to break (24 ^ brute-force versus 24-bit code).
On the other hand, take the initiative to enter the system more difficult to crack. There are several ways to implement these systems. The most common way is to dynamically change the code’s rolling code on the key and receiver based on commonly used algorithms. I am currently working on these types of systems, hoping to give some guidance on these types.
Under this guidance, I will explain how to analyze passively into the system code and how to repeat the code to gain access.
Hack Car doors and other Wireless Devices using Arduino
I tested this method and programming on the following security systems.
- Liftmaster/Chamberlain/Sentex 893Max Remote Control Transmitter (Buy Here)
- Viper 350 PLUS 3105V 1-Way Car Alarm Keyless Entry (Buy Here)
- Steelmate 838N 1 Way Car Alarm System (Buy Here)
Although I’ve tested using the above system, this intrusion will apply to any passive entry system that uses a 315MHz, 433.92MHz frequency.
It is worth noting that by convention, all commercial remote keyless systems must be limited to use only radio frequencies at 315MHz (in Europe) and 433.92MHz (in the United States and other countries).
Collect the Hardware
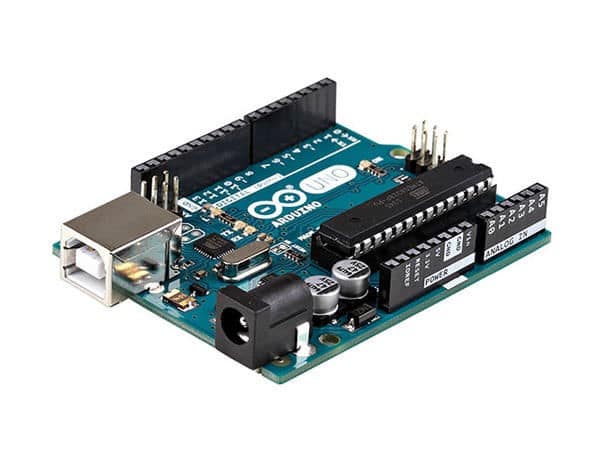
- Arduino UNO (Buy)
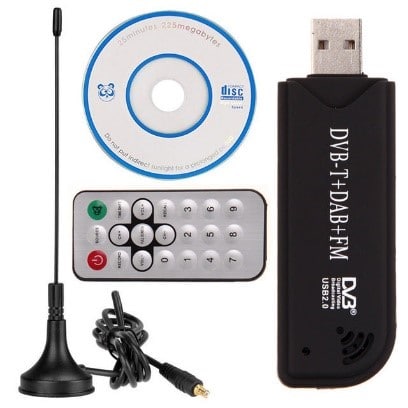
- DVR-T TV Tuner Receiver (Buy)
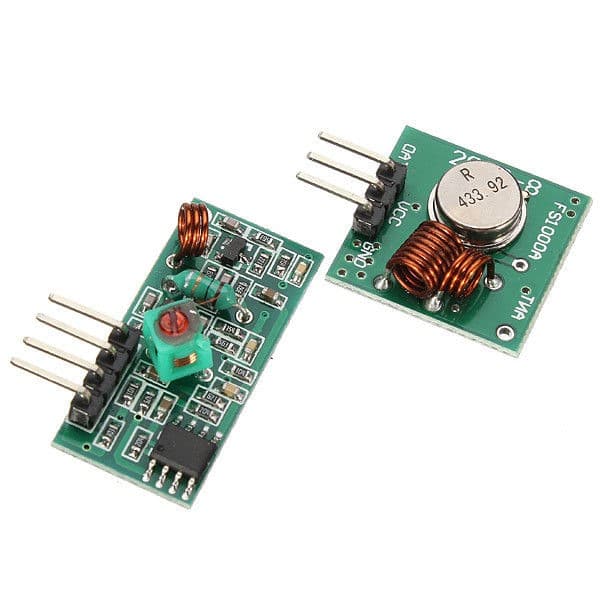
- 433 RF transmitter and Receiver (Buy)
- 315mhz RF transmitter and Receiver (Buy)
- Vero board (Buy)
- Headers (Buy)
Project Idea
Here are the major steps to follow.
Identify passive code:
- Install the RTL-433 library on your computer.
- (This is necessary because these libraries allow us to listen to any radio frequency that the dongle can handle).
- Listen to 315MHz and 433.92MHz frequency and decode.
Send passive code (using Arduino):
- Install Arduino hardware and sketches.
- Test the Arduino settings with a serial monitor.
- Set GUI interface to Arduino settings.
Complete the contact prototype:
- Create a simple RF transmitter shield
- (Optional) Build USB Type A to B adapter
Identify the Passive Code: Install RTL-433 Library
RTL library will be based on Realtek RTL2832 DVB dongle into a universal data receiver. Since the RTL2832 chipset allows adjustment of the 24-1766 MHz range, it can also be used for a variety of other projects. Such as monitoring adb aircraft transponder data for each commercial flight broadcast.
I will try my best to make every step as complete as possible. To install the RTL library, we have a few prerequisites below.
The main goal of this step is to install merbanan / rtl_433 on your computer. With some Google search and mini brainstorming, you will find quick and dirty ways to set it up. But I always like to keep control from infrastructure.
Rtl_433 Window Binary (32/64 bit)
rtl_433 (https://github.com/merbanan/rtl_433) is a program that allows you to use USB-based RTB2832-based devices as a universal receiver for 433 MHz devices (temperature sensors, weather stations, etc.).
Here you will find the unofficial Windows 32/64-bit version I compiled using MinGW. For my librtlsdr version go here.
Use suggestions
If you can see the signals in other programs, but nothing is found in rtl_433, try adjusting the gain and bit detection level:
rtl_433.exe -g 35 -l 0
These values apply to me, but are highly dependent on signal strength / noise, so you have to experiment. -l 0 is automatic level detection (edit: now the default). Enabling profiling (-a) can help determine what the program sees (if any).
If your CPU is slow and needs to save some resources, you may need to disable some devices, for example:
rtl_433.exe -R 12
Support for Oregon Scientific Weather Sensors will be enabled and all other features will be disabled
Download
rtl_433 windows 32-bit binary
rtl_433 windows 64 bit binary
The above binaries have been tested by me and are known to work. For the latest version, you can try to build it automatically daily (32-bit / 64-bit), but note that I do not test these versions and may or may not work.
Note:- I have written a post for people looking for the Best Wireless Access Point to buy?, do read it If you are interested.
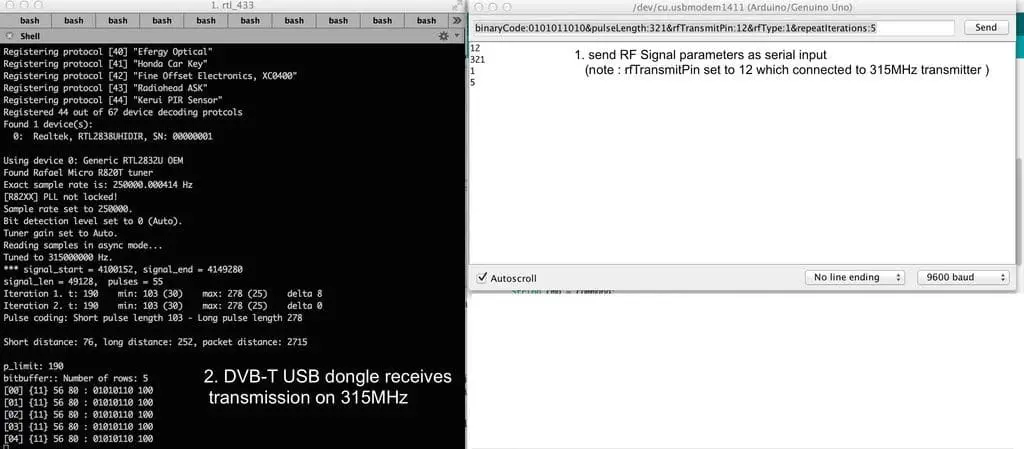
Identify the Passive Code: Start Listening to 315MHz and 433.92MHz
Depending on the RF frequency of the test security lock, you need to hear 433.92MHz or 315MHz. Since all RF key frequencies are adjusted using one of these frequencies, you can try both if you do not know the exact frequency of the frequency.
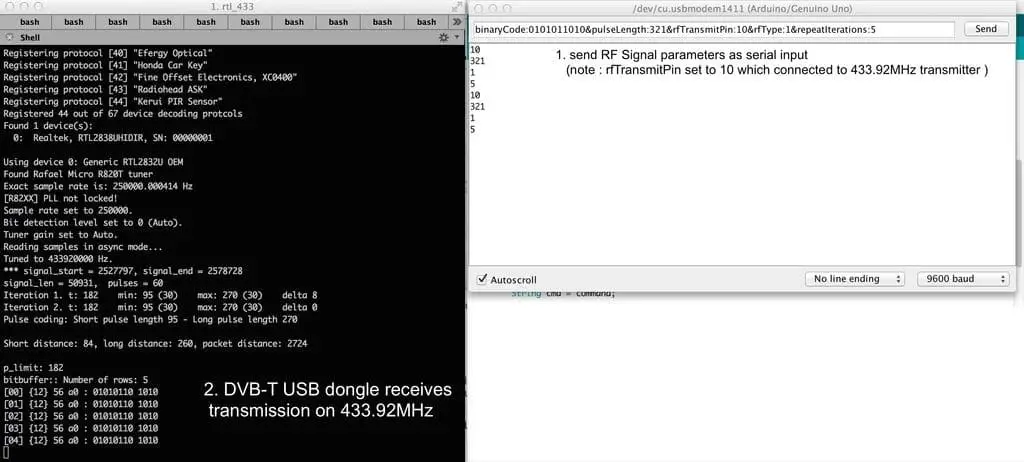
For 433.92 MHz RF key
“Rtl-433” default tuning to the frequency of 433.92MHz. In order to listen to all incoming transmissions.Frequency, we need to switch to the analyzer mode as follows.
Insert the DVB-T tuner dongle into one of the USB ports on your computer.
Open the terminal and enter the following command:
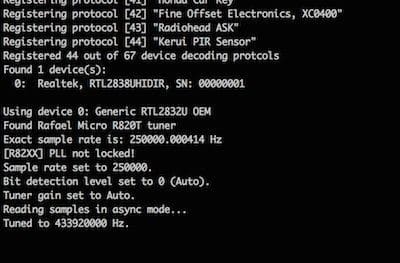
rtl_433 -a
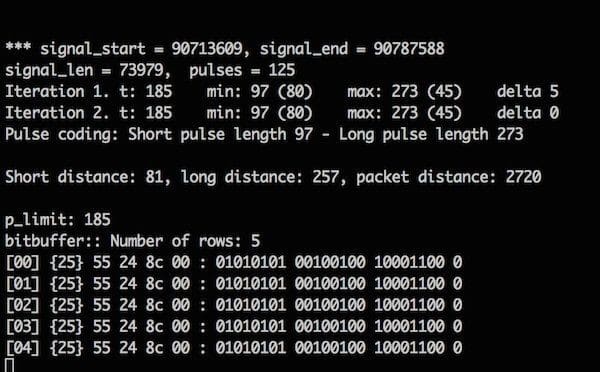
It will start listening for any incoming traffic and print it on the console. Press a button on the remote control and it will register on the console output.
For 315MHz RF keys
The name of the library is somewhat misleading because it says “433” means it can only receive at 433MHz. This is not true. The library can receive any frequency if the connected hardware allows it.
To tune to 315MHz using the tuner:
- Insert the DVB-T tuner dongle into one of the USB ports on your computer.
- Open the terminal and enter the following command:
- Rtl_433 -f 315000000 -a
- Press a button on the remote control and it will register on the console output.
Important: Like a radio, a DVB-T tuner can only tune to one frequency at a given time. One receiver cannot tune to two frequencies simultaneously.
Setup Arduino Hardware and Sketch
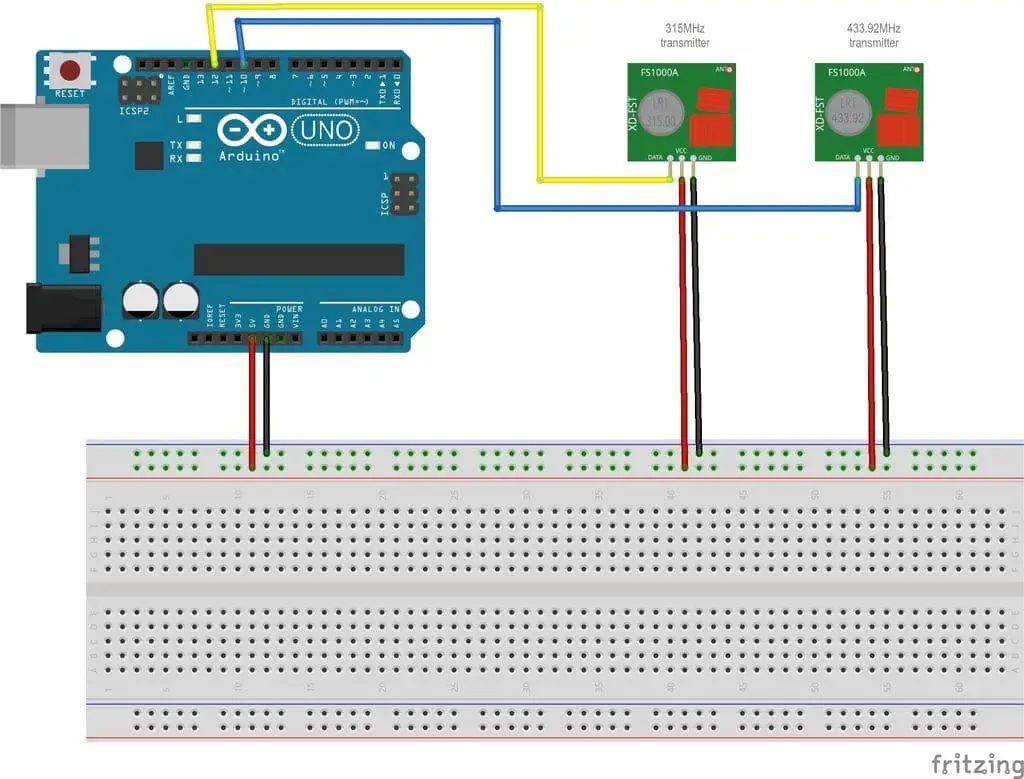
Arduino hardware settings
The hardware setup is very simple, as shown in the photo. I already include a breadboard to keep the chart clean. If you can properly connect 5v and ground to the Arduino, you do not need a breadboard.

In addition, the data pins can be configured using the GUI interface explained later. Therefore, there is no need to stick to the 12 and 10 pins. You can use any digital output pin as needed.
Arduino Sketch
In order to send the binary code, we need the Arduino third-party library called rc_switch developed by Suat Özgür.
Follow these steps to properly install the rc-switch library and upload sketches.
- Download the rc-switch library from the sui77 / rc-switch git repository.
- Place the unpacked rc-switch library directory in “{USER_HOME} / Documents / Arduino / libraries /”.
- (There are several ways to install the library, for more information on how to install the library, see the Arduino official guide)
- Download the attached arduino sketch file (RfProjectArduinoCode.ino) or the latest sketch from my git repository. Sketch is simple, good reviews and self-explanation.
- At a high level, what it does is monitor any incoming serial message and transmit the RF code based on serial input parameters.I added inline comments to make it more readable. If you need more information, feel free to ask any questions in the comments section.
- Open the sketch file from Arduino IDE, validate and upload to Arduino.
Test Arduino Setup With Serial Monitor
Finishing the Prototype
In order to complete this project, we need to properly package everything. Of course, we can not handle breadboards with mini launchers hanging from wires in parking lots or garage parking. 🙂
This step focuses on making this project portable and easy to handle.
This step can be divided into two parts:
- RF Transmitter Arduino Connector Shielding
- (Instead of using breadboards, I need a more portable device and can easily connect / disconnect from the Arduino.)
- USB A type / B type connector
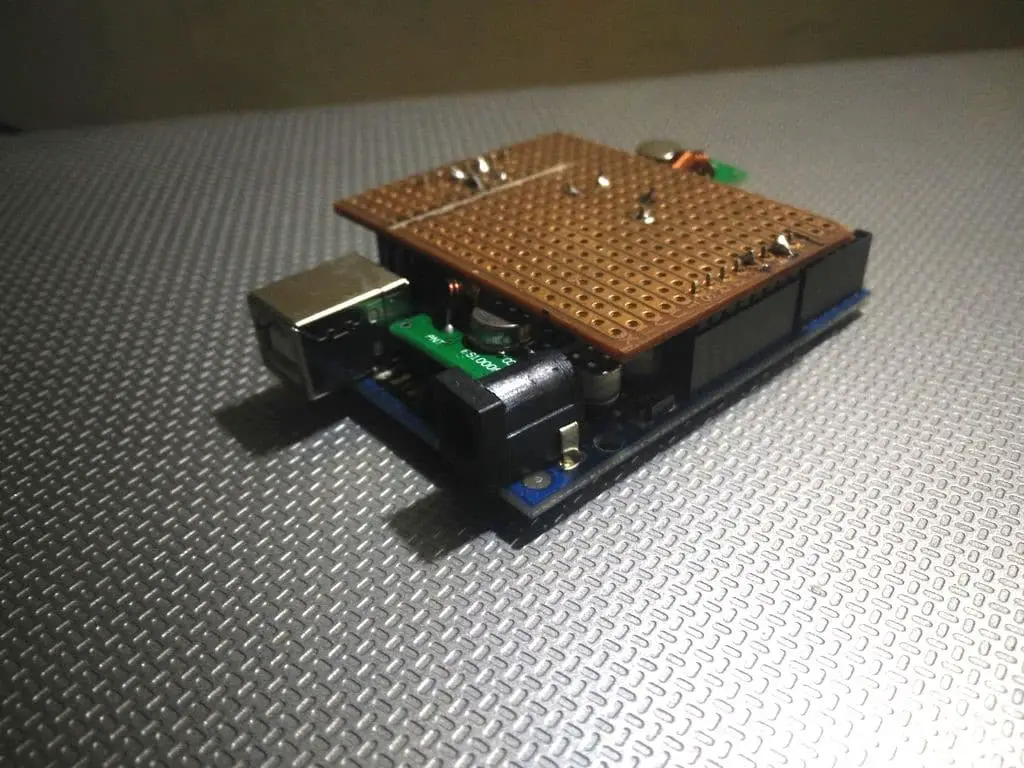
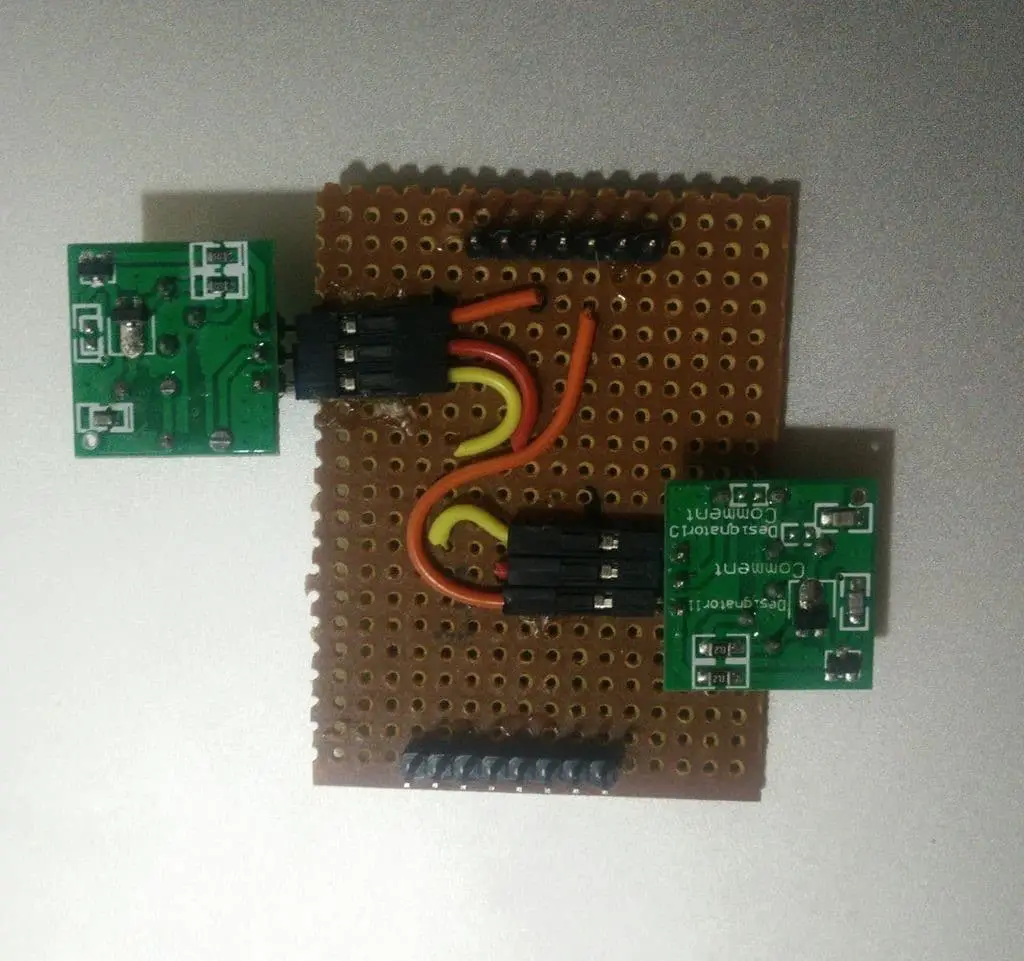
RF Transmitter Arduino Connector Shielding
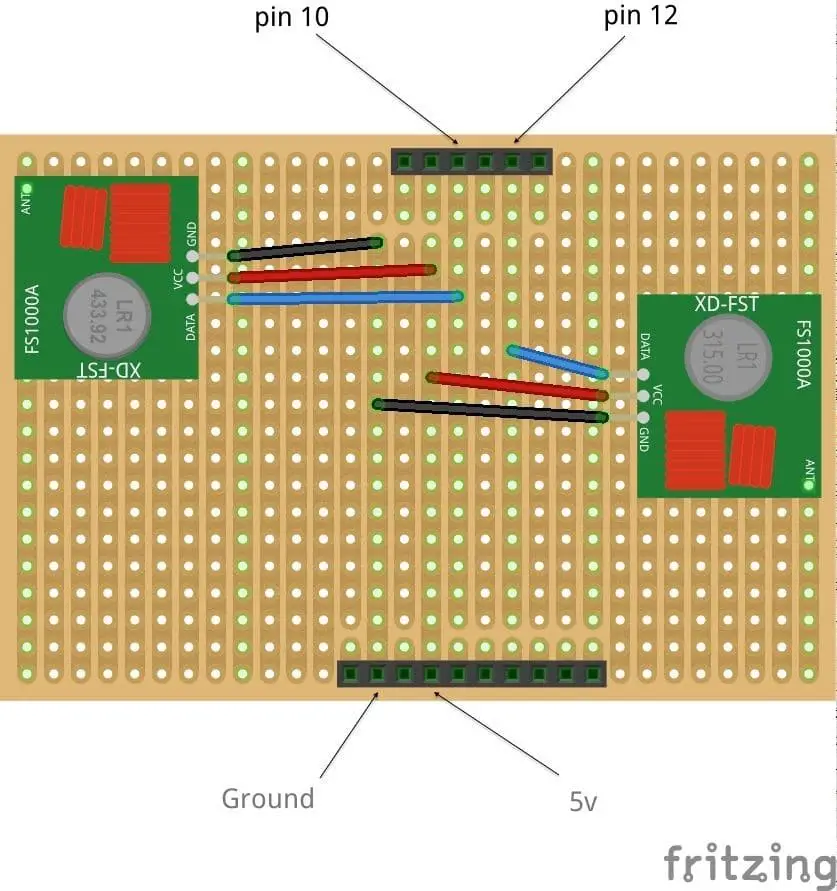
This is a simple setup that uses only 4 pins from the arduino. I’ve attached the Veroboard diagram. Correctly weld as shown, and be sure to disconnect all unused pin pins as a precaution. I also use connectors to connect / disconnect transmitters. If you do not want to reuse the transmitter in other projects, just solder it directly to the board.
Be sure to verify each pin connection after soldering. Make sure that the opposite Arduino pin is not connected via Veroboard.
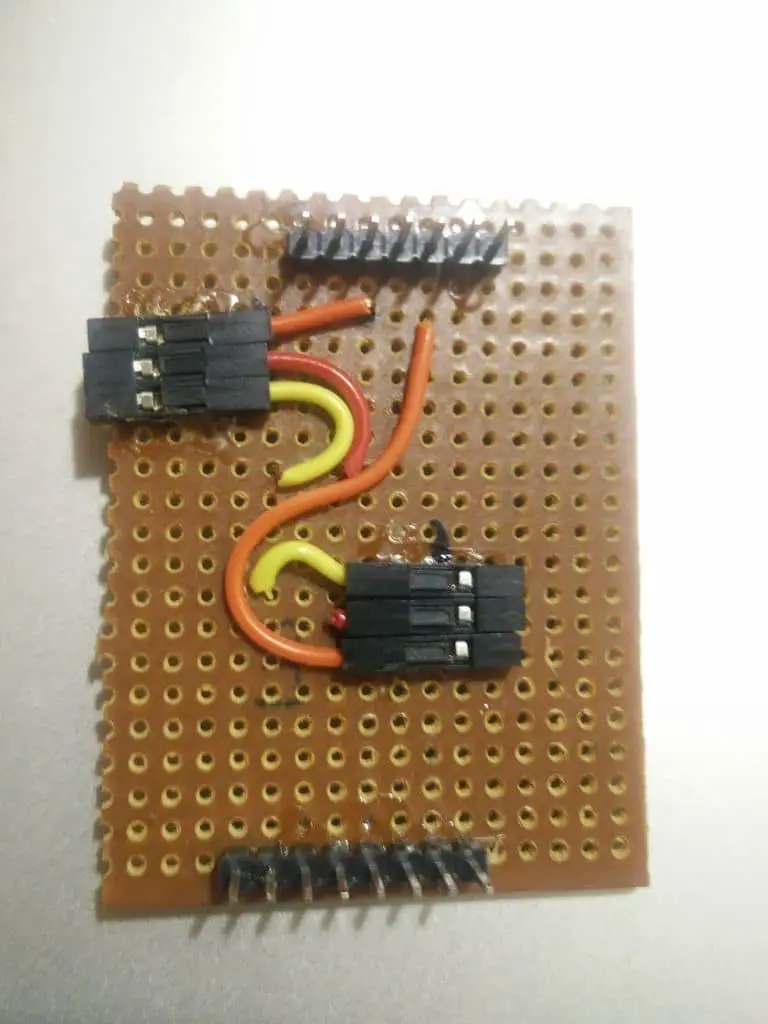
My final adapter looks like this. I believe there is a better way to arrange it. I just extracted from the currently available stuff
USB Type A to B connector
If you can buy prebuilt adapters, it’s cheaper and well built. But because it took a long time to reach (where I live) I decided to set up my own adapter because I got all the necessary parts at home.
This attack can be improved in a variety of ways. For example, if this can be done with arduino micro or nano, it’s like a pen drive and it’s easy to carry anywhere. It’s quite easy to do this. In addition to these steps, the only thing that needs to be done is to properly install the RF transmitter to the arduino.

Hopefully, this will help others evaluate their own RF safety systems and take the necessary action to prevent any accidents.

You may also like to read these articles
How to Connect your Raspberry Pi and Arduino Together
How to Drive and Build Project with Nokia 5110 LCD using Arduino
Hope this project “How to Hack Car doors and other Wireless Devices using Arduino” helps you to learn and secure Hack Car doors and other Wireless Devices using Arduino. if you have any query, feel free to comment.


