


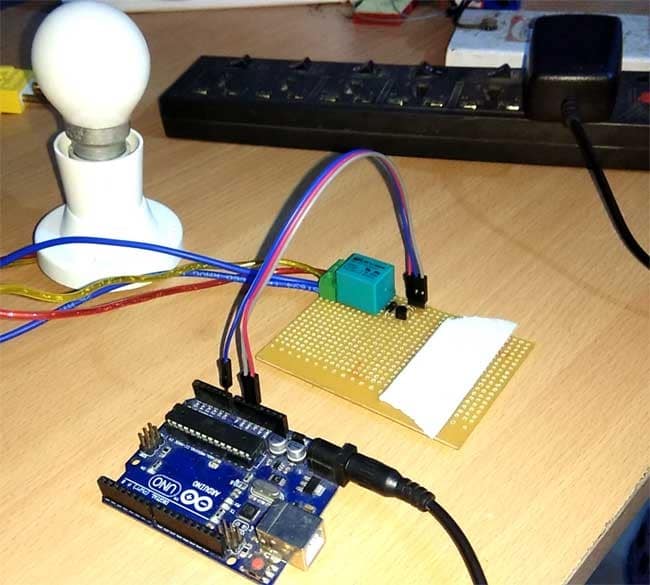
For each embedded learner or beginner, LED flicker is a very common and almost the first program. We flash the LED with some delay. So today we are doing the same project here, but here we will use AC bulbs instead of regular LEDs and will make AC bulbs flash.
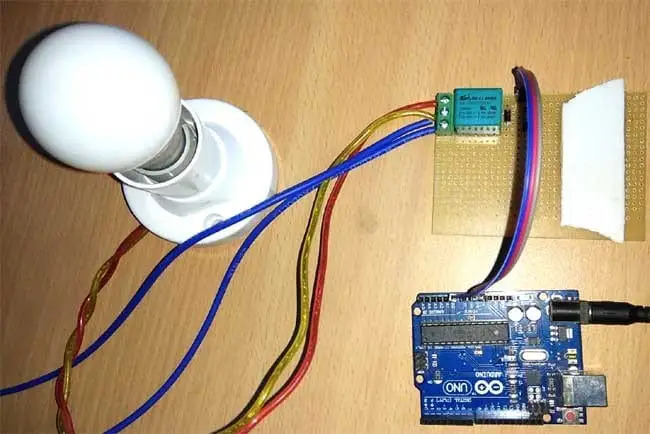
Whenever we need to connect any AC equipment in our embedded circuit, we will use Relay. So in this arduino relay control tutorial, we will simply learn how to use Arduino connection relay. Here we do not use any relay driver IC like ULN2003 and only use NPN transistors to control the relay.
Hardware Required
- Arduino Buy Now
- 5v or 6v relay Buy Now
- AC appliance or Bulb
- BC547 transistor Buy Now
- 1k resistor Buy Now
- Breadboard or PCB
- Connecting jumper wire
- Power supply
- 1n4007 diode
What is Relay?
A relay is an electromagnetic switch controlled by a small current that is used to turn on and off a relatively large current. By applying a small current, we can turn on a relay that allows more current to flow. Relays are a good example of using a smaller DC current to control AC (AC) equipment. The commonly used relay is a single pole double throw (SPDT) relay, which has five terminals as follows:-
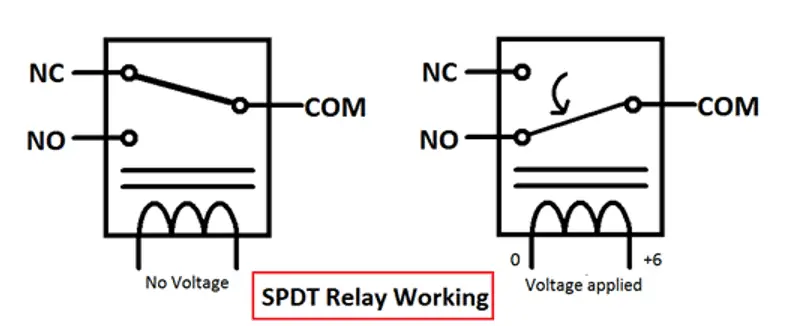
When no voltage is applied to the coil, COM (common) is connected to the NC (normally closed contact). When a certain voltage is applied to the coil, an electromagnetic field is generated that attracts the armature (the rod is connected to the spring) and the COM and the NO (the normally-open contact), so that a large current flows. The relay has a lot of ratings, here we use 6V working voltage relay, which allows 7A-250VAC current flow.
The Relays are usually configured by small drive circuits consisting of transistors, diodes, and resistors. The transistor is used to amplify the current so that the full current (from the DC power supply – the 9V battery) can flow through the coil to take full advantage of the current. Resistors are used to bias the transistors. When the transistor is off, the diode is used to prevent reverse current flow. Each inductor coil produces an equal and opposite EMF when it is suddenly switched off, which may cause permanent damage to the element, so diodes must be used to prevent reverse current. All driver circuits on the market can easily use relay modules, or you can create relay modules on the following demo board or PCB. Here we use a 6V relay module.
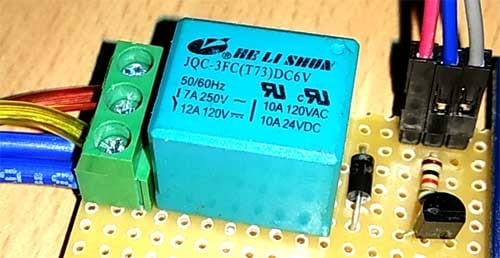
Here to open the relay with the Arduino, we only need to connect the Arduino pin high (in our case A0) to the relay module. The following is a relay drive circuit to build your own relay module:
5v relay drive circuit module circuit schematic
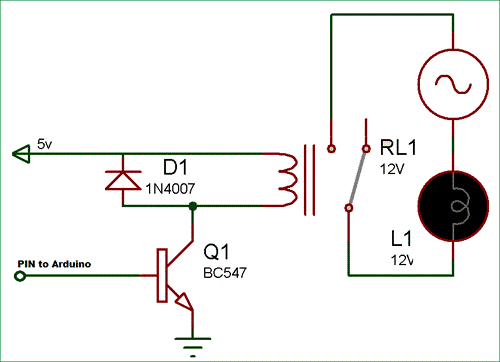
In this Arduino relay control circuit, we use the Arduino to control the relay through the BC547 transistor. We connect the base of the transistor to the Arduino pin A0 through a 1k resistor. An AC bulb is used for demonstration. The 12v adapter is used to power the circuit.
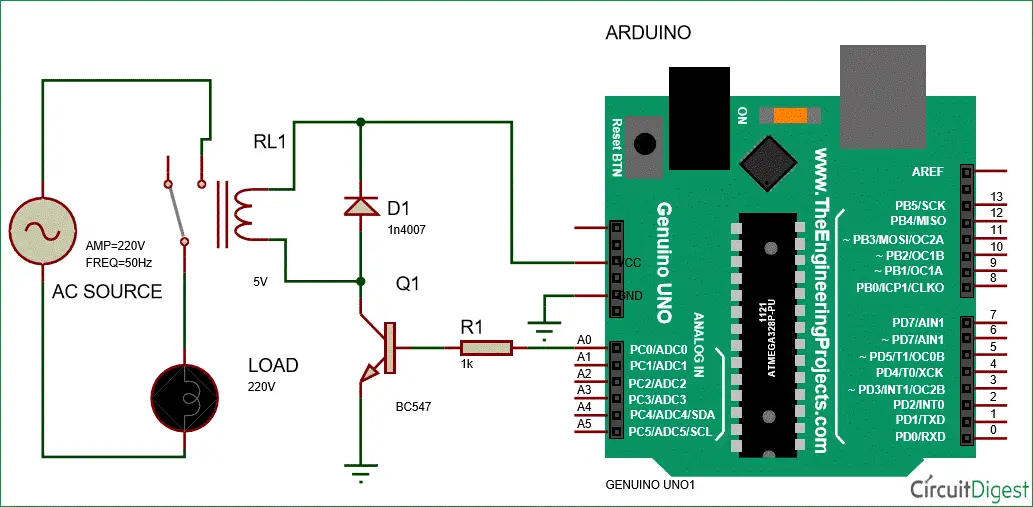
Working with Arduino Control Relays
The job is very simple, we need to make the relay pin (pin A0) high, the relay module is turned on, and the relay pin is low to turn off the relay module. The AC lamp also turns on and off according to the relay.
We have just programmed the Arduino to make the relay pin (A0) with a delay of 1-second-high and low:
Upload Source Code
void loop()
{
digitalWrite(relay, HIGH);
delay(interval);
digitalWrite(relay, LOW);
delay(interval);
}
Demonstration Video and complete code for Arduino Relay Control is given below.
Code:
// Arduino Relay Control Code
#define relay A0
#define interval 1000
void setup() {
pinMode(relay, OUTPUT);
}
void loop()
{
digitalWrite(relay, HIGH);
delay(interval);
digitalWrite(relay, LOW);
delay(interval);
}
You may also like to read these articles


