


Are you tired of clumsy screenshot tools that don’t deliver high-quality images?💁
Have you ever felt frustrated when your snipping tool lacks the features you need, like editing options or the ability to capture scrolling windows?
As a content creator, developer, or just an everyday user, screenshots are crucial to your daily tasks.
Yet, finding the right tool that offers both efficiency and versatility can be a struggle.
Traditional screenshot tools, like the built-in Snipping Tool on your Windows device, can be limited. Yes, it’s handy for quick grabs, but what if you want to do more than simply cropping?💁
What if you need to annotate the image or capture a video of your screen? Unfortunately, these tasks are not within the capabilities of the Snipping Tool.
This limitation could lead to wasted time and missed opportunities, especially if your work depends heavily on capturing and sharing high-quality screen images or videos.
Snagit, developed by TechSmith, could be your solution. Unlike the Snipping Tool, Snagit is more than just a screenshot tool. It’s a robust screen capture and image editing software designed to make your life easier.
Snagit offers features that range from capturing scrolling windows, creating GIFs, to recording screen videos with audio. But how does Snagit truly compare with the Snipping Tool?
In this article, we will deep dive into the key differences and capabilities of “Snagit vs Snipping Tool”, to help you decide which tool is right for you.
Stay tuned for a comprehensive comparison that could revolutionize how you capture and share content.
Snagit vs Snipping Tool – Which Should I Use?
In the realm of screen capturing and image annotation, two prominent players vie for attention: Snagit and Snipping Tool.
Although both tools serve the purpose of capturing screenshots, they possess distinctive features and cater to different user needs.
Snagit, a premium tool developed by TechSmith, offers an array of advanced functionalities that surpass the basic capabilities of the native Snipping Tool found in Windows operating systems.
With an intuitive interface and a rich toolkit, Snagit allows users to capture, edit, and share screenshots effortlessly. Its robust capture options encompass full-screen captures, scrolling captures, and even capture presets for specific applications.
Moreover, the extensive editing capabilities of Snagit facilitate precise annotation, highlighting, and resizing, enhancing the overall visual impact of the captured content.
On the other hand, the Snipping Tool, a built-in utility in Windows, provides a simple and lightweight solution for basic screen capturing needs.
It lets users capture rectangular, free-form, window, or full-screen screenshots. Although lacking in advanced editing features, the Snipping Tool allows basic annotations such as highlighting and drawing.
Its simplicity and ease of use make it suitable for quick and uncomplicated screenshot requirements.
here’s a detailed table comparing Snagit and Snipping Tool:-
| Feature | Snagit | Snipping Tool |
|---|---|---|
| Price | Paid software with a free trial period | Free, comes pre-installed with Windows |
| Capture Types | Capture images, video, scrolling windows, and panoramic images | Capture images only |
| Editing Tools | Comprehensive editing tools, including annotations, effects, and resizing | Basic editing tools such as crop, pen, highlighter, and eraser |
| File Formats | Supports a wide range of file formats, including JPG, PNG, GIF, PDF, and more | Limited to PNG, JPEG, and GIF formats |
| Sharing Options | Allows for easy sharing to social media platforms, cloud storage, and more | Limited sharing options, can only share via email or save to local storage |
| Image and Video Effects | It comes with a variety of image and video effects, such as borders, shadows, and captions | No video effects or advanced image editing options |
| Customization Options | Allows for customized capture settings and hotkeys | Limited customization options |
| User Interface | Modern and intuitive interface with easy-to-use features | Simple interface |
| Integration with other tools | Can integrate with other tools such as Microsoft Office, Google Drive, and more | Limited integration options |
Easy to Use:-
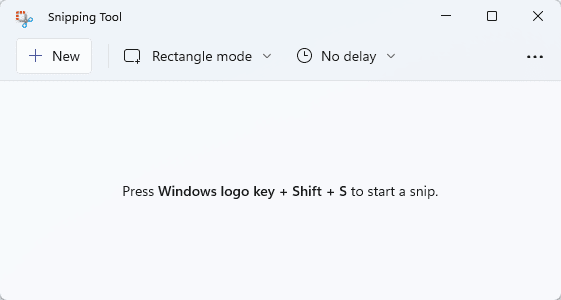
All you have to do to get a screenshot using the Snipping tool is to click launch the Snipping Tool. To start the tool, use hotkeys Windows + Shift + S.
You then select the area of the screen you wish to capture. Once you have captured it, the image appears on the editing screen.
On the other hand, using Snagit takes a bit of learning and mastery. This is because it has more features, settings, and many ways you can choose to screenshot the image. Taking screenshots will become easier if you learn how to use these features.
To fully enjoy the privileges of using Snagit, you may need to use more recent PC models. If not, the application will be laggy. This problem is due to all the advanced features it packs.
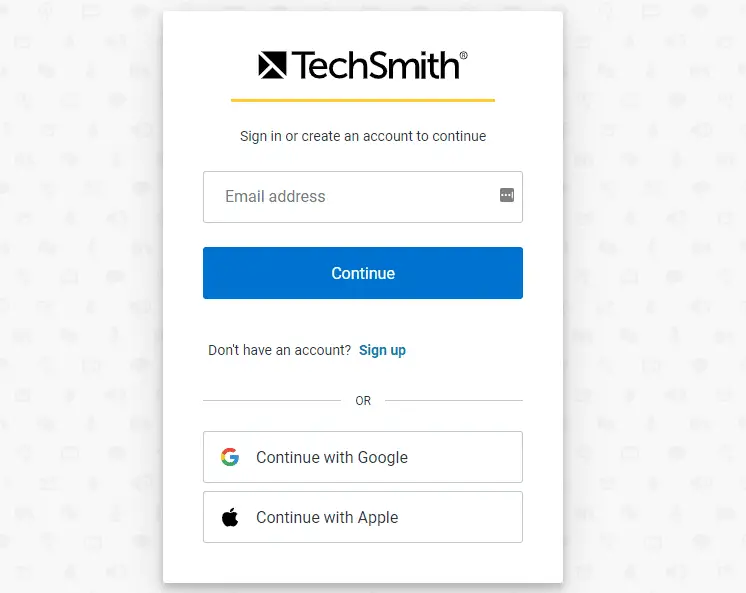
The tool also requires registration; hence if you are concerned about privacy, this may be a discouraging factor, even though not a deal-breaker, in my opinion.
That said, if the aim is to conserve system resources, you may rather stick to Snipping Tool.
In the easy-to-use comparison, we lean more toward the former because of its simplistic and easy-to-use model.
However, for persons looking to do elaborate work, this will not be an important factor, especially since once you get past downloading and installing the bulky Snagit file, you are all set to go.
Platform Support:-
Snipping Tools has always been packaged with the Windows OS. It was first featured in Windows Vista, and since then, it has always been a member of the Windows family.
If you’re using a Windows OS, you will have access to the Snipping Tool. Unfortunately, Mac users cannot enjoy this package as it is not supported, but other options are available.
This is where Snagit comes into play, as it has been developed to function on Windows and Mac OS. This makes it an option perfect for working across your different OS versions and perfect for making instructions and guides across these.
Hence, in this Snagit vs Snipping Tool platform support comparison, Snagit is highly recommended since it is supported on Mac and Windows OSs.
Screenshot Capabilities:-
The Snipping Tool’s features are quite simple, even though they are a great improvement from its previous version in Windows Vista days.
The Snipping Tool has a preset delay of about 1-5 seconds, allowing the completion of processes before you can take a screenshot.
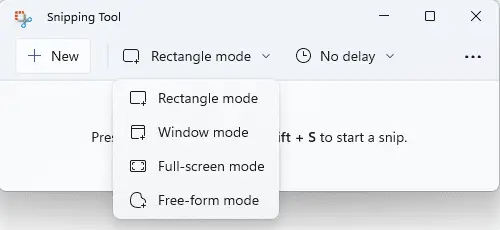
The tool lets you change the shape of a snip using either the Free-form Snip, Rectangular Snip, Window Snip, or Full-screen Snip.
Configurable options like a straightforward copy on Snipping Tool are limited, although it is loaded with other settings and features you can enjoy.
On the other hand, Snagit is filled with advanced features like panorama capture, text capture, window capture, and other capture you will find useful.
Some effects can be added to a screenshot process coupled with several ways images can be shared with other apps.

With Snagit, the features do not stop amazing you. You can capture video moments from your computer screen or a webcam. The tools simplify making ‘how-to’ videos using live voice narration.
Snagit takes the lead in screenshot capabilities with its never-ending advanced features that are just the right touch you need for your screen captures.
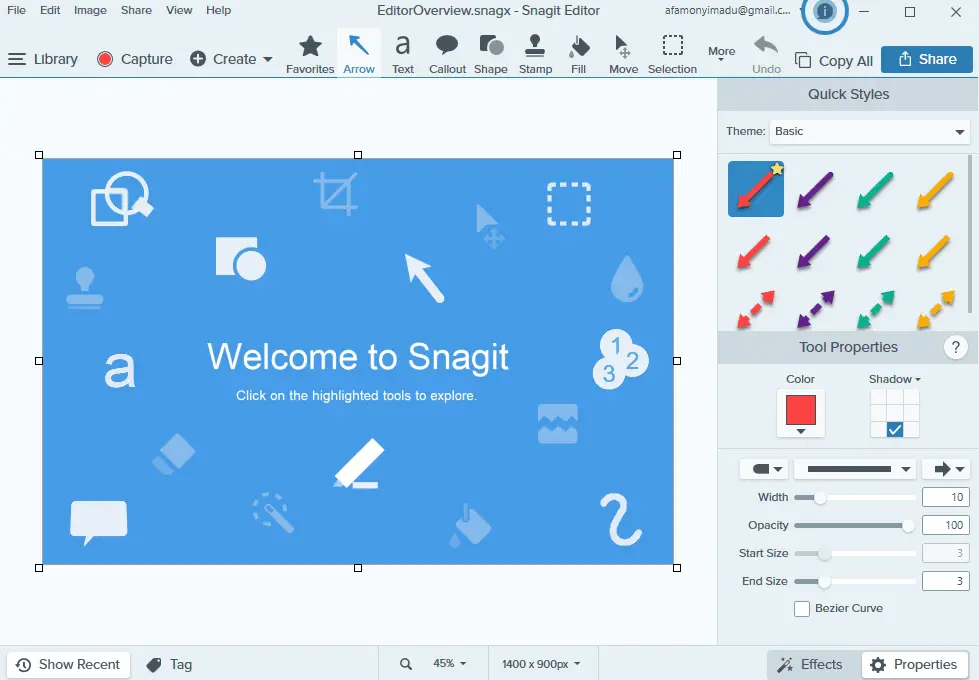
Editing:-
Editing screenshots is a crucial part of taking screenshots. This is where we put in all the necessary detail like text, arrows, or special effect that better conveys what the captured image is all about.
You may sometimes use Photoshop when editing; this can be a drag, especially when you have complex tools that should make editing easy and fun.
Snagit and Snipping Tool make editing so much easier, although the editing capabilities of the Snipping Tool are limited but user-friendly.
The editing features would allow you to draw lines and highlight areas on the captured screen.
Here Snagit is a clear winner, it allows you to annotate diagrams, cropping, blurring, etc.

Screenshot Quality:-
If you do tasks like writing instructional documents or an email about an error sign, you may not need the best image quality to do so.
Still, if it requires that you take shots for a book, then there will be a minimum requirement in the image quality.
Both Snagit and Snipping Tool have an image default of 92 dpi. If you compare two screenshots taken by the two tools, you will notice that the difference is little.
But the Snagit tool is your best bet if you need a higher image quality of 300 dpi or more.
Snagit tool has a setting adjustment where you can change the image quality setting to get the best screenshot quality, while the Snipping tool does not have such an adjusting feature.
Hence, in the Snagit vs Snipping tool comparison, your best shot at getting the best image quality is using the Snagit tool.
Text Quality:-
The text feature has the amazing ability to take text from an image and convert it into plain text that you can paste on a different document of your choice.
This feature saves a whole lot of time retyping a book.
Sadly, Snipping Tool does not offer users this feature; you must manually retype any text you wish to paste on a different document.
Video Support:-
You probably think that tools like Snagit and Snipping tools only capture images. The truth is that while Snipping Tool screenshot images, Snagit can let you video actions on your screen.
The feature will even include audio from your webcam, the perfect setting for making tutorial videos.
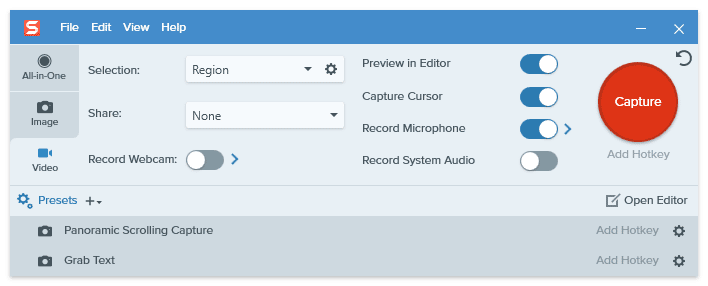
The video recorder on Sangit includes features for Cursor capture, Microphone recording, and system audio recording.
After recording, you can also edit the recorded video in the in-app recorder.
Pricing:-
If you use a Windows PC, Snipping Tool is already installed. You do not have to pay to use it. It is supported on every Windows computer.
On the other hand, you would have to pay a user fee. Snagit offers 4 different pricing plans as follows:
- Individual for 1 user – $62.99
- Business/user – $62.99
- Education /user – $37.99
- Government and non-profit $53.99
Other Great Screenshot Options
We have reviewed two screenshot tools in this article, but there are many others you may be interested in exploring.
We believe that for a free option, Snipping Tool packs many features, but Snagit may be the way to go for more productivity.
However, the list does not end here. Other great options to look at include the following:
- Greenshot
- ShareX
- PicPick
- Lightshot
- ScreenRec
How Can I Get the Best Out of Screenshot Tools?
1. By demonstrating how to perform a role
It’s not enough to tell but also important to demonstrate. With these tools, you can use a screenshot to show exactly what you mean. There’s less danger of misinterpretation if you use a screenshot that indicates exactly what you said.
As a result, there will be less confusion, less time spent in explaining, and more time available to do other things during the day.
For example, you could explain the log-in process to a client or new user by leaving notes, figures, and an explanation on screenshots.
2. Collaboration
Is your coworker looking for your opinion on a website they’ve created? Or are they requiring your assistance in reviewing a brochure that they have printed? Imply screenshot it and wow them with outstanding, concise feedback instead of writing a long email with modifications.
3. Show exact details
You’ve probably been requested to send a screenshot if you’ve ever had to contact the web or IT Support Team to report a bug.
This is a requirement because no two computer issues are always the same. The way a bug manifests for one user may differ for another user depending on the computers involved, the OS it’s running, and the browser version used.
Presenting exact representations of the issue makes it easier for it to be resolved.
📗FAQs: Snagit Vs Snipping Tool
Should I use Snagit or Snipit?
The choice between Snagit and Snipit depends on your needs. Snagit offers more advanced features such as video recording, GIF creation, and image editing, while Snipit is a basic tool for simple snips. If you need more advanced features and can afford to pay, Snagit is a good choice.
Is there anything better than Snipping Tool?
Yes, several tools are better than Snipping Tool regarding features and functionality. Snagit, Greenshot, and Lightshot are examples of more advanced and versatile screenshot tools.
Can you use Snagit for free?
No, Snagit is not a free tool. However, it does offer a free trial period for users to test the tool and see if it meets their needs before purchasing a license.
Why did Microsoft remove Snipping Tool?
Microsoft removed Snipping Tool in favor of Snip and Sketch, which offers more features and functionality. Snip and Sketch allow users to take screenshots, annotate them, and save or share them easily.
What is the best tool for screenshots?
The best tool for screenshots depends on your needs. Snagit, Greenshot, and Lightshot are popular for their advanced features and ease of use.
What will be replacing Windows Snipping Tool?
Windows Snipping Tool has been replaced by Snip and Sketch, which offers more features and functionality.
What is the best free Snipping Tool alternative?
Greenshot and Lightshot are two popular free alternatives to Snipping Tool. They offer advanced features such as annotations, editing, and sharing.
Does Windows have a built-in Snipping Tool?
Windows used to have a built-in Snipping Tool, but Snip and Sketch have replaced it in newer operating system versions.
What software is like Snagit but free?
Greenshot and Lightshot are free alternatives to Snagit that offer similar features and functionality.
Does Microsoft have Snagit?
No, Snagit is not a Microsoft product. It is developed and sold by TechSmith.
Why Windows 11 cannot use Snipping Tool?
Windows 11 no longer includes Snipping Tool, as Snip and Sketch have replaced it.
Is Snipping Tool good for screenshots?
Snipping Tool is a basic tool for taking screenshots, but it lacks some advanced features of other tools, such as annotation and editing. It may not be the best choice if you need more advanced features.
How can I access the free version of Snagit?
To use the Snagit tool long-term, you will have to pay an access fee of $49.95, it has a 30-day free trial with full access to its features. This can get you started while you decide whether to continue or not.
What tool is better than Snipping Tool?
If what you are looking for is way beyond taking screenshots, then other tools are available for you. Snagit is a tool that gives you good professional quality in creating how-to content.
Does Snagit do the same job as Snipping Tool?
Both tolls are perfect for screenshots, but Snagit lets you do more with captured images. It lets you mark the captured image with arrows, numbers, and callouts while combining them in an organized piece.
Final Thought
Taking screenshots plays an important role at work, especially if you need an application that you would use to make tutorials on your computer screen.
The comparison between Snagit and Snipping Tool may confuse you about what works best for your work.
If this is the case, you can test-run both software using them. Snagit offers a 30-day free trial that you can optimize.
Let me know which one works best for you after trying them out.
Also, if you are interested in new options, any 11 Snipping tool alternatives may be worthwhile.

