


In this tutorial, you will learn how to use the DS18B20 temperature sensor in the Arduino. The temperature data will be printed on the character LCD 16×2 with the help of Arduino.
Before we start building this project, let’s take a look at details about this sensor
About the DS18B20 sensor
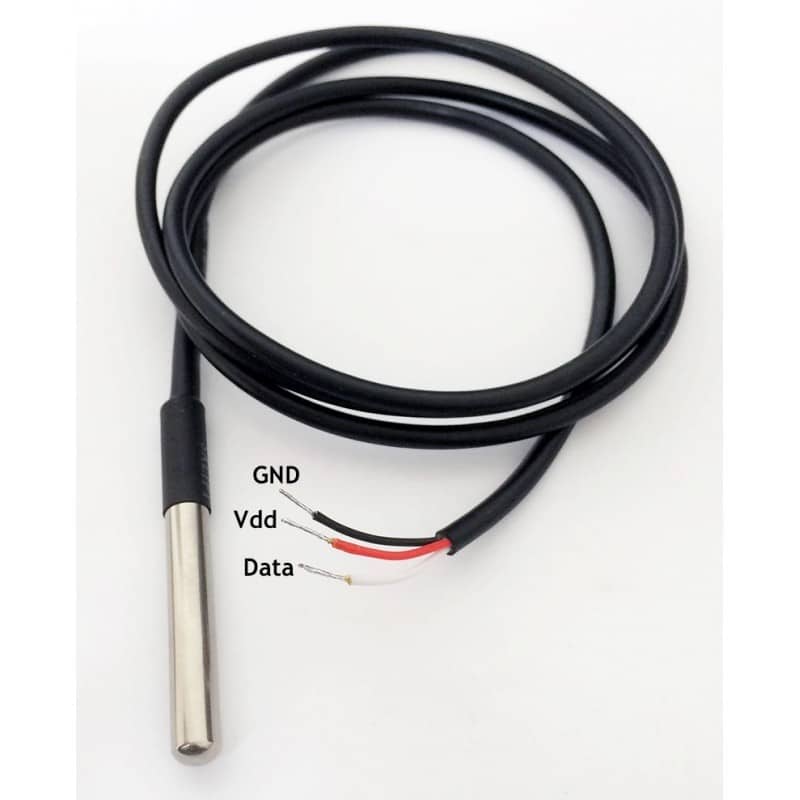
The DS18B20 communicates via the 1-Wire bus. By definition, only one data line (and ground) is required to communicate with the Arduino. It has an operating temperature range of -55°C to +125°C, accurate to ±0.5°C in the range of -10°C to +85°C. In addition, the DS18B20 can receive power directly from the data line (“parasitic power supply”) without the need for an external power supply.
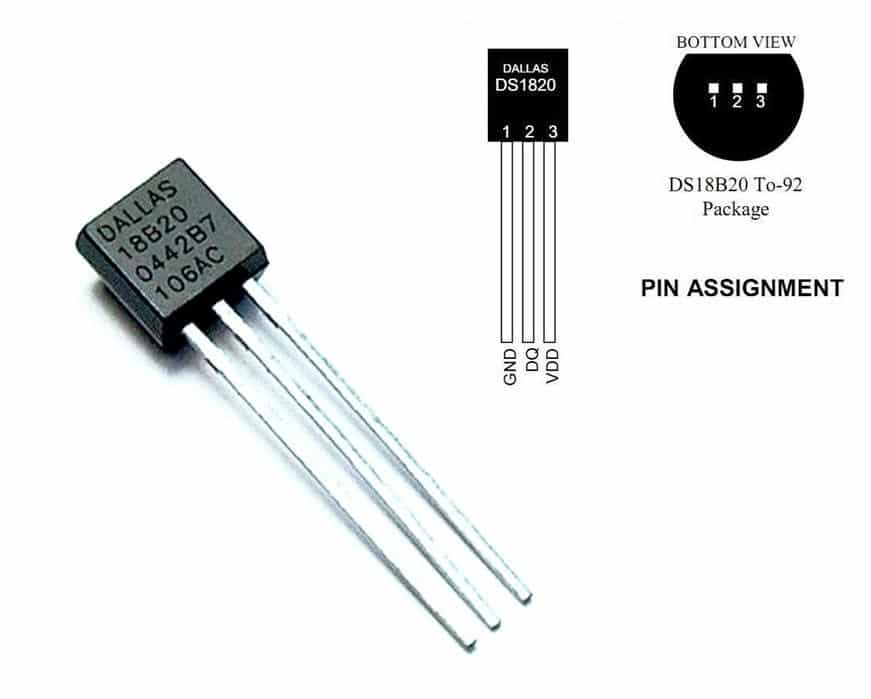
Each DS18B20 has a unique 64-bit serial code that allows multiple DS18B20s to run on the same 1-Wire bus. Therefore, using a microprocessor makes it easy to control many DS18B20s distributed over a large area. Applications that can benefit from this function include HVAC environmental controls, temperature monitoring systems in buildings, equipment or machines, and process monitoring and control systems.
Features of DS18B20:
- Single 1-Wire Interface Requires Only for communication between the micro-controller and sensor
- No external components required, required only 4.7kOhm resister
- It can be powered from data line directly; Require voltage from 3.0V to 5.5V
- Each device has a unique 64-bit serial code stored in onboard ROM.
- It can measure temperature from -55°C to +125°C (-67°F to +257°F)
- ±0.5°C Accuracy in the -10°C to +85°C Range
Let’s Get Started
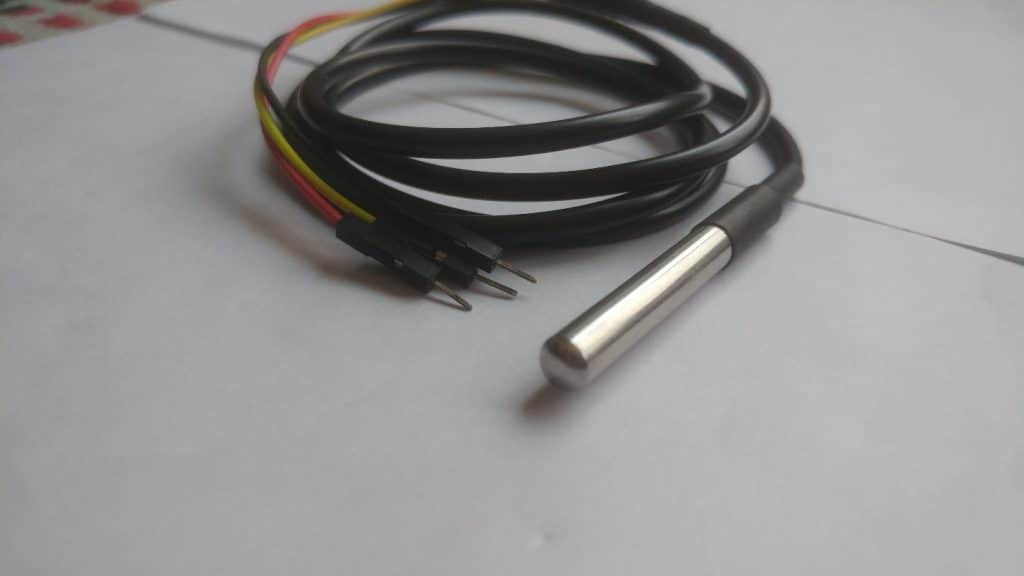
I am using DS18B20 which is comes in a temperature probe form, which is waterproof. So we can also check the temperature of a liquid such as water, Juice, tea, coffee etc.

Collect hardware
The parts you will need for this project:
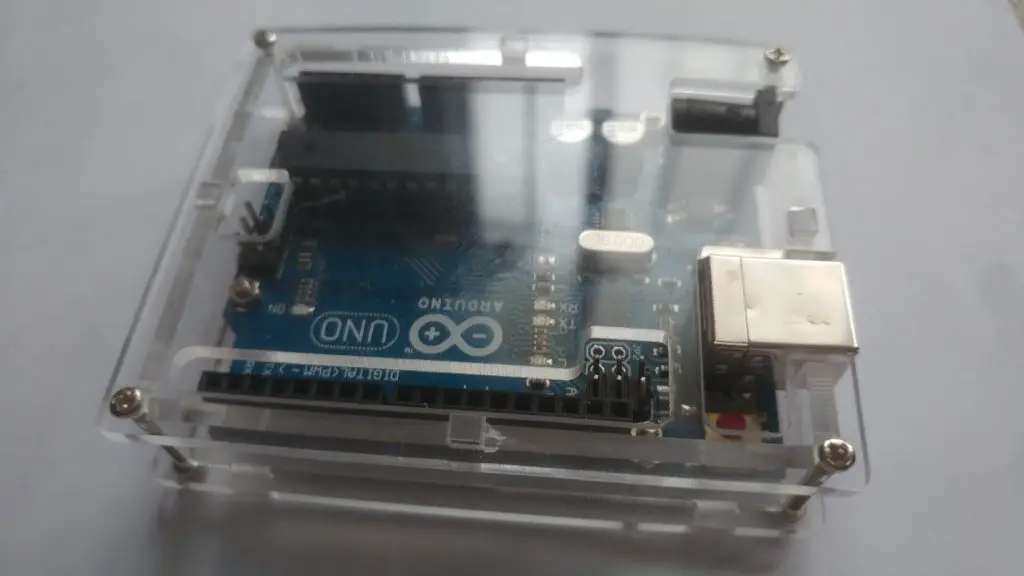
- Arduino UNO View on Amazon
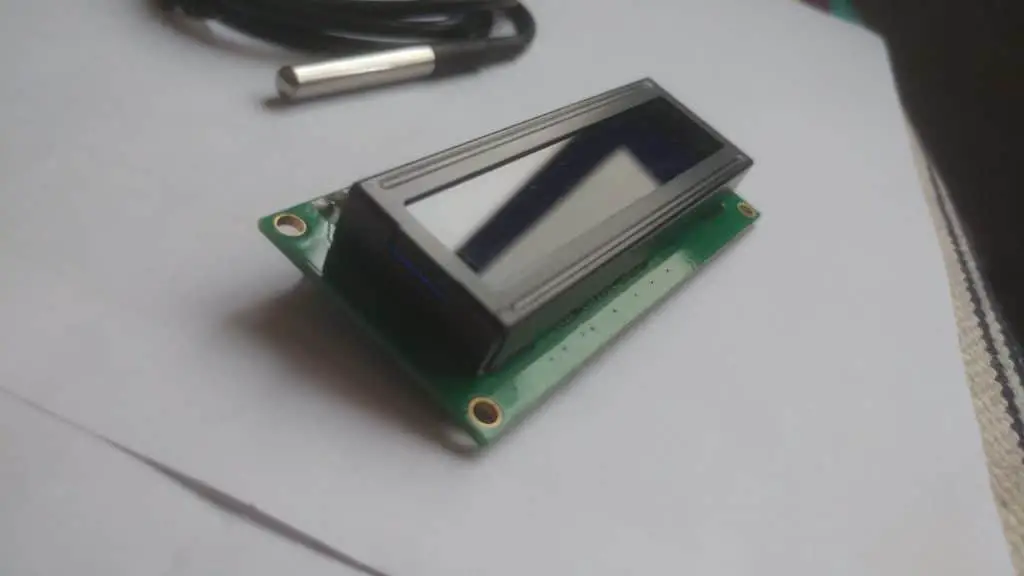
- Character LCD View on Amazon
- A DS18B20 temperature probe View on Amazon
- Jumper Wires View on Amazon
- 1K resistor View on Amazon
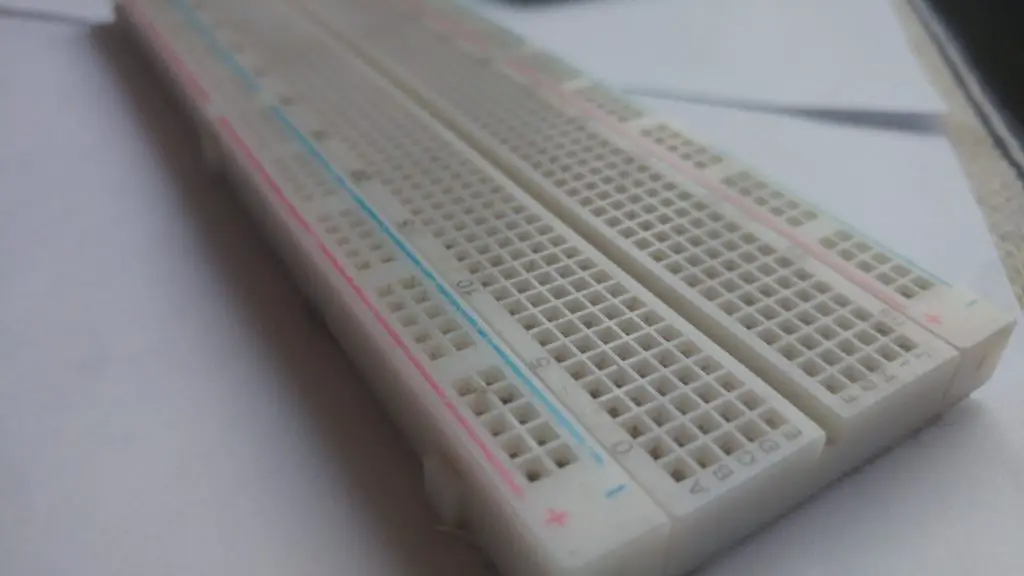
- Breadboard View on Amazon
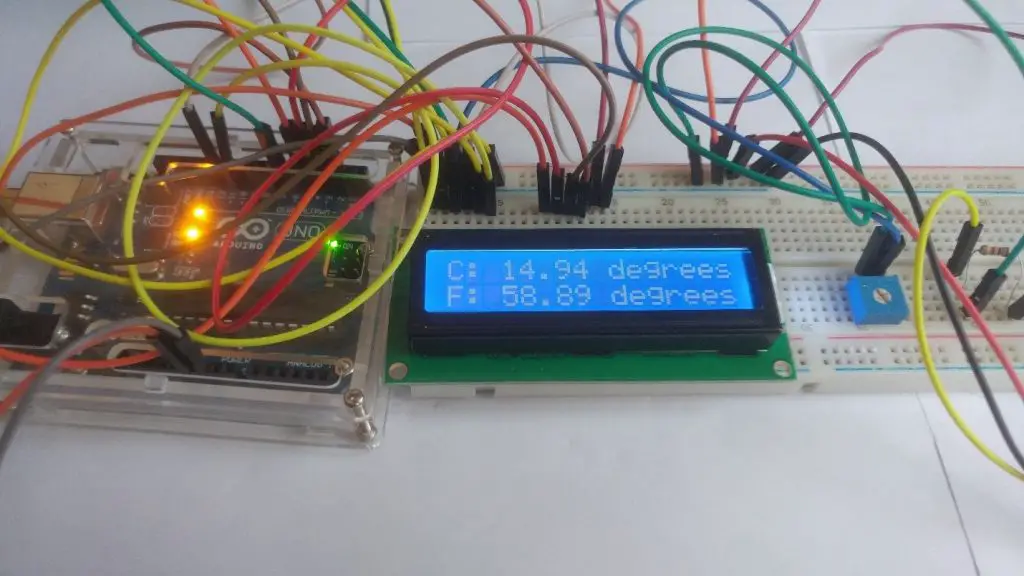
Hardware Assembling
Let’s assemble hardware, you have to connect this as the picture intends. You will have to connect:
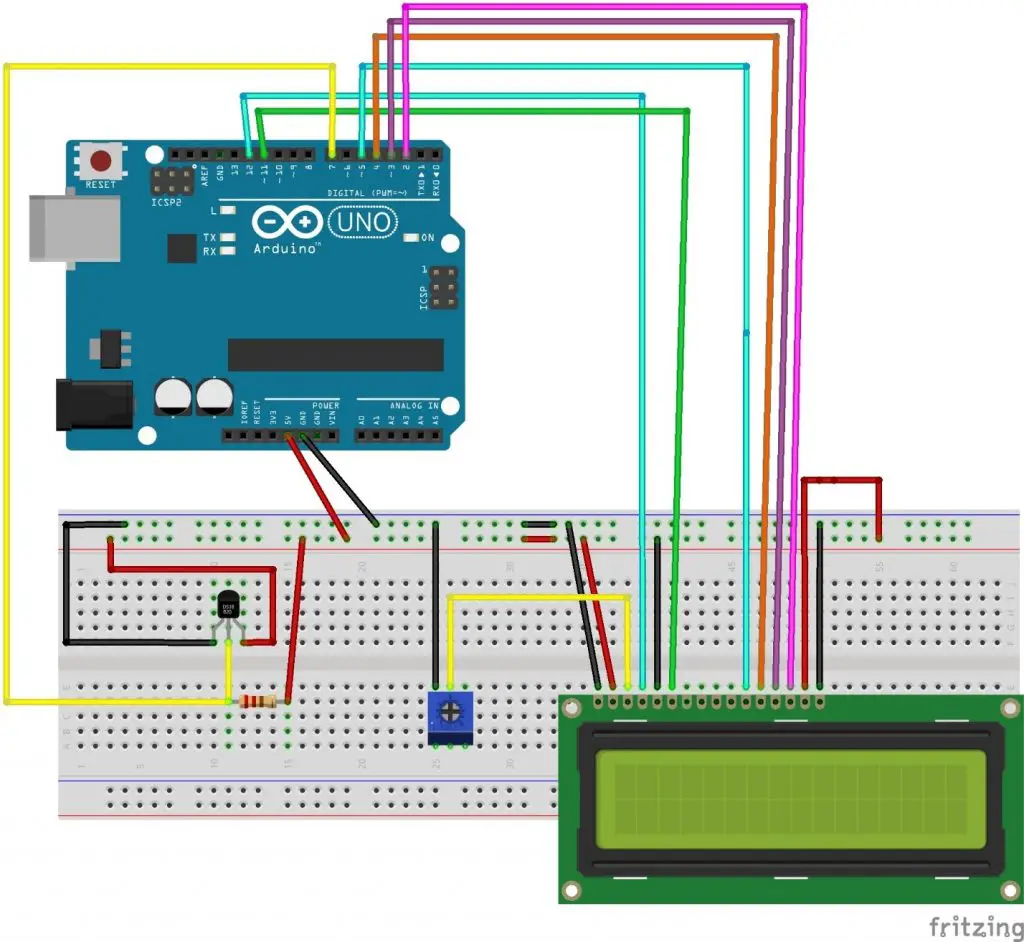
- VCC -> Arduino 5V, plus a 4.7K resistor going from VCC to Data
- Data -> 7 Arduino pin
- GND -> Arduino GND
After it, Let’s connect the wire which should go to a potentiometer to control the contrast to pin 3 on Arduino.
Connections: (LCD -> ARDUINO)
- Pin 1 -> GND
- Pin 2 -> VCC
- Pin 3 -> Arduino pin 3
- Pin 4 -> Arduino pin 33
- Pin 5 -> GND
- Pin 6 -> Arduino pin 31
- Pin 7 – 10 -> NONE
- Pin 11 -> Arduino pin 22
- Pin 12 -> Arduino pin 24
- Pin 13 -> Arduino pin 26
- Pin 14 -> Arduino pin 28
- Pin 15 -> VCC through 220 OHM resistor.
- Pin 16 -> GND
So here we have the code for the LCD, also hook up everything correctly as I mention the schematics, and then this project work responsively up to 125 degrees. And if in your LCD only showing -127 degrees, then it’s mean probably the resistor to the temperature sensor is not hooked up correctly
Source Code
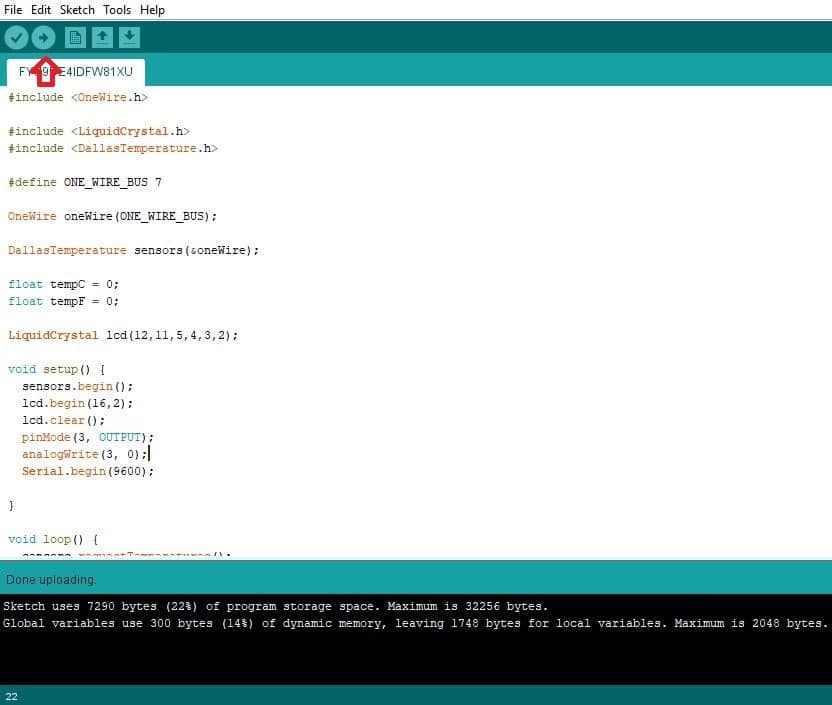
//Upload the source code for get the things working
#include <OneWire.h>
#include <LiquidCrystal.h>
#include <DallasTemperature.h>
#define ONE_WIRE_BUS 7
OneWire oneWire(ONE_WIRE_BUS);
DallasTemperature sensors(&oneWire);
float tempC = 0;
float tempF = 0;
LiquidCrystal lcd(12,11,5,4,3,2);
void setup() {
sensors.begin();
lcd.begin(16,2);
lcd.clear();
pinMode(3, OUTPUT);
analogWrite(3, 0);
Serial.begin(9600);
}
void loop() {
sensors.requestTemperatures();
tempC = sensors.getTempCByIndex(0);
tempF = sensors.toFahrenheit(tempC);
delay(1000);
Serial.println(tempC);
lcd.setCursor(0,0);
lcd.print(“C: “);
lcd.print(tempC);
lcd.print(” degrees”);
lcd.setCursor(0,1);
lcd.print(“F: “);
lcd.print(tempF);
lcd.print(” degrees”);
}
I have already tested this project and able to measure temperature up to 100 degrees with this sensor and it works responsively great.
Thank you so much for reading this article and I hope it will help you in connecting your DS18B20.
Happy building

You may also like to read these awesome projects
How to Build Gesture Sensing project using APDS-9960 with Arduino
Getting started with LCD Shield, Arduino and connect the DS3231


