Raspberry Pi is a low-cost, credit card-sized computer that plugs into a computer monitor or TV and uses a standard keyboard and mouse.
This is a small, capable device that allows people of all ages to explore calculations and learn how to program in languages such as Scratch and Python.
It can do everything desktop computer needs, from browsing the Internet and playing HD video to making spreadsheets, word processing and playing games.
More importantly, Raspberry Pi has the ability to interact with the outside world and has been used by various digital maker projects, ranging from music machines and parent probes to weather stations and texting infrared cameras to birdhouses.
We hope to see Raspberry Pi being used by kids around the world to learn how to program and understand how computers work.
Motion Detector with Raspberry Pi
In this articles we will theft detector with raspberry So Today, monitoring security is the most important part of our lives.
As theft and theft have always been a problem, they play a crucial role in our security as the recent terrorist threats and theft of raw materials make the manufacture, transport, and storage of important products more dangerous and expensive.
Last few years. Industrial sites like factories, warehouses, energy (oil and gas) production, mining and others can benefit. Security provided by intelligent monitoring.
I proposed this mechanism to solve the problem of object detection and tracking in a video security monitoring system.
The project mechanism used by Raspberry Pi and PIR Motion Sensor enables intelligent detection tracking and recording of objects of interest so that the number of active videos.
So Let’s Get Started
The architecture of this project
In this article, we will use a raspberry pi is a low-cost credit card size and connect the computer monitor or TV computer, and using a standard keyboard and mouse, this is a small capable device that enables people of all ages to explore calculation.
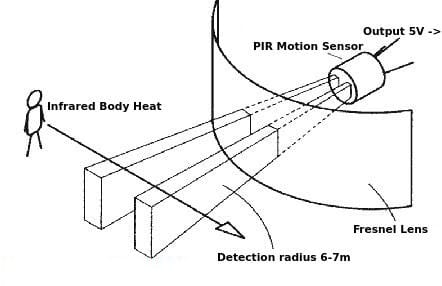
we need PIR motion sensors that let you sense movement, almost always Used to detect whether people enter or leave under the sensor range.
Collect Hardware for this Project
- Raspberry Pi Buy Here
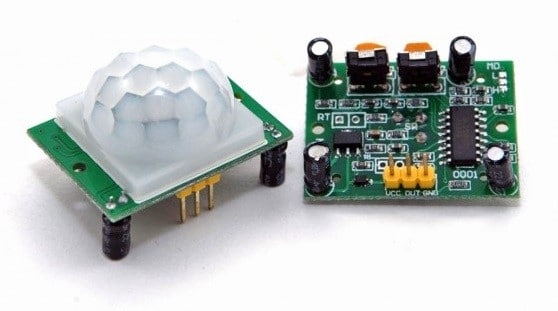
- PIR Motion Sensor Buy Here
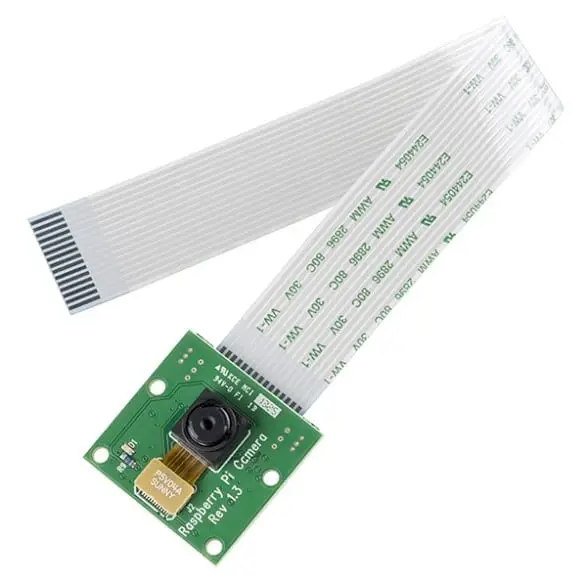
- Raspberry Pi Camera Buy Here
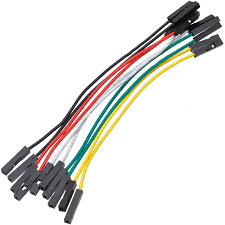
- Jumper Wires Buy Here
Make Connection
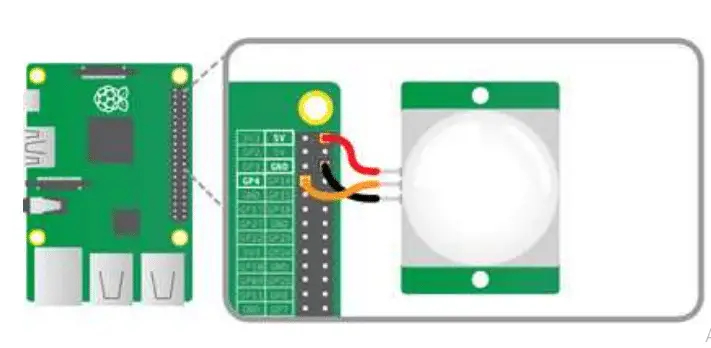
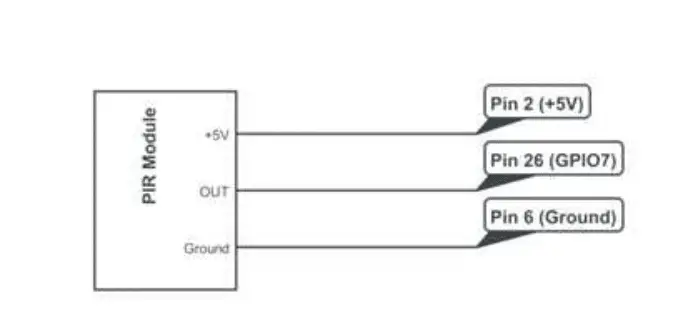
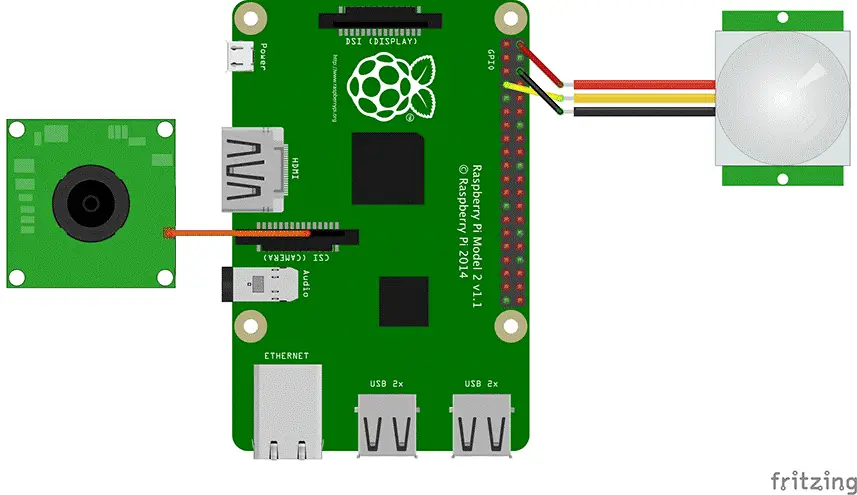
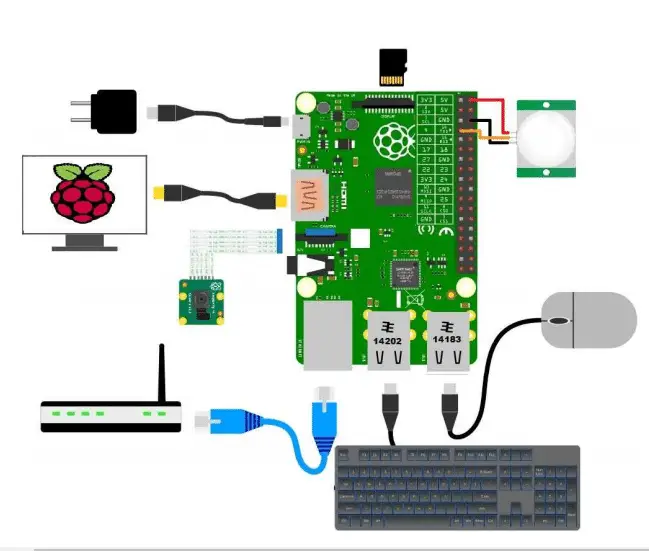
Wired up everything as mention below in the image
Connect the VCC marked on the PIR sensor to the 5V pin on the Raspberry Pi. This provides
PIR sensor power supply. Connect the one labeled GND to the ground pin on the Raspberry Pi. This completes the circuit. Connect the OUT tag to the GPIO pin 4. when motion is detected, the pin will output a voltage, It can then be received by Raspberry Pi.
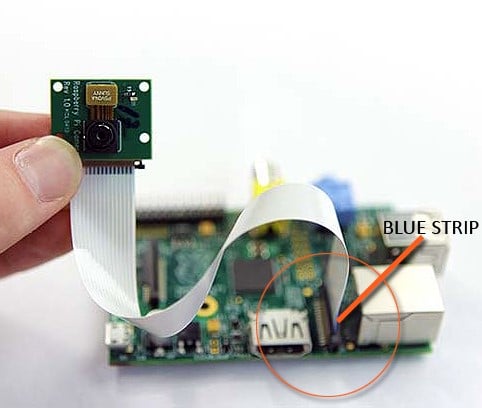
Connect Camera Ribbon strip with Raspberry Pi as mention below in the figure
Note:- I have written a post for people looking for the best laptop for architecture students, do read it If you are interested.
Software Setup
Now that we have all the components connected, we have to configure raspberry pie, the first step preparing raspberry pi is installed and configured Raspbian Software Connect the raspberry pie camera to the Raspberry Pi.
Use the instructions that came with your camera module (download Raspbian and load it on SD card) Insert the SD card into the raspberry slot skin.
Connect Raspberry Pi to the monitor, keyboard, Mouse, LAN with an Internet connection, and a 5-volt power supply USB power adapter start Raspberry Pi and run for the first time configuration.
Note If you are Beginner in Raspberry pi Then I will Suggest you To Have a look on my previous Tutorial How To Setup noobs in raspberry pi
After the software setup when configuring Raspbian, do not configure it. The graphical user interface starts automatically. we have to make sure that the camera is enabled and updated. For raspberry pi updates, we have to type from the terminal menu or click (CTRL + ALT + T) This command line.
$ sudo apt-get install rpi-update
$ sudo rpi-update
$ sudo apt-get update
$ Sudo apt-get upgrade
Install node.js in your Raspberry Pi
$ wget https://nodejs.org/dist/v4.4.5/node-v4.4.5-linux-armv7l.tar.xz
$ tar -xvf node-v4.4.5-linux-armv7l.tar.xz
$ cd node-v4.4.5-linux-armv7l
$ sudo cp -R * /usr/local/
Check if node is successfully installed:
$ node -v
Enable Camera access
Go to Pi Software Config Tool to enable camera
$ sudo raspi-config
Test if your camera is working by try typing this command on terminal:
$ raspistill -o photo.jpg
Run Code
$ sudo apt-get install libcairo2-dev libjpeg8-dev libpango1.0-dev libgif-dev build-essential g++
Install Johnny-Five
Johnny-Five is a Javascript robotics framework that let you program microcontrollers easily with carious hardware APIs.
$ npm install johnny-five
$ Install Raspi-io
This I/O plugin allows you to use Johnny-Five on Raspbian.
$ npm install raspi-io
$Install PubNub
This is used to establish real-time live-updating the web interface, use PubNub (v3.x, imcompatible with the new v4).
$ npm install pubnub@3.15.2
Run the Code
You must run with sudo, because some modules used in the app requires root access:
$ sudo node kittyCam.js
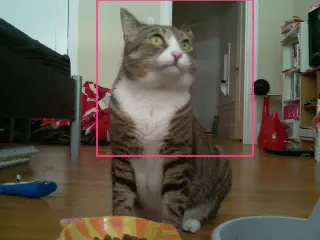
That is, it so this will detect the motion although if you place a car near camera it will work just great if you face any problem with then please do comment write below!
Visit similar tutorials on Raspberry Pi
How to Build your own Super Computer with Raspberry Pi 3 Cluster
Build Super Computer with 5$ Raspberry pi zero using Cluster HAT
How to make a Raspberry Pi bitcoin mining rig
Convert Any Printer into a Wireless Printer with a Raspberry Pi zero (10$ Cost)
Build AYI Google Voice Home with Raspberry Pi Under 35$
Best Raspberry Pi Alternatives ( Updated 2018 List)
Hope my article “How to Build Thief Detector With Raspberry Pi” helps you to Build Thief Detector With Raspberry Pi. if you have any query, feel free to comment.


