


If you’re looking for an easy to understand article about using the task manager, then this is the right article for you. I will be explaining the functions of the task manager in Windows 10.
A task manager is an important tool that shows us information about system processes and resource usage amongst other uses. It is vital for users in managing app processes too.
Launching The Task Manager
The first step is opening the task manager. There are a few ways you could do that.
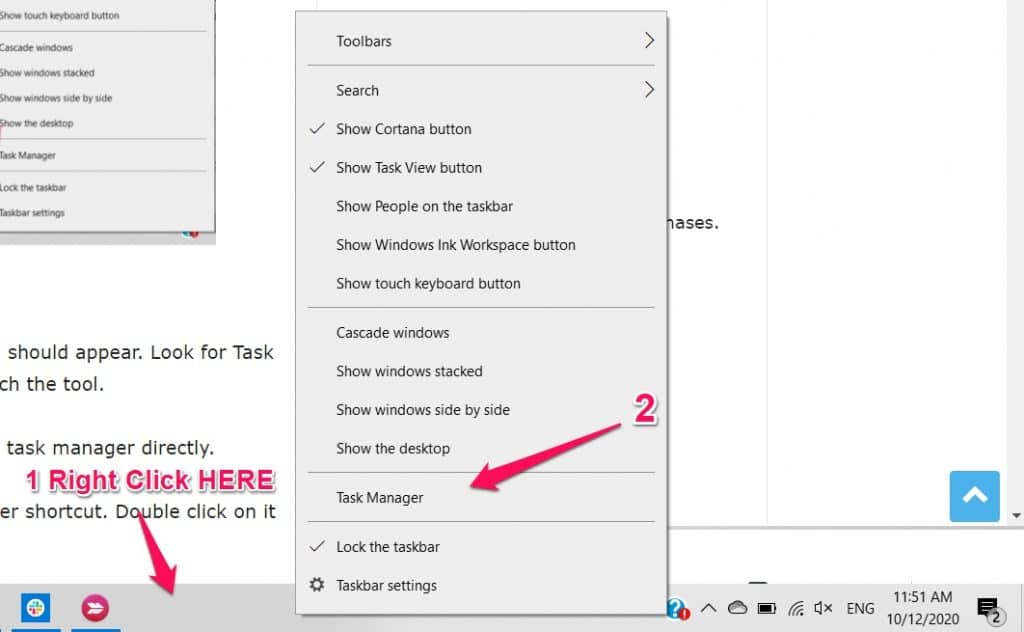
Navigate to your Windows Taskbar and right-click it. In the options that appear, click on Task Manager and it should launch the tool.
 Or, use the shortcut keys (Ctrl + Alt + Delete) and a screen should appear. Look for Task Manager in the options on the screen and click on it to launch the tool.
Or, use the shortcut keys (Ctrl + Shift + ESC) to launch the task manager directly.
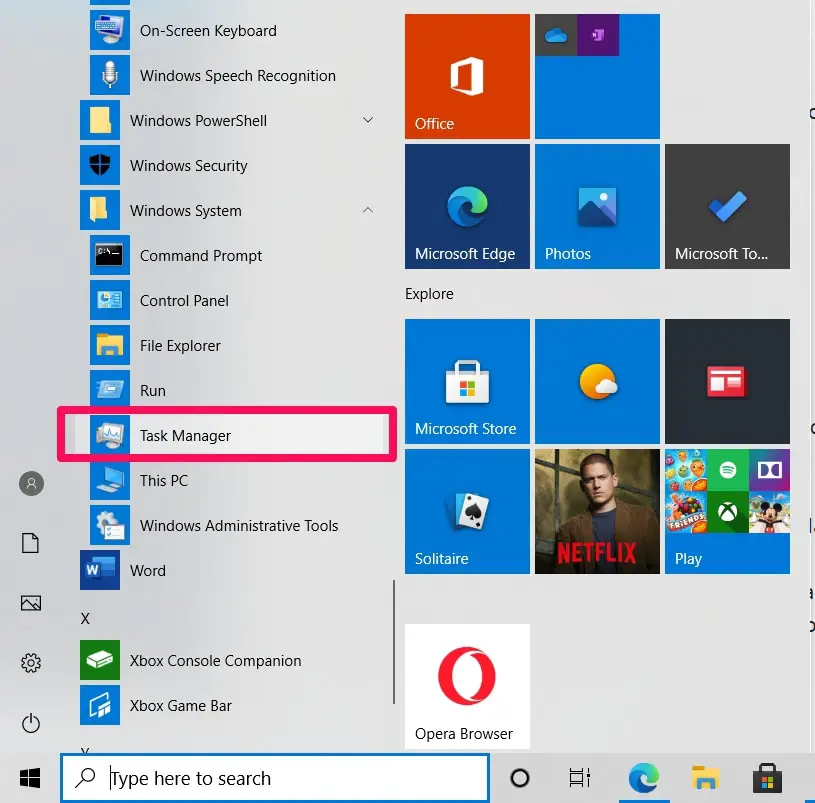
Or, Navigate to the Start Menu and look for the task manager shortcut. Double click on it to launch the tool.
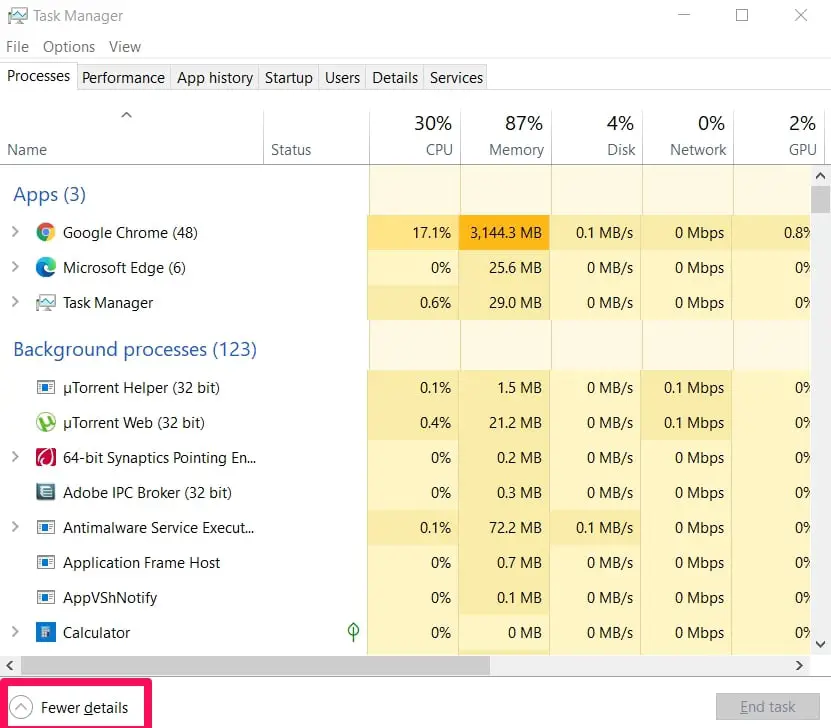
The Task Manager At First Glance
Now that you’ve learned how to launch the tool, I’m going to explain what you’ll see at first glance when you open the task manager.
The first window you’ll see is small and quite simple. You will see a list of all the applications that are running on your system. You won’t see background applications though in this simple window.
There are quite a few things you could do in this window that as an everyday user you’d find useful. To get a list of actions you can carry out on any of the applications running, hover on the application and right-click on it.
When you right-click, you’ll be shown some options. I will explain all those options below in the order that you’ll see them in the small pop-up menu.
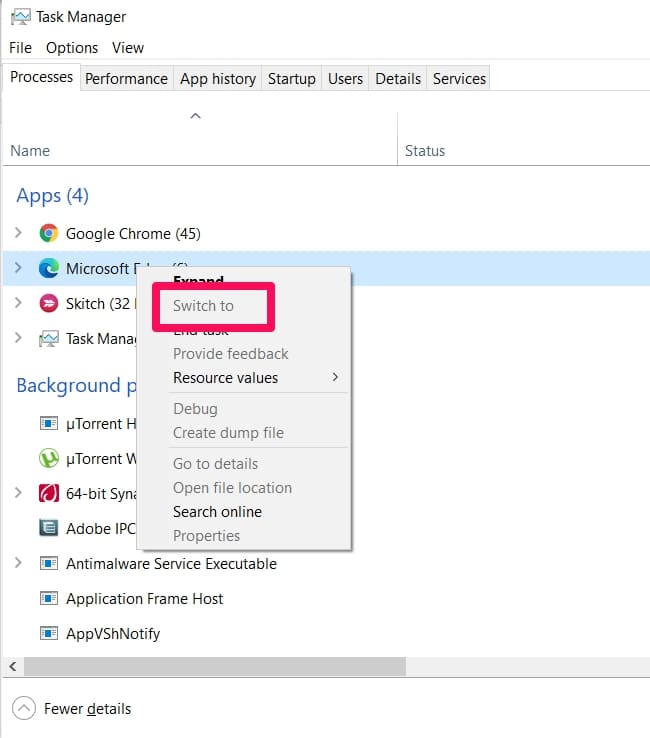
Switch To
When you have a lot of applications running and you’re trying to get back to a particular process but you’re not sure which window it is in, you can use this option.
All you have to do is launch the task manager, right-click on the process you want to go to, and select the Switch To option. It will immediately bring the window to the front of your system.
End Task
This option is useful whenever applications freeze.
If you’re gaming or using any app and the screen freezes and doesn’t respond to clicks, you can use the shortcut keys to access the task manager, right-click the process that froze and select End Task to get rid of the process.
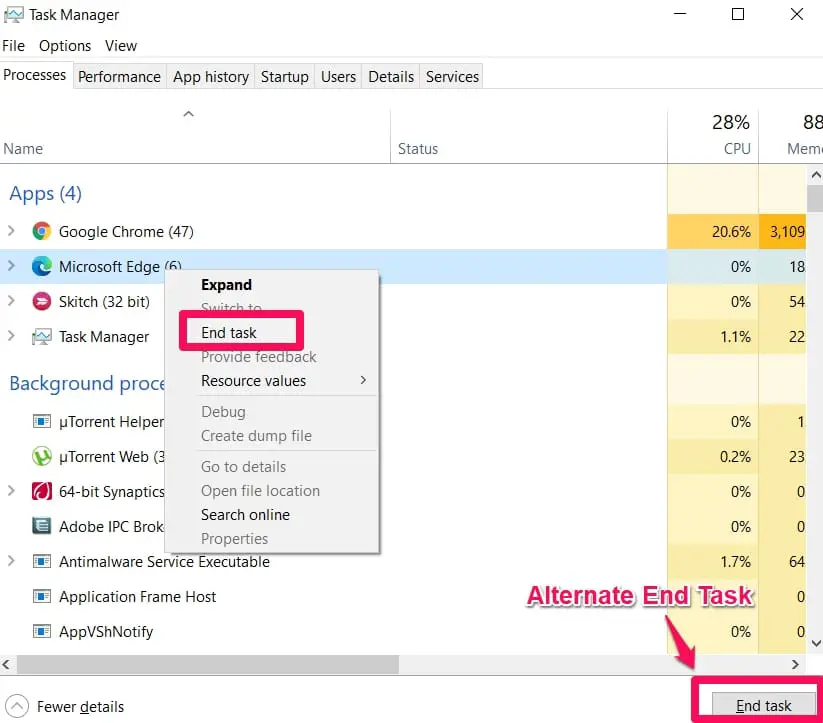
Please note that the End Task option is also available at the bottom right-hand side of the simple task manager window.
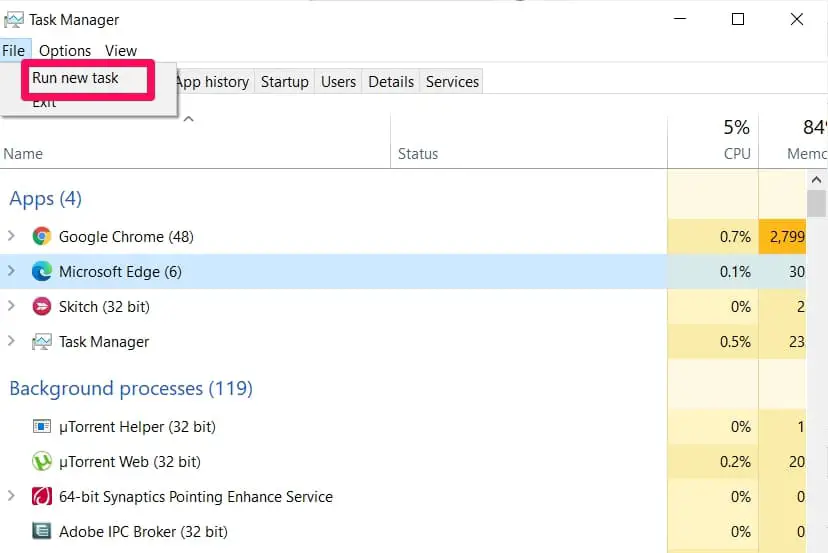
Run New Task
Here’s where you can just open a new folder, app, process, browser, or just about any system process.
All you need to do is choose this option from the file menu and open the Create New Task window.
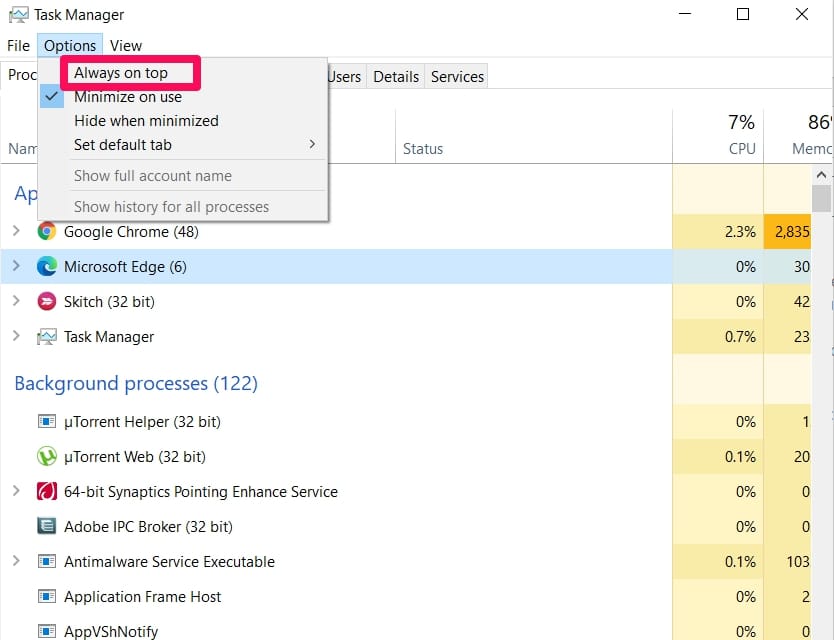
Always On Top
No, not what you’re thinking of. This is for the task manager menu itself.
When you select this option from the options menu, it means you want the task manager menu to always stay on the screen even when you switch windows.
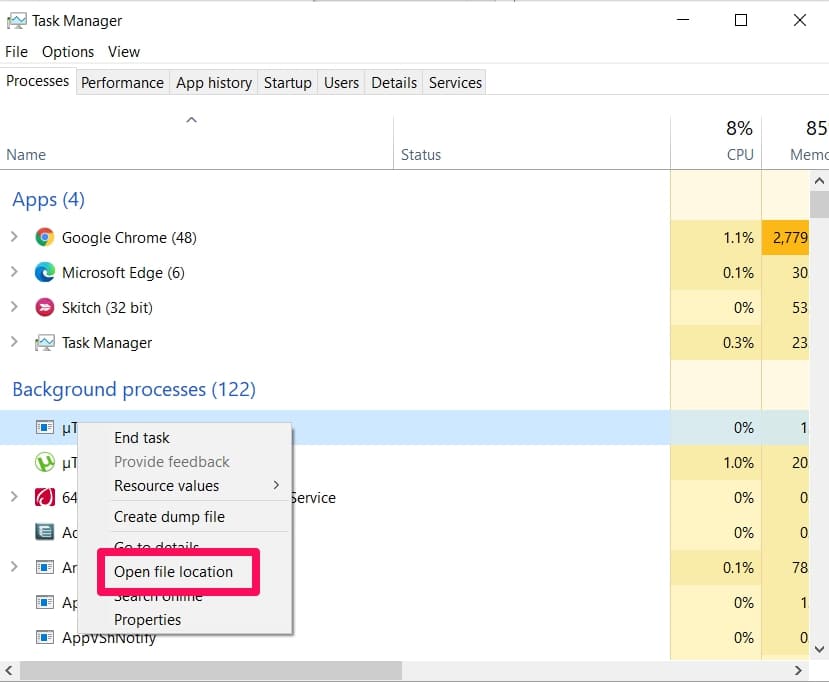
Open File Location
This action is done on app processes. It takes you to where an app’s .exe file is located in a File Explorer window.
Right-click on any process, choose this option and you’ll go to where the file of that process is.
Search Online
When you select this option on any app process, a Bing search will be carried out about the program’s file name and app name.
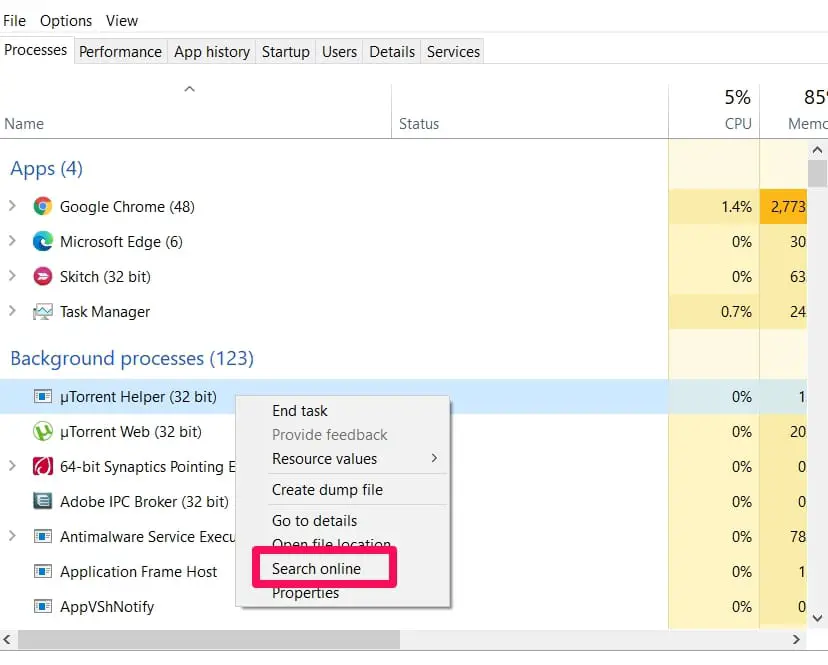
You will be shown information about the app; what it is and what it does.
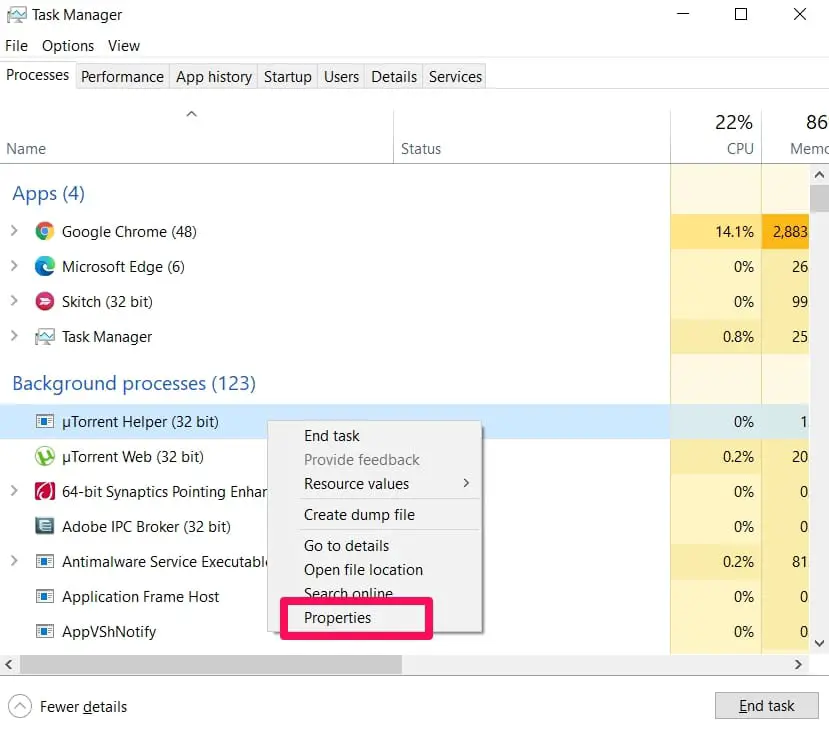
Properties
This option when chosen for a specific app process shows you details about the app. It gives you access to the Properties menu of that particular .exe file.
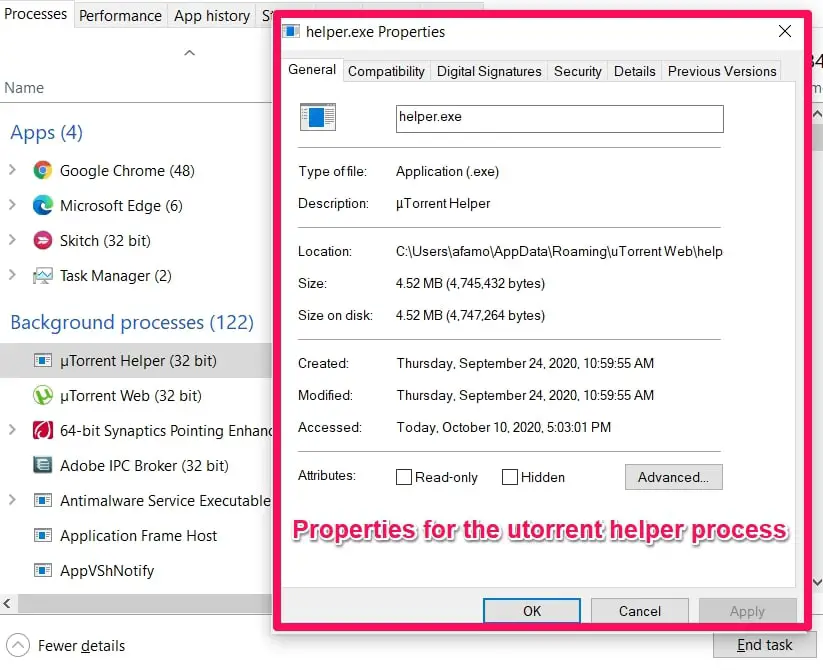
This is where you can make changes to compatibility or see information like app versions.
The above is the last of the options available when you right-click any app process in the simple task manager menu view.
The Task Manager Detailed Menu Overview
When you launch the task manager tool, the tool’s icon will pop up in your notification area.
This icon gives you information about system processes that could prove useful. Info like
- The amount of CPU resources in use
- Memory, disk, and network usage
To get to this detailed menu, open the simple task manager menu, and go down the window.
Close to the bottom left-hand side of the window, you’ll see the option for More Details.
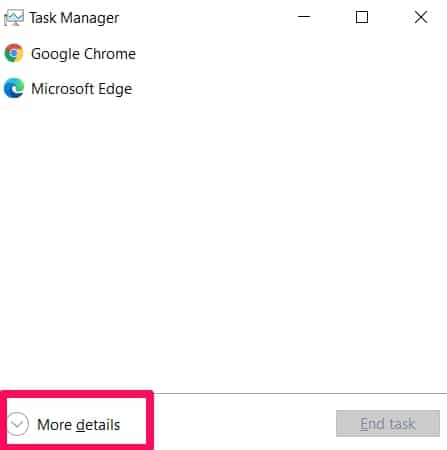
Click on that option and you’ll be able to access the detailed menu.
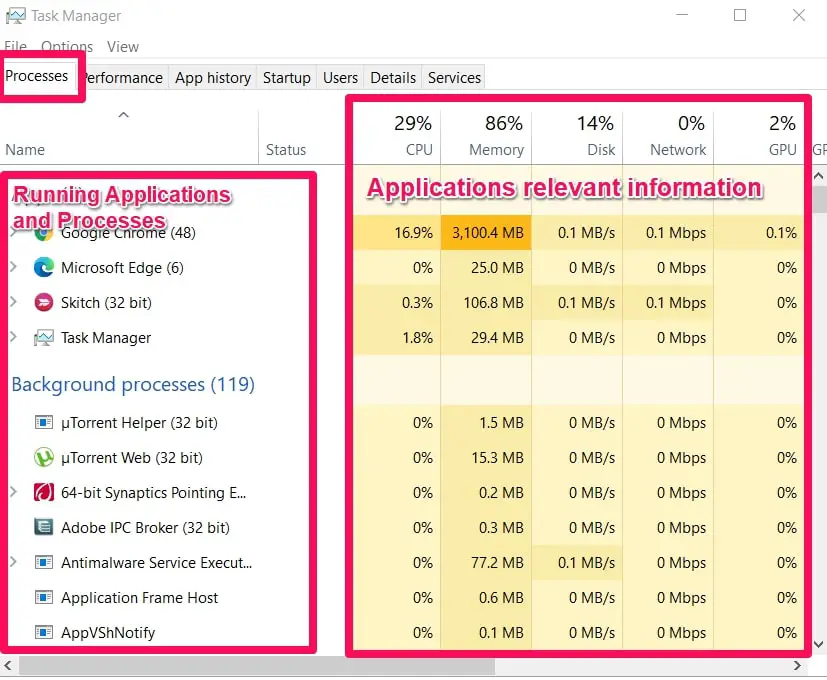
In this full interface, you’ll see a task manager window with 7 tabs close to the top of your screen.
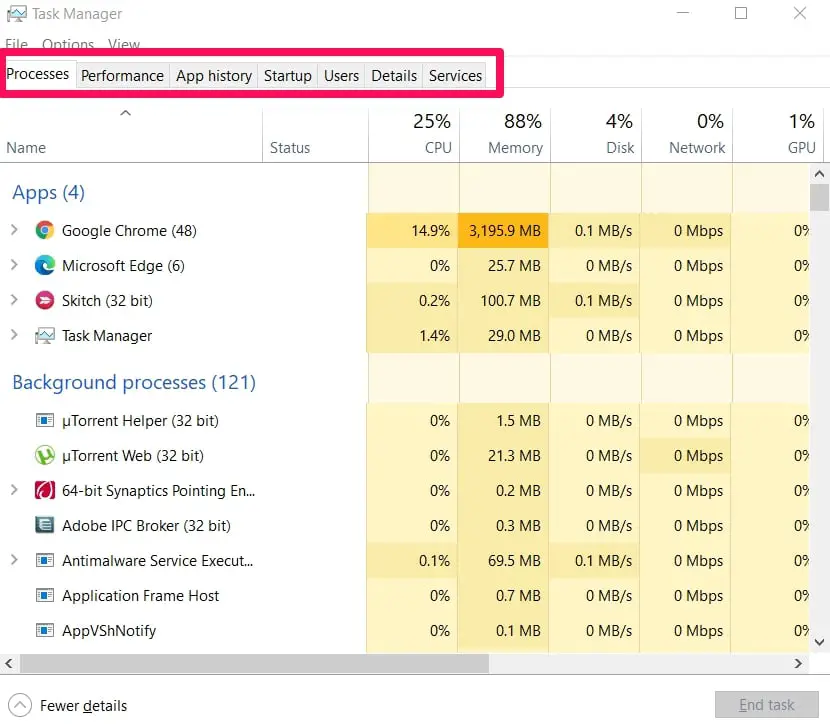
These tabs will be below a line of options (task manager menu options) that read
File | Options | View
You can always go back to the simple menu by going down the window and clicking on Fewer Details.
Please note that the task manager will remember your last preferred option when you launch it.
I’ll list and explain the functions of the tabs in the detailed menu below.
Processes
Here’s where you’ll find a list of all the running applications and background applications.
You’ll also get relevant information about these processes like their memory, disk, network, CPU, and GPU resource usage.
Performance
If you’re looking for your computer’s IP address, this is where you’ll find it.
You’ll also get real-time graphs that show information about resource usage (memory, disk, network, CPU amongst others).
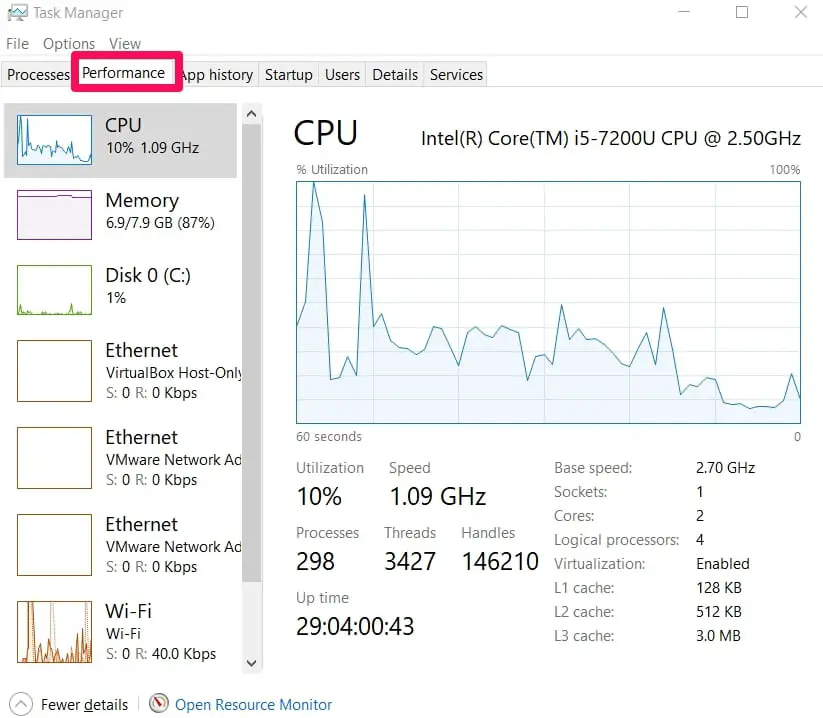
The model names of your system’s GPU and CPU can also be found in this tab.
App History
Here’s where you’ll get information about user accounts. Information like how much CPU and GPU resources a particular user account has used.
Please note that only information about (Universal Windows Platform) Store apps will be shown.

(Win32 apps) Core windows desktop apps are left out. You won’t be able to get information here on them.
Startup
This tab provides information about the applications that automatically start up whenever you sign in to your user account.
You can disable some apps from starting up automatically.

Please note that you can also disable apps from starting up by following the navigation below.
Settings > Apps > Startup
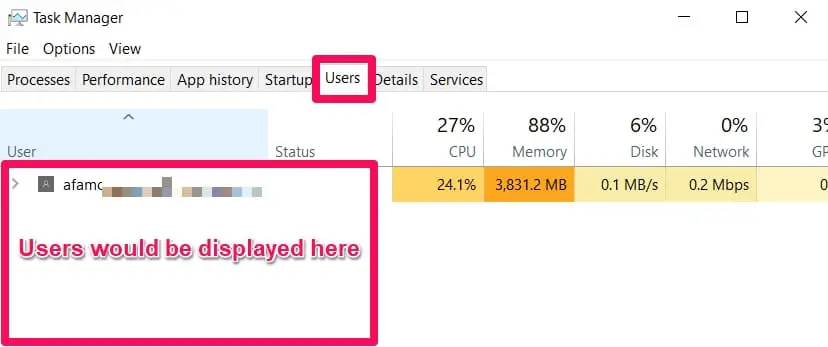
Users
Information about user accounts like the accounts signed in currently, the applications being run by the accounts and the number of system resources the accounts are using.
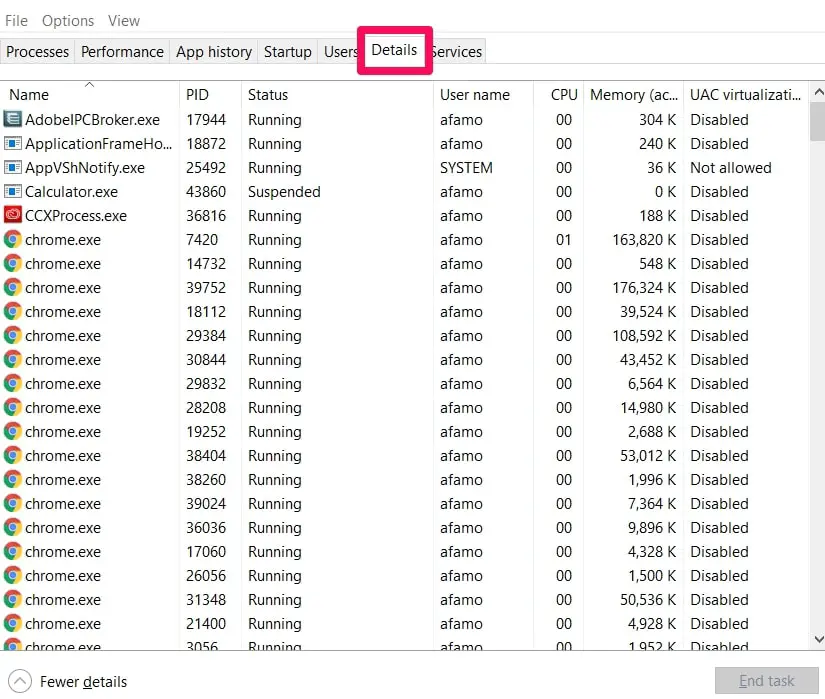
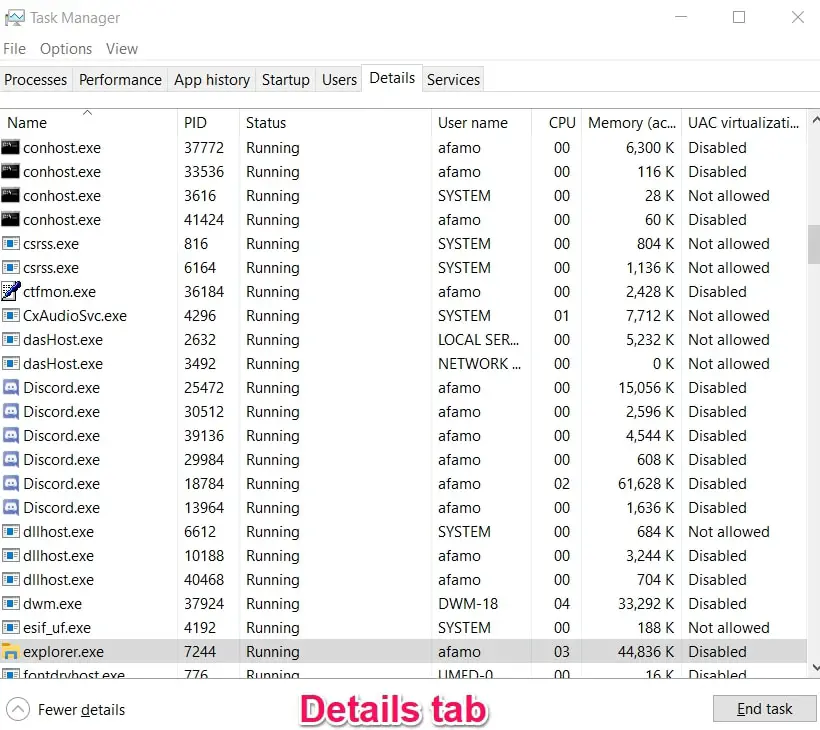
Details
This is even much more detailed than the normal Processes tab about the current processes running on your system.
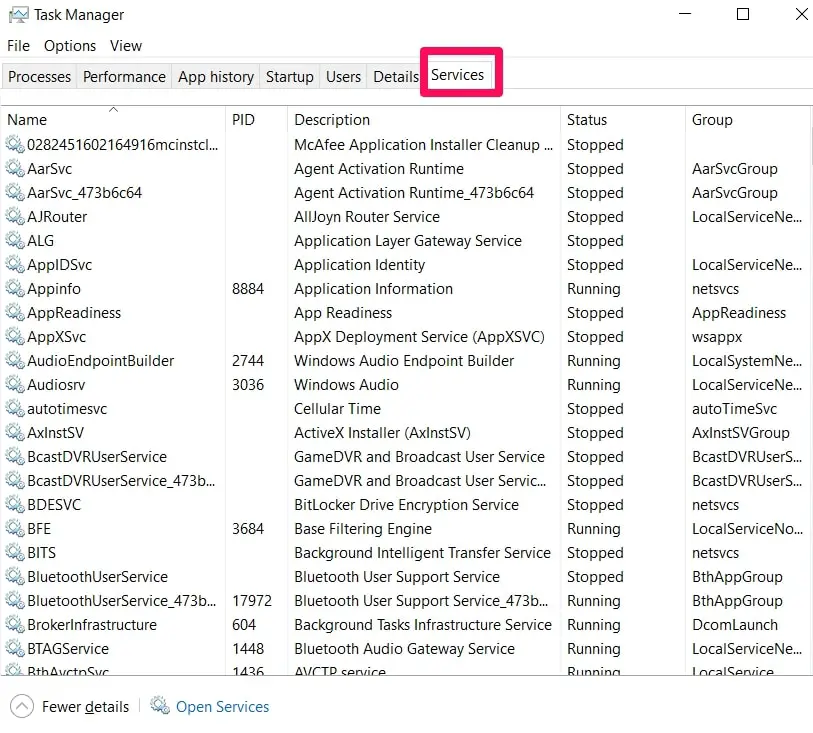
Services
If you know services.msc (the services management console), then this tab is the same thing.
Here’s where you can manage system services.
That’s the end of the overview of the tabs in the detailed task manager menu.
Let’s now take a look at the tabs (what they can do, how to get needed info) in detail.
File, Options, View of The Task Manager Tool
These are the options in the context menu for each task manager menu option.
File
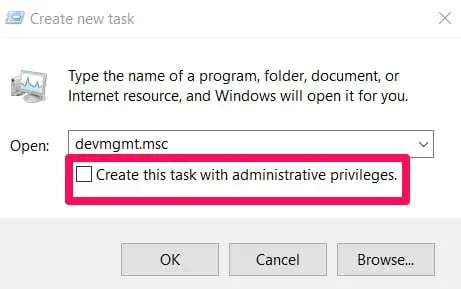
Run New Task – As already explained above will help users open up new tasks, apps, or processes. (There’s an added option of being able to run programs with administrative privileges)
Options
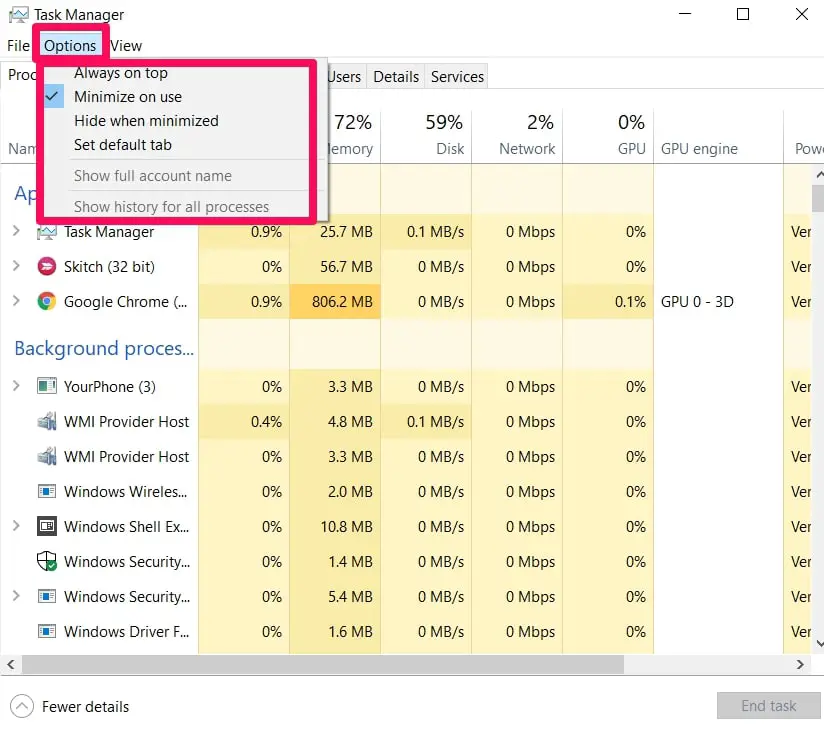
Always On Top – As explained earlier, will make sure the task manager remains in front of every other running app.
Minimize On Use – Whenever you right-click a process and select Switch To, this option minimizes your task manager when enabled.
Hide When Minimized – When enabled, your task manager will run in the notification area even after being minimized.
View
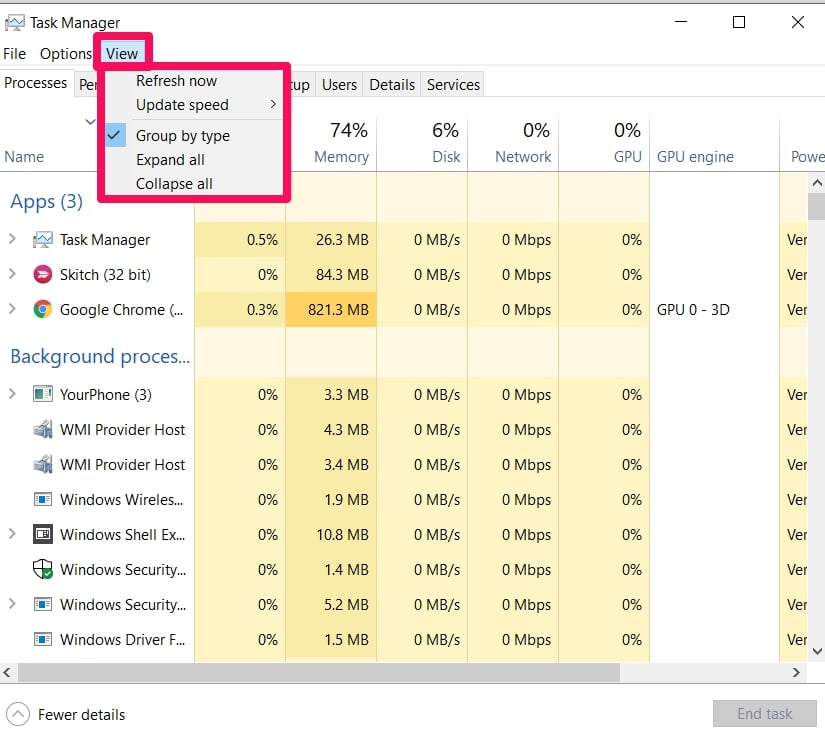
Refresh Now – Refreshes the information on the task manager window.
Update Speed – Basically decides how often the info is refreshed in the task manager window. Options include Low, Medium & High frequencies.
There’s also a Paused option. This option ensures that the task manager window information is not refreshed.
- Group By Type – Already explained above.
- Expand All – Same explanation as Expand above.
- Collapse All – Same explanation as Collapse above.
Processes Tab
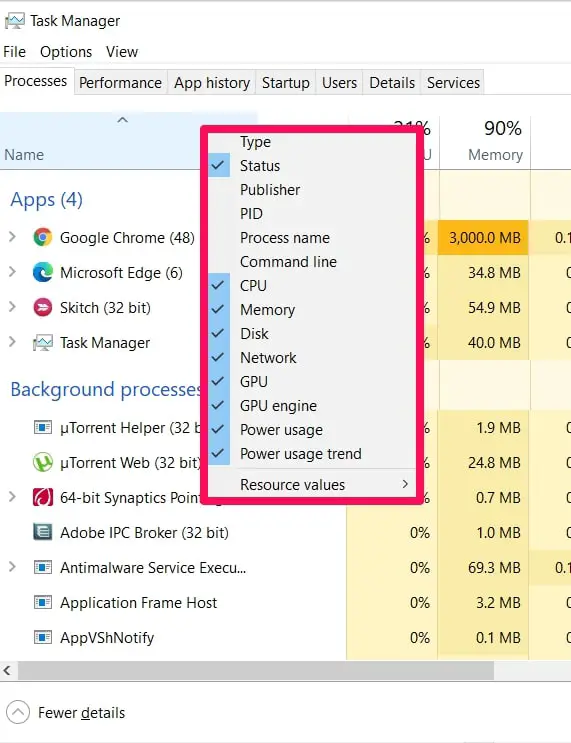
In the Processes tab, right-clicking the headings (where Name, Status, and others are) will allow you to pick what columns to view.
Click on the column Type to view by type of processes.
When you sort the processes by type, it will split into three categories.
- Normal foreground apps. Usually the same list of app processes you’ll see in the simple task manager menu
- Background Processes. You can’t see these processes in the simple task manager menu.
App processes that belong here include (but are not limited to) background updates and antivirus programs.
- Windows Processes. Processes that are part of the core Windows operating system platform.
Sometimes some of them still appear under background processes too.
Whenever you right-click on any of the app processes in the Processes tab, you’ll get a context menu of actions you can carry out on the process.
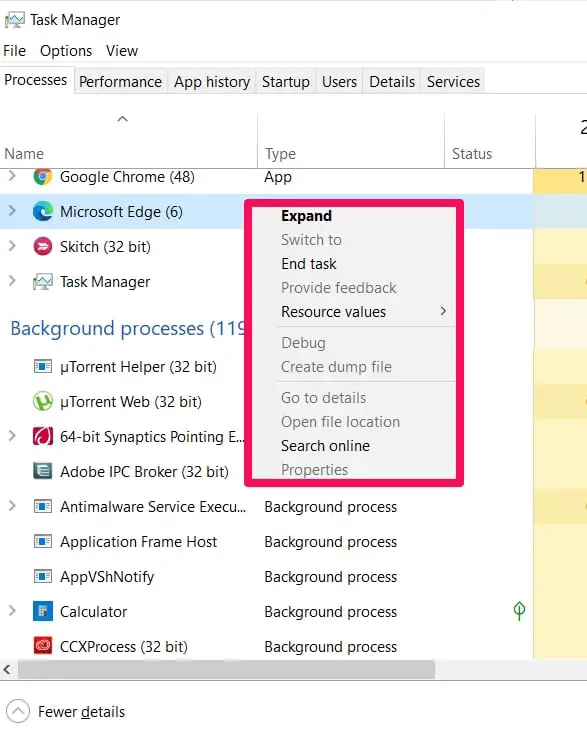
Here’s a list of options you’re likely to find in the context menu.
The first three actions are conditional on what app process you right-click on. The rest of the actions will appear on every app process.
Expand
Whenever you right-click on Google Chrome’s process, you’ll see this option. This is because it has multiple processes grouped there.
Some other apps could have multiple Windows but a single process.
Select Expand and double-click the process you want.
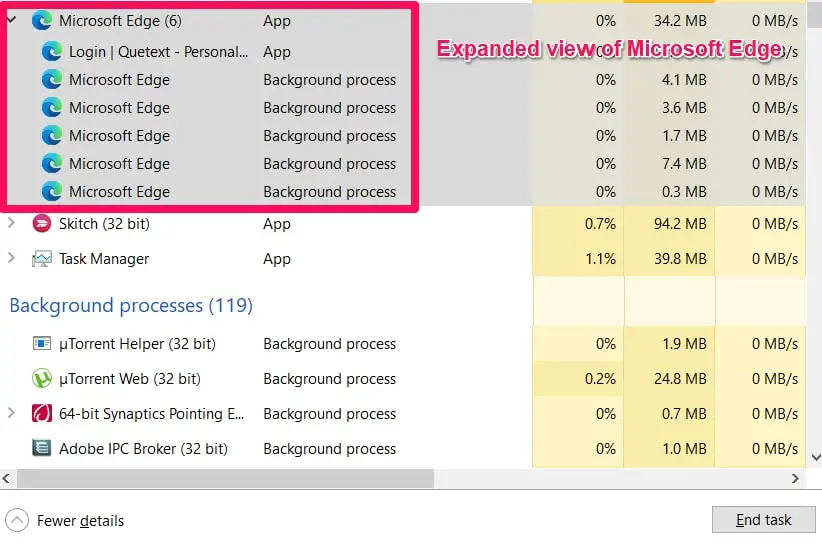
Or you can select the arrow to the left of the process to individually view the group of processes.
Collapse
Appears only on apps with group processes, it is used to collapse expanded groups.
Restart
This option only appears when you right-click the Windows Explorer process.
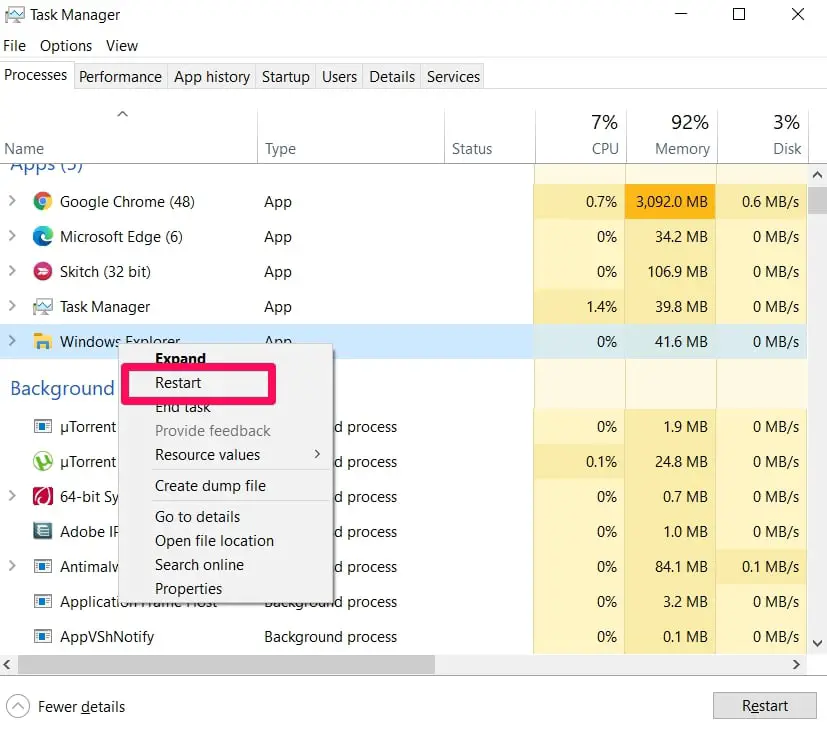
Normally, when you run into problems with your Windows taskbar, Start menu, or desktop, you would need to stop the Windows Explorer process and then manually start it up to fix the issue.
But now you can just restart the process using your task manager.
End Task
Already explained above. It will end a task currently running.
Resource Values
Here’s where you can change the way you view the information about system resources usage.
You can switch to a percentage-based data or maybe a precise value or number.

Create Dump File
Useful action for programmers, this action takes a picture of the process or program’s memory and then saves the picture to disk.
Go To Details
This takes you to another tab entirely. The Details tab. You’ll get more detailed information about the process you clicked on.
Open File Location
This like explained above, it takes a user to where the executable file can be found on the computer.
Search Online
As stated above, when you select this option on any app process, a Bing search will be carried out about the program’s file name and app name.
Properties
This option when chosen for a specific app process shows you details about the app. It gives you access to the Properties menu of that particular .exe file.
Warning
Ending processes indiscriminately is very dangerous. If you don’t know what a process does, try finding out first.
Many background processes are integral to the Windows operating system. Ending any one of them could have adverse effects on your system in the short-run and the long-run.
Sorting By Columns
This action makes it possible to immediately find out information like the process with the highest or lowest CPU usage or other vital data needed.
Right-clicking the headings (where Name, Status, and others are) will allow you to pick what columns to view.
Because the values in the columns are color-coded, when a process is using quite a lot of system resources, it should be automatically color-coded red (or a color close to it). Otherwise, normal usage is light orange or a color close to it.
The columns available are listed and explained below.
Type
Sorts processes based on whether they’re background, Windows, or normal foreground processes.
Status
Sometimes, Windows suspend programs to save battery. If that has happened to a process, you’ll see a green leaf in the status column.
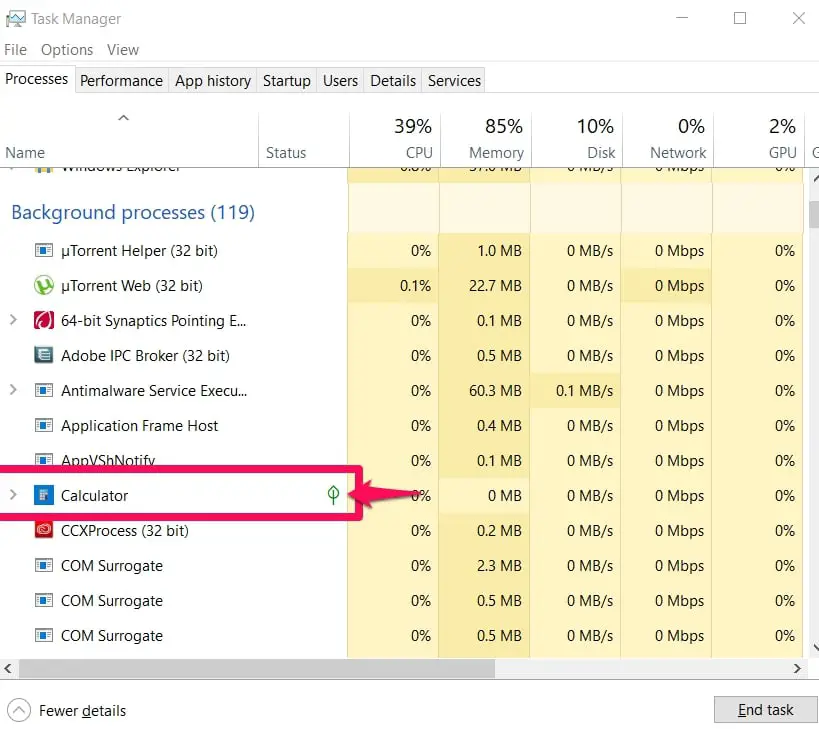
You will also get information about processes that are frozen in the status column. What you’ll see is “Not Responding” when the process is frozen.
All types of apps (traditional or store apps) can be suspended to save power.
Publisher
Details about the program’s publisher can be found here. When you check Microsoft Word, for example, the publisher should be Microsoft Corporation.
PID
This reads Process Identifier Number but most times it is shortened to Process ID. Whenever you start up a program, Windows assigns the process of that program a unique PID.
The PID helps in separating multiple process windows of the same program running at the same time.
Process Name
Here you’ll find the name of the process. Task Manager itself is called Taskmgr.exe when you check its process name.
Command Line
When you select this option, you’ll be able to view the full path to the .exe file of a process.
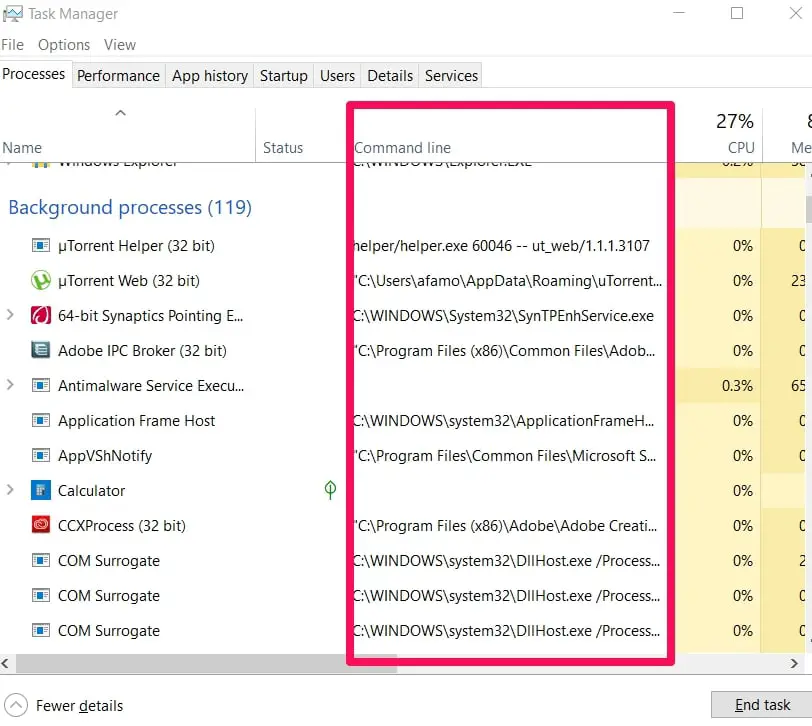
You’ll also be able to see the command-line options used in opening the program.
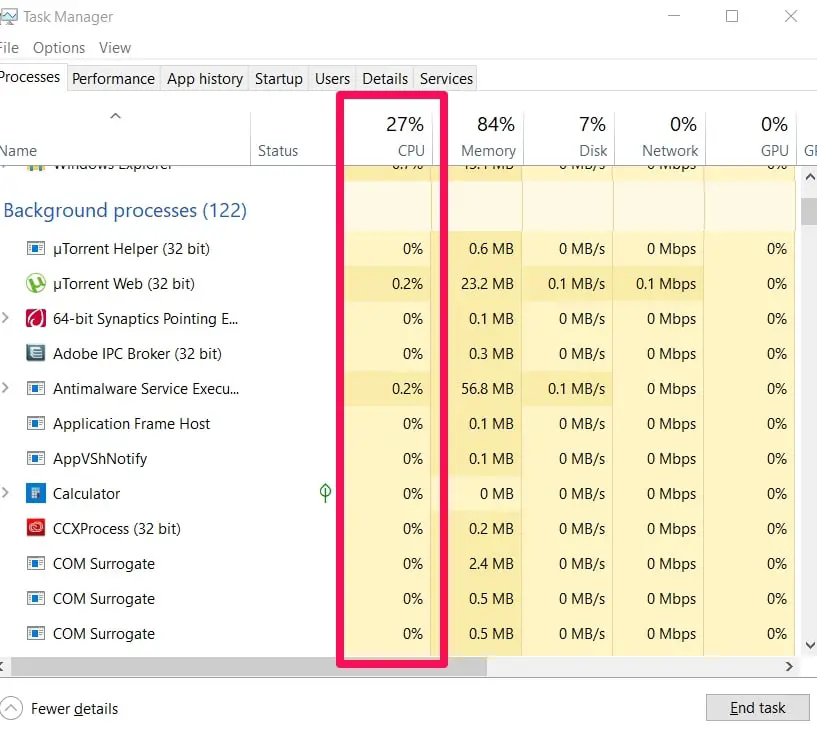
CPU
This option gives you information about the process’s CPU usage. It’ll be a percentage of the total CPU resource available on your system.
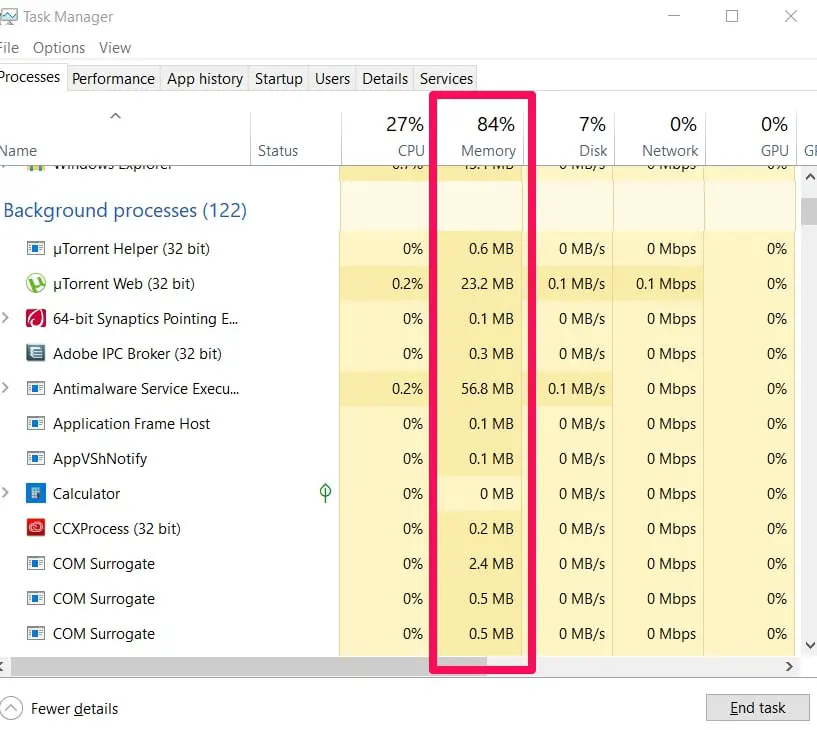
Memory
Displayed in MB or GB, this option shows you the amount of physical working memory of a process in use.
Disk
When processes aren’t reading or writing to disk, the info displayed should be 0/Mbs.
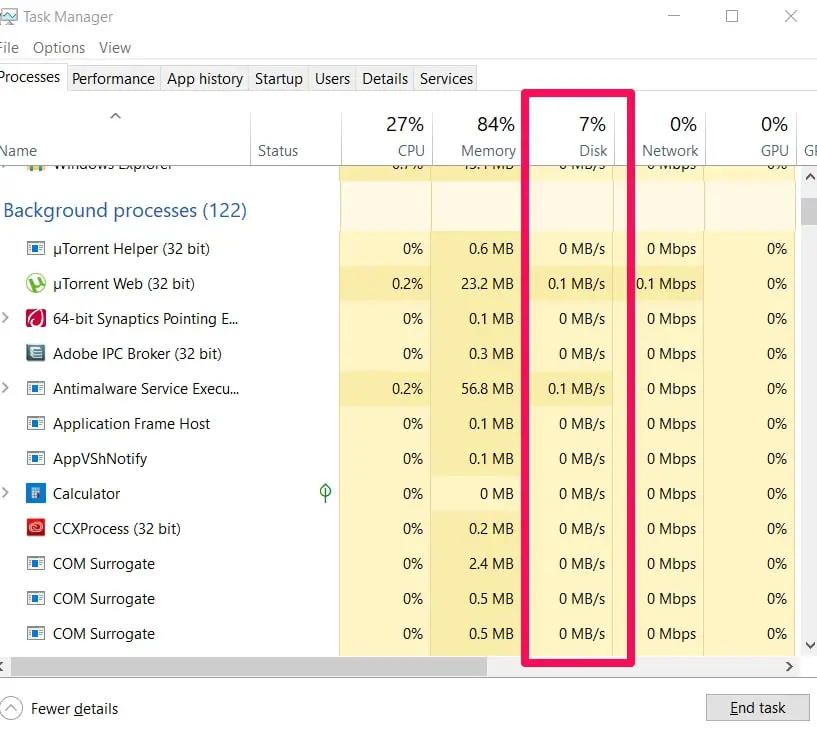
But if the process you clicked on is reading or writing to disk, the amount of disk activity will be displayed.
Network
Information about the process’s network usage in the current network is available here.
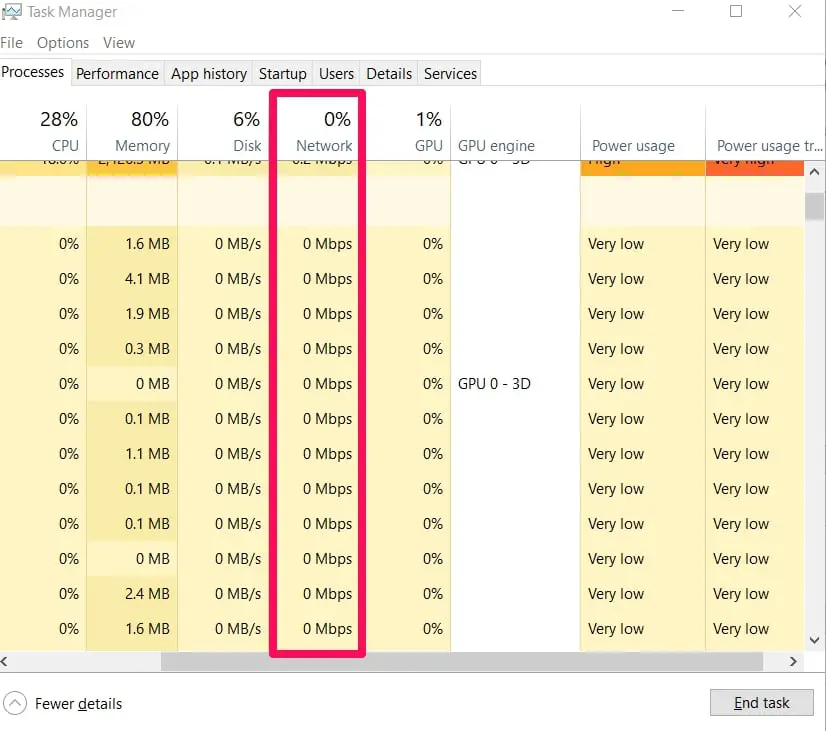
It is usually measured in Mbps.
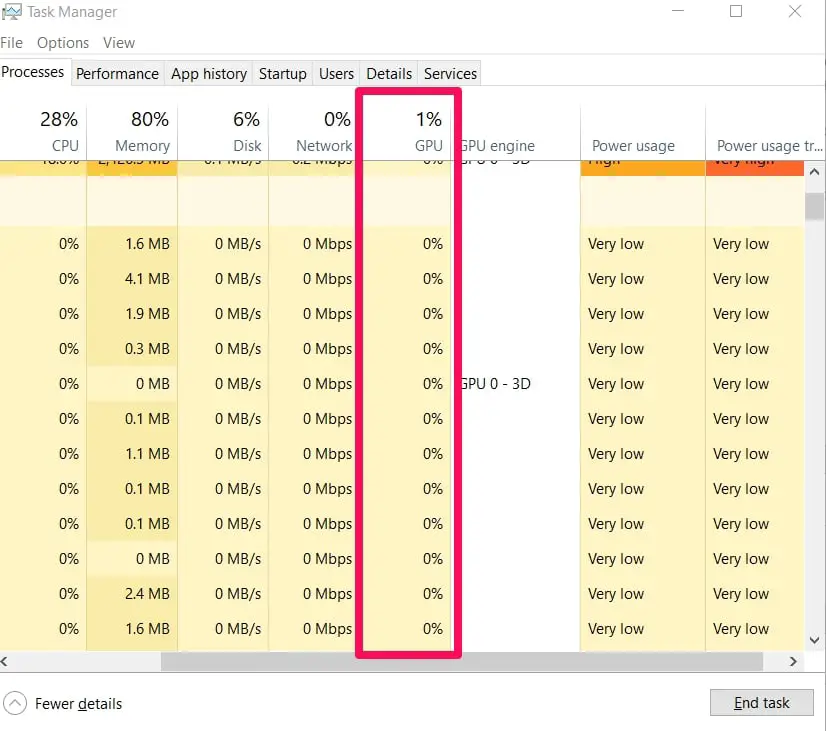
GPU (Graphics Processing Unit)
A process’s usage of GPU is displayed as a percentage of the available GPU resources in this option.
GPU Engine
For folks with multiple GPUs in their system, this option will tell you which GPU the process is using.
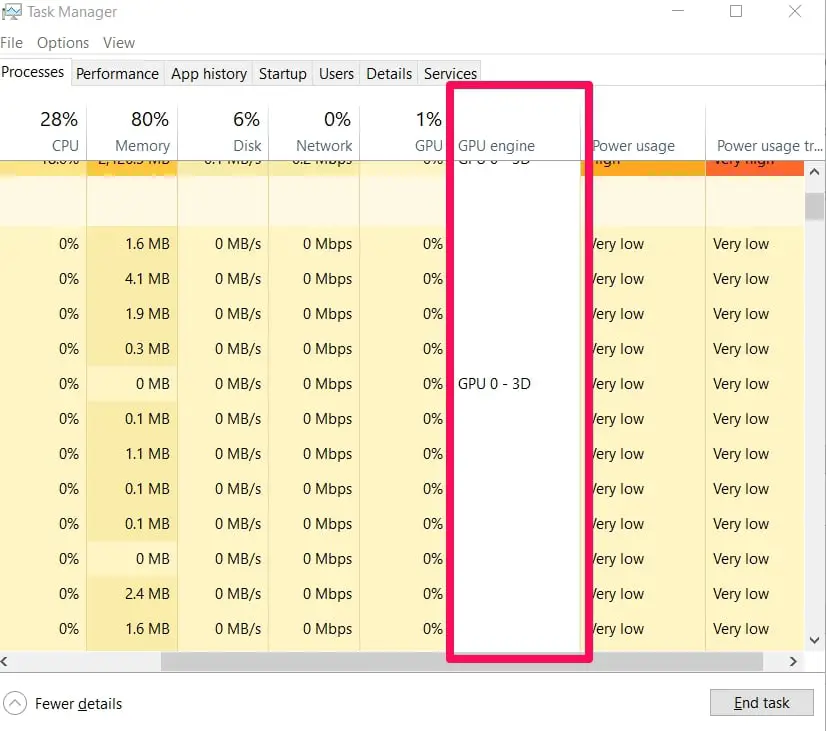
You will have to check the Performance tab to see which number is associated with which GPU. It is usually numbered like “GPU 0” and “GPU 1”.
Power Usage
As the name suggests, this option shows you the amount of battery consumption (for laptops) that a particular app process is consuming.

It usually takes into account factors like CPU, GPU, and disk activity.
Power Usage Trend
This is more detailed information about power usage (over time).
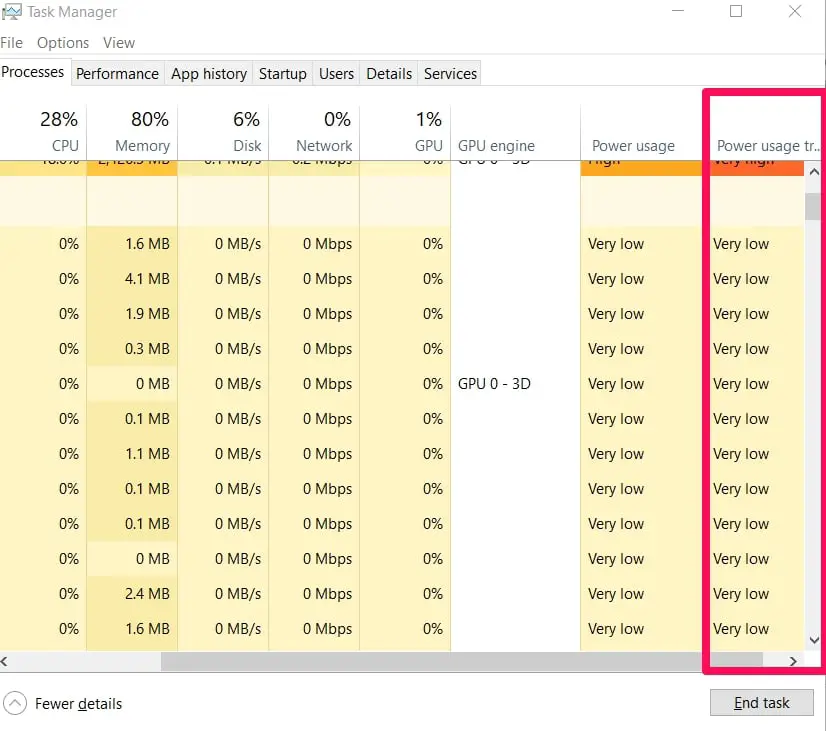
You might check a process in the Power Usage column and see Very High but in the Power Usage Trend column, the same process will be rated Moderate.
This is because the process over time hasn’t been power-consuming even though it is consuming a lot of power at the moment.
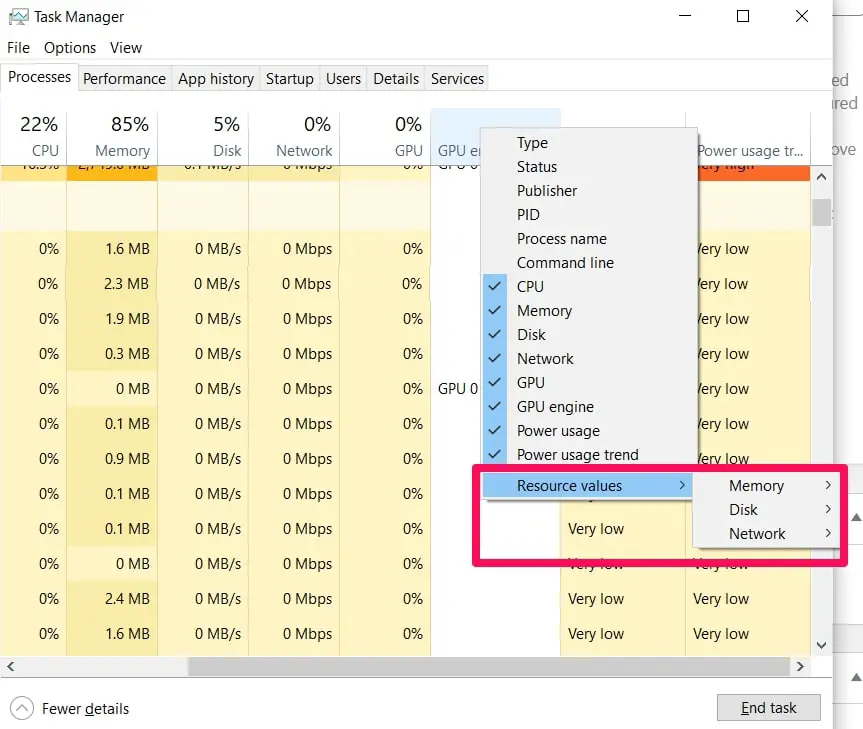
Resource Values
Whenever you click this last option, you’ll be shown options that are mirror images of what you’ll see when you individually right-click a process.
Performance Tab
Here’s where you’ll find the real-time (basically being updated over the last minute) graphs displaying the usage of system resources. Multiple GPUs, network devices, or disks can be viewed separately.
On the Performance tab, there should be small labeled graphs on the left pane and a large detailed one on the right.
You can switch the right detailed graph on the right by clicking on any on the left pane. The graphs and what they contain are described below.
CPU
The CPU graph when projected on the right pane contains data such as the model number, name, and other identifying characteristics like speed and number of cores.
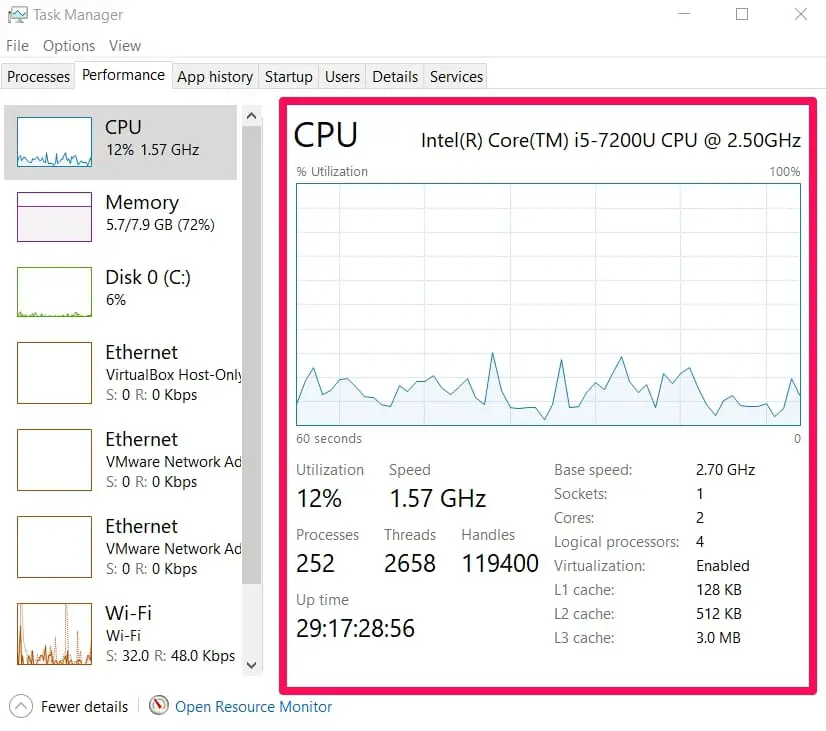
You’ll also find out here if hardware virtualization functions are possible and/or enabled.
There’s also information concerning your system’s uptime (how long your system has been running since the time you booted it up last).
Memory
Data such as the RAM capacity, speed, and the number of slots on your motherboard used currently are available in this graph.
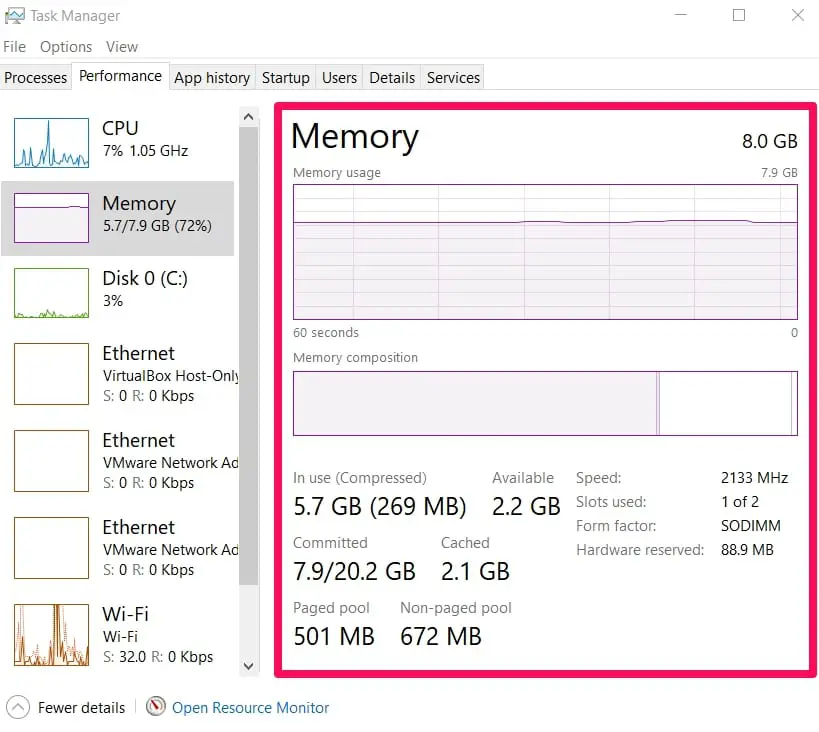
You might see the amount of cached data you have on your system. Don’t worry about it, if you need memory space, Windows will automatically clear the cached data to make space.
Disk
Here’s where you’ll see information such as model number, name, read/write speeds, and size about your disk.

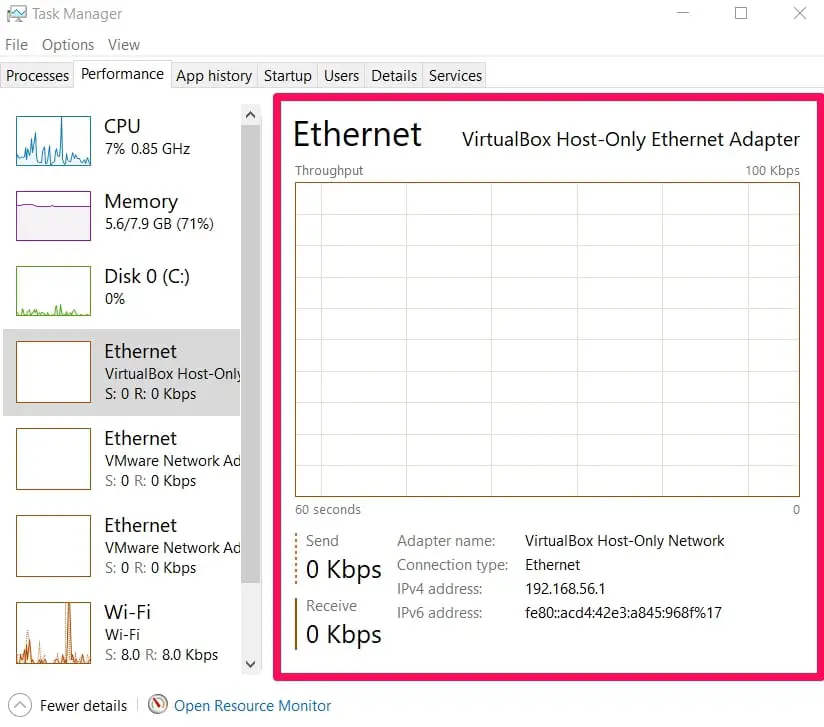
WiFi Or Ethernet
The WiFi standard used currently can be seen in this graph. You’ll be able to see the network adapter’s name and the corresponding IPv4 and IPv6 addresses.
GPU
The task manager tool makes it possible for folks to be able to monitor their GPU without the need for 3rd party tools.
Normal identifying data like name, graphics driver version, and model number of GPU can be seen here.
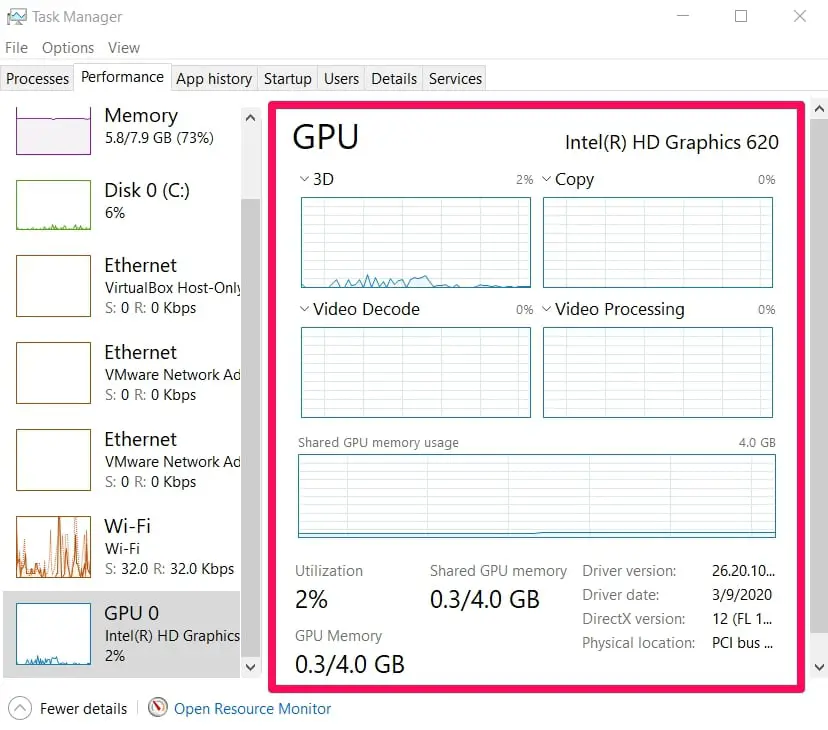
Here, the graphs (yes, more than one) are for different data. You’ll also be able to see the GPU memory usage (it has its built-in memory).
Right-click a GPU graph and select the Graph Summary View option to get a small floating window that shows an up-to-date GPU graph on demand.
Resource Monitor
At the bottom of the Performance tab, there’s an Open Resource Monitor option.
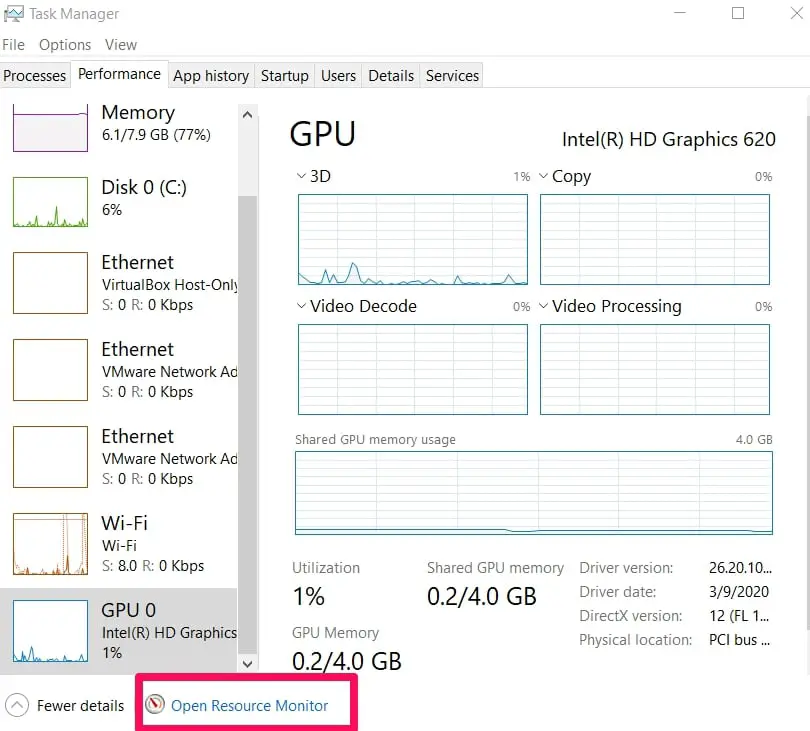
This option offers much more detailed information about a currently running individual process (Memory, GPU, Network, Disk) usage.
App History Tab
This tab is a bit limited because it only contains info about Store apps (Universal Windows Platform Apps).
Information about traditional apps won’t appear here.
The first thing you’ll probably see is the date that Windows started collating the information in this tab and every data you get here is based on that time frame.
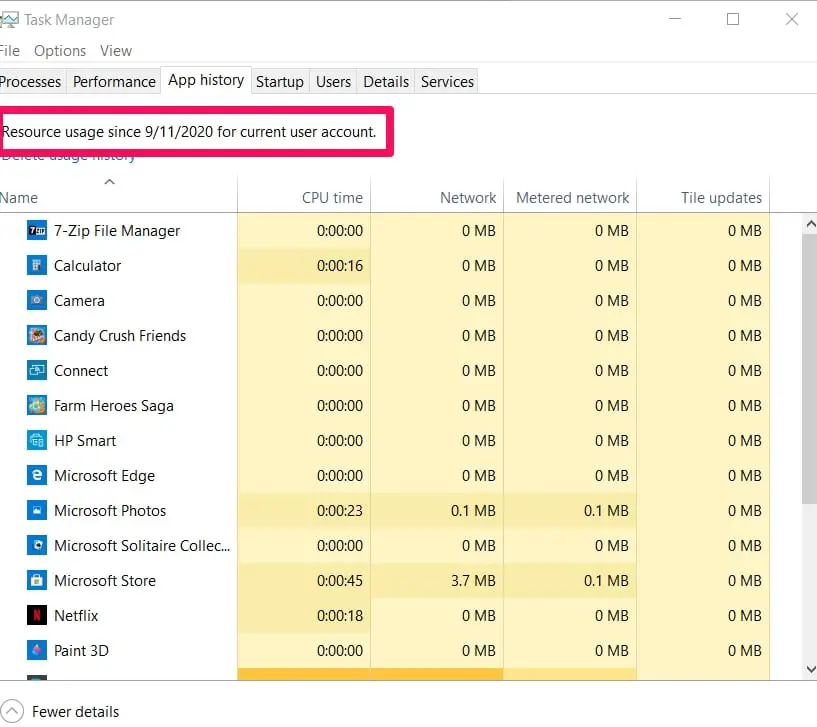
Then you’ll see the explained options below with a list of UWP apps.
CPU Time
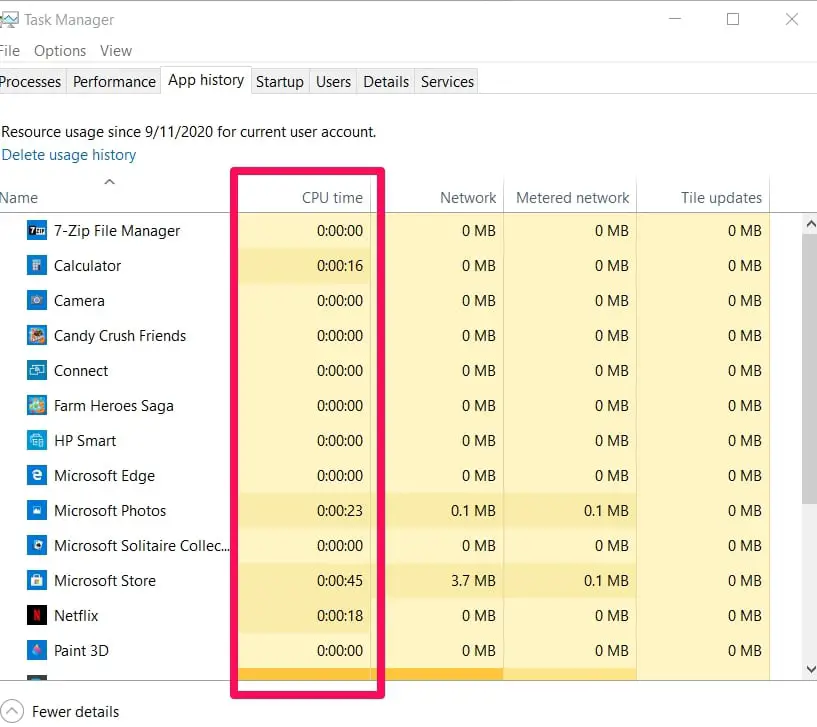
You’ll see data concerning the total amount of time used by a program.
Network
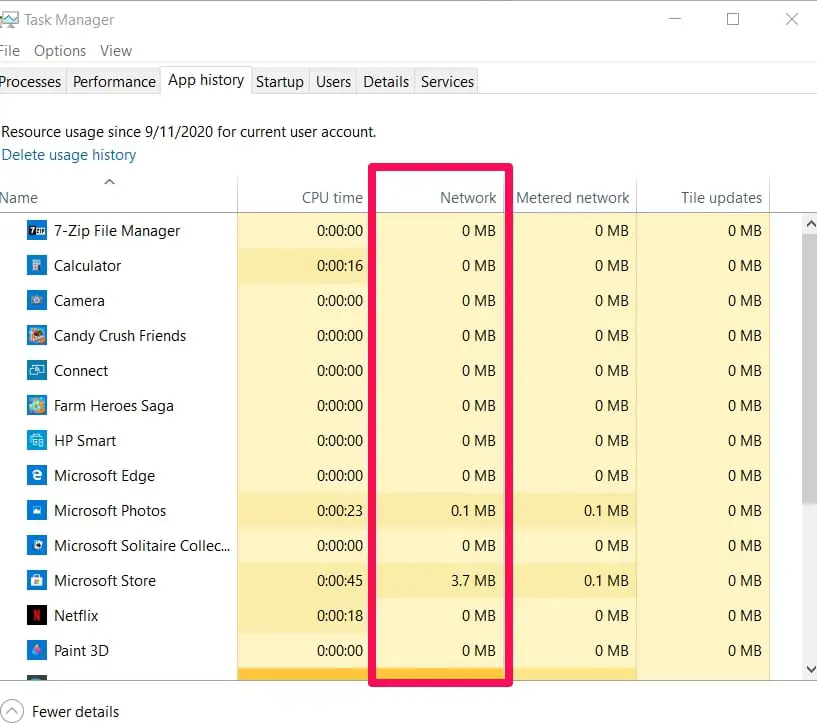
Here, you’ll get information concerning the total amount of data transferred by the program over your network.
Metered Network
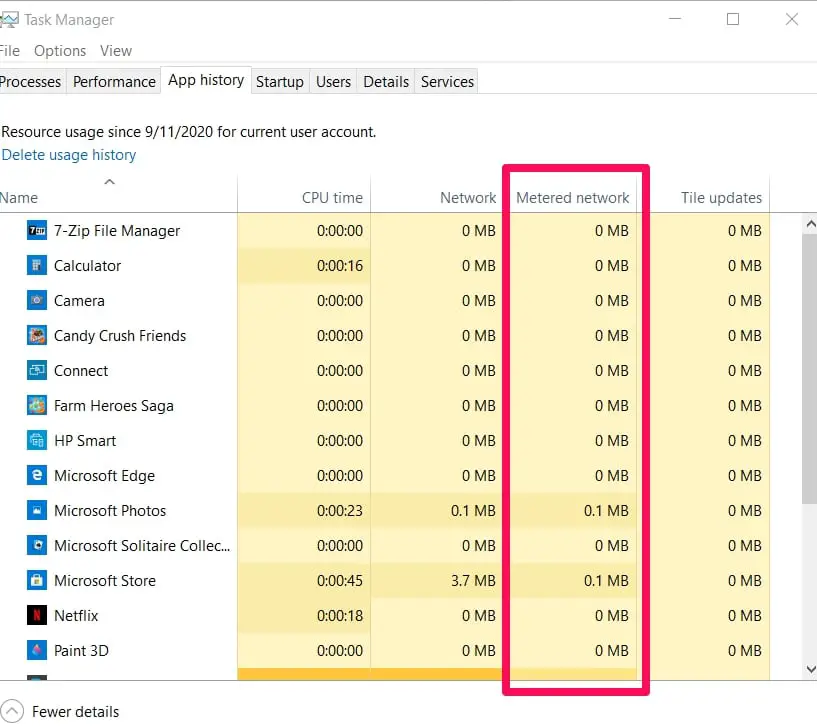
Metered networks mean networks with limited data like (you being tethered to mobile networks).
Here’s where you’ll see the total amount of data the program transferred over metered networks.
Tile Updates
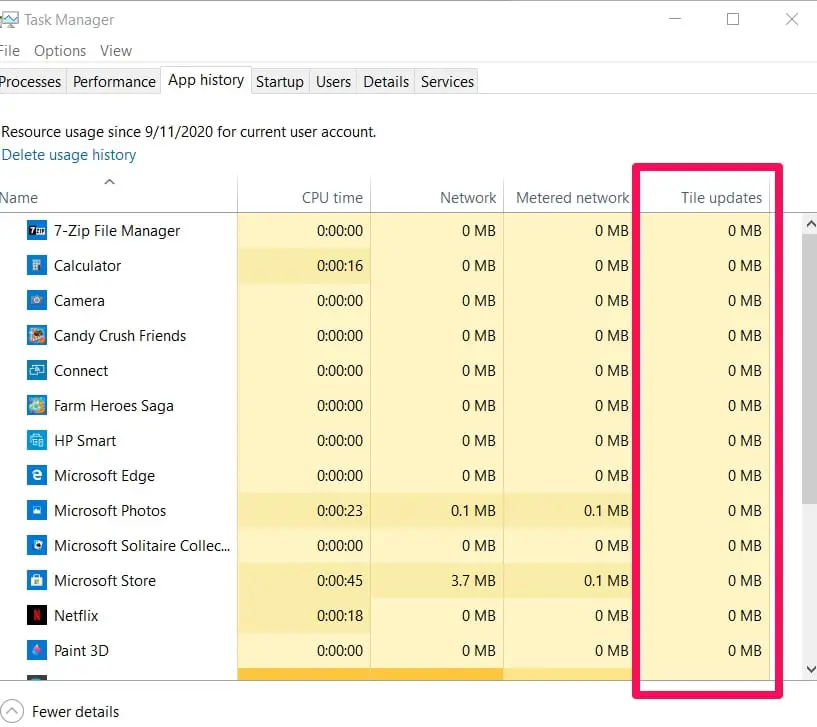
Programs display live tiles (that need updating regularly) in the Start Menu (Windows 10).
Here’s where you’ll see the total amount of data programs used in downloading the live tiles.
Non-Metered Network
This and the last two options do not display by default.

It is the opposite of metered networks. You’ll get the total amount of data transferred over these networks here.
Downloads
Here’s a compilation of all the data downloaded by programs regardless of the network type (metered or non-metered).
Uploads
Here’s a compilation of all the data uploaded by programs regardless of the network type (metered or non-metered).
Startup Tab
Remember my warning about ending any process indiscriminately? Well, the warning still works for disabling startups too.
Some of these processes are vital and if you disable them, your system won’t boot properly.
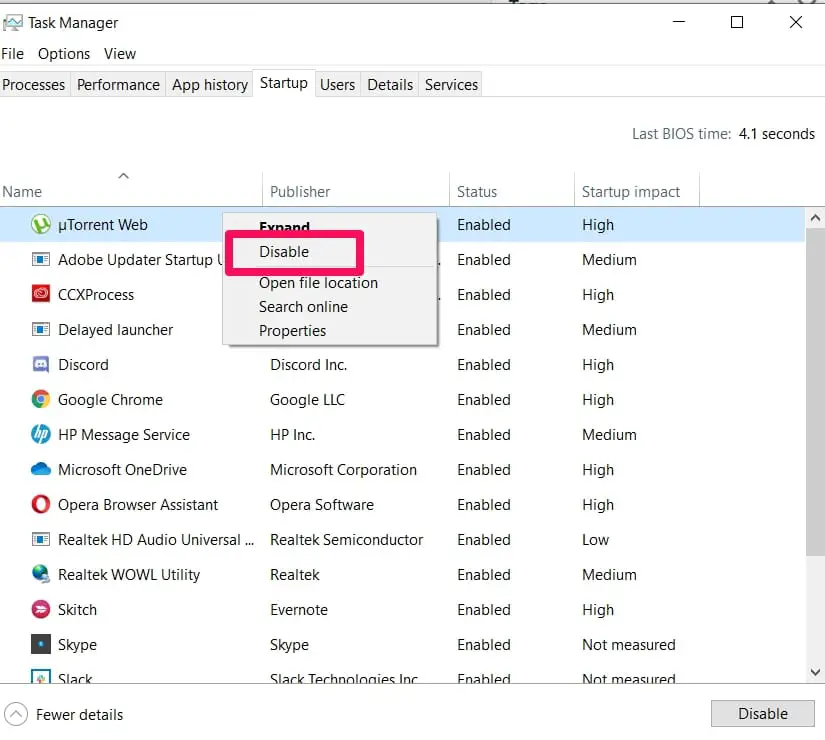
Right-click a startup program and you’ll be able to Disable it. The same action is needed if you want to Enable it back.
Some systems will see a Last BIOS time option at the top right-hand side of the window. The option will also have time (usually in seconds) in front of it.
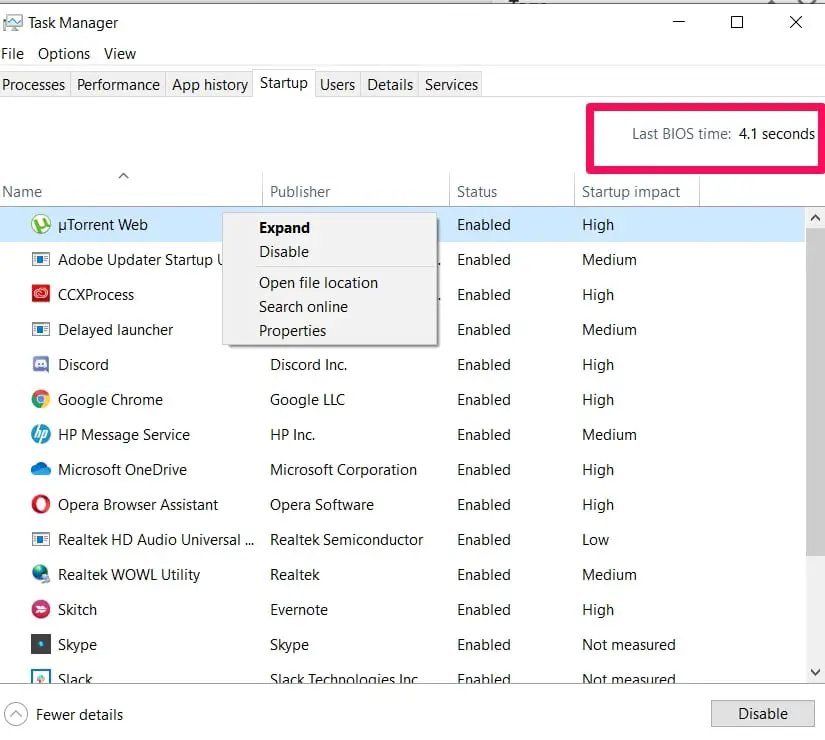
This just means the time needed for your BIOS or UEFI firmware to boot your hardware. You’ll usually see this if your PC’s BIOS sends a report about this back to Windows.
When you right-click the headings, other columns (explained below) will appear.
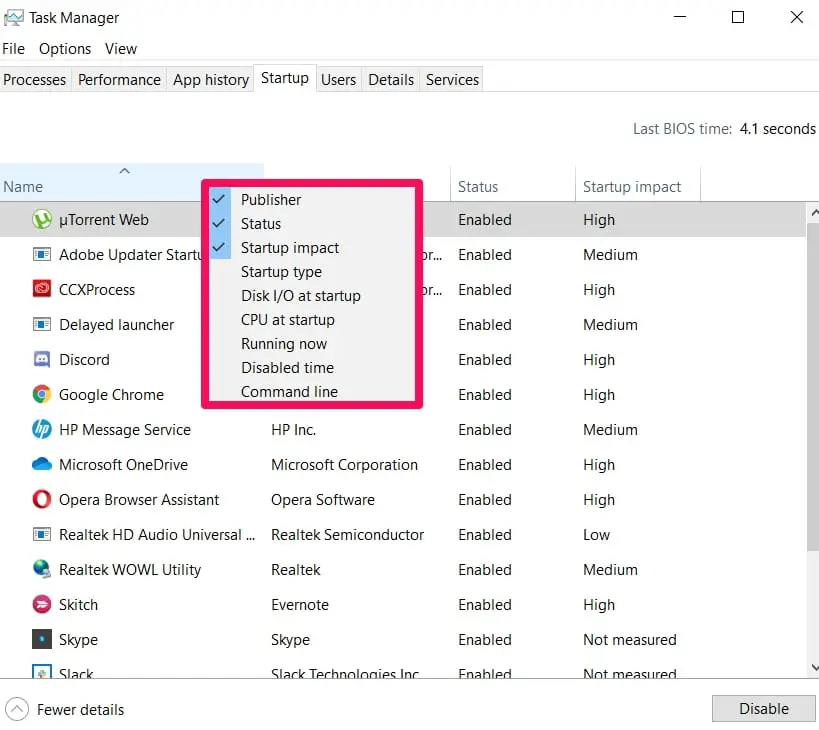
Name
Program’s name.
Publisher
Program’s publisher’s name.
Status
Shows whether the startup process is enabled or disabled on booting.
Startup Impact
Here’s where you’ll see the effect of startup apps on your booting time. Apps with a high rating use a lot of system resources on startup and slow down the process and vice versa for apps with low rating. Disabled apps have no rating at all.
One way of decreasing startup time is by disabling apps with a high rating.
Startup Type
Tells you why a process or program is starting.
It could be because of a Registry Entry or it could be because the program is in your Startup folder.
Disk I/O At Startup
Recording disk activity (measured in MB) at every startup.
CPU At Startup
Amount of resources used (measured in ms) by programs at the startup.
Running Now
Shows startup apps or processes that are currently running.
Disabled Time
Gives information about how long you’ve disabled a startup program or process.
Command Line
When you select this option, you’ll be able to view the full path to the .exe file of a process.
You’ll also be able to see the command-line options used in opening the program.
Users Tab
This tab shows information about signed-in users.
You can also see the system resources usage of users here.
Sessions that aren’t properly logged out by users appear as Disconnected sessions. Programs opened by these sessions continue to run.
There are options for disconnecting users or forcing the user account to sign off.
Right-click on the account and choose Disconnect or Sign-off based on what action you want to perform.
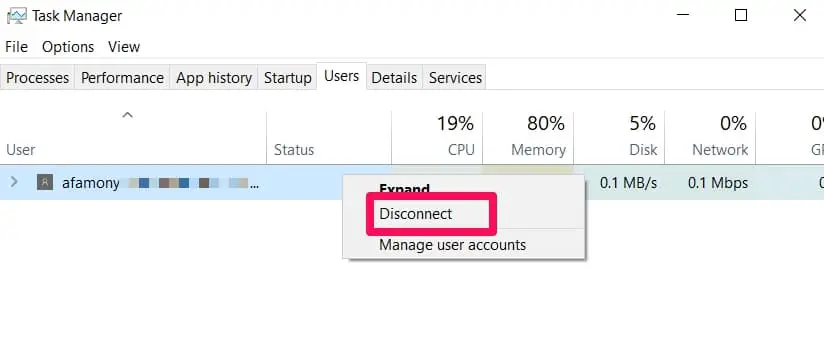
Managing the tasks of other currently running user accounts is also possible in this tab.
When right-clicking the headings in this tab, you’ll see the columns (explained) below.
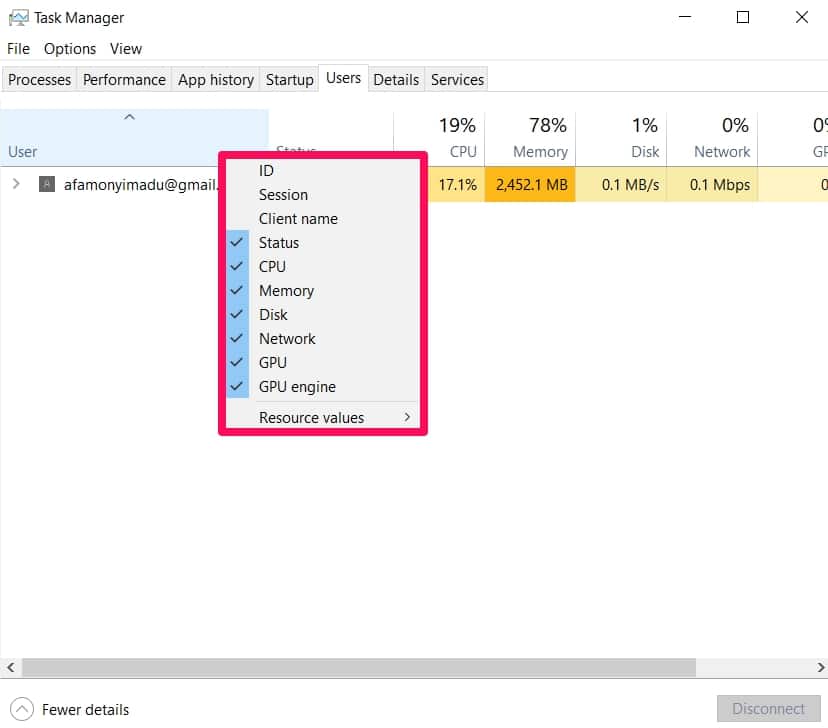
ID
Hidden by default, it doesn’t matter much. System services have the ID no – 0. Every user account (currently signed-in) has unique session ID nos.
Session
Explains what type of session the user account is. An example is when this column says Console, this is for local system access.
Client Name
For remote access users. Name of remote client system using the session.
Status
An example is when it shows that a session is disconnected.
CPU
User process CPU usage.
Memory
User process memory usage.
Disk
User process disk usage.
Network
User process total network activity.
Details Tab
Many of the terms below have been explained in the Performance tab so I will only be explaining the new terms.
Whenever you right-click a process in the Details tab, you’ll get to see these options (explained) below.
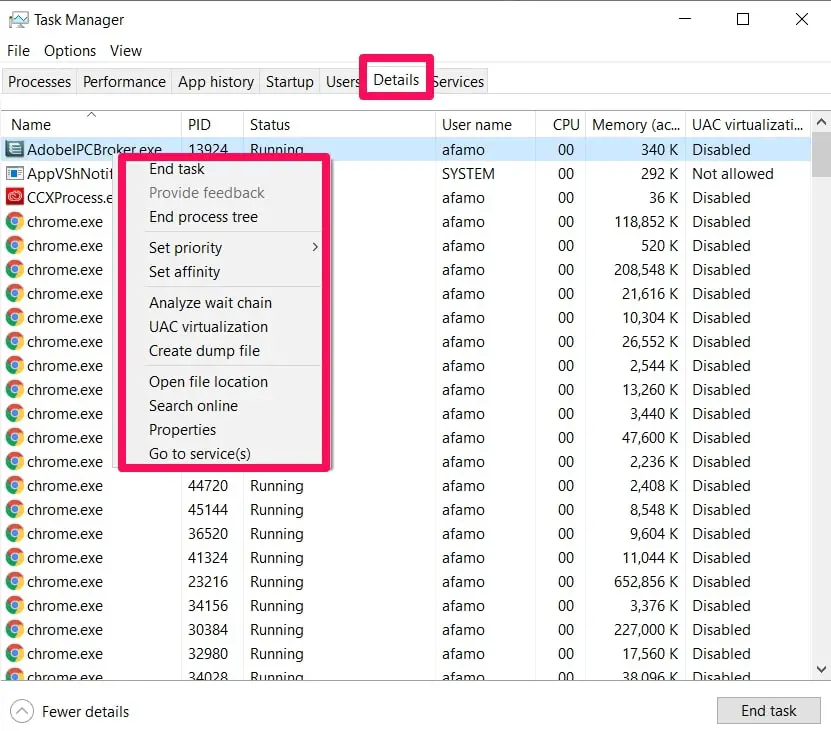
End Task
This puts a stop to running processes.
End Process Tree
Doesn’t just stop a process, it also stops all processes initiated by the first process.
Set Priority
Here you can set priority (resource usage) for processes.
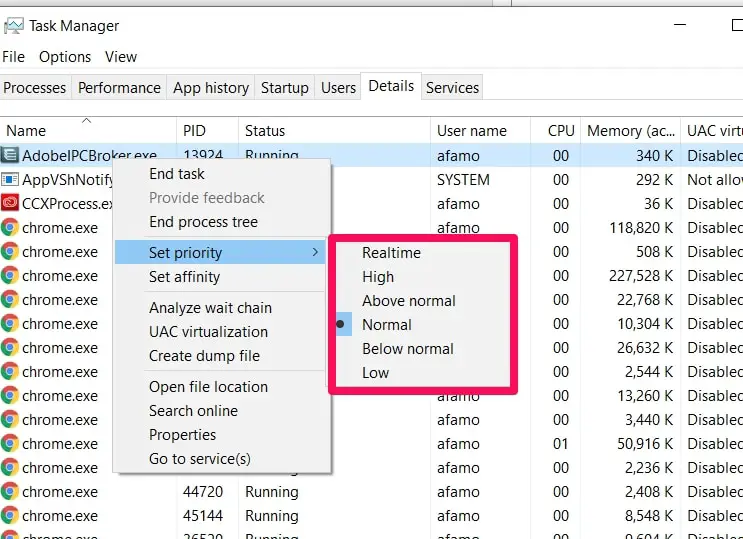
- Low – For background processes
- Below Normal – For background processes too
- Normal – This is sort of the default setting for many processes
- Above Normal – For desktop processes
- High – For desktop processes too
- Realtime – Please don’t make any changes to or from this priority, according to Microsoft’s directive.
Set Affinity
This helps users choose the particular processor a process runs on. Could help in the running of games smoothly.
In systems with single CPUs, each core appears as separate processors.
Analyze Wait Chain
Vital to programmers, this helps users know which in-use resource (already being used by another process) a process currently needs.
This helps programmers in solving (diagnosing) hanging issues.
UAC Virtualization
This option is not relevant in the modern world and should be left alone by everybody except for folks who know what they’re doing.
Create Dump File
Useful action for programmers, this action takes a picture of the process or program’s memory and then saves the picture to disk.
Open File Location
This like explained above, it takes a user to where the executable file can be found on the computer.
Search Online
When you select this option on any app process, a Bing search will be carried out about the program’s file name and app name.
Properties
This option when chosen for a specific app process shows you details about the app. It gives you access to the Properties menu of that particular .exe file.
Go To Service(s)
Important if you want to find out which services are associated with the svchost.exe process. When you click on this option, all the associated services will be highlighted.
There are other columns available but not normally on display unless you right-click the tab window heading and click on Select Columns.
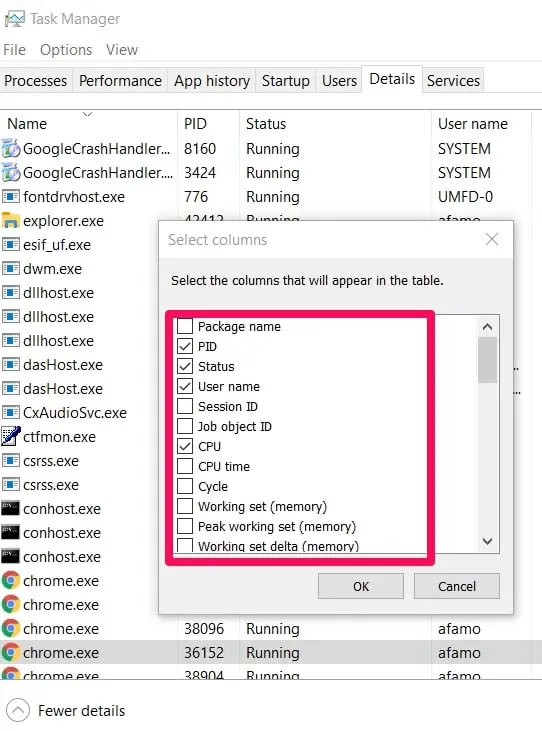
Here are the columns displayed (explained) below.

Package Name
Basically which app package the process is from.
UWP apps usually have – Microsoft Store in this column. Other apps Package Name columns are usually empty.
PID
This reads Process Identifier Number but most times it is shortened to Process ID. Whenever you start up a program, Windows assigns the process of that program a unique PID.
The PID helps in separating multiple process windows of the same program running at the same time.
Status
Shows if the program is Running or Stopped.
User Name
Shows the user account’s name.
Job Object ID
This option helps group processes based on the job object in which the process is running so that the processes can be effectively managed as a group.
CPU
Shows the number of CPU resources a process is using with reference to all other processes. If the figure is 5%, it means all the other processes are sharing the rest of the resources.
If you see System Idle using a large chunk of your CPU resources, it means your processes aren’t using much of your resources at that particular time.
CPU Time
Tells you the total amount of processor time used by a process (since the process started running).
The time usually resets when the process restarts.
Cycle
Information here is similar to what you’ll see on the CPU option above.
Working Set (Memory)
The process’s current physical memory amount in use.
Peak Working Set (Memory)
The process’s maximum physical memory amount used.
Working Set Delta (Memory)
Here you can view changes in working set data from the last resets of the process.
Memory (Active Private Working Set)
Memory already used by the process that is exempted from other processes ‘ usage. UWP processes that are suspended don’t have their info shown here.
Memory (Private Working Set)
Same thing as above but includes data on suspended UWP processes.
Memory (Shared Working Set)
Shows the amount of memory used by a process but can still be used by other processes concurrently.
Commit Size
Windows usually reserves memory for processes. Here’s where you can see the amount reserved.
Paged Pool
Windows kernel or drivers allocate pageable kernel memory. Here’s where you’ll see the amount allocated to the process.
Data here can be moved by the OS to the paging file.
NP Pool
Non-pageable pool. The same explanation as above except that data here can’t be moved by the OS to the paging file.
Page Faults
These faults are normal, they occur when processes try accessing memory no longer allocated.
Here’s where you’ll see a process’s number of pages faults since it started running.
PF Delta
Changes in page Faults of a process since the page was refreshed.
Base Priority
Explained something similar above. Windows usually allow more resources to processes that have higher priority.
Here, you’ll see the priority of the process you highlighted.
Handles
Handles are system resources like files, threads, and registry keys. Here’s where you’ll see in the object table, a process’s number of handles.
Threads
Processes run one (or more than one) thread(s), these threads as long as they’re in the same process share a memory.
Here’s where you’ll see the number of active threads in the highlighted process.
User Objects
Processes use window manager objects like cursors. This tells users the number of objects used by a process.
GDI Objects
Similar to the above but tells the number of Graphics Device Interface objects instead.
I/O (Input/Output) Reads
Processes perform read operations. You can find the number of read operations a particular process has made since starting up here.
I/O Writes
Same idea as above. But write instead of read.
I/O Other
The figure here is the number of non-read and non-write operations made by a process since startup.
I/O Reads Byte
Amount of reads in bytes since the process started.
I/O Writes Byte
Amount of writes in bytes since the process started.
I/O Other Bytes
Amounts of non-read and non-write operations in bytes since the process started.
Image Path Name
The process’s executable’s full path.
Command Line
When you select this option, you’ll be able to view the full path to the .exe file of a process.
You’ll also be able to see the command-line options used in opening the program.
Operating System Context
Here’s where you’ll see the minimum requirements (OS) that a process or program is compatible with.
Platform
32-bit process or 64-bit process.
Elevated
Processes running with (Yes) or without (No) Administrator privileges.
UAC Virtualization
Where you can see if it is enabled for the process. I have already explained this option above.
Description
Same words displayed in the Name columns in the Processes tab. Name of the process.
Data Execution Prevention
This is a security feature protecting processes and apps from malicious attacks. Here you can see if it is enabled or not.
Enterprise Context
You’ll be able to see the enterprise context an app is running in.
Examples include Personal – no access to work resources or Exempt – for Windows system processes or an enterprise domain context that has access to work resources.
Power Throttling
This is a feature to save battery power. Sometimes Windows automatically throttle apps and processes, not in use. But here you’ll see if it’s in use for the process or not.
GPU
Checks the process’s highest usage across all the GPU engines in percentages.
GPU Engine
Checks the most used GPU engine by a process.
Dedicated GPU Memory
Gives you the figure of the total amount of resources (GPU) used by a process across all the GPUs.
Deals with GPU built-in memory.
Shared GPU Memory
Deals with data stored in your system’s RAM as opposed to the above that deals with data stored in your GPU built-in memory.
Gives you the total amount of system resources shared the process is using (with the GPU).
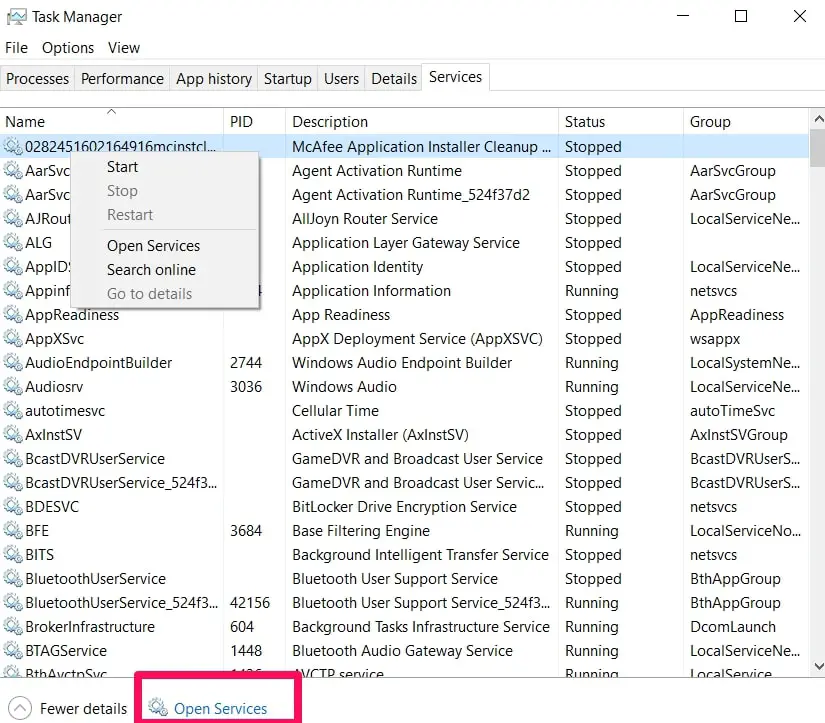
Services Tab
This tab deals with background processes that are always running even if there’s no user signed in.
These processes startup when systems are booting or when they’re needed. They’re controlled by Windows OS.
Services are either part of Windows 10 itself or installed by 3rd party apps. They’re important and should not be toyed with.
When you right-click on these services, you can perform the functions below on them.
- Start
- Stop
- Restart
- Search Online
- Go To Details
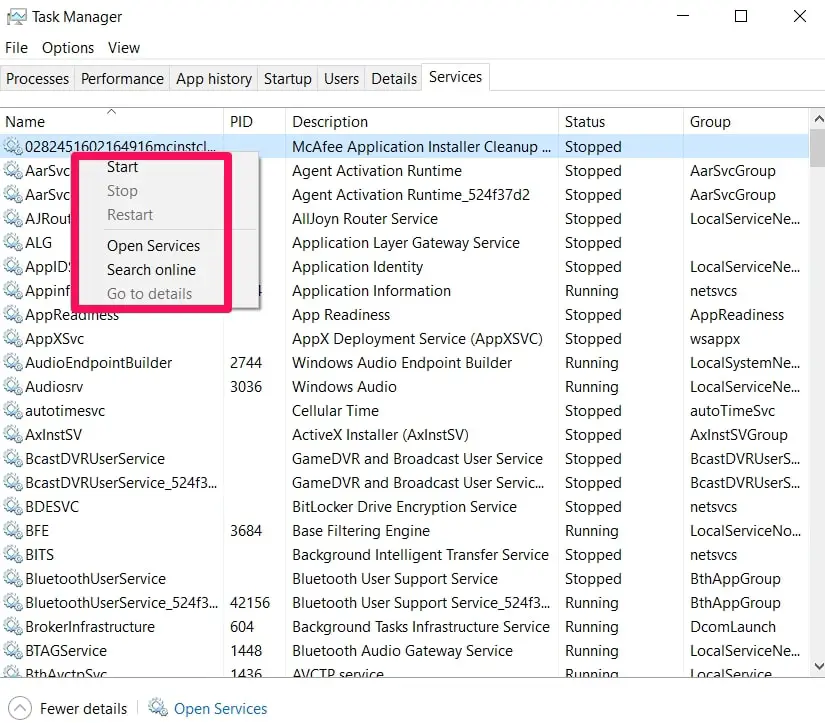
Please note that services usually have the svchost.exe process in one form or the other.
The Service tab’s columns are explained below.
Name
Name of the service
PID
This reads Process Identifier Number but most times it is shortened to Process ID. Whenever you start up a program, Windows assigns the process of that program a unique PID.
The PID helps in separating multiple process windows of the same program running at the same time.
Description
Explains what the process or program does in more detail.
Status
Shows if the program is Running or Stopped.
Group
Some services are in groups (because of their similarities) because Windows loads services in groups. So, this column tells you which group the service is in.
Open Services
The Open Services option at the bottom of the Services window will provide you with more details about the services above it.
Conclusion
The task manager tool is a really important tool for folks who know how to use it.
That’s why this guide is so important in ensuring that people who aren’t familiar with tech terms can easily understand how to use the task manager for everyday needs.
If there’s a process that you don’t understand, please share your concerns in the comments section below and I will get back to you with tips to help.


